Table of Contents
Advertisement
Quick Links
Advertisement
Table of Contents

Related Manuals for FläktGroup ECO SIDE


Summary of Contents for FläktGroup ECO SIDE
- Page 1 ECO SIDE INSTALLATION AND MAINTENANCE MANUAL...
-
Page 2: Table Of Contents
Side - Installation and Maintenance Manual CONTENTS Page Page 1. SAFETY INSTRUCTIONS ................3 10. CONTROL FUNCTIONS VDI 6022 ......................3 10.1 Rotor, heating and cooling .............29 2. DESCRIPTION OG THE UNIT ................4 10.2 Temperature controls ..............29 3. TRANSPORT AND PLACEMENT ..............5 10.3 Freeze protection ................31... -
Page 3: Safety Instructions
– Before opening the unit check that its power has been quality. disconnected. The eCO Side is designed in order, not to endanger health, not to disturb the condition and the thermal comfort, not to lead to odour – Take care when opening the isolating valves for the hot nuisance and to prevent exposure and impact of inorganic and water to the air heater. -
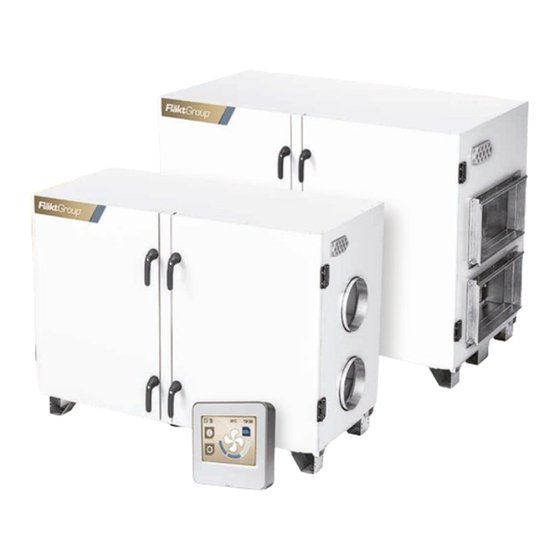
Page 4: Description Og The Unit
Side - Installation and Maintenance Manual 2. DESCRIPTION OF THE UNIT COMPONENTS The unit can be supplied in left-hand or right-hand configurations. Left-hand configurations is mirror-reversed to right-hand. Refer to the order code in Technical Instruction. TOP RIGHT HAND CONFIGURATION RDSP , bb = 12 or 14... -
Page 5: Transport And Placement
Side - Installation and Maintenance Manual 3. TRANSPORT AND PLACEMENT TRANSPORT Use a fork lift truck, pallet truck or platform trolley for transport on site. The unit can be lifted from the front or from the side. To move size 06 through a 900 mm opening remove the door and the center strut. -
Page 6: Connections
Side - Installation and Maintenance Manual 4. CONNECTIONS 4.1 DUCT CONNECTIONS PREVENTING FREEZING Size 03 (Ø250 mm) and 04 (Ø315 mm) have circular duct connec- There is a risk of freezing in the hot water coil at low outdoor tions. -
Page 7: Cooling Coil, Water
Side - Installation and Maintenance Manual 4. CONNECTIONS 4.4 COOLING COIL, WATER ACCEPTED INSTALLATION METHODS The cooling coils have circular duct connections with rubber ring seals. For size 06 a converter from rectangular to circular is available as an accessory (RDTZ-24). The cooler has to be installed horizontally and the distance to nearest bend has to be at least 600 mm. -
Page 8: Electrical Connections
Side - Installation and Maintenance Manual 5. ELECTRICAL CONNECTIONS 5.1 FUSE PROTECTION 5.3 MAIN SUPPLY Size Unit with Hot water coil Electrical coil Supply 1 x 230 V 3 x 400 V Fuse 10 A 10 A Supply 1 x 230 V... -
Page 9: Connection Of Control Panel
Side - Installation and Maintenance Manual 5. ELECTRICAL CONNECTIONS 5.4 CONNECTION OF CONTROL PANEL The control panel is connected when delivered from factory and provided with a magnet for easy handling. For wall mounting see below. 5. Connect the cable to the back of the display as shown above. -
Page 10: Connection Of External Components
45 – 46 Voltfree alarm input NO - C (NO, configurable) unit. eCO Side is preconfigured for electrical post heater. Valve 39 – 40 – 41 - 42 SV2 CTRL (Electrical heater for size 03 and 04 is built-in in the unit, no actuator SV2 Y –... -
Page 11: Temperature Sensors
Side - Installation and Maintenance Manual 6. CONNECTION OF EXTERNAL COMPONENTS 6.6 TEMPERATURE SENSORS TIMER FUNCTION 2 Timer 1 Timer 2 The unit is provided with: Manual/Automatic Mode Supply air sensor GT1, located at supply air spigot. Trickle Outdoor air sensor GT3, located at outdoor air spigot. -
Page 12: Wiring Diagrams
Side - Installation and Maintenance Manual 7. WIRING DIAGRAMS Outside the AHU Not in FläktGroup’s delivery Outside the AHU Not in FläktGroup’s delivery FläktGroup DC_10176GB_20180924_R3 Specifications are subject to alteration without notice... - Page 13 Side - Installation and Maintenance Manual 7. WIRING DIAGRAMS Control board FläktGroup DC_10176GB_20180924_R3 Specifications are subject to alteration without notice...
- Page 14 Side - Installation and Maintenance Manual 7. WIRING DIAGRAMS EXTERNAL CONNECTIONS DIAGRAM 230/400 V EXTERNAL CONNECTIONS DIAGRAM 24 V FläktGroup DC_10176GB_20180924_R3 Specifications are subject to alteration without notice...
-
Page 15: Testing Of Functions
0,35 The rotor should rotate downwards when looking from the front. Supply air/Extract air AIR FLOW MEASUREMENT SIZE 06 The eCO Side has measuring nipples for air flow measurement. Air flow m 0,15 0,25 0,35 Using a measuring pressure Dpm (Pa) and a constant (k) the air... -
Page 16: Control Panel, Opeerations, Commissioning
Side - Installation and Maintenance Manual 9. CONTROL PANEL, OPERATIONS, COMMISSIONING 9.1 GENERAL Use the number buttons to enter a value. This section provides an introduction to the touchscreen LCD Confirm with or cancel with control panel, also known as the ‘Human Machine Interface’, or simply, HMI. -
Page 17: Home Screen Overview
Side - Installation and Maintenance Manual 9. CONTROL PANEL, OPERATIONS, COMMISSIONING 9.2 HOME SCREEN STATUS LINE Heat recovery active CURRENT SET CLOCK Post-heater active POINT VALUE Defrosting in progress Cooling active OPERATING STATUS ALARM Manual mode No alarm Automatic mode... - Page 18 Side - Installation and Maintenance Manual 9. CONTROL PANEL, OPERATIONS, COMMISSIONING 9.2 HOME SCREEN, CONT. SHORTCUT TO SET THE SHORTCUT TO SET THE TIME SHORTCUT TO COMMISSIONING TEMPERATURE SET POINT AND DATE WIZARD ALARM SELECT OPERATING MODE See section 9.3..
-
Page 19: Sub Menus
Side - Installation and Maintenance Manual 9. CONTROL PANEL, OPERATIONS, COMMISSIONING 9.3 SUB MENUS USER SETTINGS OPERATING MODES The operating status icon present on the Home Screen dis- plays the current operating mode. To change the operating mode, press the large fan icon located on the Home Screen. -
Page 20: Date/Time, Language
Side - Installation and Maintenance Manual 9. CONTROL PANEL, OPERATIONS, COMMISSIONING 9.4 DATE AND TIME, LANGUAGE DATE/TIME SETTINGS To enter the settings menu: 1. Set the date and press the Confirm button. 1. Push the gear cog button. 2 Set the time and press the Confirm button CHOOSE LANGUAGE 2. -
Page 21: Advanced Settings For Installers And Sevice Personnel
Side - Installation and Maintenance Manual 9. CONTROL PANEL, OPERATIONS, COMMISSIONING 9.5 ADVANCED SETTINGS FOR INSTALLERS AND SETTINGS FOR INSTALLERS AND SERVICE PERSONNEL SERVICE PERSONNEL This section provides an overview to the more advanced opera- tions that are available from the Home Screen via the passcode protected Advanced Settings option. -
Page 22: Commissioning Wizard
1. Press the question mark on the start screen. The question mark is not shown if the wizard has been started earlier. eCO Side can be ordered with four different configurations: 9.6.1 Standard – settings in % of max speed 9.6.2... - Page 23 Side - Installation and Maintenance Manual 9. CONTROL PANEL, OPERATIONS, COMMISSIONING Option 1 - Use ± buttons Make the appropriate settings for the supply fan and press the confirm button. Enter desired temperature setpoint value. Option 2 - Use the numerical keypad, confirm with...
- Page 24 Side - Installation and Maintenance Manual 9. CONTROL PANEL, OPERATIONS, COMMISSIONING Set the air flow in R/W. To end the commissioning wizard press the red cross button. For the rest of the settings see section 9.6.1. Press the to continue to schedules. See section 9.7 9.6.2 CONSTANT AIR VOLUME...
- Page 25 Side - Installation and Maintenance Manual 9. CONTROL PANEL, OPERATIONS, COMMISSIONING Set the desired pressure in Pa. Constant pressure control is -control is only active in normal speed. In trickle or boost only active in normal speed. In trickle or boost speed set the fan speed set the fan speed in %.
-
Page 26: Schedules
Side - Installation and Maintenance Manual 9. CONTROL PANEL, OPERATIONS, COMMISSIONING 9.7 SCHEDULES The controller has three types of internal time schedules: Weekly, Single date and Date period. First, program the weekly schedule with the required times. Then use any single date programs and the period to enter exceptions. - Page 27 Side - Installation and Maintenance Manual 9. CONTROL PANEL, OPERATIONS, COMMISSIONING 9.7 SCHEDULES, CONT. EXAMPLE 3 EXAMPLE 2 Below is an example of a weekly schedule configured to run the fans at normal speed from 08.00 to 18.00 Monday to Friday.
- Page 28 Side - Installation and Maintenance Manual 9. CONTROL PANEL, OPERATIONS, COMMISSIONING 9.7 SCHEDULES, CONT. NOTE!! SINGLE DATE SCHEDULE (1-4) REMEMBER TO ENABLE THE DESIRED TIME A single date schedule is defined as a one-off schedule that CHANNELS BY PRESSING automati cally starts and finishes on the same date.
-
Page 29: Control Functions
10.1 ROTOR, HEATING AND COOLING 10.2 TEMPERATURE CONTROLS The unit is configured differently regarding to heating, heat eCO Side has three temperature control options, supply air, ex- re covery and cooling, see below. tract air and room. Room control and extract air control is the same control type with... - Page 30 Side - Installation and Maintenance Manual 10. CONTROL FUNCTIONS EXAMPLE OUTDOOR TEMPERATURE COMPENSATION 1. Setpoint = 18°C The setpoint temperature for supply air can be adjusted up or 2. Extract air temperature = 16°C down depending on the outdoor temperature. By setting a higher...
-
Page 31: Freeze Protection
Side - Installation and Maintenance Manual 10. CONTROL FUNCTIONS 10.3 FREEZE PROTECTION 10.6 NIGHT COOLING Warning! Do not change these parameters unless it is absolutely Night cooling is used in summertime to reduce cooling load necessary. If the unit is misconfigured the water coil can freeze at unit start-up and to limit the maximum temperature during up and cause water damage to property. -
Page 32: Pressure Or Constant Flow Control
Side - Installation and Maintenance Manual 10. CONTROL FUNCTIONS, CONT. 10.7 FAN CONTROL ZERO POINT-CALIBRATION, PRESSURE SENSORS 10.7.1 STANDARD 3-speed control (trickle, normal, boost). To change fan speed use schedules, external timer or PIR. push-button 10.7.2 CONSTANT PRESSURE CONTROL (COP) -
Page 33: Communication
Side - Installation and Maintenance Manual 11. COMMUNICATION The unit can communicate with a Building Management System (BMS) via Modbus (RS485 and TCP/IP). No other protocols are supported. 11.1 MODBUS, RS485 See table below for connection of Modbus. For more information,... -
Page 34: Parameter List
Side - Installation and Maintenance Manual 12. PARAMETER LIST Incorrect parameter settings may cause malfunction and freezing damage in hot water coil. Therefore all settings has to be made by persons with necessary knowledge. TEMPERATURE STATUS Parameter Type of value... - Page 35 Side - Installation and Maintenance Manual 12. PARAMETER LIST SCHEDULES Parameter Type of value Range Unit Default value Comments Schedules – – – Active schedules, read onl SETTINGS Parameter Type of value Range Unit Default value Comments Set Date and Time –...
- Page 36 Side - Installation and Maintenance Manual 12. PARAMETER LIST Parameter Type of value Range Unit Default value Comments 5. Heating / Cooling 5.1 Pre Heater Not for eCO Side 5.2 Heating/Cooling 1 = Standard, supply air control. See section 10.2 Temperature control option 2 = Cascade control See section 10.2...
- Page 37 Side - Installation and Maintenance Manual 12. PARAMETER LIST Parameter Type of value Range Unit Default value Comments 6. Air quality 6.1 CO Control Yes/No – Set point 0-2000 P-band 0-2000 I-time 0-9999 ppm at 0V 0-9999 ppm at 10V...
- Page 38 Side - Installation and Maintenance Manual 12. PARAMETER LIST Parameter Type of value Range Unit Default value Comments 7.4 Contact function DI1 Timer 1 NO/NC – DI2 Timer 2 NO/NC – DI3 RHE Rotation Guard NO/NC – DI4 Defrost pressure switch NO/NC –...
- Page 39 Side - Installation and Maintenance Manual 12. PARAMETER LIST Parameter Type of value Range Unit Default value Comments 9. Save settings Saves adjusted values Slot 1 – – – – Slot 2 – – – – Slot 3 –...
-
Page 40: Maintenance
Side - Installation and Maintenance Manual 13. MAINTENANCE 13.2 FILTER WARNING! – When the unit needs to be opened ensure that the voltage to the unit is disconnected. – Take care when opening the isolating valves for the hot water to the air heater. There is a risk of water hammer or steam discharge. -
Page 41: Rotary Heat Exchanger
Side - Installation and Maintenance Manual 13. MAINTENANCE 13.3 ROTARY HEAT EXCHANGER Removal of the center post. When cleaning by means of a high-pressure nozzle, direct the jet at right angles so the rotor face structure. The nozzle should preferably be held about 50 mm from the rotor face. -
Page 42: Post Heater, Hot Water
Side - Installation and Maintenance Manual 13. MAINTENANCE 13.4 POST HEATER, HOT WATER NOTE! To avoid freezing the temperatures for frost protection must not be set too low. If the building has to be left unheated for long periods during winter, the water must be drained from both the pipework and the heating coil. -
Page 43: Post Heater, Electrical
Side - Installation and Maintenance Manual 13. MAINTENANCE 13.5 POST HEATER, ELECTRICAL 13.6 WATER COOLING COIL, DUCT MOUNTED GENERAL CLEANING Units with an electric air heater may be installed in dry rooms Despite effective air filters the fin surface can be covered with not subject to the risk of fire or explosion and in garages where dust which prevents the air flow and impairs cooling transfer. -
Page 44: Fans
Side - Installation and Maintenance Manual 13. MAINTENANCE 13.7 FANS REMOVAL OF FAN 1. Disconnect the control cable with fittings. MAINTENANCE Make an inspection and if necessary clean the fan according to Service Schedule, section 13.8.. Important! Turn off the safety switch and wait for the impeller to stop before inspection and service. -
Page 45: Service Schedule
Side - Installation and Maintenance Manual 13. MAINTENANCE 13.8 SERVICE SCHEDULE Date and sign every service. INSPECTION INTERVALS The length of the service interval is calculated on the basis of approximately 2000 operating hours in a 12 month period for a The service schedule covers service and inspection intervals for normal AHU installation. -
Page 46: Declaration Of Conformity
Side - Installation and Maintenance Manual 14. DECLARATION OF CONFORMITY II A ENCLOSURE Försäkran om maskinens överenstämmelse Declaration of Conformity med EG:s Maskindirektiv / with the EU Directive for Machinery, 2006/42/EC EG:s EMC Direktiv / with the (EMC) Directive, 2014/30/EU EG:s Direktiv för energirelaterade produkter /... -
Page 47: Disposal
Side - Installation and Maintenance Manual 15. DISPOSAL OF PRODUCT AND PACKAGING MATERIALS Recycling should be made in accord- ance with local regulations. When the product is scrapped the following parts/ components/materials shall be sorted. Depending on what product it is may not all parts/components/materials be represented. - Page 48 WWW.FLAKTGROUP .COM ECO SIDE FläktGroup is the European market leader for smart and energy efficient Indoor Air and Critical Air solutions to support every application area. We offer our customers innovative technologies, high quality and outstanding performance supported by more than a century of accumulated industry experience.
Need help?
Do you have a question about the ECO SIDE and is the answer not in the manual?
Questions and answers