Table of Contents
Advertisement
Smart WIFI Controlled Wall Mounted
Inverter Split Air Conditioner with Heat Pump
iQool9
iQool12
iQool18
iQool24
USER AND INSTALLATION MANUAL
Thank you for choosing a TCL Air Conditioner
Please read this user manual before using this innovative
Air Conditioner and keep it safe for future reference.
9,000 BTU
12,000 BTU
18,000 BTU
24,000 BTU
Advertisement
Table of Contents
Troubleshooting

Related Manuals for TCL iQool9


Summary of Contents for TCL iQool9
- Page 1 9,000 BTU iQool12 12,000 BTU iQool18 18,000 BTU iQool24 24,000 BTU USER AND INSTALLATION MANUAL Thank you for choosing a TCL Air Conditioner Please read this user manual before using this innovative Air Conditioner and keep it safe for future reference.
-
Page 2: Table Of Contents
CONTENTS SAFETY INSTRUCTIONS OPERATION REMOTE CONTROL & FUNCTIONS WIFI CONTROL FILTERS END OF SEASON START OF SEASON REPLACING THE BATTERIES INSTALLATION GUIDE INSTALLATION OF THE OUTDOOR UNIT STANDARD PIPELINES CONNECTION & AIR PURGING ELECTRICAL WIRING DIAGRAMS TROUBLESHOOTING AND SELF DIAGNOSIS TECHNICAL SPECIFICATION APPENDIX... -
Page 3: Safety Instructions
SAFETY INSTRUCTIONS Important! Carefully read the instructions before operating the unit This appliance comprises of an indoor and an outdoor unit. The indoor slim evaporator is designed exclusively for indoor installations while the external condenser can be installed outside while still away from flood water or snow line. ... -
Page 4: Operation
Energy Saving and Unit Safety Protection Tips Do not cover or restrict the airflow from the outlet or inlet grills. For maximum performance the minimum distance from a wall or objects should be 50cm. Keep the filters clean. Under normal conditions, filters should only need cleaning once every four weeks (approximately). - Page 5 REMOTE CONTROL The remote control has a range of up to 8m. Point the remote control at the receiver in the interior unit. A beep confirms that the remote control signal has been received. REMOTE OPERATION Turn the appliance on using the ON/OFF button.
- Page 6 Temperature units can be changed on the remote by altering the switch under the battery cover. Remove the batteries, move the switch to the desired units then replace the batteries. TEMPERATURE The desired temperature is set with the up and/or down button, within the limits of the thermostat: 16°C –...
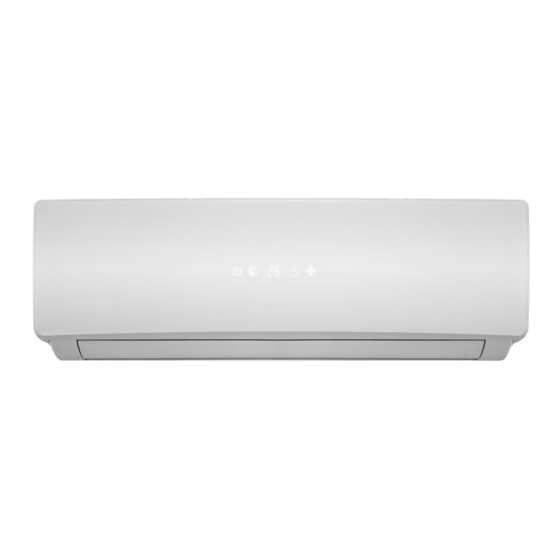
- Page 7 OUTDOOR UNIT Description Air outlet grille Outdoor unit rating label Terminal block cover Gas valve Liquid valve DISPLAY PANEL Iqool 9/12/18 Iqool24 Display Function POWER Illuminated when power is on SLEEP Illuminated in sleep mode Temp. / Error code Shows the temperature / error code TIMER Illuminated when timer is activated Illuminated when unit is turned on...
- Page 8 FUNCTIONS COOL 1. Press the MODE button until the COOL indicator appears. 2. Set the desired temperature. 3. Use the FAN button to set the fan speed. HEAT 1. Press the MODE button until the HEAT indicator appears 2. Set the desired temperature. 3.
- Page 9 SLEEP MODE 1. Press the SLEEP button 2. Set the desired temperature. 3. Press the SLEEP button; The SLEEP indicator will appear on the display. Cancel the sleep mode by pressing the button again. 4. The fan will operate at low speed.. 5.
- Page 10 RANGE OF INTERNAL THERMOSTAT The internal thermostat can be set at a desired temperature between 16 and 32°C. Note that whether the desired value is achieved depends on the room size, temperature and insulation of the room. RANGE OF HEAT PUMP FUNCTION The heat function can be used when the external ambient temperature is above -15°C.
- Page 11 Please note that your air conditioner requires a good signal during the setup process. Your air conditioner is designed to be connected to a 2.4ghz network, and the connection is set up using the TCL “SMART LIFE” app. We would advise on using the QR codes below to ensure the correct app is downloaded.
- Page 12 QR code below, or press “Enter Activation Code” and enter the activation code: TCL REGISTER THE APP Upon the first use, an account will need to be registered. Click on the “Register” button to enter the registration screen. The...
- Page 13 SMS REGISTRATION Press on the option at the bottom of the screen to choose the option for registering with a mobile number. You will receive an activation code via SMS. Enter the activation code into the verification code box, before entering your new password in the box below. Please note the password should be at least 6 characters and include letters and numbers.
- Page 14 CONNECTION METHODS AVAILABLE FOR SETUP The air conditioner has two different setup modes, CF (Quick Connection) and AP (Access Point). The CF mode is a quick and simple way to set the unit up. The AP connection uses a direct local wifi connection between your phone and the air conditioner to upload the network details.
- Page 15 CONNECTING USING CF MODE (QUICK CONNECTION) 1. Ensure that the display on the air conditioner is displaying CF before pressing “Next Step” (otherwise to change the connection mode: Quickly press the display button on the remote 6 times and wait 10 seconds until CF is displayed) 2.
- Page 16 CONNECTING USING AP MODE (ALTERNATIVE METHOD) 1. Ensure that the screen on the air conditioner is displaying AP (otherwise to change the connection mode: Quickly press the display button on the remote 6 times and wait 10 seconds until AP is displayed) 2.
- Page 17 The app will automatically upload the connection information to the air conditioner, once the connection is completed, a message will be displayed to confirm. On this page there is the option to rename the air conditioner to something more relevant. If the connection fails, please retry the connection, failing this try connecting using the CF mode connection.
- Page 18 CONTROLLING YOUR DEVICE THROUGH THE APP Now that your air conditioner is linked up to your network, you can control it from your phone. Select your device in the device list to gain access to the controls for the device. Use the + and –...
- Page 19 USING THE TIMER FUNCTION The timer can be used to either set a time for the air conditioner to turn on (and specify the settings it will run with), or a time for the unit to turn off. Multiple timers can be used together to build a schedule with on and off times.
- Page 20 MORE SETTINGS When on the main screen the three dots in the top right hand corner give you access to the settings options for the app. This a number of extra options for modifying the name of the air conditioner, and removing a device from the app.
-
Page 21: Filters
FILTERS Ensure the power is turned off to the unit before attempting to service the filters. Opening the front panel: at the A recesses, pull the front part up with both hands. The front panel will stay horizontal (at around 90°). Closing the front panel: press the front part down at the sides at B and in the middle at. -
Page 22: Start Of Season
START OF SEASON If the air conditioner is to be used again after an extended period: • Check that the air intake and exhaust openings of the interior and exterior units are not blocked. Remove all dirt and debris. • Check that filter is installed and is clean. - Page 23 This air conditioner contains a refrigerant and can be classified as pressurized equipment. Therefore always contact an authorized air conditioning engineer for installation and maintenance of the air conditioner. The air conditioner must be inspected and serviced on an annual basis by an authorized air conditioning engineer.
- Page 24 RECOMMENDED INSTALLATION SPACING DIAGRAM...
- Page 25 TOOLS RECOMMENDED FOR INSTALLATION Electric drill Hammer Screwdrivers Tape measure Spirit Level Core hole Cutter Number 14 (7mm) Pencil and chalk Masonry drill 1.5 inch number Small 10 screws stepladder roundhead slotted Protective glasses and mask 7 mm wallplugs Pipe & cable detector 4 inch plastic ties...
- Page 26 Also the following 2 inch Pipe clips Circuit breaker Garden gloves when lifting the outdoor unit Dustsheets Foam Filler Silicone sealant and gun...
- Page 27 . Check the area for any 2 . Mark the right hand 3 . Remove the backplate hidden wires or pipes. backplate screw and drill a 7mm hole. position. 4 . Tap home a 7mm . Screw the backplate 6 . Check level, mark the wallplug.
-
Page 29: Installation Of The Outdoor Unit
The piping can be lead out on the right, left or directly behind the indoor unit as seen in fig. 1. Please cut off the pipe hole guards if you are changing the pipe position. The unit also features alternative guards for more pipe positioning. -
Page 30: Standard Pipelines Connection & Air Purging
STANDARD PIPELINES CONNECTION & AIR PURGING No dust or any other particles, air or moisture should be allowed to enter the air conditioning system. Careful attention should be paid when pipeline connection for outdoor unit is made. Try to avoid repeated curves as much as possible;... - Page 31 ADDING REFRIGERANT Refrigerant must be added if the pipe length is more than 5 metres (16'5"). This operation can only be performed by a professional F-Gas engineer, for the additional gas amount, see the below Liquid pipe Additional Additional Refrigerant diameter Refrigerant Φ6.3 or Φ6 (1/4)
- Page 32 NOTES: The copper pipe used in the refrigeration lines are very soft, high pressure copper and prone to get damaged if not handled correctly. Try to avoid bending or stretching the pipework. Always use the pipe’s foam protectors and the plastic ring before putting the pipes through the wall.
-
Page 33: Electrical Wiring Diagrams
ELECTRICAL WIRING DIAGRAMS INDOOR UNIT Iqool9/12/18: Iqool24:... - Page 34 OUTDOOR UNIT Iqool9/12 Iqool18...
- Page 35 Iqool24...
-
Page 36: Troubleshooting And Self Diagnosis
TROUBLESHOOTING AND SELF DIAGNOSIS MALFUNCTION POSSIBLE CAUSE The appliance Power failure does not Damaged indoor/outdoor unit fan motor operate Faulty compressor thermomagnetic circuit breaker Faulty protective device or fuses Loose connections Self protection in adverse conditions Voltage higher / lower than the voltage range Active TIMER-ON function Damaged electronic control board Strange odour... - Page 37 ERROR SIGNALS ON THE DISPLAY In case of error, the display on the indoor unit shown the following error codes: Error Light flash code Failure type Code Run & Timer – both blinking Indoor and outdoor communication failure Run & Timer – both blinking Outdoor communication failure Run –...
- Page 38 OUTDOOR UNIT FAULT CODES The outdoor unit has an LED on the power board. This LED will be illuminated when the compressor is running and blink 1s on and 1s off when the compressor is in standby. If there is a fault on the outdoor unit, it will blink on and off for half a second at a time, followed by a 3s gap.
-
Page 39: Technical Specification
5. The AC can’t connect to network through the router 6. The mobile device can’t connect to the router 7. The mobile device can’t connect to a network (when being used remotely) TECHNICAL SPECIFICATION Iqool9 – v3 Iqool12 – v3 Iqool18 – v3 Iqool24 – v3 Model... - Page 40 Annual consumption (kW) 1785 2100 Copper Pipe Type length Liquid side / Gas side 6.35 (1/4) + 9.52 6.35 (1/4) + 9.52 6.35 (1/4) + 12.7 6.35 (1/4) + 15.88 (mm/inch) (3/8) (3/8) (1/2) (5/8) Max. refrigerant pipe length Max. elevation Interconnecting Cable 4×1.0mm²...
-
Page 41: Appendix
Please contact the local council for details of your local household waste recycling centres. WARRANTY INFORMATION TCL guarantee provides cover against material or manufacturing faults. This means that if your air conditioner develops a fault during the guarantee period, we will arrange for it to be repaired or replaced. - Page 42 TCL UK SUPPORT Please, for your own convenience, check the troubleshooting guide before calling the service line. If the unit still fails to operate call: 0871 620 1057 or complete the online form Office hours: 9AM - 5PM Monday to Friday...
Need help?
Do you have a question about the iQool9 and is the answer not in the manual?
Questions and answers