
Related Manuals for Hubsan X4 H107P


Summary of Contents for Hubsan X4 H107P
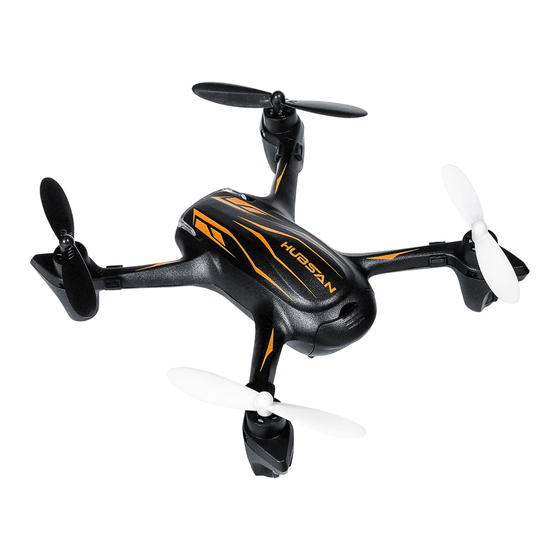
- Page 1 ® Read the User Manual and its instructions carefully before use! HUBSAN X4 2.4GHZ RC SERIES 4 CHANNEL ITEM NO.: H107P...
-
Page 2: Table Of Contents
TABLE OF CONTENTS 1 FOREWORD 2 SAFETY INSTRUCTIONS 3 PRE-FLIGHT CHECKLIST 4 AIRCRAFT BATTERY & CHARGING 5 THE TRANSMITTER 5.1 GETTING TO KNOW YOUR TRANSMITTER 5.2 TRANSMITTER BATTERY INSTALLATION 6 FLIGHT 6.1 POWER-UP SAFETY PROTOCOL 6.2 HEADLESS MODE 6.3 BASIC FLIGHT OPERATION 6.4 ARMING/DISARMING THE MOTORS 7 ADVANCED FLIGHT SETTINGS 7.1 NORMAL AND EXPERT MODE... -
Page 3: Foreword 0
1 FOREWORD Thank you for purchasing a HUBSAN product. The H107P is an easy to fly aircraft capable of a variety of flight functions. It is equipped with a full-function remote control. Please read and follow the manual carefully for proper operation and use. Be sure to keep the manual as important reference for future routine maintenance. - Page 4 SAFETY ADVISORY (LITHIUM-POLYMER/LI-PO BATTERIES) LiPo batteries are different from conventional batteries in that their chemical contents are encased in a relatively lightweight foil packaging. This has the advantage of significantly reducing their weight but it does make them more susceptible to damage if roughly or inappropriately handled.
- Page 5 SAFETY ADVISORY (LITHIUM-POLYMER/LI-PO BATTERIES) This battery is prohibited for non-designated devices. Do not touch any kind of liquid waste or byproduct from batteries. If skin or clothes come incontact with these substances, please flush with water! Do not mix other types of batteries with lithium batteries.
-
Page 6: Pre-Flight Checklist
Exposing the model to water or a humid environment may cause failure and damage. 2.5 Correct Operation For safety reasons, use only Hubsan parts for replacement and repair. 2.6 Pay attention to the rotating blades During operation, high speed rotating propeller blades can cause serious bodily injury or damage to the aircraft. -
Page 7: Aircraft Battery & Charging
4 AIRCRAFT BATTERY & CHARGING 4.1 The 3.7v 520mAh LiPo Be sure to use the provided Hubsan dedicated charger for charging. Fully charge the battery before flight. Connect the charger ‘s USB adapter to a PC terminal and then the battery to the charger. Charging time is approximately 80 minutes; recommended flight time is 6 minutes. -
Page 8: The Transmitter
5 THE TRANSMITTER 5.1 Getting To Know Your Transmitter Main Interface Transmitter Transmitter power level power level Joystick power Throttle Joystick power Elevator channel Throttle channel channel Elevator channel Expert Mode Expert Mode Rudder Expert Expert Aileron channel Aileron channel Rudder channel channel Mode 1 (Japanese Hand) - Page 9 Transmitter Key Functions KEY/SWITCH FUNCTION Push the stick forward or backward and the quadcopter will ascend or descend (respectively). Push the stick left or right and Throttle/Rudder stick the quadcopter will rotate counterclockwise or clockwise (respec- tively). Push the stick forward or backward and the quadcopter will fly Elevator/Aileron stick forwards or backwards (respectively).
-
Page 10: Transmitter Battery Installation
Environmental Impact Old appliances cannot be processed together with ordinary garbage. Please dispose of them separately. Usage of public waste collection points is typically free and owners of old appliances have the obligation and responsibility to send used electrical appliances to these waste collection point for disposal. -
Page 11: Flight
6 FLIGHT 6.1 Power-Up Safety Protocol Your aircraft has a power-up safety protocol. When both your remote control and the aircraft are powered on, the aircraft motors will not start up unless an arming signal is detected. 6 . 1 . 1 P o w e r o n t h e r e m o t e a n d w a t c h t h e a i r c r a f t parameters appear on the remote control screen. -
Page 12: Headless Mode
6.2 Headless Mode To access Headless Mode, *first* make sure that you “set” a forward direction. Say, you'd like to consider due North as your “forward” direction. Have the drone's head facing North- then and only then, initiate Headless mode. During Headless Mode, the aircraft's blue LEDs will be flashing together simultaneously. - Page 13 AIRCRAFT REMOTE CONTROL Ascend Expert Expert Mode 2 (American Hand) Mode 1 (Japanese Hand) Descend The throttle is used to control the ascent and descent of the aircraft. Push the throttle up and the aircraft ascends. Pull the throttle back and the aircraft descends. When the joystick is centered (unmoving), the aircraft will hold its altitude in the air.
-
Page 14: Arming/Disarming The Motors
AIRCRAFT REMOTE CONTROL Expert Expert Left Right NOTE: When the aircraft's head faces the pilot Mode 2 (American Hand) Mode 1 (Japanese Hand) during flight, all control inputs from the joysticks will be backwards. The aileron controls the aircraft's left and right movement. Push the joystick to the left and the aircraft will tilt and fly leftwards. -
Page 15: Advanced Flight Settings
7 ADVANCED FLIGHT SETTINGS 7.1 Normal and Expert Mode Whenever it is powered on, this aircraft will default to "Normal Mode". Although this aircraft responds quickly in "Normal Mode", it is even more fragile in "Expert Mode". When the aircraft has entered "Expert Mode", the remote screen will display "Expert". Operation: Short press the non-throttle joystick to switch between "Normal Mode"... - Page 16 7.2.1 Front flip Short press on the throttle (you should feel and hear a click) and push the aileron stick forward. The aircraft will perform a front flip. Expert Expert Mode 1 Mode 2 (American Hand) (Japanese Hand) 7.2.2 Back flip Short press on the throttle (you should feel and hear a click) and push the aileron stick backward.
-
Page 17: Installing And Removing Propellers 1
FRONT 8 INSTALLING AND REMOVING PROPELLERS Before installing propellers for the first time, please check that each Propeller A is matched with motor A and each Propeller B is matched with motor B. If propellers are improperly paired with the wrong motors, the aircraft will not be able to takeoff or fly properly and will most likely crash. -
Page 18: Aircraft Exploded View 1
AIRCRAFT EXPLODED VIEW... - Page 19 Part Name Part Name Body Shell (Top) Motor A Body Shell (Bottom) Propeller A (Black) Battery Compartment Propeller B (Black) Battery Compartment Cover Propeller A (White) Battery Propeller B (White) Motor Cover Screw PCB Motherboard Screw Motor B Propeller Guard...
-
Page 20: H107P Frequently Asked Questions 1
H107P FREQUENTLY ASKED QUESTIONS 1. Aircraft and remote control are not pairing. Restart the aircraft and its remote. Power on the aircraft first, followed by the transmitter. 2. The transmitter powers on, then shuts off immediately after. The remote control battery voltage is too low. Check that the batteries is installed correctly. - Page 21 (2) Motor(s) are/is installed incorrectly. Check to make sure that each motor is installed correctly: each motor has two differently colored motor wires. Please check the figure on how to redo incorrectly installed motors. Black Black White White Blue Black Top View 9.
- Page 22 10. Motor(s) does not turn after a fall or crash. Check for and remove any foreign material on the motor or motor shaft. If a propeller or propellers still does not turn, replace the motor. Check to see if a propeller is stuck on its motor shaft as well.
-
Page 23: H107P Parts & Accessories 2
H107P PARTS & ACCESSORIES H107P-09 H107P-04 H107-A02 H107P-07 H107P-12 BODY SHELL PROPELLERS MOTORS BATTERY PCB MOTHERBOARD H107-A06 H107P-16 H107P-14 H107-A11 H107-A13 T-SHIRT WRENCH USB CHARGER SCREW SET TRANSMITTER H107P-02 H107P-03 H107P-01 H107P-06 H107P-10 BLUE LED RED LED SCREWDRIVER CANOPY MOTOR SLEEVE H107P-15 H107P-05 H107P-11... - Page 24 This manual is subject to change without notice. WWW.HUBSAN.COM Version 2.0...
Need help?
Do you have a question about the X4 H107P and is the answer not in the manual?
Questions and answers