Advertisement
Quick Links
AVerVision U15 is a USB powered document camera. It comes with 2 extra USB Hubs wherein you can connect
any external USB device such as keyboard, mouse, USB flash drive and more. An optional power adaptor can be
used in cases where the connected external USB device requires more power.
(1)
(2)
(3)
(4)
Folding and Storing
The flex arm design allows you to freely bend the arm and store the camera head in the camera holder. Once you have properly
secured the camera head to the camera holder, you may now carry the AVerVision U15 from the built-in holder.
Adjust the camera head gently and DO NOT forcibly twist the camera head back and forth or around. It may break
the camera head off from the flex arm.
Connecting the AVerVision U15 to a computer
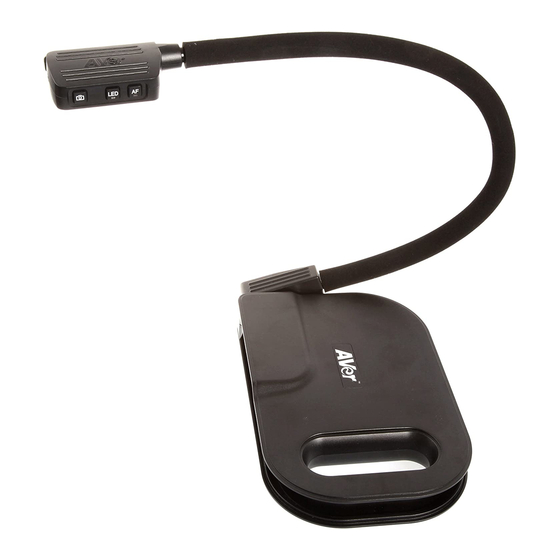
Parts
(5)
(1) Mic
(2) Camera sensor and LED
(3) Camera/LED/AF buttons
(6)
Camera - capture a still image.
LED - turn the overhead LED light on/off
AF - Automatically Adjust the Focus.
(4) Camera holder
(5) Flex arm
(6) USB ports panel
(7)
(7) Power port panel
(8) Holder
(8)
Advertisement

Related Manuals for AVer AVerVision U15


Summary of Contents for AVer AVerVision U15
- Page 1 AVerVision U15 is a USB powered document camera. It comes with 2 extra USB Hubs wherein you can connect any external USB device such as keyboard, mouse, USB flash drive and more. An optional power adaptor can be used in cases where the connected external USB device requires more power.
- Page 2 Connect a power adapter to a standard 100V~240V AC power outlet. The power from the computer USB is sufficient enough to power AVerVision U15. However, if your laptop or desktop USB port does not supply as much power as the USB specification says it should, then you may encounter problems and need an external power supply.
Need help?
Do you have a question about the AVerVision U15 and is the answer not in the manual?
Questions and answers