Table of Contents
Advertisement
Quick Links
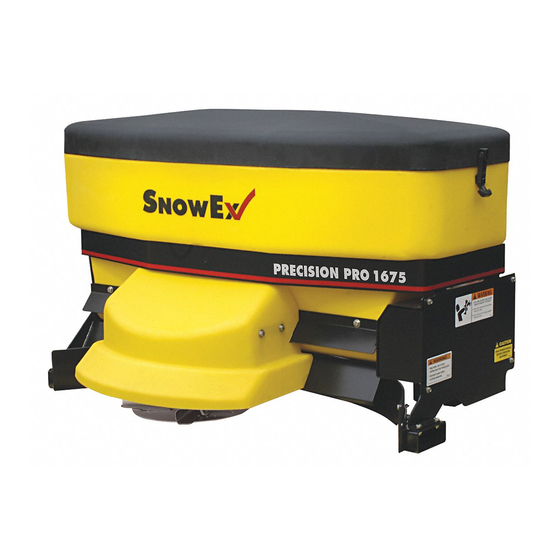
Precision Pro Spreader
SP-1675
Owner's Manual
Original Instructions
Read this document before operating or
servicing spreader.
This Owner's Manual is for SP-1675 Precision Pro spreaders
with serial numbers X4-100000 to X4-999999,
and serial numbers beginning with 150918 and higher.
This document supersedes all editions with an earlier date.
CAUTION
July 15, 2018
Lit. No. 70691, Rev. 01
Advertisement
Table of Contents

Related Manuals for SnowEx Precision Pro SP-1675


Summary of Contents for SnowEx Precision Pro SP-1675
- Page 1 July 15, 2018 Lit. No. 70691, Rev. 01 Precision Pro Spreader SP-1675 Owner's Manual Original Instructions CAUTION Read this document before operating or servicing spreader. This Owner's Manual is for SP-1675 Precision Pro spreaders with serial numbers X4-100000 to X4-999999, and serial numbers beginning with 150918 and higher.
-
Page 3: Table Of Contents
TABLE OF CONTENTS PREFACE ..............5 MOUNTING THE SPREADER ......... 14 Owner's Information ..........5 Attaching to Vehicle ..........14 SAFETY ..............7 OPERATING THE SPREADER ........ 15 Safety Defi nitions ..........7 Powering the Control .......... 15 Warning/Caution Labels ........7 Starting and Stopping Spreader ...... - Page 4 Lit. No. 70691, Rev. 01 July 15, 2018...
-
Page 5: Preface
PREFACE This manual has been prepared to acquaint you with the safety information, operation, and maintenance of your new tailgate spreader. Please read this manual carefully and follow all recommendations. This will help ensure profi table and trouble-free operation of your tailgate spreader. - Page 6 Lit. No. 70691, Rev. 01 July 15, 2018...
-
Page 7: Safety
SAFETY SAFETY DEFINITIONS WARNING/CAUTION LABELS Please become familiar with the warning and caution WARNING labels on the spreader. Indicates a potentially hazardous situation that, if not avoided, could result in death or NOTE: If labels are missing or cannot be read, see serious personal injury. -
Page 8: Serial Number Label
SAFETY SERIAL NUMBER LABEL (PLATE) Madison Heights, MI 48071 U.S.A. 1-800-725-8377 trynexfactory.com Code Defi nition Model No. SP-1675 2-Digit Year 2-Digit Month Serial No. YYMMDDLLXXXXZZZZZZ 2-Digit Day 2-Digit Location Code Manuf. 2017 XXXX 4-Digit Sequential Number ZZZZZ 5–7-Digit Assembly Part Number SERIAL NUMBER LABEL (CONTROL) Lit. -
Page 9: Safety Precautions
SAFETY SAFETY PRECAUTIONS CAUTION During the spreader installation we Improper installation and operation could cause recommend the addition of an OSHA compliant personal injury and/or equipment and property damage. Backup Alarm. This alarm is required for Read and understand labels and this Owner's Manual OSHA governed employers. -
Page 10: Personal Safety
SAFETY PERSONAL SAFETY VENTILATION WARNING • Remove ignition key and put the vehicle in park or in gear to prevent others from starting the vehicle Vehicle exhaust contains lethal fumes. during installation or service. Breathing these fumes, even in low concentrations, can cause death. -
Page 11: Torque Chart
SAFETY TORQUE CHART CAUTION Read instructions before assembling. Fasteners should be fi nger tight until instructed to tighten according to torque chart. Use standard methods and practices when attaching spreader, including proper personal protective safety equipment. Recommended Fastener Torque Chart Inch Fasteners Grade 5 and Grade 8 Torque (ft-lb) Torque (ft-lb) -
Page 12: Loading
LOADING This manual covers vehicles that have been CAUTION recommended for carrying the spreader. Please see Never use wet materials or materials with your local dealer for proper vehicle applications. foreign debris with any of these spreaders. CERTIFICATION These units are designed to handle dry, clean, free-fl... -
Page 13: Determining Vehicle Payload
LOADING DETERMINING VEHICLE PAYLOAD 6. Obtain the weight per cubic foot (lb/ft ) of the desired material. Divide the weight into the payload to determine the maximum volume of WARNING material that can be carried. Overloading could result in an accident or damage. -
Page 14: Mounting The Spreader
MOUNTING THE SPREADER ATTACHING TO VEHICLE To attach the spreader to a 3-Point Mount: CAUTION Simply back up to the spreader frame (requires Before lifting, verify that the hopper is empty PN F51196). Lower the hitch until the lower arms are of material. -
Page 15: Operating The Spreader
OPERATING THE SPREADER – CONTROL Adjust SPINNER and AUGER speeds with the two WARNING knobs. Speed will be displayed on the screens. Adjust Never operate equipment when under the to get the desired spread width and application rate or infl uence of alcohol, drugs, or medications that "Spread Pattern."... -
Page 16: Spreading Tips
OPERATING THE SPREADER SPREADING TIPS For consistency in spreading results, it is best to drive at a constant speed. • Spread ice melters with the storm to prevent The spinner speed changes the spread width. This unmanageable levels of ice. determines how much area the same material fed by the •... -
Page 17: Adjustable Material Baffl Es
OPERATING THE SPREADER ADJUSTABLE MATERIAL BAFFLES The Precision Pro spreader is equipped with adjustable material baffl es inside the hopper. These baffl es restrict the fl ow of salt to the auger. Leave these baffl es at the factory setting until you have run some material through the spreader at different combinations of auger and spinner speeds. -
Page 18: Adjustable Spinner
OPERATING THE SPREADER ADJUSTABLE SPINNER The spreader is equipped with an adjustable spinner to assist in more precise material application. The spinner plate gives the operator control of whether the material spreads to the right, left, or is centered. Before operating the spreader, spread some material in a clear area where the spread pattern can be easily observed to see how it changes with fi... -
Page 19: Maintenance
MAINTENANCE salt removal product or spraying your spreader with WARNING a cleaning solution before rinsing. Rinse all cleaning Never remove the spreader with material in solutions off thoroughly with water. the hopper. Sweep puddles of water from surfaces of the spreader. -
Page 20: At End Of Each Season Or Extended Storage
MAINTENANCE AT END OF EACH SEASON OR STORE THE SPREADER EXTENDED STORAGE WARNING CAUTION Never remove the spreader with material in DO NOT leave unused material in the hopper. hopper. Material can freeze or solidify, causing unit to not work properly. How the spreader is stored can have a lot to do with Empty and clean after each use. -
Page 21: Electrical Components
ELECTRICAL COMPONENTS VEHICLE HARNESS DIAGRAM Lit. No. 70691, Rev. 01 July 15, 2018... -
Page 22: Troubleshooting Guide
TROUBLESHOOTING GUIDE TROUBLESHOOTING Please see your authorized dealer for service. The troubleshooting reference table below may guide you in diagnosing the issue. Before servicing the spreader: • Review all safety information. • Confi rm that all electrical connections are tight and clean. •... - Page 23 TROUBLESHOOTING GUIDE TROUBLESHOOTING (Continued) Control Problem Possible Cause Suggested Solution Jammed material. Engage Auto-Reverse. Turn OFF vibrator (if on). Auger over-full. Engage Auto-Reverse. Adjust baffl es to restrict fl ow. Foreign object in hopper. Remove object. Frozen material. Shovel frozen material out. Use shovel or snow brush to clear Material on spinner at start-up.
- Page 24 U.S. patents: 7,400,058; 7,737,576, and other patents pending. TrynEx International offers a limited warranty for all spreaders and accessories. See separately printed page for this important information. The following is a registered ( ) trademark of Douglas Dynamics, LLC: SnowEx ®...
Need help?
Do you have a question about the Precision Pro SP-1675 and is the answer not in the manual?
Questions and answers