
Related Manuals for Netstor NA322A-G3


Summary of Contents for Netstor NA322A-G3
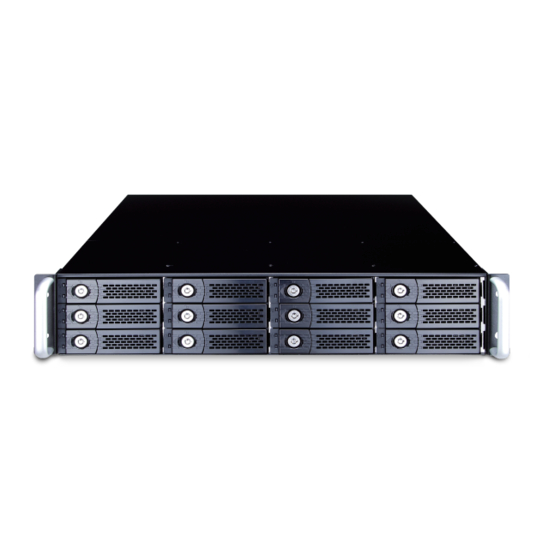
- Page 1 NA322A-G3 2U 12-Bay External PCIe ×8 JBOD Storage User Manual First edition, Apr. 2018...
-
Page 2: Table Of Contents
1. Unpack the NA322A-G3 2. Panel Layout 3. Configuration 4. Build Up Procedure 5. Operation Questions and Answers... -
Page 3: Panel Layout
1. Unpack the NA322A-G3 The box contains the following items: 。Netstor NA322A-G3 enclosure × 1 。HDD tray × 12 (installed in chassis) 。PCIe 3.0 ×8 host card × 1 。PCIe 3.0 ×8 data cable (1.5 meter) × 1 。Internal mini-SAS cable × 3 。Power cord ×... - Page 4 5. Temperature LED 。Normal – Green 。Over 55℃ - Red 8. External PCIe ×8 connector 。Connecting external PCIe ×8 data 4. Fan status LED cable to host computer 。Normal – Green 。Fail – Red (stop or low RPM) 6. Power cord receptacles 3.
-
Page 5: Configuration
3. Configuration Slot 1: PCIe 3.0 ×16 slot for RAID card NOTE: The host computer should have at least one PCIe ×8 or ×16 slot. There may be PCIe slot which is ×8 or ×16 physically but ×4 electrically within the host; please always install the host card in PCIe slot ×8/×16 electrically in the host computer. -
Page 6: Build Up Procedure
4. Build Up Procedure 1. Open the chassis by removing the top cover. 2. Install RAID card into the PCIe slot within NA322A-G3 and fix it with a screw on the bracket of the card. Go Top ↑... - Page 7 3. Connect all internal mini-SAS to mini-SAS cables between RAID card and backplane. Connect the first, topmost mini-SAS connector on backplane to channel 1~4 mini-SAS connector on RAID card, the second mini-SAS connector on backplane to channel 5~8 mini-SAS connector on card, and the third, bottommost mini-SAS connector on backplane to channel 9~12 mini-SAS connector on card.
- Page 8 Host Computer Power Power 6. Pull out all the HDD trays from the storage enclosure. 7. Place hard drives in the trays and fix them with hard drive mounting screws. Insert HDD trays back to NA322A-G3 storage enclosure. Go Top ↑...
-
Page 9: Operation
5. Operation 1. Power on NA322A-G3 storage first before powering on the host computer. 2. As all the hard drives are identified by the host computer, please follow the operational procedure by RAID card. Host Computer Go Top ↑... -
Page 10: Questions And Answers
Questions and Answers 1. NA322A-G3 supports SGPIO; what does it mean? NA322A-G3 chassis supports SGPIO. When any HDD fails, the red LED indicator on the tray will light. The SGPIO function will be effective when the SAS/SATA RAID card supports SGPIO function. (for example: Areca’s RAID card) 2.
Need help?
Do you have a question about the NA322A-G3 and is the answer not in the manual?
Questions and answers