Table of Contents
Advertisement
Quick Links
Advertisement
Table of Contents

Related Manuals for ITT Advantage Actuator 2.0


Summary of Contents for ITT Advantage Actuator 2.0
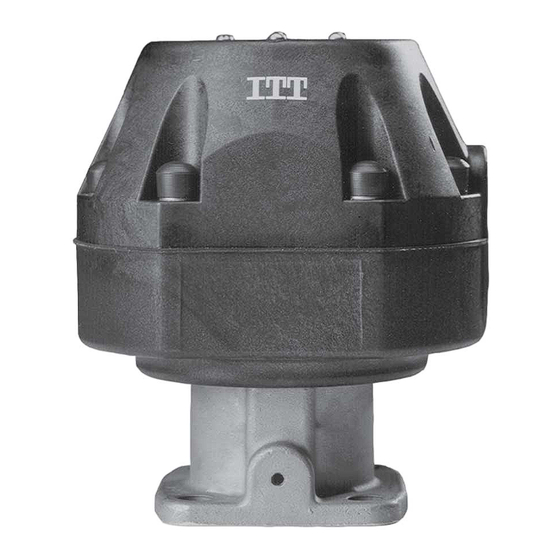
- Page 1 Industrial Process Maintenance Manual ® Advantage Actuator 2.0...
-
Page 3: Table Of Contents
Table of Contents Table of Contents Introduction and Safety..............................2 Safety message levels.................................2 User health and safety...............................2 Product Description................................4 Actuator identification..............................4 Bonnet description................................5 Valve diaphragm identification............................6 Maintenance..................................7 Precautions..................................7 Inspection...................................7 Tighten the bonnet fasteners............................7 Fastener torque table for valve body to topworks....................8 Disassemble the valve...............................8 Replace the valve diaphragm............................9 Adjust the travel (closing) stop............................12... -
Page 4: Introduction And Safety
General precautions This product is designed and manufactured using good workmanship and materials, and meets all applicable industry standards. This product should be used only as recommended by an ITT engineer. WARNING: • Misapplication of the valve can result in injury or property damage. Select valves and valve components of the proper materials and make sure that they are consistent with your specific performance requirements. - Page 5 Introduction and Safety Instruction and training can be carried out by either ITT or the reseller of the valve by order of the operating company. Non-compliance risks Failure to comply with all safety precautions can result in the following conditions: •...
-
Page 6: Product Description
2.0 Figure 1: Pin connection for Advantage actuator Model number The actuator model number is located on the ITT identification tag. The model number is a four digit number defining the actuator as follows. Table 1: Actuator Code Description Advantage actuator 2.0... -
Page 7: Bonnet Description
Product Description Identification tag Line Description Valve serial number Valve size and model number Valve diaphragm type Maximum recommended actuation pressure Bonnet description Non-Sealed bonnet The non-sealed bonnet has a weep hole that permits leakage of the process fluid if the diaphragm ruptures. -
Page 8: Valve Diaphragm Identification
Product Description Valve diaphragm identification Diaphragm tab codes All diaphragm materials and physical properties are batch traceable via permanent codes molded into the diaphragm tabs. The molding date, grade of diaphragm, and valve size provide traceability to original batch records. Supplier code Date code Figure 4: Elastomer diaphragm front... -
Page 9: Maintenance
What to look for Action if problem is found External valve parts Excessive wear or corrosion • Replace the affected parts • Contact ITT to obtain replacement parts or for specific instructions Non sealed bonnet Fluid weeping from the plug... -
Page 10: Fastener Torque Table For Valve Body To Topworks
Maintenance Tighten the bonnet fasteners in a crisscross pattern. For more information, see Fastener torque table for valve body to topworks in this manual. Make multiple crisscross passes to build up torque to the final table value. Make additional crisscross passes using final table values to evenly tighten each fastener to within 5% of torque value. -
Page 11: Replace The Valve Diaphragm
Maintenance If the actuator mode of Then ... operation is ... Fail close Load the air port in the bottom cover of the actuator with sufficient air to partially open the valve. Remove the bonnet fasteners. Lift the topworks assembly from the valve body. If the actuator mode of operation is fail open, then remove pressure load from the actuator. - Page 12 Maintenance d) Continue rotating the PTFE diaphragm clockwise into the compressor while securing the backing cushion from rotating. Rotate the diaphragm until hard stop or heavy resistance is achieved and additional force does not significantly rotate the diaphragm into the compressor. If replacing a PTFE diaphragm, re-invert the diaphragm.
- Page 13 Maintenance Back off (no more than half turn) until the bolt holes in diaphragm and the bonnet flange align. 10. If the actuator mode of operation is fail open or fail close, select one of these steps. If the actuator Then ...
-
Page 14: Adjust The Travel (Closing) Stop
If leakage is present, then replace the spindle o-rings. Lubrication requirements WARNING: Standard lubricants are as outlined below. Special lubricants may be required for oxygen or other unique services. Contact ITT for evaluation of non-standard lubricants. ® Advantage Actuator 2.0 Maintenance Manual... -
Page 15: Replace The Actuator Diaphragm And Spring For Fail Open Actuator
If present, remove the switch package. Disconnect the air lines. ITT recommends that the following steps be performed on a bench with the body removed from the actuator: a) Disassemble the valve. For more information, see Disassemble the valve in this manual. -
Page 16: Replace The Actuator Diaphragm And Spring For Fail Close Actuator
One fixture exists for the series 3, 5, and 8 actuators and one for the series 16 actuator. If present, remove the switch package. Disconnect the air lines. ITT recommends that the following steps be performed on a bench, with the body removed from the actuator: a) Disassemble the valve. -
Page 17: Replace The Actuator Diaphragm For Double Acting Actuator
Replace the actuator diaphragm for double acting actuator If present, remove the switch package Disconnect the air lines. ITT recommends that the following steps be performed on a bench with the body removed from the actuator: a) Disassemble the valve. -
Page 18: Parts Listing And Cross-Sectional Drawings
Parts Listing and Cross-Sectional Drawings Parts Listing and Cross-Sectional Drawings Advantage actuator series 3, 5, 8, and 16 parts List of parts 1/8” NPT 11/12 Figure 7: Fail open and double acting actuator 18” NPT Figure 8: Low profile actuator 1/8”... -
Page 19: Parts For Fixture
Parts Listing and Cross-Sectional Drawings Item Description Material Quantity Upper Actuator Cover Plastic Lower Actuator Cover Plastic Valve Spindle Stainless Steel Diaphragm, Actuator Buna-N Plate, Actuator Stainless Steel or Carbon Steel Nickel Plated Spindle, Indicating Stainless Steel Spring Steel Spring Steel O-Ring Compressor... - Page 20 Parts Listing and Cross-Sectional Drawings Item Description Quantity Centering Rod Handwheel Set Screw Upper Plate Thrust Washer Thrust Race Thrust Bearing Thrust Race Bushing Stem Outer Column Spacer Spring Pin Lower Plate Machine Screw Shim Washer As required Spacer Plate Cap Screw Inner Column Support Plate...
- Page 22 33 Centerville Road Lancashire PR4 2HU Lancaster, PA 17603 England Tel. +44-1772-682696 Tel. (717) 509–2200 Fax +44-1772-686006 Fax (717) 509–2316 E-mail: pureflo.custserv@itt.com © 2009 ITT Corporation. The original instruction is in English. All non-English instructions are translations of the original instruction. AA2.0-Maintenance...
Need help?
Do you have a question about the Advantage Actuator 2.0 and is the answer not in the manual?
Questions and answers