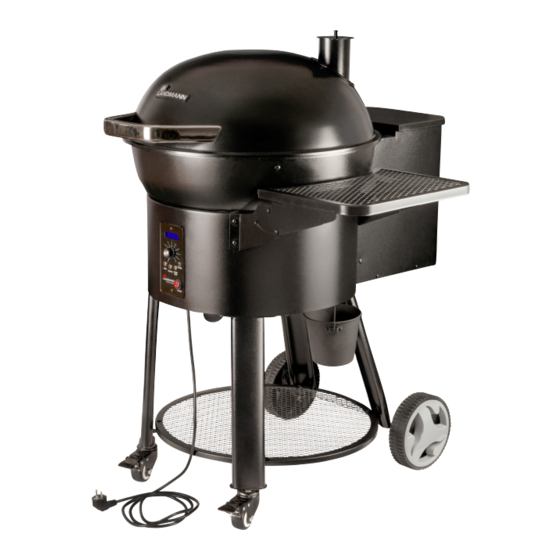
Summary of Contents for Landmann Pellet Kettle
- Page 1 Pellet Kettle Installation and Operation Manual 13140 ersion #2018 ateD 12/17 Dition...
- Page 2 • DO NOT leave unattended at any time while in READ FIRST! use. • Before each use, make sure the grill is in good RULES FOR PELLET KETTLE GRILL working condition. SAFE OPERATION. • DO NOT alter the grill in any way.
-
Page 3: Part List
Lid Handle Cooking grate Drip Tray Heat Diffuser Low Drip Tray Holders High Drip Tray Holder Main Grill Assembly Meat Probe Bottom Shelf Grease Bucket Wheels Wheel Covers Left Back Leg Right Back Leg Front Legs Wheel Axle Pellet Kettle... - Page 4 Pellet Kettle...
- Page 5 Pellet Kettle...
- Page 6 Pellet Kettle...
- Page 7 4.1. 4.2. Pellet Kettle...
- Page 8 Pellet Kettle...
- Page 9 WARNING! DO NOT OPERATE GRILL WITHOUT THE HEAT DIFFUSER IN PLACE. Pellet Kettle...
- Page 10 WARNING! DO NOT OPERATE GRILL WITHOUT THE HEAT DIFFUSER OR DRIP TRAY IN PLACE. Pellet Kettle...
- Page 11 Pellet Kettle 11...
- Page 12 Pellet Kettle...
- Page 13 OVERVIEW OF THE ASSEMBLED GRILL These are the main components of the Pellet Kettle. The Pellet Kettle uses an electrically powered auger and fan that is connected to a control panel to control the burning of fuel pellets for temperature and smoke.
- Page 14 WARNING! DANGER! Keep hands and DANGER! fingers away Sharp! Rotaing Auger! from auger. Keep hands and Keep hands and fingers away fingers away. Ignitor Rod from auger. Auger on bottom of hopper Fire pot on bottom of firebowl Pellet Kettle...
- Page 15 When the control dial is turned to STANDBY, STANBY will display. This shuts down the auger and fuel supply but the fan continues to run for up to 8 minutes burning off any remaining fuel in the fire pot. This is a very important step in using your grill. Pellet Kettle 15...
- Page 16 5. The grill is ready to use. 2) Fan: look inside the firebowl and place your hand over the fire pot to check for air coming from the fire pot. Do not put your hands inside the fire pot! Pellet Kettle...
- Page 17 Add fuel pellets ROUTE POWER CORD SO THAT IT IS NOT A TRIPPING HAZARD WARNING! NEVER PUT PELLETS DIRECTLY IN THE FIRE POT OR THE FIREBOWL. THIS GRILL ONLY WORKS WITH PELLETS FED THROUGH THE HOPPER. Pellet Kettle 17...
- Page 18 4. Close the lid and open the vent to full open. 3. This Pellet Kettle is very fuel efficient. A full 5. Set the temperature dial to any cooking hopper will be sufficient for most cookouts.
- Page 19 Medium ................72°C Well Done ................ 77°C Ground Meats Beef, Pork ................ 72°C Turkey ................74°C Pork Medium ................71°C Well Done ................ 77°C Poultry Chicken ................74°C Turkey ................74°C Fish ................. 63°C Egg Dishes ..............72°C Pellet Kettle 19...
- Page 20 Do not expose the control panel or the electrical components inside the hopper to water. All moisture should be wiped away and not allowed to stay on any surface of the grill. Always unplug the grill prior to cleaning. Pellet Kettle...
-
Page 21: Troubleshooting
ON SMOKE SET- the fire pot move all ash and unburned pellets. TING 2. Windy environment 3. Replace parts and initiate startup. 4. Too much wind can extinguish the fire, move grill to a more protected area. Pellet Kettle 21... - Page 22 LID HINGE bolts on the hinge. 1. Lid hinge movement is STICKING AND 2. If movement is still not smooth, check hexnuts to not smooth. make sure they are not too tight. Lid movement POPPING should be without resistance. Pellet Kettle...
- Page 23 Green / yellow Motor speed: 2800+/-10% RPM Replacement Fuse Size: 5x20mm Rating: 250V, 4A Ground to chassis Power Cord Control panel parts Item Qty. Designation Control Panel Temperature Probe Ignitor Rod Power Cord Replacement Fuse M4 x 10mm Screw Pellet Kettle 23...
- Page 24 PELLET BURNER ASSEMBLY PARTS Pellet burner parts Item Qty. Designation Pellet burner assembly Auger motor assembly Auger housing assembly Fire pot assembly Fan motor assembly Pellet Kettle...
- Page 25 HOT SURFACES DURING USE! USE MITTENS OR GLOVES ON THESE PARTS. SIDE SHELF 6.5 kg MAX HOT SURFACES DURING USE! HANDLES BECOME WARM TO HOT WITH EXTENDED USE. DO NOT STORE FLAMMABLE MATERIALS ON THE STORAGE SHELF. Pellet Kettle 25...
- Page 26 Pellet Kettle...
- Page 27 Pellet Kettle 27...
- Page 28 Email: receptionfrance@landmann.de 1 IS LANDMANN Iceland ehf ® Grillbúðin ehf Smiðjuvegur 2, 200 Kópavogur E-mail: landmannn@landmann.is Web site: www.landmann.is Wyprodukowano w ChRL dla koncernu LANDMANN. Importer / DOVOZCE: LANDMANN POLSKA Sp. z o.o. ® 59-400 Jawor, ul. Kuziennicza 13b Tel.


Need help?
Do you have a question about the Pellet Kettle and is the answer not in the manual?
Questions and answers