Table of Contents
Advertisement
We
GOOD WILL INSTRUMENT CO., LTD.
No. 7-1, Jhongsing Rd., Tucheng City, Taipei County 236, Taiwan.
GOOD WILL INSTRUMENT (SUZHOU) CO., LTD.
No. 69 Lushan Road, Suzhou New District Jiangsu, China.
declare that the below mentioned product
PEL-300
is herewith confirmed to comply with the requirements set out in the Council Directive on the
approximation of the Law of Member States relating to Electromagnetic Compatibility
,
,
(89/336/EEC
92/31/EEC
93/68/EEC
).
93/68/EEC
For the evaluation regarding the Electromagnetic Compatibility and Low Voltage
Directive, the following standards are applied:
EN 61326-1:
Electrical equipment for measurement, control and laboratory use––EMC requirements
Conducted Emission
EN 55022 class B (1994)
Radiated Emission
Current Harmonics
EN 61000-3-2
Voltage Fluctuations EN 61000-3-3
------------------
----------
------------------
----------
------------------
----------
Low Voltage Equipment Directive 73/23/EEC & amended by 93/68/EEC
IEC/EN 61010-1:2001
EC Declaration of Conformity
)
and
Low
Voltage
(1997+A1:1998)
Electrostatic Discharge
Radiated Immunity
(1995)
Electrical Fast Transients
(1995)
Surge Immunity
----------
Conducted Susceptibility
Power Frequency Magnetic field
----------
----------
Voltage Dip/Interruption
Equipment
Directive
IEC 1000-4-2
IEC 1000-4-3
IEC 1000-4-4
IEC 1000-4-5
EN 61000-4-6
EN 61000-4-8
EN 61000-4-11
(
73/23/EEC,
Equipment
(1995)
(1995)
(1995)
(1995)
(1996)
(1993)
(1994)
1
Advertisement
Table of Contents

Subscribe to Our Youtube Channel
Related Manuals for GW Instek PEL-300


Summary of Contents for GW Instek PEL-300
- Page 1 No. 69 Lushan Road, Suzhou New District Jiangsu, China. declare that the below mentioned product PEL-300 is herewith confirmed to comply with the requirements set out in the Council Directive on the approximation of the Law of Member States relating to Electromagnetic Compatibility...
-
Page 2: Table Of Contents
CONTENTS 1. INTRODUCTION ............................1 1-1 Features..............................1 2. SPECIFICATIONS............................2 3. OPERATION ..............................5 3-1 Front and rear panels..........................5 3-2 Operations ............................9 (1). Constant Voltage Mode ........................10 (2). Constant Current Mode ........................10 (3). Constant Resistance Mode......................11 (4). - Page 3 4-8 Calibrating the D/A, A/D in 0.6A range of C.C. MODE ................24 4-9 Calibrating the D/A in 0.6A range of W SET..................24 4-10 Calibrating the D/A, A/D in 60A range of C.C. MODE .................25 4-11 Calibrating the D/A in 60A range of W SET..................26 4-12 Calibrating the reference voltage in 1Ω...
-
Page 4: Introduction
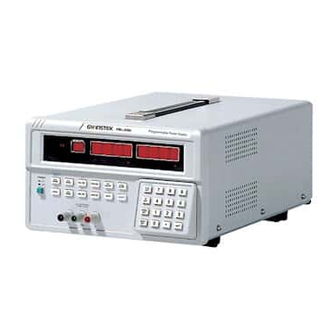
1. INTRODUCTION 1-1 Features Simple operation with smart push buttons High resolution (20mV, 0.2mA, 0.33mΩ) With voltage, current and power overload prevention functions Easy access to maximum 100 files Voltage range: 3 ~ 60V Current range: 6mA ~ 60A Maximum power: 300W Operational modes: constant voltage (CV), constant current (CC), and constant resistance (CR) With self-testing and auto software calibration functions... -
Page 5: Specifications
2. SPECIFICATIONS Functions Modes Ranges Voltage Range 3 ~ 60V Operational Limits Current Range 6mA ~ 60A Power Range 1 ~ 300W Applicable Range 3 ~ 60 V ±(0.1% + 40mV) Accuracy Constant Voltage (CV) Mode Resolution 20mV Step 20mV ~ 6V Applicable Range 6mA ~ 60V ±(0.5% + 100mA) - Page 6 Functions Modes Ranges Applicable Range 50mΩ ~ 1kΩ ±(5% + 1Ω) 100Ω ~ 1kΩ ±(5% + 100mΩ) 10Ω ~ 100Ω Accuracy ±(5% + 10mΩ) 1Ω ~ 10Ω ±(5% + 1mΩ) 50mΩ ~ 1Ω 100Ω ~ 1kΩ 330mΩ Constant Resistance 10Ω ~ 100Ω 33mΩ...
- Page 7 Functions Modes Ranges Time Setting 1 sec. ~ 999 min. 59 sec. Timer Resolution 1 sec. Dynamic Operation 0°C ~ 40°C Temperature Storage -10°C ~ 70°C Dynamic Operation 80% (Max.) Humidity Storage 70% (Max.) AC 100V, 120V, 220V, 240V ± 10% 50/60 Hz Power Source 110V/120V T 0.5A 250V...
-
Page 8: Operation
3. OPERATION 3-1 Front and rear panels Graph 3-1 Front Panel... - Page 9 Graph 3-2 Rear Panel...
- Page 10 “▃” -- power is on; “▉” -- power is off. POWER C.C. MODE To set operation in constant current mode. C.V. MODE To set operation in constant voltage mode. C.R. MODE To set operation in constant resistance mode. To recall the previous batch of memorized data. To recall the next batch of memorized data.
- Page 11 V.I.R. SET To set the values of input voltage, current, and resistance. W SET To set the maximum of input power. FREQ. SET To set the frequency in dynamic operational mode. DUTY SET To set DUTY under dynamic operational mode. 0 ∼...
-
Page 12: Operations
3-2 Operations Graph 3-3 PEL - 300 ELECTRONIC LOAD POWER SUPPLY... -
Page 13: Constant Voltage Mode
(1) Constant Voltage Mode: Connect the instrument according to Graph 3-3. Turn the power switch to “ON” position, then press C.V. MODE button (the light of C.V. MODE will be on). Press LOAD ON/OFF button (the light of LOAD will be on), the displays will indicate the value of external voltage and current. -
Page 14: Constant Resistance Mode
(3). Constant Resistance Mode: Connect the instrument according to Graph 3-3. Turn the power switch to “ON” position, then press C.R. MODE button (the light of C.R. MODE is on). Press LOAD ON/OFF button (the light of LOAD is on), the displays will indicate the value of external voltage and current. -
Page 15: Setting Of Operational Frequency
(5). Setting of operational frequency: Connect the instrument according to Graph 3-3. Turn the power switch to “ON” position, then press C.C. MODE button (the light of C.C. MODE is on). Press FREQ. SET button; then input desired FREQ. value after the display indicating the original FREQ. value. -
Page 16: Setting Of Dynamic Mode
(7). Setting of dynamic mode: Connect the instrument according to Graph 3-3. Turn the power switch to “ON” position, then press C.C. MODE button (the light of C.C. MODE is on). Press SW ON/OFF button; the light of SW is on which indicates the operation is proceeded in dynamic mode. -
Page 17: Setting Of Step
9). Setting of STEP: Turn the power switch to “ON” position, then press SHIFT button to enable the secondary functions. Press V.I.R. SET button, key in digits to specify the value of STEP, then press ↵ button to complete the setting. - Page 18 Examples: In C.V. MODE, to set voltage at 10V, W SET at 300W, STEP at 1V and to save current data in the 99th batch. STEP 1. C.V. MODE STEP 9. V.I.R. SET STEP 2. V.I.R. SET STEP10. ↵ STEP 3. STEP11.
-
Page 19: Setting The Duration Of Execution
To save data in current batch STEP 1. SHIFT STEP 2. ↵ STEP 3. (Assume MEMORY indicates 33, data will then be saved in the 33rd batch right after proceeding the 3 STEPs aforementioned.) (11). Setting the duration of execution: Press SHIFT to enable the secondary function. -
Page 20: Setting Of Repeated Executions
(12). Setting of repeated executions: Press SHIFT to enable the secondary function. Press RCL key. Key in three sets of digits with two decimals in between. The first set of the digits is specified as “the starting batch”, the second set is specified as “the ending batch”, and the last set is specified as “the number of executions.”... -
Page 21: Setting Of Auto Execution
(13). Setting of auto execution: The light of AUTO is out when auto execution is not functioning. Press AUTO button, the indicator will light up, and the function will be turned on. Note: Be sure to complete the settings of item 1 to 7 and 10 to 12 before proceeding the setting of auto execution. -
Page 22: Calibration Procedures
4. CALIBRATION PROCEDURES Instruments: 2 sets of DMM(digital multiple meters with 5 1/2 digits); 3 sets of POWER SUPPLY(60V, 6A; 8V, 75A; and 18V, 20A ); 1 set of COUNTER (frequency counter). 4-1 Adjusting the reference voltage of C.V. MODE Press SHIFT and C.V. -
Page 23: Adjusting The Reference Voltage In 10Ω~1Kω Range Of C.r. Mode
4-2 Adjusting the reference voltage in 10Ω∼1kΩ range of C.R. MODE Set voltage of POWER SUPPLY to 60V and current of it to 1A. Connect the output terminal of POWER SUPPLY to the input terminal of electronic load. Press SHIFT and C.V. MODE, then key in 3, 8, 0, 2, and ↵. Test the input terminal of load by the 200V range of a DMM. -
Page 24: Calibrating The Offset Of C.r. Mode
When MEMORY indicates “01” and A indicates “CL03”, key in the current reading (no less than 6 digits including decimal) of the DMM (in unit of “A”) and press ↵ . When MEMORY indicates “02”, key in the current reading (no less than 5 digits including decimal) of the DMM (in unit of “A”) and press ↵... -
Page 25: Calibrating The D/A Of C.v. Mode
4-5 Calibrating the D/A of C.V. MODE Set voltage of POWER SUPPLY to 62V and current of it to 0.5A. Connect the output terminal of POWER SUPPLY to the input terminal of electronic load. Test the input terminal of the load by the 200V range of a DMM. Pursue a reading of 62.00V from the DMM. -
Page 26: Calibrating The D/A In 6A Range Of W Set
Test the input terminal of the load by the 200V range of a DMM. Press SHIFT and C.V. MODE, then key in 3, 8, 0, 5, and ↵ . Adjust the POWER SUPPLY until t he DMM display reads 30.00V. When MEMORY indicates “01”... -
Page 27: Calibrating The D/A, A/D In 0.6A Range Of C.c. Mode
4-8 Calibrating the D/A, A/D in 0.6A range of C.C. MODE Set voltage of POWER SUPPLY to 60V and current of it to 0.8A. Connect the output terminal of POWER SUPPLY to a DMM in 2A range in series. Hook up the DMM with the input terminal of the electronic load. -
Page 28: Calibrating The D/A, A/D In 60A Range Of C.c. Mode
Adjust the POWER SUPPLY until t he DMM display reads 60.00V. When MEMORY indicates “01” and A indicates “CL08”, the execution will be proceeded automatically by the pre-set program without key-in process. Note: Applied instruments -- POWER SUPPLY (60V, 6A); DMM (5 1/2 digits) Applied situation --The POWER SET in 0.6A range is not reliable. -
Page 29: Calibrating The D/A In 60A Range Of W Set
4-11 Calibrating the D/A in 60A range of W SET Set voltage of POWER SUPPLY to 5V and current of it to 75A. Connect the output terminal of POWER SUPPLY to a DMM in 75A range in series. Hook up the DMM with the input terminal of the electronic load. -
Page 30: Calibrating The D/A In 1Kω Range Of C.r. Mode
When MEMORY indicates “03”, key in the voltage reading of TP1 (no less than 7 digits including decimal) of the DMM (in unit of “V”) and press ↵ . Note: Applied instruments -- POWER SUPPLY (60V, 6A); DMM (5 1/2 digits) Applied situation -- The readings of C.R. -
Page 31: Calibrating The D/A In 100Ω Range Of C.r. Mode
4-14 Calibrating the D/A in 100Ω range of C.R. MODE Set voltage of POWER SUPPLY to 40V and current of it to 6.2A. Connect the output terminal of POWER SUPPLY to a DMM in 20A range in series. Then hook up the DMM with the input terminal of the electronic load. -
Page 32: Calibrating The D/A In 1Ω Range Of C.r. Mode
4-15 Calibrating the D/A in 1Ω range of C.R. MODE Set voltage of POWER SUPPLY to 5V and current of it to 75A. Connect the output terminal of POWER SUPPLY to a DMM in 75A range in series. Then hook up the DMM with the input terminal of the electronic load. -
Page 33: Calibrating The100Hz~1Khz Range Of Sw Mode
4-16 Calibrating the100Hz∼1kHz range of SW MODE Set voltage of POWER SUPPLY to 60V and current of it to 1A. Connect the positive output terminal of POWER SUPPLY to a 0.1Ω 5W concrete resistance first, then connect the resistance to the input terminal of electronic load. Hook up a DMM in 200V range with the input terminal of the load. -
Page 34: Calibrating The D/A In 10Hz~100Hz Range Of Sw Mode
4-17 Calibrating the D/A in 10Hz∼100Hz range of SW MODE Set voltage of POWER SUPPLY to 60V and current of it to 1A. Connect the positive output terminal of POWER SUPPLY to a 0.1Ω 5W concrete resistance first, then connect the resistance to the input terminal of the electronic load. Hook up a DMM in 200V range with the input terminal of the load. -
Page 35: Calibrating The D/A In 1Hz~10Hz Range Of Sw Mode
4-18 Calibrating the D/A in 1Hz∼10Hz range of SW MODE Set voltage of POWER SUPPLY to 60V and current of it to 1A. Connect the positive output terminal of POWER SUPPLY to a 0.1Ω 5W concrete resistance first, then connect the resistance to the input terminal of the electronic load. Hook up a DMM in 200V range with the input terminal of the load. -
Page 36: D/A Calibrating The Sense Current Offset Of C.c., C.r. Mode
4-19 D/A Calibrating the SENSE current offset of C.C., C.R. MODE Set voltage of POWER SUPPLY to 60V and current of it to 1A. Connect the output terminal of POWER SUPPLY to a DMM in 2A range in series. Hook up the DMM with the input terminal of the load. -
Page 37: Application
5. APPLICATION 5-1 The Table of the error message Code Cause Resolvent Err-01 Input voltage over 60V Lower the input voltage Set higher power value or lower the voltage and Err-02 Input power exceeds setting current Lower the input voltage and set a higher power Err-03 Input voltage and power exceed setting value... -
Page 38: Test Lead
5-2 Test Lead The Selection of Output Test Lead and Feedback Test Lead: For safety assurance, please select the adequate output test lead according to the following list: Conductor Permissible Maximum (CSA) Cross Section Area Current Wire No. Component Outer Conductive Resistor Model pc/mm... -
Page 39: Safety Summary
6. SAFETY SUMMARY SAFETY TERMS AND SYMBOLS: These terms may appear in this manual or on the product: WARNING. Warning statements identify condition or practices that could result in injury or loss of life. CAUTION. Caution statements identify conditions or practices that could result in damage to this product or other property WARNING: This equipment is not for measurements performed for CAT II, III and IV. - Page 40 FOR UNITED KINGDOM ONLY NOTE: This lead/appliance must only be wired by competent person. WARNING: THIS APPLIANCE MUST BE EARTHED IMPORTANT: The wires in this lead are coloured in accordance with the following code: Green/ Yellow: Earth Blue: Neutral Brown: Live (Phase) As the colours of the wires in main leads may not correspond with the colours marking identified in your plug/appliance, proceed as follows:...
- Page 41 Any moulded mains connector that requires removal /replacement must be destroyed by removal of any fuse & fuse carrier and disposed of immediately, as a plug with bared wires is hazardous if an engaged in live socket. Any re-wiring must be carried out in accordance with the information detailed on this label.
Need help?
Do you have a question about the PEL-300 and is the answer not in the manual?
Questions and answers