Table of Contents
Advertisement
Advertisement
Table of Contents

Related Manuals for MRC PS-9303SD


Summary of Contents for MRC PS-9303SD
-
Page 2: Table Of Contents
TABLE OF CONTENTS 1. FEATURES..............1 2. SPECIFICATIONS............2 2-1 General Specifications..........2 2-2 Electrical Specifications......... 5 3. FRONT PANEL DESCRIPTION........7 4 SENSOR TYPE SELECTION........... 9 5 MEASURING PROCEDURE..........10 6. OTHER FUNCTION............11 6-1 Data Hold..............11 6-2 Record ( Max./ Min. reading ).........11 6-3 LCD Backlight ON/OFF..........12 7. -
Page 3: Features
1. FEATURES * Meter can cooperate optional pressure sensor with 2, 5, 10, 20, 50, 100, 200, 400 Bar, new calibration procedures are not necessary when change the new sensor . * When change the new pressure sensor, just select pressure type ( 2, 5, 10, 20, 50, 100, 200, 400 bar ) on the front panel button. -
Page 4: Specifications
* SD card capacity : 1 GB to 16 GB. * LCD with green light backlight, easy reading. * It can default auto power off or manual power off. * Data hold, record max. and min. reading. * Microcomputer circuit, high accuracy. * Power by UM3/AA ( 1.5 V ) x 6 batteries or DC 9V adapter. - Page 5 Input signal DC 100 mV for full Scale. from sensor Datalogger Auto 1 sec to 8 hour 59 min. 59 sec. Sampling Time @ Sampling time can set to 1 second, Setting range but memory data may loss. Manual Push the data logger button once will save data one time.
- Page 6 Power Supply Alkaline or heavy duty DC 1.5 V battery ( UM3, AA ) x 6 PCs, or equivalent. DC 9V adapter input. ( AC/DC power adapter is optional ). Power Current Normal operation ( w/o SD card save data and LCD Backlight is OFF) : Approx.
-
Page 7: Electrical Specifications
2-2 Electrical Specifications (23± 5 ℃ Sensor type 2 bar 5 bar 10 bar Max. Reso- Max. Reso- Max. Reso- range lution range lution range lution 0.002 0.005 0.01 0.02 72.5 Kg/cm^2 2.040 0.002 5.095 0.005 10.19 0.01 mm Hg 1500 3750 7500... - Page 8 Sensor type 200 bar 400 bar Max. Reso- Max. Reso- range lution range lution 2900 5800 Kg/cm^2 204.0 408.0 mm Hg 150000 300000 inch Hg 5905 11810 meter H20 2040 4075 inch H20 80200 100 160600 Atmosphere 197.4 394.5 200000 200 400000 500 20000 20 40000 50...
-
Page 9: Front Panel Description
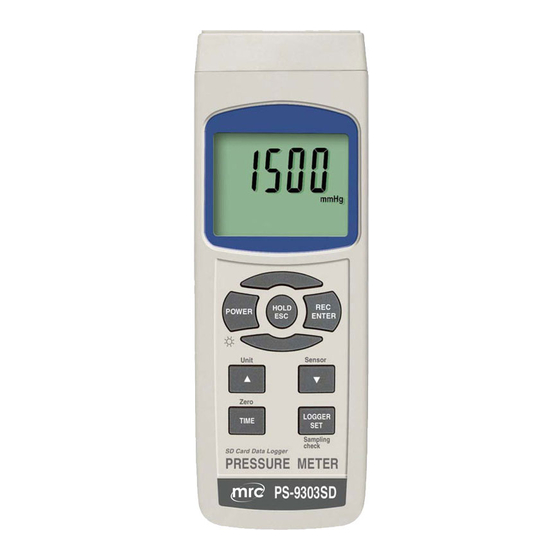
3. FRONT PANEL DESCRIPTION Fig. 1... - Page 10 3-1 Display 3-2 Power Button ( Backlight Button ) 3-3 Hold Button ( ESC Button ) 3-4 REC Button ( Enter Button ) 3-5 Unit Button ( Button ) ▲ 3-6 Sensor type Button ( Button ) ▼ 3-7 Zero Button ( Time Button ) 3-8 Logger Button ( SET Button, Sampling check ) 3-9 Stand 3-10 Battery Compartment/Cover...
-
Page 11: Sensor Type Selection
4. SENSOR TYPE SELECTION The meter can cooperate with optional 2, 5, 10, 20, 50, 100, 200, 400 bar sensor, new calibration are not necessary when change the new sensor . Those different optional pressure sensor are : * 2 bar pressure sensor, Model : PS100-2BAR * 5 bar pressure sensor, Model : PS100-5BAR * 10 bar pressure sensor, Model : PS100-10BAR * 20 bar pressure sensor, Model : PS100-20BAR... -
Page 12: Measuring Procedure
5. MEASURING PROCEDURE 1) Plug in the " Plug of Pressure Sensor " ( 3-20, Fig. 1 ) to meter's " Probe Input Socket " ( 3-13, Fig. 1 ) 2) Power on the meter by pushing the " Power Button " ( 3-2, Fig. -
Page 13: Other Function
5) Zero adjustment : If the Display is not show zero value, push the " Zero Button " ( 3-7, Fig. 1 ), > 10 seconds continuously, the Display value will change to zero value. 6) Connect the " Port Connector of Pressure Sensor " ( 3-18, Fig. -
Page 14: Lcd Backlight On/Off
b)Press the " REC Button " ( 3-4, Fig. 1 ) again, the " REC MIN " symbol along with the minimum value will appear on the display. If intend to delete the minimum value, just press the " Hold Button " ( 3-3, Fig. 1 ) once, then the display will show the "... -
Page 15: Auto Datalogger ( Set Sampling Time ≧ 1 Second )
c. Time setting If the meter is used at first time, it should to adjust the clock time exactly, please refer chapter 9-2, page 20. d. Decimal format setting The numerical data structure of SD card is default used the " . " as the decimal, for example "20.6"... -
Page 16: Manual Datalogger ( Set Sampling Time = 0 Second )
b. Pause the datalogger During execute the Datalogger function , if press the " Logger Button " ( 3-8, Fig. 1 ) once will pause the Datalogger function ( stop to save the measuring data into the memory circuit temporally ). In the same time the text of "... -
Page 17: Check Time Information
Remark : During execute the Manual Datalogger, press the " ▲ Button " ( 3-5, Fig, 1 ) the lower no. ( position no. ) will flashing. It can use the " Button " ( 3-5, Fig. 1) or " ▲... -
Page 18: Sd Card Data Structure
7-6 SD Card Data structure 1) When the first time, the SD card is used into the meter, the SD card will generate a route : PSA01 2) If the first time to execute the Datalogger, under the route PSA01\, will generate a new file name PSA01001.XLS. -
Page 19: Saving Data From The Sd Card To The Computer
8. Saving data from the SD card to the computer ( EXCEL software ) 1) After execute the Data Logger function, take away the SD card out from the " SD card socket " ( 3-17, Fig. 1 ). 2) Plug in the SD card into the Computer's SD card slot ( if your computer build in this installation ) or insert the SD card into the "... - Page 20 EXCEL graphic screen ( for example, graphic )
-
Page 21: Advanced Setting
9. ADVANCED SETTING Under do not execute the Datalogger function, press the " SET Button " ( 3-8, Fig. 1 ) continuously at least two seconds will enter the " Advanced Setting " mode. then press the " SET Button " ( 3-8, Fig. 1 ) once a while in sequence to select the eight main function, the display will show : Sd F.. - Page 22 9-1 SD memory card Format When the lower display show " Sd F " 1) Use the " Button " ( 3-5, Fig. 1 ) or " Button " ( ▲ ▼ 3-6, Fig. 1 ) to select the upper value to " yES " or "...
- Page 23 2) After set all the time value ( Year, Month, Date, Hour, Minute, Second ), press the " SET Button " ( 3-8, Fig. 1 ) once will save the time value, then the screen will jump to Sampling time " setting screen ( Chapter 9-3 ). Remark : After the time value is setting, the internal clock will run precisely even Power off if the battery is under...
- Page 24 9-4 Auto power OFF management When the lower display show " PoFF " 1) Use the " Button " ( 3-5, Fig. 1 ) or " Button " ▲ ▼ ( 3-6, Fig. 1 ) to select the upper value to " yES " or "...
- Page 25 9-6 Decimal point of SD card setting The numerical data structure of SD card is default used the " . " as the decimal, for example "20.6" "1000.53" . But in certain countries ( Europe ...) is used the " , " as the decimal point, for example "...
- Page 26 Selecting no. via the optional pressure sensor type : If the select no. is " 2 " . The meter will cooperate : 2 bar pressure sensor, Model : PS100-2BAR If the select no. is " 5 " . The meter will cooperate : 5 bar pressure sensor, Model : PS100-5BAR If the select no.
-
Page 27: Power Supply From Dc Adapter
Remark : During execute the " Advanced Setting " function, if press " ESC Button " ( 3-3, Fig. 1 ) will exit the " Advanced Setting " function, the LCD will return to normal screen. 10. POWER SUPPLY from DC ADAPTER The meter also can supply the power supply from the DC 9V Power Adapter ( optional ). -
Page 28: System Reset
12. SYSTEM RESET If the meter happen the troubles such as : CPU system is hold ( for example, the key button can not be operated... ). Then make the system RESET will fix the problem. The system RESET procedures will be either following method : During the power on, use a pin to press the "... - Page 29 The 16 digits data stream will be displayed in the following format : D15 D14 D13 D12 D11 D10 D9 D8 D7 D6 D5 D4 D3 D2 D1 D0 Each digit indicates the following status : Start Word When send the upper display data = 1 When send the lower display data = 2 D12, D11 Annunciator for Display Bar = 22...
-
Page 30: Optional Pressure Sensor
14. OPTIONAL PRESSURE SENSORS Description * Optional, pressure sensor that cooperate with PS-9303SD. * Out put : 100 mV DC for full scale. * 4 pin DIN plug, 2 pins to accept DC 5 V exciting voltage(power supply) for pressure transducer, another two pins for output signal of 100 mV full scale. -
Page 31: Other Optional Accessories
15. OTHER OPTIONAL ACCESSORIES Memory card SD memory card ( 2 GB ) RS232 cable * Computer interface cable. UPCB-02 * Used to connect the meter to the computer ( COM port ). USB cable * Computer interface cable. USB-01 * Used to connect the meter to the computer ( USB port ). -
Page 32: Patent
16. PATENT The meter ( SD card structure ) already get patent or patent pending in following countries : Germany Nr. 20 2008 016 337.4 JAPAN 3151214 TAIWAN M 358970 M 359043 CHINA ZL 2008 2 0189918.5 ZL 2008 2 0189917.0 Patent pending...
Need help?
Do you have a question about the PS-9303SD and is the answer not in the manual?
Questions and answers