Advertisement
Table of Contents
- 1 Important Safety Instruction
- 2 Safety Device
- 3 Warning Stickers
- 4 Packing Contents
- 5 Installation
- 6 How to Use Control Panel
- 7 Error Message
- 8 How to Laminate
- 9 Maintenance
- 10 Troubleshooting
- 11 Specification
- 12 Digital Sleeking Solution
- 13 Gloss/Matt Sleeking
- 14 Hologram Sleeking
- 15 Metallic Sleeking
- Download this manual
Advertisement
Table of Contents

Related Manuals for GMP QTOPIC-380


Summary of Contents for GMP QTOPIC-380
- Page 1 2015. 06 User Manual for QTOPIC-380 Before you operate the product, this manual has to be read by operator. ※ External Design & Specification can be changed for improvement without any prior notice.
- Page 2 INDEX ◐ SAFETY ◐ HOW TO LAMINATE 27~30 page Important Safety Instruction page ◐ MAINTENANCE Safety Device page page Warning Sticker page ◐ TROUBLE SHOOTING 32~35 page ◐ INSTALLATION ◐ SPECIFICATION Packing Contents page page Main Devices page ◐ DIGITAL SLEEKING SOLUTION How to move &...
-
Page 3: Important Safety Instruction
IMPORTANT SAFETY INSTRUCTION "Instruction for Safety" is for the purpose of user's safety and prevention of Property loss. Read thoroughly and Use rightly according to the manual Important Safety Instruction is classified as "Warning" and "Caution", the meaning is as follows; Warning : If you ignore this symbol, you could suffer serious injury or death Caution:... - Page 4 IMPORTANT SAFETY INSTRUCTION WARNING Do not connect or disconnect with wet hands, as this will cause an electric shock Do not overload a power supply, as this will cause a fire and an electric shock. Do not use a damaged plug or lead, as this could cause a fire or an electric shock Do not use other voltage and power supply other than specified, as this will cause a fire and an electric shock.
- Page 5 IMPORTANT SAFETY INSTRUCTION CAUTION When moving the product, turn off the power switch, disconnect the power plug from the socket When laminator is not in use, you must turn off the power switch, disconnect the power plug from the socket. More than 2 people are needed to carry this equipment to avoid personal injury or damage to the machine.
-
Page 6: Safety Device
SAFETY DEVICE Emergency Stop Switch ☞ Emergency Stop Switch (E-STOP S/W) When emergency situation happened, it stops the running motor(rollers) rotation and system operation. In case of emergency, use this switch. ☞ Position of E-Stop Switch ☞ How to use Press the Red button to operate the Emergency Stop Switch. -
Page 7: Warning Stickers
WARNING STICKERS Warning Stickers For the user safety, in the outer design, the below sticker is attached. Be cautious not to injured during operation. ☞Roller caution ☞ Higher Temperature Do not touch the roller and heating plate with your hand as you could be burnt. Do not touch on the heating part Roller's higher temperature and press can damage your body ☞Chain Caution... - Page 8 WARNING STICKERS Warning Stickers 8/48...
-
Page 9: Packing Contents
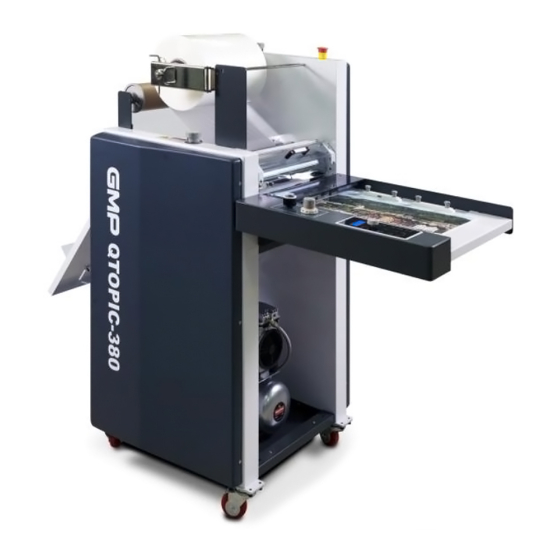
PACKING CONTENTS Packing Contents ITEMS Q'TY(EA) QTOPIC-380 LAMINATOR FEED TABLE FEED TABLE GUIDE AIR COMPRESSOR AIR HOSE GLASS TUBE FUSE (20mm) 250V/5.0A GLASS TUBE FUSE (20mm) 250V/6.3A 5mm L WRENCH USER MANUAL SLEEKING IDLE ROLLER 9/48... - Page 10 MAIN DEVICES Main Devices Film Shaft Perforator (Optional) E-Stop S/W Film Tension Decurling Adjustment Knob Adjustment Knob Rewinder Rewinder Tension Feeding Gate Adjustment Knob Roller Pressure Power S/W Adjustment Device Bursting Roller Control Tray Paper Extension Feeding Table(Optional) Air Compressor Feeding Table Roller Safety Cover Paper Guide...
- Page 11 HOW TO MOVE & INSTALL UNPACK & INSTALLATION ☞ HOW TO UNPACK 1. For rust prevention purpose, vacuum packing with aluminum materials is applied to the machine packing. and the machine is additionally packed in wooden crate. Each wooden plate of the crate is fixed by screws to avoid external shock.
-
Page 12: Installation
잠김(ON) 풀림(OFF) HOW TO MOVE & INSTALL INSTALLATION ☞ Circumstance for Operation of Product 1. The product has to be installed on the hard & even surfaced ground. 2. If inflammables / ignition materials would be nearby the product, this could be a cause of fire. 3. - Page 13 HOW TO MOVE & INSTALL Connection for Air Compressor ☞ How to connect Compressed air needs to be supplied into the laminator to activate the bursting roller and pressure on the laminating roller. NOTE : It is recommended to place the air compressor at outside of the laminator.
-
Page 14: How To Use Control Panel
HOW TO USE CONTROL PANEL CONTROL PANEL A. "LCD"(Display) To display the setting values in the laminator. QTOPIC-380 When the Power is ON, LCD is lighted on. Refer to the "Explanation of Display" for each displays. B. "MASTER DIAL" Dial to adjust values of Roller Temp.(C), Paper Length(D), Laminating Speed(E), Job Mode(F), Bursting Point(G), etc. - Page 15 HOW TO USE CONTROL PANEL E. "SPEED"(Speed Setting Button) : To set up the laminating speed. Speed setting range is "1 ~ 10". ☞ How to set up Speed : Press "SPEED" button and adjust speed with MASTER DIAL. NOTE : Start Speed is set with speed "3". During operation, speed can be controlled. F.
- Page 16 HOW TO USE CONTROL PANEL I. "LOADING"(Button for Film Loading & Setting) : To set the machine initially and to load a film roll. While "LOADING" button is pressed, roller is rotated and feeder is opened for feeding. NOTE : During the machine operation, the function is not activated. J.
- Page 17 HOW TO USE CONTROL PANEL Explanation of Control Panel Job condition, Setting Status and Machine status are shown on the display. 1. Job Mode 6. Laminating Roller Temp. Status 2. Roller Temp. 7. Counter 3. Paper Bursting Timing 8. Error Message 4.
- Page 18 HOW TO USE CONTROL PANEL ③ "BURST:409" - Bursting Timing Display Operation point for Bursting Roller. Bursting Point range is "360 ~ 530"mm NOTE : Refer to he Explanation of Control Panel to set up the Bursting Timing. ④ "LENGTH:0465" - Paper Length Display Displayed value means paper length.
-
Page 19: Error Message
ERROR MESSAGE Error Messages ☞ "EMS & COVER OPEN!!" This is displayed when Roller Safety Cover is opened or when E-STOP Switch is pressed. In emergency case, the switch makes Roller operation and System stop. Roller Safety Cover is to avoid burn from contact to high temp. roller Then, keep this in close status except film loading. - Page 20 ERROR MESSAGE ☞ "LAMI DRIVE ALARM" When main motor drive doesn't generate the input and output voltage or be overloaded, LAMI DRIVE ALARM is occurred. Press STOP button to cancel the alarm. ☞ "BURST DRIVE ALARM" When Burst motor drive doesn't generate the input and output voltage or be overloaded, BURST DRIVE ALARM is occurred.
- Page 21 MAIN DEVICES LAMINATION DEVICE ☞ Pressure Adjustment Device Pressure on Laminating Roller & Pull Roller (for DUAL - Embossing Roller) can be adjusted by Pressure Controller and Pressure its pressure on rollers are displayed on the gauge. Gauge Pull the Pressure Controller to adjust the pressure. Turn it to the right to increase its pressure, and turn it to the left to decrease the pressure.
- Page 22 MAIN DEVICES ☞ How to adjust pressure on Feeder Thickness / Surface Status of substrate requires adjustment on Feeder Stopper Shutter. Different pressure on shutter could be a cause of twisted paper fed, miss feeding, etc. for error in feeding. Bellows are the way for pressure adjustment.
- Page 23 MAIN DEVICES ☞ Tension Adjustment of Conveyor Belt Long time operation could make conveyor belt loosen. If the belt is loosen, feeding could not be working properly. Adjust its tension with Tension Adjustment Bolts that are at Feed Table. Turn it to the right to increase tension and turn it to the left to decrease it. (Adjust it with 5mm Wrench that is packed in the machine.) Tension Adjustment Bolt ☞...
- Page 24 MAIN DEVICES ☞ Attachable Extension Feeding table(Option) To put long size substrate for feeding and convenient feeding. Please refer to following drawings for attaching table. CUTTING DEVICE ☞ Perforator To cut a laminated results easily, perforator makes holes on film ends. Position the device from the film ends by 1~3mm inside. To make clear holes on films with adjust perforator Pressure adjustment bolt.
- Page 25 MAIN DEVICES HOW TO LOAD/REPLACE FILM ROLL ☞ Film Loading Device ① ② 1. Film Shaft : To load the Laminating Roll Film. 2. Film Shaft Holder Fixing Pin : To avoid the movement of Film Shaft Support ③ 3. Film Shaft Holder : To fix the Film Shaft to avoid movement of Film Shaft ④...
- Page 26 MAIN DEVICES THE OTHER DEVICES ☞ Main Power Switch Power Switch is to supply or to cut the Power to the Machine. Press the Switch to the "I" direction, the Power is ON and to the "O" direction to Power OFF. ☞...
-
Page 27: How To Laminate
HOW TO LAMINATE ☞ Preparation for Lamination 1. Turn on the machine and the system is operated. 2. Set up for Control Panel 1) press the "PAPER LENGTH" on control panel and set up the length of substrate with Master dial. 2) Press "TEMP"... - Page 28 HOW TO LAMINATE 3) As the adhesive on film is melted, stick a substrate on the adhesive side of film and install the safety cover as the picture. NOTE : Refer to the right picture of web diagram. 4) Ready for Lamination. ☞...
- Page 29 HOW TO LAMINATE 2. If there is no problem for substrate feeding, set up the perforator. Position the perforator at 1~3mm from film edge. If the perforator would be more inside of the above position, this could be a cause of quality trouble & cutting error. Pressure on film to make holes clearly.
- Page 30 HOW TO LAMINATE ◐ LAMINATION If the test lamination has a good results, increase its speed for lamination. ※ This machine contains special speed and temperature control program to improve lamination quality. 1. Soft Accelerate System - This program is to apply the change of the job speed within 4secs if the job speed is rapidly increased. This delays the temperature decrease caused by the high speed rotation to prevent the low temperature that causes deterioration of laminating quality Example) Starting job with a speed of 3 and increase the speed to 10...
-
Page 31: Maintenance
MAINTENANCE ROLLER CLEANSING ※ If the roller is not cleaned regularly, - Film can be wound into the rollers. - It contaminates the laminating results. ※ Roller Cleansing - After laminating is finished, when the laminating roller temperature is below 80℃, sweep the roller with "cotton" rag and "isoprophile alcohol". Caution : When cleansing the roller, use "isoprophilene alcohol"... -
Page 32: Troubleshooting
TROUBLE SHOOTING Feeding Trouble Type Reason How to solve Laminating Roller 1. Safety Switch on the Laminating roller cover is open. 1. Close laminating roller cover safety switch. does not work. 2. Laminating roller motor is broken OR 2. Contact our dealer or A/S center. Timing belt is damaged. - Page 33 TROUBLE SHOOTING Laminating Trouble Type Reason How to solve Laminating is not good 1. When the printing color is black (Silvering) 2.Laminating roller pressure is not good 2. Using pressure controller, increase the pressure Refer to Laminating "Roller Pressure control" 3.
- Page 34 TROUBLE SHOOTING Perforating Trouble Type Reason How to solve Cutting roller does not work 1. Cutting roller motor's disorder or 1. Contact dealer or A/S Center Conveyer belt is broken 2. FUSE is disconnected 2. Exchange the enclosed fuse. 3. Compressor's malfunction 3 Contact dealer or A/S Center Laminating results' cutting 1.
- Page 35 TROUBLE SHOOTING Others Trouble Type Reason How to solve Roller is not heated 1. Temperature sensor's malfunction 1. Contact dealer or A/S Center not increase above a certain temp. 2. Odds between the temp. sensor and laminating 2. Remove odds roller 3.
-
Page 36: Specification
SPECIFICATION QTOPIC - 380 ITEMS Dimension(W*L*H)(mm) 700*1250*1340 Max. Laminating Speed(m/min) Max. Paper Size(mm) 380*1200 Min. Paper Size(mm) 210*203 Substrate Thickness(g/㎡) 120~350 Laminating Film POLYNEX,PERFEX,NYLONEX FILM (20~44㎛) Rated Voltage AC 220~240V, 50/60Hz Power Consumption 2.0 kw, 9A Warm-up Time 6 mins. Heating System INFRARED HEATER Roller Temperature(℃) -
Page 37: Digital Sleeking Solution
DIGITAL SLEEKING SOLUTION - Introduction DIGITAL SLEEKING SOLUTION GMP DIGITAL SLEEKING SOLUTION is the epoch solution to provide various value-added products with Whole Page & Spot Gloss/Matt/Hologramming with GMP Laminators. 1. SLEEKING (GLOSS & MATT FINISH) SLEEKING FOIL : GLOSS SLEEKING FOIL, MATT SLEEKING FOIL 2.HOLOGRAM... -
Page 38: Gloss/Matt Sleeking
SLEEKING (GLOSS & MATT FINISH) 1.GLOSS/MATT SLEEKING With GMP GLOSS SLEEKING FOIL & MATT SLEEKING FOIL, the surface of Toner Based Prints / Digital Prints can be changed for higher quality of results. Conditions for GLOSS/MATT SLEEKING FOILS Model Speed Set Temp.(℃) Pressure (MPa) - Page 39 SLEEKING (GLOSS & MATT FINISH) 2. Whole Page Gloss / Matt SLEEKING SOLUTION SLEEKING Film Loading POD Prints FINISH FILM & LAMINATOR (DIGITAL PRINT) Refer to the Pic. 1.2 Temp. / Speed Setting PRINTER FILM Refer to the Table 1.1 HP INDIGO 3500 GLOSS SLEEKING FOIL XEROX 5252...
- Page 40 SLEEKING (GLOSS & MATT FINISH) 3. Spot Gloss/Matt SLEEKING SOLUTION with Prints POD Prints (DIGITAL PRINT) POD Prints FINISH SLEEKING (DIGITAL PRINT) OFFSET Prints Temp. / Speed Setting PRINTER Refer to the Table 1.1 HP INDIGO 3500 XEROX 5252 (Table 1.3) Spot Gloss / Matt Sleeking 1.Cut the Car 4.
- Page 41 5. Sleeking on the Printed Surface in process of (Table 1.2) 1.Cut the Car Image(Picture 6. Only the Spot 3. Laminate in GMP 4. Print the Spot Image Image has Sleeking 1.2) with Image Editing Laminator with GMP on the Laminated Surface.
-
Page 42: Hologram Sleeking
SLEEKING(HOLOGRAM FINISH) 1.HOLOGRAM SLEEKING With GMP Hologram SLEEKING FOIL, the surface of Toner Based Prints / Digital Prints can be changed for higher quality of results. Conditions for HOLOGRAM SLEEKING FOIL HOLOGRAM SLEEKING FOILS Model ① SPARKLE-HOLOGRAM Speed Set Temp.(℃) Pressure (MPa) PROTOPIC II Series ②... - Page 43 SLEEKING(HOLOGRAM FINISH) 2. Whole Page HOLOGRAM SLEEKING SOLUTION ① Whole Page Hologram Sleeking POD Prints SLEEKING FINISH Foil Loading FILM & LAMINATOR (DIGITAL PRINT) Refer to the Picture 2.1 Temp. / Speed Setting PRINTER FILM Refer to the Table 2.1 HP INDIGO 3500 HOLOGRAM SLEEKING FOIL XEROX 5252...
- Page 44 SLEEKING(HOLOGRAM FINISH) 2. Spot HOLOGRAM SLEEKING SOLUTION POD Prints (DIGITAL PRINT) SLEEKING FINISH POD Prints OFFSET Prints Temp. / Speed Setting PRINTER Refer to the Table 2.1 HP INDIGO 3500 XEROX 5252 (Table.2.3) Spot Hologram Sleeking 6. Only the Spot 1.Cut the Carrot 3.
- Page 45 Image only. process of (Table 2.2) d 6. Only the Spot 4. Print the Spot Image 1.Cut the Carrot Image has Sleeking 3. Laminate in GMP on the Laminated Image(Picture 2.1) with Effect. Laminator with GMP Sleeking Surface. Image Editing Program Foil.
-
Page 46: Metallic Sleeking
METALLIC SLEEKING 1.SPOT METALLIC SLEEKING GMP METALLIC SLEEKING FOIL makes different effect on the printed area for highlight. Conditions for METALLIC SLEEKING FOIL METALLIC SLEEKING FOIL ① GOLD Model ② SILVER Speed Set Temp.(℃) Pressure (MPa) PROTOPIC II Series (Table 3.1) How to load the Foils (Picture 3.1) - Page 47 Refer to the Table 3.1 HP INDIGO 3500 XEROX 5252 (Table.3.3) Spot Gold/Silver Metallic Sleeking 4. Print the Background Image. 3. Laminate in GMP Laminator with GMP Sleeking Foil. 1.Cut the Spot 2. Print out the Spot Image Image(Picture 3.1) with only.
- Page 48 SLEEKING FOIL SPECIFICATION SLEEKING FILM MEATALLIC FOIL (GOLD,SILVER) SINGLE COLOR FOIL 3000M MULTI COLOR FOIL 3000M HOLOGRAM FOIL 3000M SLEEKING FOIL GLOSS 77CORE * 1000M,2000M MATT 77CORE * 1000M,2000M DUAL 77CORE * 1000M,2000M HOLOGRAM SLEEKING FOIL - SPECTRUM,MILKYWAY,CRYSTAL,STAR,MOSAIC,SPARKLE,HYPER PLAID HOLOGRAM SLEEKING FOIL-PET12 77CORE * 1000M HOLOGRAM SLEEKING FOIL-PET25 77CORE * 1000M...
Need help?
Do you have a question about the QTOPIC-380 and is the answer not in the manual?
Questions and answers