Advertisement
Table of Contents
- 1 Important Safety Instruction
- 2 Safety Device
- 3 Warning Stickers
- 4 Packing Contents
- 5 Installation
- 6 How to Use Control Panel
- 7 Error Message
- 8 How to Laminate
- 9 Maintenance
- 10 Troubleshooting
- 11 Specification
- 12 Digital Sleeking Solution
- 13 Gloss/Matt Sleeking
- 14 Hologram Sleeking
- 15 Metallic Sleeking
- Download this manual
Advertisement
Table of Contents

Subscribe to Our Youtube Channel
Related Manuals for GMP PROTOPIC III-540


Summary of Contents for GMP PROTOPIC III-540
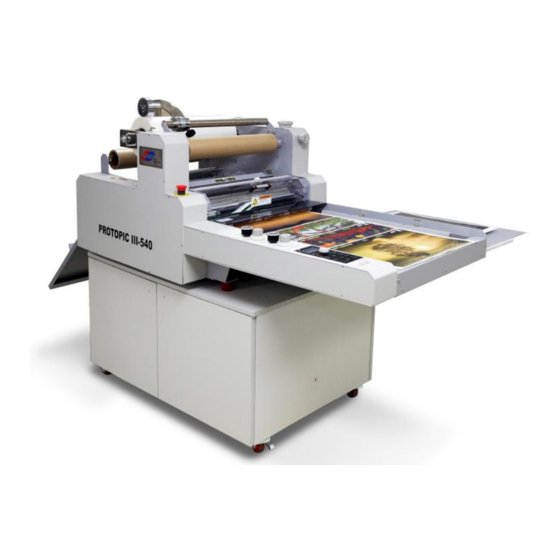
- Page 1 2015. 06 User Manual for PROTOPICⅢ-540 PROTOPICⅢ-540 DUAL Before you operate the product, this manual has to be read by operator. ※ External Design & Specification can be changed for improvement without any prior notice.
- Page 2 INDEX ◐ SAFETY ◐ HOW TO LAMINATE 29~30 page Important Safety Instruction page ◐ MAINTENANCE Safety Device page page Warning Sticker page ◐ TROUBLE SHOOTING 32~35 page ◐ INSTALLATION ◐ SPECIFICATION Packing Contents page page Main Devices page ◐ DIGITAL SLEEKING SOLUTION How to move &...
-
Page 3: Important Safety Instruction
IMPORTANT SAFETY INSTRUCTION "Instruction for Safety" is for the purpose of user's safety and prevention of Property loss. Read thoroughly and Use rightly according to the manual Important Safety Instruction is classified as "Warning" and "Caution", the meaning is as follows; Warning : If you ignore this symbol, you could suffer serious injury or death Caution:... - Page 4 IMPORTANT SAFETY INSTRUCTION WARNING Do not connect or disconnect with wet hands, as this will cause an electric shock Do not overload a power supply, as this will cause a fire and an electric shock. Do not use a damaged plug or lead, as this could cause a fire or an electric shock Do not use other voltage and power supply other than specified, as this will cause a fire and an electric shock.
- Page 5 IMPORTANT SAFETY INSTRUCTION CAUTION When moving the product, turn off the power switch, disconnect the power plug from the socket When laminator is not in use, you must turn off the power switch, disconnect the power plug from the socket. More than 2 people are needed to carry this equipment to avoid personal injury or damage to the machine.
-
Page 6: Safety Device
SAFETY DEVICE Emergency Stop Switch ☞ Emergency Stop Switch (E-STOP S/W) When emergency situation happened, it stops the running motor(rollers) rotation and system operation. In case of emergency, use this switch. ☞ Position of E-Stop Switch ☞ How to use E-STOP S/W Press the Red button to operate the Emergency Stop Switch. -
Page 7: Warning Stickers
WARNING STICKERS Warning Stickers For the user safety, in the outer design, the below sticker is attached. Be cautious not to injured during operation. ☞Roller caution ☞ Higher Temperature Do not touch on the heating part Do not touch the roller and heating plate with your hand as you could be burnt. Roller's higher temperature and press can damage your body ☞... - Page 8 WARNING STICKERS Warning Stickers 8/48...
-
Page 9: Packing Contents
PACKING CONTENTS Packing Contents ITEMS Q'TY(EA) PROTOPIC III-540 LAMINATOR FEED TABLE FEED TABLE GUIDE AIR COMPRESSOR AIR HOSE GLASS TUBE FUSE (20mm) 250V/12.5A GLASS TUBE FUSE (20mm) 250V/15A WRENCH SET LAMI TABLE USER MANUAL SEPARATOR IDLE ROLLER 9/48... - Page 10 MAIN DEVICES Main Devices Film Shaft Film Shaft Holder Film Tension Adjustment Knob Rewinder E-Stop S/W Decurling Feed Table Rewinder Tension Adjustment Knob Adjustment Knob Feeding Gate Paper Guide Lami Table Pull Roller Pressure Sub-Paper Table Adjustmen Kob Control Panel Bursting Roller Main Air Power Board...
- Page 11 After moving is done, press "ON" to fix the machine. WARNING The product is heavy, then be careful to move the product to avoid injury or damage of the product. - Weight for PROTOPIC III-540(DUAL) : 170㎏s (190㎏s), Weight for LAMI TABLE : 75㎏s 11/48...
-
Page 12: Installation
HOW TO MOVE & INSTALL INSTALLATION ☞ Circumstance for Operation of Product 1. The product has to be installed on the hard & even surfaced ground. 2. If inflammables / ignition materials would be nearby the product, this could be a cause of fire. 3. - Page 13 HOW TO MOVE & INSTALL Connection for Air Compressor ☞ How to connect Compressed air needs to be supplied into the laminator to activate the bursting roller and pressure on the laminating roller. Insert air hose in to the air Plug in at Independent Power Connect the air hose to the laminator compressor...
-
Page 14: How To Use Control Panel
3. Press STOP button and MASTER DIAL at the same time for 5 secs. to change the mode to AUTO or to MANUAL. NOTE : AUTO MODE is to integrated with GMP Automatic Feeder of PROFEEDR-5478. (Contact GMP to purchase it.) C. - Page 15 HOW TO USE CONTROL PANEL D. "PAPER LENGTH"(Button to set up Paper Length) : To set up the length of substrate. Length set up range for MANUAL MODE is "203 ~ 1,219"mm and for ATUO MODE is "254 ~ 813"mm. ☞...
- Page 16 HOW TO USE CONTROL PANEL G. "BURST POSITION"(Set up button for the Bursting Point) : To set up operation point of Bursting Roller. Bursting Point range is "580 ~ 660"mm (for DUAL : "760 ~ 840"mm). ☞ How to set up Bursting Point : Press "BURST POSITION"...
- Page 17 8. Feeding System 4. Paper Length 9. Error Message 5. Roller Speed [PROTOPIC III-540] ① "M:User-3" - Job Mode Display To save a setting values that are made by operator for different conditions. Job mode is composed of the below 13 modes.
- Page 18 HOW TO USE CONTROL PANEL ③ "BURST:615" - Bursting Timing Display Operation point for Bursting Roller. Bursting Point range is "580 ~ 660"mm (for DUAL : "760 ~ 840"mm). NOTE : Refer to he Explanation of Control Panel to set up the Bursting Timing. ④...
- Page 19 9. Error Message 5. Roller Speed [PROTOPIC III-540 DUAL] Refer to the Explanation of Display for PROTOPIC III-540 for normal conditions. A. "F:115℃R , R:100℃W" - Roller Temp. & Status Display MIRROR Roller & EMBO Roller Temp. & its Status.
-
Page 20: Error Message
ERROR MESSAGE Error Messages ☞ "EMS & COVER OPEN!!" This is displayed when Roller Safety Cover is opened or when E-STOP Switch is pressed. In emergency case, the switch makes Roller operation and System stop. Roller Safety Cover is to avoid burn from contact to high temp. roller Then, keep this in close status except film loading. - Page 21 ERROR MESSAGE ☞ "Ovr-H" This message is displayed when the Laminating Roller temp. is higher than 170℃. This is caused by trouble in Heater Controller. Contact to a supplier. ☞ "H-Err" If laminating roller temp. is fluctuated by 25℃ in 0.5 sec., the message is displayed. This is caused by trouble in temp.
- Page 22 MAIN DEVICES LAMINATION DEVICE ☞ Pressure Adjustment Device Pressure on Laminating Roller & Pull Roller (for DUAL - Embossing Roller) can be adjusted by Pressure Controller and its pressure on rollers are displayed on the gauge. Pressure Gauge Pull the Pressure Controller to adjust the pressure. Turn it to the right to increase its pressure, and turn it to the left to decrease the pressure.
- Page 23 MAIN DEVICES ☞ Cooling Device for Embossing Roller [PROTOPIC III-540 DUAL PHOTO] To keep the temp. on Photo Embossing Roller stable with cooling for continuous quality of photo embossing during the job. If photo embossing roller temp. would be higher than 35℃ , the cooler is automatically operated.
- Page 24 MAIN DEVICES ☞ How to adjust pressure on Feeder Thickness / Surface Status of substrate requires adjustment on Feeder Stopper Shutter. Different pressure on shutter could be a cause of twisted paper fed, miss feeding, etc. for error in feeding. Bellows are the way for pressure adjustment.
- Page 25 MAIN DEVICES ☞ Paper Table For convenient lamination job. Substrates can be put on the table. Pull the table handle to draw the table out. ☞ Tension Adjustment of Conveyor Belt Long time operation could make conveyor belt loosen. If the belt is loosen, feeding could not be working properly. Adjust its tension with Tension Adjustment Bolts that are at Feed Table.
- Page 26 MAIN DEVICES CUTTING DEVICE Rewinder Film ☞ Side Slitter & Rewinder To slit film ends if a film roll width is wider than substrate. Put the side slitters at a proper position to slit film. Rewind the slitted films on Rewinder. NOTE: This device is designed to be moved up/downwards for feeding.
- Page 27 MAIN DEVICES HOW TO LOAD/REPLACE FILM ROLL ☞ Film Loading Device ① ② 1. Film Shaft : To load the Laminating Roll Film. 2. Film Shaft Holder Fixing Pin : To avoid the movement of Film Shaft Support ③ 3. Film Shaft Holder : To fix the Film Shaft to avoid movement of Film Shaft ④...
- Page 28 MAIN DEVICES THE OTHER DEVICES ☞ Main Power Switch Power Switch is to supply or to cut the Power to the Machine. Press the Switch to the "I" direction, the Power is ON and to the "O" direction to Power OFF. Power Switch has Circuit Breaker to cut the power supply for overload or over current status in the machine.
-
Page 29: How To Laminate
HOW TO LAMINATE ☞ Laminating Roll Film Loading for Lamination Laminating film width has to be narrower than substrates' one by 5~10mm. Laminating film has to be positioned inside from the substrate's edge by 5mm. 1. Remove the Roller Safety Cover. 2. - Page 30 HOW TO LAMINATE ☞ Test Lamination If Roller Temp. is reached to the Setting Temp., test lamination is required to check the setting condition & lamination status. Start at 3~5m/min speed and increase its speed. Press "RUN" button to engage the roller and lamination is started. ※...
-
Page 31: Maintenance
MAINTENANCE ROLLER CLEANSING ※ If the roller is not cleaned regularly, - Film can be wound into the rollers. - It contaminates the laminating results. ※ Roller Cleansing - After laminating is finished, when the laminating roller temperature is below 80℃, sweep the roller with "cotton" rag and "isoprophile alcohol". Caution : When cleansing the roller, use "isoprophilene alcohol"... -
Page 32: Troubleshooting
TROUBLE SHOOTING Feeding Trouble Type Reason How to solve Laminating Roller 1. Safety Switch on the Laminating roller cover is open. 1. Close laminating roller cover safety switch. does not work. 2. Laminating roller motor is broken OR 2. Contact our dealer or A/S center. Timing belt is damaged. - Page 33 TROUBLE SHOOTING Laminating Trouble Type Reason How to solve Laminating is not good 1. When the printing color is black (Silvering) 2.Laminating roller pressure is not good 2. Using pressure controller, increase the pressure Refer to Laminating "Roller Pressure control" 3.
- Page 34 TROUBLE SHOOTING Perforating Trouble Type Reason How to solve Cutting roller does not work 1. Cutting roller motor's disorder or 1. Contact dealer or A/S Center Conveyer belt is broken 2. FUSE is disconnected 2. Exchange the enclosed fuse. 3. Compressor's malfunction 3 Contact dealer or A/S Center Laminating results' cutting 1.
- Page 35 TROUBLE SHOOTING Others Trouble Type Reason How to solve Cutting status is not good when using 1. Rewinder tension is strong 1.Turn left the rewinder tension control knob Rewinder Tension decreases 2. Rewinder tension is weak 2. Turn right the rewinder tension control knob Tension increases Roller is not heated 1.
-
Page 36: Specification
SPECIFICATION ITEMS PROTOPIC III - 540 PROTOPIC III - 540 DUAL Dimension(W*L*H)(mm) 800*1580*670(1340 - incl. Lami Table height) 800*1820*670(1340 - incl. Lami Table height) Max. Laminating Speed(m/min) Max. Paper Size(mm) 540*800 540*800 Min. Paper Size(mm) 210*203 210*203 Substrate Thickness(g/㎡) 120~350 120~350 Laminating Film POLYNEX,PERFEX,NYLONEX FILM (20~44㎛) -
Page 37: Digital Sleeking Solution
DIGITAL SLEEKING SOLUTION - Introduction DIGITAL SLEEKING SOLUTION GMP DIGITAL SLEEKING SOLUTION is the epoch solution to provide various value-added products with Whole Page & Spot Gloss/Matt/Hologramming with GMP Laminators. 1. SLEEKING (GLOSS & MATT FINISH) SLEEKING FOIL : GLOSS SLEEKING FOIL, MATT SLEEKING FOIL 2.HOLOGRAM... -
Page 38: Gloss/Matt Sleeking
SLEEKING (GLOSS & MATT FINISH) 1.GLOSS/MATT SLEEKING With GMP GLOSS SLEEKING FOIL & MATT SLEEKING FOIL, the surface of Toner Based Prints / Digital Prints can be changed for higher quality of results. Conditions for GLOSS/MATT SLEEKING FOILS Model Speed Set Temp.(℃) Pressure (MPa) - Page 39 SLEEKING (GLOSS & MATT FINISH) 2. Whole Page Gloss / Matt SLEEKING SOLUTION Film Loading SLEEKING FINISH POD Prints FILM & LAMINATOR (DIGITAL PRINT) PRINTER FILM Refer to the Pic. 1.2 Temp. / Speed Setting HP INDIGO 3500 GLOSS SLEEKING FOIL Refer to the Table 1.1 XEROX 5252 LAMINATOR...
- Page 40 SLEEKING (GLOSS & MATT FINISH) 3. Spot Gloss/Matt SLEEKING SOLUTION with Prints POD Prints (DIGITAL PRINT) POD Prints FINISH SLEEKING (DIGITAL PRINT) OFFSET Prints Temp. / Speed Setting PRINTER Refer to the Table 1.1 HP INDIGO 3500 XEROX 5252 (Table 1.3) Spot Gloss / Matt Sleeking 1.Cut the Car 4.
- Page 41 5. Sleeking on the Printed Surface in process of (Table 1.2) 1.Cut the Car Image(Picture 6. Only the Spot 3. Laminate in GMP 4. Print the Spot Image Image has Sleeking 1.2) with Image Editing Laminator with GMP on the Laminated Surface.
-
Page 42: Hologram Sleeking
SLEEKING(HOLOGRAM FINISH) 1.HOLOGRAM SLEEKING With GMP Hologram SLEEKING FOIL, the surface of Toner Based Prints / Digital Prints can be changed for higher quality of results. Conditions for HOLOGRAM SLEEKING FOIL HOLOGRAM SLEEKING FOILS Model ① SPARKLE-HOLOGRAM Speed Set Temp.(℃) Pressure (MPa) PROTOPIC II Series ②... - Page 43 SLEEKING(HOLOGRAM FINISH) 2. Whole Page HOLOGRAM SLEEKING SOLUTION ① Whole Page Hologram Sleeking POD Prints SLEEKING FINISH FILM & LAMINATOR Foil Loading (DIGITAL PRINT) Refer to the Picture 2.1 Temp. / Speed Setting PRINTER FILM Refer to the Table 2.1 HP INDIGO 3500 HOLOGRAM SLEEKING FOIL XEROX 5252...
- Page 44 SLEEKING(HOLOGRAM FINISH) 2. Spot HOLOGRAM SLEEKING SOLUTION POD Prints (DIGITAL PRINT) SLEEKING POD Prints FINISH OFFSET Prints Temp. / Speed Setting PRINTER Refer to the Table 2.1 HP INDIGO 3500 XEROX 5252 (Table.2.3) Spot Hologram Sleeking 6. Only the Spot 1.Cut the Carrot 3.
- Page 45 Image only. process of (Table 2.2) d 6. Only the Spot 4. Print the Spot Image 1.Cut the Carrot Image has Sleeking 3. Laminate in GMP on the Laminated Image(Picture 2.1) with Effect. Laminator with GMP Sleeking Surface. Image Editing Program Foil.
-
Page 46: Metallic Sleeking
METALLIC SLEEKING 1.SPOT METALLIC SLEEKING GMP METALLIC SLEEKING FOIL makes different effect on the printed area for highlight. Conditions for METALLIC SLEEKING FOIL METALLIC SLEEKING FOIL ① GOLD Model ② SILVER Speed Set Temp.(℃) Pressure (MPa) PROTOPIC II Series (Table 3.1) How to load the Foils (Picture 3.1) - Page 47 Refer to the Table 3.1 HP INDIGO 3500 XEROX 5252 (Table.3.3) Spot Gold/Silver Metallic Sleeking 4. Print the Background Image. 3. Laminate in GMP Laminator with GMP Sleeking Foil. 1.Cut the Spot 2. Print out the Spot Image Image(Picture 3.1) with only.
- Page 48 SLEEKING FOIL SPECIFICATION SLEEKING FILM MEATALLIC FOIL (GOLD,SILVER) SINGLE COLOR FOIL 3000M MULTI COLOR FOIL 3000M HOLOGRAM FOIL 3000M SLEEKING FOIL GLOSS 77CORE * 1000M,2000M MATT 77CORE * 1000M,2000M DUAL 77CORE * 1000M,2000M HOLOGRAM SLEEKING FOIL - SPECTRUM,MILKYWAY,CRYSTAL,STAR,MOSAIC,SPARKLE,HYPER PLAID HOLOGRAM SLEEKING FOIL-PET12 77CORE * 1000M HOLOGRAM SLEEKING FOIL-PET25 77CORE * 1000M...
Need help?
Do you have a question about the PROTOPIC III-540 and is the answer not in the manual?
Questions and answers