Table of Contents
Advertisement
Quick Links
AVG-SC42T
The AVG-SC42T is a professional 4x2 HDMI 2.0
presentation switcher. It is designed to switch HDMI
or USB-C video signals to the HDMI outputs. With
multiple built in EDID settings, including an EDID
pass-through option, the highest quality digital video
signal will be routed directly to the display.
The AVG-SC42T supports stereo and multichannel
audio on the HDMI or USB-C inputs. It also features
de-embedded analogue audio.
Features
▪ Automatic Switching
▪ HDMI Video resolution up to
4Kx2K@60Hz 4:4:4, and USB-C
resolutions up to 4Kx2K@30Hz
4:4:4
▪ HDMI 2.0 and HDCP 2.2 compliant.
▪ MIC and LINE inputs can be mixed
to the audio outputs.
▪ Supports 3 microphone types,
Condenser, Dynamic and Wireless.
▪ Smart EDID management: Preset
EDIDs and customised setting
allowed.
▪ Control from the Front Panel, IR
Remote and the GUI.
▪ Firmware can be updated.
Advertisement
Table of Contents

Related Manuals for AVGear AVG-SC42T


Summary of Contents for AVGear AVG-SC42T
- Page 1 ▪ MIC and LINE inputs can be mixed to the audio outputs. ▪ Supports 3 microphone types, The AVG-SC42T is a professional 4x2 HDMI 2.0 Condenser, Dynamic and Wireless. presentation switcher. It is designed to switch HDMI or USB-C video signals to the HDMI outputs. With ▪...
- Page 1 ▪ MIC and LINE inputs can be mixed to the audio outputs. ▪ Supports 3 microphone types, The AVG-SC42T is a professional 4x2 HDMI 2.0 Condenser, Dynamic and Wireless. presentation switcher. It is designed to switch HDMI or USB-C video signals to the HDMI outputs. With ▪...
- Page 2 AVG-SC42T PLEASE READ THIS PRODUCT MANUAL CAREFULLY BEFORE USING THIS PRODUCT. This manual is only for operational instruction only, and not to be used for maintenance. The functions described in this version are current as at November 2018. Any changes of functions and operational parameters will be updated in future manual versions.
- Page 2 AVG-SC42T PLEASE READ THIS PRODUCT MANUAL CAREFULLY BEFORE USING THIS PRODUCT. This manual is only for operational instruction only, and not to be used for maintenance. The functions described in this version are current as at November 2018. Any changes of functions and operational parameters will be updated in future manual versions.
- Page 3 AVG-SC42T SAFETY OPERATION GUIDE To guarantee the reliable operation of the equipment and safety of the user, please abide by the following procedures in installation, use and maintenance: 1. The system must be earthed properly. Please do not use two blade plugs and ensure the alternating power supply ranges from 100v to 240v and from 50Hz to 60Hz.
- Page 3 AVG-SC42T SAFETY OPERATION GUIDE To guarantee the reliable operation of the equipment and safety of the user, please abide by the following procedures in installation, use and maintenance: 1. The system must be earthed properly. Please do not use two blade plugs and ensure the alternating power supply ranges from 100v to 240v and from 50Hz to 60Hz.
-
Page 4: Table Of Contents
AVG-SC42T TABLE OF CONTENTS Introduction ......................1 Introduction to AVG-SC42T ................1.1 Features ....................... 1.2 What’s in the Box ..................1.3 Panel Description ..................... 2 Front Panel ....................2.1 Rear Panel....................2.2 System Connection ....................3 Usage Precautions ..................3.1 System Diagram ................... -
Page 5: Introduction
1. Introduction 1.1. Introduction to AVG-SC42T The AVG-SC42T is a professional 4x2 HDMI 2.0 presentation switcher. It is designed to switch HDMI or USB-C video signals to the HDMI outputs. With multiple built in EDID settings, including an EDID pass-through option, the highest quality digital video signal will be routed directly to the display. -
Page 6: What's In The Box
AVG-SC42T 1.3. What’s in the Box ▪ 1 x AVG-SC42 4x2 4K Presentation Switcher ▪ 2 x Mounting Ears with 4 screws ▪ 4 x Rubber feet for the Scaler ▪ 1 x IR Receiver ▪ 1 x IR Emitter ▪... -
Page 6: What's In The Box
AVG-SC42T 1.3. What’s in the Box ▪ 1 x AVG-SC42 4x2 4K Presentation Switcher ▪ 2 x Mounting Ears with 4 screws ▪ 4 x Rubber feet for the Scaler ▪ 1 x IR Receiver ▪ 1 x IR Emitter ▪... -
Page 7: Panel Description
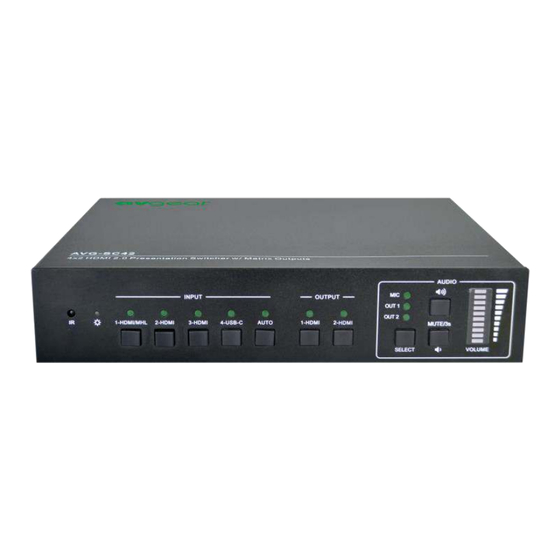
AVG-SC42T 2. Panel Description 2.1. Front Panel ① IR: Built-in IR sensor to receive IR signal from the IR remote. ② Power LED: The LED illuminates green when the device is in standby or illuminates red when the device is powered on. -
Page 7: Panel Description
AVG-SC42T 2. Panel Description 2.1. Front Panel ① IR: Built-in IR sensor to receive IR signal from the IR remote. ② Power LED: The LED illuminates green when the device is in standby or ③ INPUT: illuminates red when the device is powered on. -
Page 8: Rear Panel
AVG-SC42T 2.2. Rear Panel ① INPUT: Three type-A female HDMI input ports to connect HDMI video sources. ▪ One type-C USB input port to connect a MacBook or another device with ▪ SlimPort output video source. ② AUDIO INPUTS: LINE: 3-pin phoenix plug to a connect wireless microphone or line audio ▪... -
Page 8: Rear Panel
AVG-SC42T 2.2. Rear Panel ① INPUT: Three type-A female HDMI input ports to connect HDMI video sources. ▪ One type-C USB input port to connect a MacBook or another device with ▪ ② AUDIO INPUTS: SlimPort output video source. LINE: 3-pin phoenix plug to a connect wireless microphone or line audio ▪... -
Page 9: System Connection
AVG-SC42T 3. System Connection 3.1. Usage Precautions 1. The system should be installed in a clean environment that has proper temperature and humidity. 2. All the power switches, plugs, sockets and power cords should be insulated and safe. 3. All devices should be connected before powering on the Scaler Switcher. -
Page 10: Operation
AVG-SC42T 4. Operation 4.1. Front Panel Control Front panel buttons can be used for switching operations and volume control. 4.1.1. Manual Switching When the switcher is in manual switching mode, the Auto Mode LED will be turned off. To change the input source, press the 1-HDMI, 2-HDMI, 3-HDMI or 4-USB-C button, and the corresponding LED will illuminate green. -
Page 11: Ir Control
AVG-SC42T 4.2. IR Control Connect an IR receiver to the IR EYE port. You will then be able to control the switcher with the below remote. Enter or exit standby mode. ① Select input source for 1-HDMI output. ② Enable automatic switching mode. -
Page 11: Ir Control
AVG-SC42T 4.2. IR Control Connect an IR receiver to the IR EYE port. You will then be able to control the switcher with the below remote. ① ② Enter or exit standby mode. ③ Select input source for 1-HDMI output. -
Page 12: Rs232 Control
AVG-SC42T 4.3. RS232 Control Connect the RS232 port to a control device (such as PC) with the RS232 cable. The switcher can then be controlled by sending RS232 commands. 4.3.1. RS232 Control Software ▪ Installation: Copy the control software file to the computer connected with AVG-SC42T. -
Page 13: Rs232 Control Commands
AVG-SC42T 4.3.2. RS232 Control Commands Communication protocol: RS232 control Protocol Command Type: ASCII Baud rate: 9600 Data bit: 8 Stop bit: 1 Parity bit: none Device Control Command Description Feedback Example PowerON. Power on system. Power ON! PowerOFF. System standby. -
Page 13: Rs232 Control Commands
AVG-SC42T 4.3.2. RS232 Control Commands Communication protocol: RS232 control Protocol Command Type: ASCII Baud rate: 9600 Data bit: 8 Stop bit: 1 Parity bit: none Device Control Command Description Feedback Example PowerON. Power on system. Power ON! PowerOFF. System standby. - Page 14 AVG-SC42T Source Switching Command Description Feedback Example Example: HDMI1:4. Switch input [x] to 1-HDMI output. HDMI1:[x]. Feedback: HDMI1 Out x=1~4. Switch To 04! Example: HDMI2:2. Switch input [x] to 2-HDMI output. HDMI2:[x]. Feedback: x=1~4. HDMI2 Out Switch To 04! Example: 1ALL.
- Page 14 AVG-SC42T Source Switching Command Description Feedback Example Example: HDMI1:4. Switch input [x] to 1-HDMI output. HDMI1:[x]. Feedback: HDMI1 Out x=1~4. Switch To 04! Example: HDMI2:2. Switch input [x] to 2-HDMI output. HDMI2:[x]. Feedback: x=1~4. HDMI2 Out Switch To 04! Example: 1ALL.
- Page 15 AVG-SC42T Audio Control Command Description Feedback Example Example: 1Gain:5. Set the audio gain of input [x] to [y]. [x]Gain:[y]. Feedback: x=1~4, y=0~10. Input 1 Gain Level 5! Enable 1-HDMI output audio bypass HDMI1 Audio Bypass HDMI1ABON. mode. Disable 1-HDMI output audio bypass HDMI1 Audio Bypass HDMI1ABOFF.
- Page 15 AVG-SC42T Audio Control Command Description Feedback Example Example: 1Gain:5. Set the audio gain of input [x] to [y]. [x]Gain:[y]. Feedback: x=1~4, y=0~10. Input 1 Gain Level 5! Enable 1-HDMI output audio bypass HDMI1 Audio Bypass HDMI1ABON. mode. Disable 1-HDMI output audio bypass HDMI1 Audio Bypass HDMI1ABOFF.
- Page 16 AVG-SC42T Command Description Feedback Example MicVolume:xx. Set the MIC volume to xx. Volume of MIC 80! MicVolume+. Increase the MIC volume. Volume of MIC 81! MicVolume-. Decrease the MIC volume. Volume of MIC 79! MicMute. Mute the MIC audio. Volume of MIC Mute! MicUnMute.
- Page 16 AVG-SC42T Command Description Feedback Example MicVolume:xx. Set the MIC volume to xx. Volume of MIC 80! MicVolume+. Increase the MIC volume. Volume of MIC 81! MicVolume-. Decrease the MIC volume. Volume of MIC 79! MicMute. Mute the MIC audio. Volume of MIC Mute! MicUnMute.
- Page 17 AVG-SC42T Command Description Feedback Example HDMI2OutVolume-. Decrease the 2-HDMI output volume. Volume of HDMI2 Out 59! HDMI2OutVolumeMu Volume of HDMI2 Out Mute the 2-HDMI output audio. Mute! HDMI2OutVolumeUn Volume of HDMI2 Out Unmute the 2-HDMI output audio. Mute. Unmute! Preset Setting...
- Page 17 AVG-SC42T Command Description Feedback Example HDMI2OutVolume-. Decrease the 2-HDMI output volume. Volume of HDMI2 Out 59! HDMI2OutVolumeMu Volume of HDMI2 Out Mute the 2-HDMI output audio. Mute! HDMI2OutVolumeUn Volume of HDMI2 Out Unmute the 2-HDMI output audio. Mute. Unmute! Preset Setting...
- Page 18 AVG-SC42T Command Description Feedback Example The input [x] invoke built-in EDID [y]. x=0: All inputs. x=1~4: 1~4 input. EDID 720p 2D PCM EDID/[x]/[y]. EDID/3/3 1080p 2D PCM 4K@60Hz 4:2:0 Dolby/DTS 5.1 CH 4K@60Hz 4:4:4 HDR 7.1CH User-defined EDID Get the EDID data from 1-HDMI EDIDGHDMI1.
- Page 18 AVG-SC42T Command Description Feedback Example The input [x] invoke built-in EDID [y]. x=0: All inputs. x=1~4: 1~4 input. EDID 720p 2D PCM EDID/[x]/[y]. EDID/3/3 1080p 2D PCM 4K@60Hz 4:2:0 Dolby/DTS 5.1 CH 4K@60Hz 4:4:4 HDR 7.1CH User-defined EDID Get the EDID data from 1-HDMI EDIDGHDMI1.
- Page 19 AVG-SC42T CEC Control If the input sources and displays support CEC, they can be controlled by sending CEC commands to replace IR remote. Step 1: Enable CEC control. Command Description Feedback Example CEC_ON. Enable CEC CEC ON! CEC_OFF. Disable CEC...
- Page 19 AVG-SC42T CEC Control If the input sources and displays support CEC, they can be controlled by sending CEC commands to replace IR remote. Step 1: Enable CEC control. Command Description Feedback Example CEC_ON. Enable CEC CEC ON! CEC_OFF. Disable CEC...
- Page 20 AVG-SC42T CECI010D. CECI[port]0D. Exit menu. CEC_IN_01_SEND_SUCCESS! CECI0141. CECI[port]41. Volume up. CEC_IN_01_SEND_SUCCESS! CECI0142. CECI[port]42. Volume down. CEC_IN_01_SEND_SUCCESS! CECI0143. CECI[port]43. Mute CEC_IN_01_SEND_SUCCESS! CECI0144. CECI[port]44. Play. CEC_IN_01_SEND_SUCCESS! CECI0145. CECI[port]45. Stop. CEC_IN_01_SEND_SUCCESS! CECI0146. CECI[port]46. Pause. CEC_IN_01_SEND_SUCCESS! CECI0148. CECI[port]48. Rewind. CEC_IN_01_SEND_SUCCESS! CECI0149. CECI[port]49. Fast forward.
- Page 20 AVG-SC42T CECI010D. CECI[port]0D. Exit menu. CEC_IN_01_SEND_SUCCESS! CECI0141. CECI[port]41. Volume up. CEC_IN_01_SEND_SUCCESS! CECI0142. CECI[port]42. Volume down. CEC_IN_01_SEND_SUCCESS! CECI0143. CECI[port]43. Mute CEC_IN_01_SEND_SUCCESS! CECI0144. CECI[port]44. Play. CEC_IN_01_SEND_SUCCESS! CECI0145. CECI[port]45. Stop. CEC_IN_01_SEND_SUCCESS! CECI0146. CECI[port]46. Pause. CEC_IN_01_SEND_SUCCESS! CECI0148. CECI[port]48. Rewind. CEC_IN_01_SEND_SUCCESS! CECI0149. CECI[port]49. Fast forward.
- Page 21 AVG-SC42T ✓ Control the output display device: Command Description Example and Feedback CECO0141. CECO[port]41. Volume up. CEC_OUT_01_SEND_SUCCESS! CECO0142. CECO[port]42. Volume down. CEC_OUT_01_SEND_SUCCESS! CECO0143. CECO[port]43. Mute CEC_OUT_01_SEND_SUCCESS! CECO016C. CECO[port]6C. Power off. CEC_OUT_01_SEND_SUCCESS! CECO016D. CEO[port]6D. Power on. CEC_OUT_01_SEND_SUCCESS! Third-party Device Control The switcher supports RS232 pass-through control, connect the third-party device...
- Page 21 AVG-SC42T ✓ Control the output display device: Command Description Example and Feedback CECO0141. CECO[port]41. Volume up. CEC_OUT_01_SEND_SUCCESS! CECO0142. CECO[port]42. Volume down. CEC_OUT_01_SEND_SUCCESS! CECO0143. CECO[port]43. Mute CEC_OUT_01_SEND_SUCCESS! CECO016C. CECO[port]6C. Power off. CEC_OUT_01_SEND_SUCCESS! CECO016D. CEO[port]6D. Power on. CEC_OUT_01_SEND_SUCCESS! Third-party Device Control The switcher supports RS232 pass-through control, connect the third-party device...
-
Page 22: Gui Control
AVG-SC42T 4.4. GUI Control The AVG-SC42T can also be controlled via a web-based GUI. Users can interact with the Switcher through graphical icons and visual indicators in any web browser window. Type 192.168.0.178 in your browser, it will enter the log-in web-page shown as... -
Page 22: Gui Control
AVG-SC42T 4.4. GUI Control The AVG-SC42T can also be controlled via a web-based GUI. Users can interact with the Switcher through graphical icons and visual indicators in any web browser window. Type 192.168.0.178 in your browser, it will enter the log-in web-page shown as... -
Page 23: Menu Items
AVG-SC42T 4.4.1 Menu Items Video Switching Type the user name and password, and then click Login to enter the section for video switching. 1-HDMI OUTPUT: Switch the selected input source to 1-HDMI output. ▪ 2-HDMI OUTPUT: Switch the selected input source to 2-HDMI output. -
Page 23: Menu Items
AVG-SC42T 4.4.1 Menu Items Video Switching Type the user name and password, and then click Login to enter the section for video switching. 1-HDMI OUTPUT: Switch the selected input source to 1-HDMI output. ▪ 2-HDMI OUTPUT: Switch the selected input source to 2-HDMI output. - Page 24 AVG-SC42T Audio Control 1) Input audio control Line Volume: Mute, Volume Up or Volume Down. ▪ MIC Volume: Mute, Volume Up or Volume Down. ▪ Gain Level: Adjust the gain level for input audio source. ▪ 2) Output audio control...
- Page 24 AVG-SC42T Audio Control 1) Input audio control Line Volume: Mute, Volume Up or Volume Down. ▪ MIC Volume: Mute, Volume Up or Volume Down. ▪ Gain Level: Adjust the gain level for input audio source. ▪ 2) Output audio control...
- Page 25 AVG-SC42T Mix: Audio mixing output. ▪ Bypass: Enable or disable Bypass mode. The default is OFF, the audio output ▪ format is PCM. When in Bypass mode, the output audio format is the same as the input audio and the output volume cannot be adjusted by the volume control bar.
- Page 25 AVG-SC42T Mix: Audio mixing output. ▪ Bypass: Enable or disable Bypass mode. The default is OFF, the audio output ▪ format is PCM. When in Bypass mode, the output audio format is the same as the input audio and the output volume cannot be adjusted by the volume control bar.
- Page 26 AVG-SC42T CEC Control If the input sources and display support CEC, they can be controlled by the below control buttons. 1) To control source device Source Control: Select the input source which needs to be controlled, and then ▪ select the function button required.
- Page 26 AVG-SC42T CEC Control If the input sources and display support CEC, they can be controlled by the below control buttons. 1) To control source device Source Control: Select the input source which needs to be controlled, and then ▪ select the function button required.
- Page 27 AVG-SC42T Display Control: Select the display device which needs to be controlled, and ▪ then select the function button required. Tags Setting INPUTS: Modify the label of input sources. ▪ Preset: Modify the label of presets. ▪...
- Page 27 AVG-SC42T Display Control: Select the display device which needs to be controlled, and ▪ then select the function button required. Tags Setting INPUTS: Modify the label of input sources. ▪ Preset: Modify the label of presets. ▪...
- Page 28 AVG-SC42T RS232 Control Select HEX or ASCII format. ▪ Baud Rate: Supports 2400, 4800, 9600, 19200, 38400, 57600 or 115200. ▪ Command Ending: NULL, CR, LF or CR+LF can be chosen. ▪ Command: Type the command in this box to control the third-party device which ▪...
- Page 28 AVG-SC42T RS232 Control Select HEX or ASCII format. ▪ Baud Rate: Supports 2400, 4800, 9600, 19200, 38400, 57600 or 115200. ▪ Command Ending: NULL, CR, LF or CR+LF can be chosen. ▪ Command: Type the command in this box to control the third-party device which ▪...
- Page 29 AVG-SC42T Static IP or Dynamic Host Configuration Protocol (DHCP). ▪ Modify the static IP Address, Subnet Mask, and Gateway. ▪ Password Settings Modify the login password. ▪ Lock or unlock the front panel buttons. ▪...
- Page 29 AVG-SC42T Static IP or Dynamic Host Configuration Protocol (DHCP). ▪ Modify the static IP Address, Subnet Mask, and Gateway. ▪ Password Settings Modify the login password. ▪ Lock or unlock the front panel buttons. ▪...
- Page 30 Web-based GUI for the Switcher features an update available at http://192.168.0.178:100 Note, if you have changed the IP address of the AVG-SC42T, then enter that IP address. Type the username and password (the same as in the GUI log-in settings, a modified password will be available only after rebooting) to log in the configuration interface.
- Page 30 Web-based GUI for the Switcher features an update available at http://192.168.0.178:100 Note, if you have changed the IP address of the AVG-SC42T, then enter that IP address. Type the username and password (the same as in the GUI log-in settings, a modified password will be available only after rebooting) to log in the configuration interface.
-
Page 31: Specifications
AVG-SC42T 5. Specification Video Video Input (1) HDMI/MHL, (3) HDMI, (1) USB-C Video Input Connector (3) Type-A female HDMI, (1) Type-C USB HDMI Input Resolution Up to 4Kx2K@60Hz 4:4:4 8bit MHL Input Resolution Up to 1080P@60Hz USB-C Input Resolution Up to 4Kx2K@30Hz 4:4:4 8bit... -
Page 31: Specifications
AVG-SC42T 5. Specification Video Video Input (1) HDMI/MHL, (3) HDMI, (1) USB-C Video Input Connector (3) Type-A female HDMI, (1) Type-C USB HDMI Input Resolution Up to 4Kx2K@60Hz 4:4:4 8bit MHL Input Resolution Up to 1080P@60Hz USB-C Input Resolution Up to 4Kx2K@30Hz 4:4:4 8bit... - Page 32 AVG-SC42T Output Analog Audio Format Bypass Mode: PCM 7.1 audio, Dolby Atmos®, Dolby® TrueHD, Dolby Digital® Plus, DTS:X™, and DTS-HD® Master Audio™ pass-through. HDMI Output Audio Format Mix mode: PCM 7.1 audio. < 0.1% (-80 dB), 20Hz – 20KHz bandwidth, 1KHz sine...
- Page 32 AVG-SC42T Output Analog Audio Format Bypass Mode: PCM 7.1 audio, Dolby Atmos®, Dolby® TrueHD, Dolby Digital® Plus, DTS:X™, and DTS-HD® Master Audio™ pass-through. HDMI Output Audio Format Mix mode: PCM 7.1 audio. < 0.1% (-80 dB), 20Hz – 20KHz bandwidth, 1KHz sine...
-
Page 33: Panel Drawing
AVG-SC42T 6. Panel Drawing AUDIO INPUTS CONTROL LINE IR CONTROL FIRMWARE RS232 1-HDMI / MHL 2-HDMI 3-HDMI 4-USB-C 1-HDMI 2-HDMI AUDIO DC 24V INPUTS OUTPUTS AVG-SC42 4x2 HDMI 2.0 Presentation Switcher w/ Matrix Outputs 220 mm AUDIO INPUT OUTPUT OUT 1... -
Page 33: Panel Drawing
AVG-SC42T 6. Panel Drawing AUDIO INPUTS CONTROL LINE IR CONTROL FIRMWARE RS232 1-HDMI / MHL 2-HDMI 3-HDMI 4-USB-C 1-HDMI 2-HDMI AUDIO DC 24V INPUTS OUTPUTS AVG-SC42 4x2 HDMI 2.0 Presentation Switcher w/ Matrix Outputs 220 mm AUDIO INPUT OUTPUT OUT 1... -
Page 34: Troubleshooting & Maintenance
AVG-SC42T 7. Troubleshooting & Maintenance Problems Causes Solutions Poor quality HDMI Change the HDMI cable to a good quality Output image is white cable or faulty cable. cable. noise Failed or loose Fix the connection connection Check with oscilloscope or multimeter if... -
Page 34: Troubleshooting & Maintenance
AVG-SC42T 7. Troubleshooting & Maintenance Problems Causes Solutions Poor quality HDMI Change the HDMI cable to a good quality Output image is white cable or faulty cable. cable. noise Failed or loose Fix the connection connection Check with oscilloscope or multimeter if...
Need help?
Do you have a question about the AVG-SC42T and is the answer not in the manual?
Questions and answers