Table of Contents
Advertisement
Advertisement
Table of Contents

Related Manuals for Ametek Reichert 7CR


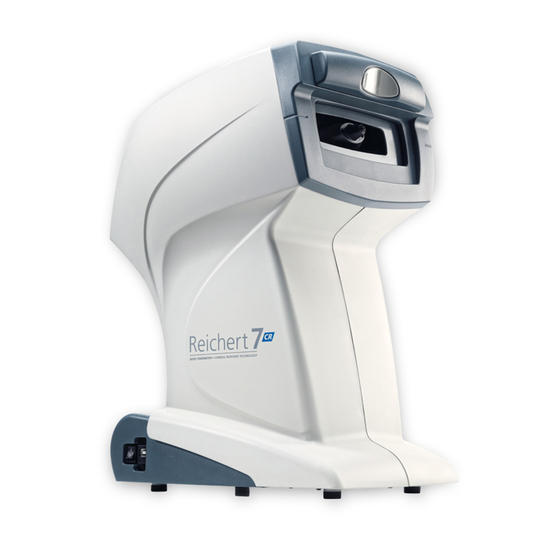
Summary of Contents for Ametek Reichert 7CR
- Page 1 Reichert ® Auto Tonometer + Corneal Response Technology ® User’s Guide...
- Page 2 ©2018 AMETEK, Inc. Reichert, Reichert Technologies, Corneal Response Technology and “CR” design mark are registered trademarks of Reichert, Inc. AMETEK is a registered trademark of AMETEK, Inc. All other trademarks are property of their respective owners. The information contained in this document was accurate at time of publication. Specifications subject to change without notice.
-
Page 3: Table Of Contents
Contents Warnings & Cautions ..................... 4 Symbol Information ....................6 Introduction ......................7 Indications for Use ..................7 Contraindications .................... 7 Instrument Setup ......................8 Unpacking Instructions ..................8 Application of Input Power ................9 Disconnection of Input Power ................. 9 Parts Identification ..................10 Accessories .................... -
Page 4: Warnings & Cautions
Warnings & Cautions Reichert Technologies is not responsible for the safety and reliability of this instrument when: ® • Assembly, disassembly, repair, or modification is made by unauthorized dealers or persons. • Instrument is not used in accordance with this User’s Guide. WARNING: AN INSTRUCTION THAT DRAWS ATTENTION TO RISK OF INJURY OR DEATH. - Page 5 Warnings & Cautions continued) CAUTION: AN INSTRUCTION THAT DRAWS ATTENTION TO THE RISK OF DAMAGE TO THE PRODUCT. CAUTION: THE INTERNAL CIRCUITRY OF THE INSTRUMENT CONTAINS ELECTROSTATIC DISCHARGE SENSITIVE DEVICES (ESDS) THAT MAY BE SENSITIVE TO STATIC CHARGES PRODUCED BY THE HUMAN BODY. DO NOT REMOVE THE COVERS WITHOUT TAKING PROPER PRECAUTIONS.
-
Page 6: Symbol Information
Symbol Information Symbol Information The following symbols appear on the instrument: Caution symbol indicating important operating and maintenance instructions that are included in this User’s Guide Type B Applied Part Alternating Current Power Protective Earth Connection ON / OFF Date of Manufacture 2018 Manufacturer Catalog Number... -
Page 7: Introduction
Fax: 716-686-4555 E-mail: reichert.information@ametek.com Indications for use The Reichert 7CR is intended to measure the intraocular pressure of the eye, taking into consideration the biomechanical response of the cornea. Contraindications Use of the Reichert 7CR is contraindicated in instances of: •... -
Page 8: Instrument Setup
Instrument Setup Great care has been taken to deliver your new Reichert 7CR to you safely. The container and packaging was specially designed to transport this unit. Please retain the packaging if future transportation is required. Unpacking Instructions Shipping Container Please remove the packaging material from the instrument in the following manner (Refer to images on left). -
Page 9: Application Of Input Power
Instrument Setup continued) Application of Input Power WARNING: CARE MUST BE TAKEN TO ARRANGE THE CABLES FOR THE ACCESSORIES SUCH THAT THEY DO NOT PRESENT A TRIPPING HAZARD TO THE EXAMINER OR A DANGER TO THE PATIENT. WARNING: POSITION THIS INSTRUMENT SO THAT IT IS NOT DIFFICULT TO OPERATE THE DISCONNECTION DEVICE (PLUG). -
Page 10: Parts Identification
7. USB Port: Communication port that transfers data to a computer. Note: USB drivers are available on the web page for the Reichert 7CR at: http://www.reichert.com 8. Main Power Connector and Fuse Holder: Connection point for input power and the fuses. Press the top tab and bottom tab together on the fuse panel to remove the fuse holder and fuses. -
Page 11: Icon Definition
Instrument Setup continued) Icon Definition The Reichert 7CR incorporates a user-friendly icon/menu-based operating system that will increase the speed of measurements, training and use. Listed below are the icons that are used during the operation of this instrument. Icon Description MENU —... -
Page 12: Default Settings
Default Settings The Reichert 7CR has default settings that are set at the factory. To view a summary of these settings, refer to page 13. To view a detailed definition and explanation of each setting, refer to pages 14 through 17. -
Page 13: Customized Options
Instrument Setup continued) Default Settings (continued) This instrument is sent from the factory with measurement, printer, communication, and miscellaneous parameters set to default settings. These settings can be changed to suit the needs of the individual operator or clinician. A summary of these settings is given below with the default selections shown in bold type. -
Page 14: Tonometer Settings
Instrument Setup continued) Tonometer Settings The following options are available in the Tonometer Setup menu: Parameters Settings PRESSURE Choose either millimeter of mercury (mmHg) or kilo Pascals (kPa). MEASUREMENTS Choose either 3 or 4 measurements for the multi-measure button function. AVERAGING Choose either Intelligent or Straight averaging. -
Page 15: General Settings
Instrument Setup continued) General Settings The following options are available in the General Setup menu: Parameters Settings LANGUAGE Sets the language that appears on the Operator Display. TONE Sets the audible tone indicator (“beep”) to be silent (OFF) or audible (ON). Note: Any time a selection is made on the touch screen, a beep will sound if the option is set to “ON”. -
Page 16: Printout Settings
Instrument Setup continued) Printout Settings The following options are available in the Printout Setup menu: Parameters Settings PRINTER Option that sets the printer to print (ON) or not to print (OFF) when the PRINT icon is touched. DATE FORMAT Choose the date format to display on the printer paper: D=Day, M=Month, Y=Year. -
Page 17: Communication Settings
Instrument Setup continued) Communications Settings The Reichert 7CR can transfer data to an external device, such as a computer, through the USB port. The following options are available in the Communications Setup menu: Parameters Settings BAUD Serial transmission data rate, transfers in bits per second (bps). -
Page 18: Instructions For Use
Note: When IOPcc is lower than IOPg, this indicates that the IOP for this patient may be being overstated when using traditional methods of tonometry. Alignment and Measurement When power is applied to the Reichert 7CR, it initially performs a system check. After completion of the system check, the title screen will be displayed. 16060-101 Rev. M... -
Page 19: Demo Puff
Touching the DEMO icon initiates a sample air puff. This can be used to demonstrate the air puff to the patient. After each time the DEMO button is pressed and the air puff is delivered, an internal check of the Reichert 7CR’s systems is conducted to ensure optimum performance of your instrument. - Page 20 (continued) Slide headrest left or right The Reichert 7CR features a left/right sliding forehead rest that enables the instrument to automatically determine which eye is being measured. It must be positioned completely to one side or to the other in order to take a measurement. Position the forehead rest to the desired position before beginning the measurement process.
-
Page 21: Correct Patient Positioning
Instructions For Use continued) Alignment and Measurement (continued) Correct Patient Positioning Set the height of the table so the canthus marks on the sides of the instrument are level with the patient’s eyes. Patients should lean forward slightly so that the center of their forehead rests in the middle of the rubber forehead pad. - Page 22 Instructions For Use continued) Alignment & Measurement (continued) To take a measurement, simply touch one of the measurement icons. • Touching the MEASURE icon (one puff) will initiate a measurement with one puff. • Touching the MULTI MEASURE icon will initiate a measurement with multiple rapid puffs. Note: To ensure fast and accurate results operators should instruct the patient to blink a few times and hold both eyes open immediately before measurement.
- Page 23 Instructions For Use continued) Alignment & Measurement (continued) During the alignment and measurement process, the Operator Display will show the position of the airtube with respect to the center of the patient’s cornea. As the positioning system aligns to the apex of the eye, the measuring icon will move to the middle of the screen and align over the center alignment mark (+).
-
Page 24: Measurement Count
Instructions For Use continued) Alignment & Measurement (continued) Measurement Count The eye icons below the eye titles (Right and Left, or OD and OS) will be filled in to indicate the number of measurements that have been made. When using the single measurement function, an eye icon will become filled after each measurement. -
Page 25: Score
Intelligent Averaging of Data The Reichert 7CR features an intelligent averaging system, based on the waveform score, to help ensure the most reliable measurements are displayed. The system works in the following manner:... -
Page 26: Example - Intelligent Averaging
Instructions For Use continued) Alignment & Measurement (continued) Examples - Intelligent Averaging Please refer to the table below for some scenarios that demonstrate how the intelligent averaging process determines the displayed result Measurement Measurement Measurement Measurement Individual IOPcc 17.5 11.0 16.0 16.5 Individual IOPg... -
Page 27: Example - Straight Averaging
Instructions For Use continued) Alignment & Measurement (continued) Examples - Straight Averaging Please refer to the table below for some scenarios that demonstrate how the straight averaging process determines the displayed result Measurement Measurement Measurement Measurement Individual IOPcc 17.5 11.0 16.0 16.5 Individual IOPg... -
Page 28: Measuring The Next Eye
Instructions For Use continued) Alignment & Measurement (continued) Measuring the Next Eye There are several options available at this point: a. The Forehead Rest may be slid to the opposite side to continue taking measurements on the other eye. b. All data may be cleared and additional measurements taken on the same eye (touch the CLEAR icon). -
Page 29: Sleep Mode
Instructions For Use continued) Sleep Mode The unit will go into sleep mode after the specified amount of time selected in the Setup Menu. When the unit comes out of sleep mode, any measurements that were not cleared out prior to sleep mode will appear on the screen, but the measurement buttons will be disabled in order to prevent accidentally combining data from two different patients. -
Page 30: Low Confidence Readings
Instructions For Use continued) Low Confidence Readings Any measurement values identified as “Low Confidence” will be indicated in orange text. Take additional measurements to replace the low confidence values. Note: It is possible that post refractive surgery eyes, eyes with corneal pathologies, and glaucomatous eyes will produce consistently low measurement scores. -
Page 31: Positioning Error Messages
Positioning Error Messages During the measurement process, the Reichert 7CR may detect a situation where the patient’s eye is too far from the nosepiece. Should this occur, the instrument will return to the home position, and the screen will change to that shown below. -
Page 32: Printing Measurement Data
Instructions For Use continued) Printing Measurement Data To print the measurement data, touch the PRINT icon. A sample printout is shown below. Sample Printout If you decide not to make a printout, touch the CLEAR DATA icon. This will clear all data from the memory and the screen. -
Page 33: Cleaning & Maintenance
Cleaning & Maintenance Fuses WARNING: DISCONNECT POWER BEFORE ATTEMPTING TO REMOVE THE FUSES OR SERIOUS INJURY OR DEATH MAY OCCUR. Replace the fuses in the Power Input Module with the fuses indicated in the Specifications section of this manual. 1. Remove input power to the instrument. 2. -
Page 34: Positioning Windows And Airtube Cleaning
Cleaning & Maintenance continued) Positioning Windows and Airtube Cleaning When the Positioning Windows or the Applanation Windows become occluded with contaminants, degradation of the positioning signal occurs. When signal degradation occurs, the system may not recognize or position at the center of the eye. Consequently, the instrument will not find the center of the eye or align off center, which may prevent the unit from taking a measurement or can cause asterisk readings. -
Page 35: Forehead Rest Pad Replacement
Cleaning & Maintenance continued) Forehead Rest Pad Replacement The Reichert 7CR tonometer has a removable Indent Forehead Rest Pad, to allow for easier replacement of the pad. On the bottom part of the Forehead Rest Pad, there is a small indent, which is to allow room Figure CL-1. -
Page 36: Troubleshooting
Troubleshooting Help Screens The Reichert 7CR includes HELP screens, which provide useful information and tips on its operation. These screens are intended to be used as a quick reference to a selection of operations. To access the HELP menu, touch the MENU icon. Press the DOWN ARROW icon until the cursor box is positioned on HELP. -
Page 37: Chart Of Common Errors
Troubleshooting continued) Chart of Common Errors The following chart provides details of common problems and solutions for the Reichert 7CR. Definition Probable Cause Solution Screen blank. Unit is in Sleep Mode. Touch any icon. ON/OFF Switch is set to OFF. -
Page 38: Print-Related Errors
Troubleshooting continued) Print-Related Errors If your printer runs out of paper during a print cycle, the following message will appear: Note: If the printer paper runs out before printing all the measurement data, the data will be stored. Once the printer paper is replaced, a complete print out of all measurement data will start. 16060-101 Rev. -
Page 39: General Specifications
General Specifications Model: 16060 - Reichert 7CR Physical Dimensions Size: Weight, unpacked: 23.0 lbs. (10.4 Kg) Height: 19.8 in. (50.2 cm) Width: 10.5 in. (26.7 cm) Depth: 14.0 in. (35.6 cm) Electrical Voltage: 100-240 VAC Power: 60-85 VA Frequency: 50/60 Hz Fuses: Time-Lag (2.5A, 250V), 5 X 20mm, RoHS... -
Page 40: Classifications
The Reichert 7CR is classified as Type B Equipment for patient contact per IEC 60601-1. The Reichert 7CR is classified as IPX0 Equipment. -
Page 41: Guidance Tables
Guidance and Manufacturer’s Declaration – Electromagnetic Emissions The Reichert 7CR is intended for use in the electromagnetic environment specified below. The customer or user of the Reichert 7CR should ensure that it is used in such an environment. Electromagnetic Environment... - Page 42 Guidance and Manufacturer’s Declaration – Electromagnetic Immunity The Reichert 7CR is suitable for use in electromagnetic environment specified below. The cus- tomer or user of the Reichert 7CR should ensure that it is used in such an environment. Immunity IEC 60601...
- Page 43 Guidance and Manufacturer’s Declaration – Electromagnetic Immunity The Reichert 7CR is intended for use in the electromagnetic environment specified below. The customer or user of the Reichert 7CR should ensure that it is used in such an environment. Immunity IEC 60601...
- Page 44 The customer or user of the Reichert 7CR can help prevent electromagnetic interference by maintaining a minimum distance between portable and mobile RF Communications Equipment and the Reichert 7CR as recommended below, according to the maximum output power of the communications equipment.
- Page 45 Immunity to Proximity Fields from RF Wireless Communications Equipment Guidance and Manufacturer’s Declaration - Electronic Immunity The Reichert 7CR is intended for use in the electromagnetic environment as specified below related to proximity fields from RF wireless communications equipment. Electromagnetic...
-
Page 46: Warranty
Warranty This product is warranted by Reichert Technologies (“Reichert”) against defective material and workmanship under normal use for a period of one year from the date of invoice to the original purchaser. (An authorized dealer shall not be considered an original purchaser.) Under this warranty, Reichert’s sole obligation is to repair or replace the defective part or product at Reichert’s discretion. - Page 47 Notes 16060-101 Rev. M...
- Page 48 Manufactured By Reichert, Inc. 3362 Walden Ave Suite 100 Depew, NY 14043 Toll Free 888-849-8955 Phone: 716-686-4500 Fax: 716-686-4555 Email: reichert.information@ametek.com www.reichert.com Authorized European Representative AMETEK GmbH Business Unit Reichert Carl-von-Linde-Strasse 42 85716 Unterschleissheim/Munich Germany Email: info.reichert-de@ametek.com Tel: +49 (89) 315 8911 0...
Need help?
Do you have a question about the Reichert 7CR and is the answer not in the manual?
Questions and answers
Сколько срок эксплуатации при правильной калибровке