Table of Contents
Advertisement
Advertisement
Table of Contents

Related Manuals for Abaxis VetScan SA


Summary of Contents for Abaxis VetScan SA
- Page 1 U S ER' S M ANUAL v1.1 SOF TWA RE F O R V E T E R I N A R Y U S E O N LY...
- Page 2 ABAXIS Europe GmbH, Bunsenstr. 9-11, 64347 Griesheim, Germany | +49 6155 780 21 0 FOR VETERINARY USE ONLY Abaxis and VETSCAN are registered trademarks of Abaxis, Inc. Reproduction in any form, either in print or electronic, is prohibited without written permission of Abaxis, Inc. Copyright ©Abaxis, Inc. 2018. 1550-7013 Rev. B V ETS CA N SA U SE R’...
- Page 3 Abaxis, Inc. Abaxis reserves the right to modify its products and services at any time. This user’s manual is subject to change without notice. Although prepared to ensure accuracy, Abaxis assumes no liability for errors, or for any damages resulting from application or use of this information.
- Page 4 EU Machinery Directive 2006/42/EC EU RoHS2 Directive 2011/65/EU The Products Covered by this Declaration VETSCAN SA sediment analyzer The Basis on which Conformity is being declared The manufacturer hereby declares under his sole responsibility that the products identified above comply with the essential health and safety requirements of the Machinery directive 2006/42/EC.
-
Page 5: Table Of Contents
Appendix G: Part Numbers ........................Appendix H: Troubleshooting ........................Appendix I: Gross Examination, Specific Gravity, and Dilution Fields ..........Appendix J: Understanding Urine Dilutions on the VETSCAN SA..........Appendix K: VETSCAN SA Suggested Normal Ranges ..............Appendix L: VETSCAN UA Results Bins .................... -
Page 6: Introduction
Its high-resolution urine sediment images and classification capabilities improve laboratory workflow, efficiency, and precision. When paired with the VETSCAN Urine Analyzer (UA), the VETSCAN SA+UA system provides a comprehensive urinalysis solution. V ETS CA N SA U SE R’ S M A N UA L... -
Page 7: Intended Use
Intended Use The VETSCAN SA is intended for veterinary use only for testing of urine sediment in mammalian urine samples, particularly dogs and cats. Urine samples collected from other species may be run on the analyzer, but have not been validated. The VETSCAN SA will provide quantitative and... -
Page 8: Result Classifications
= None To Rare Result Bin Definition Moderate Many ++++ Numerous Result Warnings The VETSCAN SA also displays warnings above the test results in a section titled SA Test Results: SA Test Results display text: Description Action Nothing abnormal or Completed None questionable Look through SA images;... -
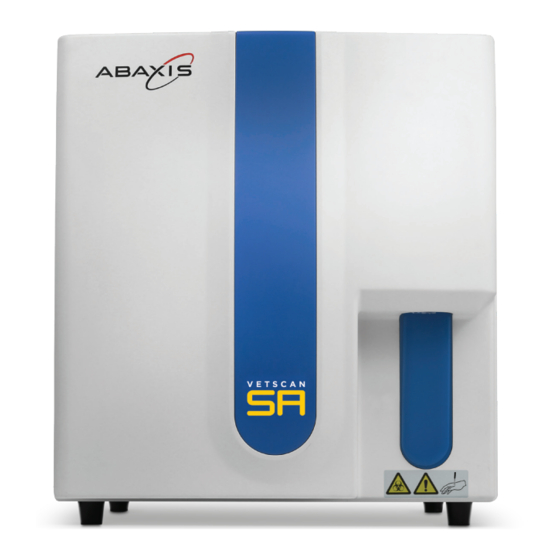
Page 9: System Overview
• VETSCAN SA Display Monitor (PN 1550-1007) • VETSCAN SA International Power Cords (see Appendix G for listings) The VETSCAN SA analyzer works with the following reagent, cleaner and control: • VETSCAN SA Reagent Kit (PN 1550-9000) • VETSCAN SA Cleaner Kit (PN 1550-9001) •... - Page 10 RINSE A RINSE B SENSOR WASTE Front Panel Rear Panel 1. Sample probe 1. Input/output panel 2. Blue start paddle 2. Power connection 3. Reagent connection panel Side Panels 1. Door latch 2. Power switch 3. Fan filter door V ETS CA N SA U SE R’ S M A N UA L 1 .1 S O F TWA RE...
- Page 11 RINSE A RINSE B SENSOR WASTE Input/output panel Reagent connection panel Ports (1) Ethernet (2) USB ports (3) VGA monitor port (4) Mouse port (5) Keyboard port Note: The Ethernet ports have not been enabled yet but will be in a future software update. The HDMI and DVI ports are not supported and should not be used to connect a display monitor.
-
Page 12: Safety
The safety metal cover surrounds the system to protect the user from exposure to electrical current. Before use, inspect the VETSCAN SA system for cracks and chips, which may allow the test sample to leak from the tubes and cause a potential electrical hazard. Additionally, inspect all electrical cables and plugs for loose connections, cracks, breaks or corrosion. -
Page 13: Vetscan Sa Menu
VETSCAN SA Menu When the VETSCAN SA powers on, the top menu has three selections: Measure is for running samples. Database is for reviewing previous tests run. Tools is for changing settings and maintenance of the analyzer. V ETS CA N SA U SE R’ S M A N UA L... - Page 14 The Measure menu screen is divided into five different panels. Measure Menu Screen 1. Left Side Panel: guides the user through running a test using images and text. 2. SA Images Panel: images captured at end of sample analysis. 3. Sample Entry Panel: where a user enters in all the inputs related to the sample. 4.
-
Page 15: Running A Sample
UA strip if also running a UA test. Sample Handling Do not centrifuge urine samples before use on the VETSCAN SA and VETSCAN UA. Use fresh, well mixed urine. Urine samples may be tested immediately after collection up to one hour post collection, if stored at room temperature. -
Page 16: Running A Test
There are three test workflows that can be initiated on the VETSCAN SA, two of which require a VETSCAN UA connected to the SA. Since there are two strip types (UA10 and UA14) on the VETSCAN UA, five unique Test Types can be selected. -
Page 17: Sa+Ua Test
SA+UA Test SA Test 1. Enter Patient Information: Enter Patient ID and select Species (Cat, Dog, Other, Control). Enter Patient Name and Doctor Name if desired. 2. Enter physical characteristics of the sample (optional): Use the drop-down option lists to select gross examination fields for the sample (Collection Method, Color, and Clarity) for the medical record. - Page 18 UA Test (continued) 12. Apply urine sample to strip. Use a dropper pipette to drop urine over entire strip, completely wetting each pad. Alternatively, strip may be dipped into urine sample, completely wetting every pad. 13. Blot either long edge of strip on absorbent paper to remove excess urine.
-
Page 19: Sa Only Test
SA Only Test 1. Enter Patient Information: Enter Patient ID and select Species (Cat, Dog, Other, Control). Enter Patient Name and Doctor Name if desired. 2. Enter physical characteristics of the sample (optional): Use the drop-down option lists to select gross examination fields for the sample (Collection Method, Color, and Clarity) for the medical record. -
Page 20: Ua Only Test
UA Only Test 1. Enter Patient Information: Enter Patient ID and select Species (Cat, Dog, Other, Control). Enter Patient Name and Doctor Name if desired. 2. Enter physical characteristics of the sample (optional): Use the drop-down option lists to select gross examination fields for the sample (Collection Method, Color, and Clarity) for the medical record. - Page 21 WARNING! If the Strip Tray has already moved into the analyzer to start scanning before the strip is placed in the tray, an error will be reported on the UA and sent to the SA. For best results, a new strip will have to be wetted to restart the testing workflow. While measuring, the SA screen is locked and navigation to other screens is prohibited.
-
Page 22: Urinalysis Results
Urinalysis Results Results will appear onscreen in approximately five minutes after the start of the test. The SA analyzer will automatically print all results if Auto-Print is selected in the settings and the printer is connected and powered on. Results may be manually printed via the Print button at the bottom left of the Measure screen or re-printed later from the Database screen. -
Page 23: Sa Images Panel
SA Images Panel Up to 96 images from the urine sediment test will be displayed on the SA Images Panel. • Select x4 for group of 4 images at a time, or x16 to see 16 images at a time •... -
Page 24: Sa Results Panel
SA Results Panel The SA result classifications from the urine sediment test are shown on the SA Results Panel by Parameter, Value, and Unit. SA Warning Area SA Sediment Classifications SA Warning Area SA Sediment Classifications SA Results Panel Examples (1) Results with No Warnings, (2) No SA test measured where N/A represents Not Applicable, (3) Review images, (4) Results with “TNTC –... -
Page 25: Urinalysis Printout
Clinic information Time stamp for when report was printed Patient and doctor info Physical characteristics of VETSCAN SA and UA serial sample and specific gravity number and software version Time stamps for both VETSCAN SA and UA tests VETSCAN UA results... -
Page 26: Retest Sa
Retest SA If one of these 3 SA Warnings appear, a restest mode is enabled: 1. Review images 2. TNTC – Dilute and retest 3. Possible short sample The SA analyzer provides an immediate option to retest the sample without any additional patient entry. - Page 27 3. Click Run. 4. Mix urine sample by gently inverting. 5. Place tube below sample probe and press blue start paddle. 1. Hold the sample below the sample probe leaving a gap to the probe tip to allow the sample probe to aspirate air prior to moving down for sampling.
-
Page 28: Database - Reviewing Previous Results
Database – Reviewing Previous Results The VETSCAN SA analyzer stores, at minimum, 500 test records. Results are stored chronologically by date and time with newest on top. Select Database on top menu to review past results. Select the desired patient result using the Database Table located on Left Side Panel. Use scroll bar if more than one page of results. -
Page 29: Combining Sa And Ua Results
Combining SA and UA Results In the SA Database, the ability to combine individual SA and UA results are provided regardless if the tests were ran separately. To do this, select the SA result first in the Database. Click the Match drop-down in the UA Results Panel and select the correct UA patient result. -
Page 30: Maintenance
Maintenance Under the Tools selection from the top menu, all the maintenance buttons are provided. Important information is presented along the top left panel indicating login information, reagent lot and expiration, last use of Rinse B, last use of Cleaner, Auto Focus last use, and connection information. On the right, a Warning and Error Handling Table is displayed with Solve and Ignore functions listed on the bottom. -
Page 31: Maintenance Schedule
Acetone Do not use abrasive or highly alkaline cleaners (example: undiluted bleach) on VETSCAN SA parts. Do not expose VETSCAN SA parts to temperature > 140 °F (60 °C). Do not sterilize VETSCAN SA parts by autoclaving or dry heat. -
Page 32: Cleaner Reagent Cycle
Cleaner Reagent Cycle A Cleaner Reagent Cycle is required once per week. The SA software automatically alerts the user when this is required with an alert in the Warning and Error Handling Table: Type Error No. Description Time Warning Cleaner use is due YYYY-MM-DD HH:MM:SS To run a Cleaner: 1. -
Page 33: Kit Change
This error appears when the float on the cap of the waste container is lifted. Empty the waste container and click “Retry” on the software on the error warning popup. Before disposing of waste from the VETSCAN SA, consult your local waste disposal regulations and the VETSCAN SA Reagent Kit SDS/MSDS for recommendations. -
Page 34: Clean Fan Filter
3. Dry the Fan Filter to remove excess water and place it back into the analyzer. For replacement Fan Filter contact your local Abaxis representative. V ETS CA N SA U SE R’ S M A N UA L... -
Page 35: Software Updates
Software Updates The SA Analyzer supports software updates via USB flash drive. Abaxis or a local distributor will contact VETSCAN SA customers when a software update is required. The software update will be completed by Abaxis or a local distributor representative. -
Page 36: Settings
Also the UA connection settings can be verified. See Appendices B and C for instructions. 2. About: details on VETSCAN SA software versions and serial number. V ETS CA N SA U SE R’ S M A N UA L... -
Page 37: Appendix A: Installation Overview
Reagent Kit change, and that there is no sign of reagent leakage. • If any damage or leakage occurs in the reagent container, contact your local Abaxis representative. -
Page 38: Appendix B: Printer Installation
Appendix B: Printer Installation An external printer may be connected to the VETSCAN SA to print test results. Connect the printer and SA Analyzer using a USB cable only. The driver for the HP OfficeJet Pro 6230 is already installed. No other printer drivers are available at this time. -
Page 39: Appendix C: Ua Installation
Appendix C: UA Installation A VETSCAN UA analyzer may be connected to the VETSCAN SA to produce a full urinalysis report. The SA analyzer becomes the urinalysis workstation where all data entry will take place and sample runs initiated. To connect the UA to the SA, use the UA Y Cable provided with the UA analyzer: 1. -
Page 40: Appendix D: Vetscan Sa Analyzer Specifications
Appendix D: VETSCAN SA Analyzer Specifications Dimensions • Width: 15.1 in. (383 mm) • Depth: 19.1 in. (485 mm) • Height: 16.8 in. (427 mm) • Weight: 67 lbs. (30 kg) Power Supply • AC 100 V – 240 V •... -
Page 41: Appendix E: Symbols
Appendix E: Symbols Symbol Definition/Use Consult User’s Manual for detailed use instructions. Keep away from sunlight. Keep away from radiation, heat and direct sunlight. Protect from moisture. Do not allow to be wet. Keep package right side up. Fragile, handle with care. Storage and transit temperatures;... - Page 42 Symbol Definition/Use Do not stack more than 5 units vertically on top of another unit. Team lift. Required 2 people to lift package of estimated 60-80 lbs (27- 36 kg). 60-80 lbs 27-36 kg FOR VETERINARY USE ONLY For Veterinary Diagnostic Use only. Not for use for humans. Serial number.
-
Page 43: Appendix F: Safety And Regulatory Compliance
Regulations made by the Department of Communications of Canada. Waste Disposal • A re-usable waste bottle is provided with your new VETSCAN SA. Before disposing of waste from the VETSCAN SA, consult your local waste disposal regulations and the VETSCAN SA Reagent Kit SDS/MSDS for recommendations. -
Page 44: Appendix G: Part Numbers
1500-0023 VETSCAN UA Control Kit To re-order, contact Abaxis, Inc. at +1 800 822 2947 or ABAXIS Europe GmbH at +49 6155 780 210. V ETS CA N SA U SE R’ S M A N UA L 1 .1 S O F TWA RE... -
Page 45: Appendix H: Troubleshooting
Click the Flush button in the Tools Menu. 3. Drain: used in preparation for shipping or moving a VETSCAN SA. The VETSCAN SA analyzer hardware is not intended to be serviced by operators. Contact Abaxis an Abaxis authorized representative if you suspect a problem inside the analyzer. - Page 46 Fuzzy or Blurry 1-Thermal conditions have changed - 1-Run Auto Focus; Contact Images need to refocus. Abaxis representative. 2-Bubbles in reagents (black lines in 2-Run Flush; Contact Abaxis Images). representative. 3-Chamber needs cleaning. 3-Run Cleaner; Contact Abaxis representative. Bacteria showing up 1-Analyzer needs anti-microbial 1-Run Cleaner cycle;...
- Page 47 4-Try plugging Y Cable into another SA USB port. 5-Verify settings by selecting VETSCAN UA after clicking Options button under Tools menu and contact Abaxis representative. UA results not 1-UA analyzer operated independently 1-Locate UA test report on the transferring over to from the SA.
- Page 48 The VETSCAN SA also displays some specific error and warning codes. Type Error No. Description Remedy Error Comms timeout Check external connections and restart. Error Failed to open camera Contact Abaxis representative. connection Error Failed to open camera Contact Abaxis representative.
- Page 49 (www.abaxis.com) contains useful information for running the VETSCAN SA Sediment Analyzer and the VETSCAN SA Reagent Kits. It also contains links to technical notes, manuals, product information, and technical support information as well as technical resources on a variety of applications related to the VETSCAN SA analyzer.
-
Page 50: Appendix I: Gross Examination, Specific Gravity, And Dilution Fields
Appendix I: Gross Examination, Specific Gravity, and Dilution Fields On the VETSCAN SA, users can use drop-down option lists to select the Collection Method, Color, and Clarity of each sample for the medical record. Pre-set options included in these lists... -
Page 51: Appendix J: Understanding Urine Dilutions On The Vetscan Sa
Appendix J: Understanding Urine Dilutions on the VETSCAN SA Why dilutions sometimes are needed? The SA reviews real-time images using a microscope and there will be clinical samples with many cells causing a very dense field of view and stacked cells. The microscope cannot focus well on a dense field to accurately identify different cell types. -
Page 52: Appendix K: Vetscan Sa Suggested Normal Ranges
SA directly measures cells in cells/μL of urine. Due to no prior published veterinary ranges in urinary cells/μL, suggested ranges are converted from reference 1a using conversion formula with VETSCAN SA specific variables on file at Abaxis. Formula cited in Conrad dos Santos, Juliana et al. “Evaluation of Urinalysis Parameters to Predict Urinary Tract Infection,” Brazilian Journal of Infectious Disease, 2007;11 (5);... -
Page 53: Appendix L: Vetscan Ua Results Bins
APPENDIX B: UA RESULTS BINS ANALYTE RESULT TYPE SPECIES SEMI-QUANTITATIVE SYMBOL AND CONCENTRATION Semi-Quantitative APPENDIX B: UA RESULTS BINS Cell/μL (CON) APPENDIX B: UA RESULTS BINS Cell/μL (SI) Appendix L: ANALYTE RESULT TYPE SPECIES SEMI-QUANTITATIVE SYMBOL AND CONCENTRATION VETSCAN UA Results Bins Semi-Quantitative ANALYTE RESULT TYPE... - Page 54 Abaxis, Inc. ABAXIS Europe GmbH 3240 Whipple Road Bunsenstr. 9-11 Union City, CA 94587 64347 Griesheim. Germany Tel +1 800 822 2947 Tel +49 6155 780 21 0 www.abaxis.com 1550-7013 Rev. B...
Need help?
Do you have a question about the VetScan SA and is the answer not in the manual?
Questions and answers