Advertisement
Installation instructions
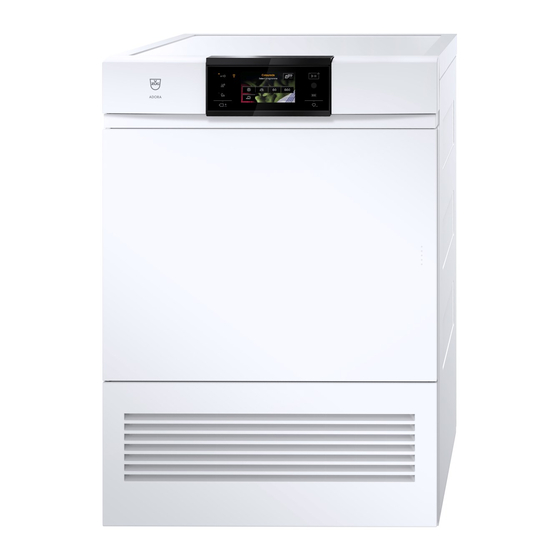
Heat pump dryer
One-family household
For Service and Spare Part Information please contact: V-ZUG AUSTRALIA Pty. Ltd. Tel +61 7 3209 6822
The appliance should be installed by qualified personnel only.
Each step must be carried out and checked in full in the order specified.
Validity
The installation instructions apply to the models: TS WP (12005), TSLQ WP (12006)
Transport
Transport the appliance in an upright position only! Transporting it in any other position will result in damage to the
appliance! When carried carefully without being shaken, the appliance may be tilted a maximum of 90° to the left
(viewed from the front).
Front
Identification plate
1
Supplied installation accessories
The necessary installation accessories are located in the washing drum and in the appliance packaging.
Designation
Installation plate
(incl. double-sided adhesive tape)
Tower panel
Condensate drain set
(incl. screw material)
Room conditions/Ventilation
Keep all ventilation slits on the appliance clear and unobstructed. Otherwise an adequate supply of air is not guaran-
teed.
▸
Ventilate the room well. Avoid the room temperature rising above 35 °C.
▸
The room temperature must be kept between the range of 15 – 25 °C to ensure the economic running of the appliance.
Installation room volume <20 m³, room with ventilation:
There must be air inlet and outlet openings (open window, ventilation grille or slits in the door, ventilation system) to the adjacent room
or to the outside.
Installation room volume ≥20 m³, room without ventilation:
Condensation may form on thermal bridges! The room must therefore be aired (by opening a window or the door to the room) after run-
ning several consecutive drying programmes.
1014097-R05
▸
Open the appliance door.
– The identification plate 1 is located bottom right.
Article no.
Number
W40653
1
W55687
1
W56298
1
1
1014097-R05
07/11/2017
See installation step
1. Positioning the installation plate
1. Positioning the installation plate
5. Connecting condensate drain
Advertisement
Table of Contents

Subscribe to Our Youtube Channel
Summary of Contents for V-ZUG Adora TSLQ WP
- Page 1 Heat pump dryer One-family household 1014097-R05 For Service and Spare Part Information please contact: V-ZUG AUSTRALIA Pty. Ltd. Tel +61 7 3209 6822 The appliance should be installed by qualified personnel only. Each step must be carried out and checked in full in the order specified.
- Page 2 ▸ In order to keep the distance to the wall, fold out the spacers D on the installation plate. If an appliance with the V-ZUG-Home option is to be installed: ▸ Connect network cable to the appliance. Dimensions 45 and 555 only apply if no plumbing fittings are to be...
- Page 3 ▸ Centre the installation plate in the niche. Cut-out for lateral connection, If a device is installed with the V-ZUG Home option: to the left or right ▸ Connect the network cable to the device. ≥100 × 100 mm Niche height ≥860 mm!
- Page 4 1014097-R05 Installation instructions 07/11/2017 Heat pump dryer One-family household 1014097-R05 Positioning on washing machines Affixing with adhesive tape Tumble dryer Models 12004, 12005, 12006 Washing machine Models L (11001, 11010), S (11002, 11011), SL (11003, 11012), SLQ (11006, 11013) and SLQ WP (11004, 11014) ▸...
- Page 5 1014097-R05 Installation instructions 07/11/2017 Heat pump dryer One-family household 1014097-R05 Installation ▸ Turn over the installation plate 3. Push to the front edge of the washing machine cover plate (see arrow) and adhere into place. Tumble dryer Models 12004, 12005, 12006 Washing machine Models L (265, 11001, 11010), S (266, 11002, 11011), SL (268, 11003, 11012), SLQ (269, 11006, 11013) and SLQ WP (11004, 11014)
-
Page 6: Electrical Connections
1014097-R05 Installation instructions 07/11/2017 Heat pump dryer One-family household 1014097-R05 3. Levelling To ensure fault-free operation, the appliance must stand level with all 4 feet firmly on the installation plate and not wobble. ▸ Roughly adjust the height of the front and rear adjuster feet. ▸... -
Page 7: Connecting Condensate Drain
1014097-R05 Installation instructions 07/11/2017 Heat pump dryer One-family household 1014097-R05 5. Connecting condensate drain When installing the drain hose, protect it against damage and kinks! ▸ Remove the pump cover A. ▸ Fasten the drain hose B to nozzle D using the hose clip C. - Page 8 1014097-R05 Installation instructions 07/11/2017 Heat pump dryer One-family household 1014097-R05 Washer-dryer combination: positioning side by side ▪ Maximum pumping height (with separately routed drainage pipe): 1.2 m ▪ Maximum pumping height (with combi drainage set): 0.7 m ▪ Can be connected to a double drain trap. Drainage into fixed upright outflow pipe with separately routed Drainage into fixed upright outflow pipe with combi drainage set drainage pipe:...
-
Page 9: Using For The First Time
1014097-R05 Installation instructions 07/11/2017 Heat pump dryer One-family household 1014097-R05 6. Using for the first time If the location of the appliance is changed, because of the heat pump it must stand in its final position for around 2 hours before it can be operated again. Failure to do this can result in damage to the appliance. When the appliance is connected to the power supply for the first time, it is possible to carry out a function test.


Need help?
Do you have a question about the Adora TSLQ WP and is the answer not in the manual?
Questions and answers