
Related Manuals for geo-FENNEL FL 210A


Summary of Contents for geo-FENNEL FL 210A
- Page 1 Bedienungsanleitung Users‘ manual Rotationslaser Rotating Laser Level FL 210A / FLG 210A-Green...
-
Page 2: Technische Daten
L IEFERUMFANG KIT CONSISTS OF Rotationslaser FL 210A, Empfänger FR 45 mit Rotating Laser Level FL 210A, receiver FR 45 Halteklammer, Akku und Ladegerät, Wand-/ with clamp for levelling staff, rechargeable Bodenauflage, Fernbedienung, magnetische battery and charger, floor-/wall mount, remote Zieltafel, Lasersichtbrille,Kunststoffkoffer, Be-... - Page 3 Temperaturbereich Temperature range rote Diode -10°C - +45°C red diode -10°C - +45°C grüne Diode 0°C - +40°C green diode 0°C - +40°C Laserdiode / Laserklasse Laser diode / laser class rote Diode 635 nm / 2 red diode 635 nm / 2 grüne Diode 532 nm / 3R green diode...
-
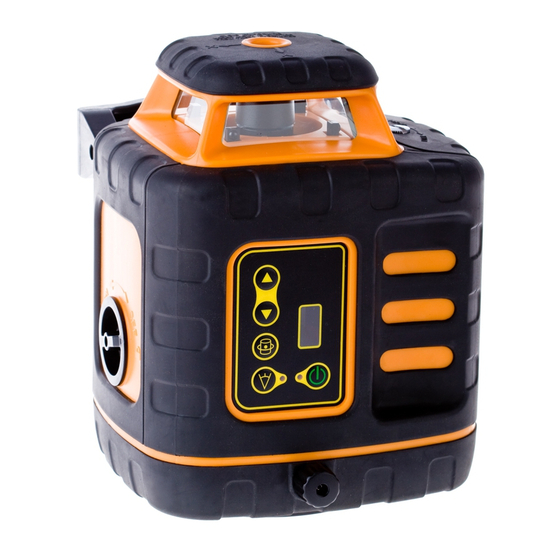
Page 4: Keypad Functions
T ASTATUR T ASTATUR 1) Libelle für Vertikaleinsatz 1) Vial for vertical use 2) An-/Aus-Schalter 2) On / Off key 3) An/Aus-LED 3) On/ Off LED 4) Scanningwinkel-LED 4) Scan angle LED 5) Scanningwinkel 5) Scan anlge 6) Rotationsgeschwindigkeit 6) Rotating speed 7) Auf- / Abtaste 7) Up / Down button TASTENBELEGUNG... -
Page 5: Power Supply
4 x C Alkaline batteries Das Gerät kann alternativ auch mit Alkaline- batterien betrieben werden. Verschluss am FL 210A / FLG 210A-Green can be used with Batteriefach (2) aufschrauben. Akkupacks Alkaline batteries alternatively. Open battery entnehmen. 4 x C Alkalinebatterien in das compartment cover (2). - Page 6 Das Gerät horizontiert sich in einem Bereich von Horizontal line is set level within range of +/- 3,5° automatisch, der Rotorkopf beginnt +/- 3,5°. Laser head starts rotating. The mit der Drehung, und die roten LEDs „POWER“ „POWER“ and „SCAN“ LEDs will show per- und „SCAN“...
-
Page 7: Remote Control
F ERNBEDIENUNG REMOTE CONTROL Die Tastenbelegung ist mit den Symbolen auf The keys of the remote control are identical dem Gerät identisch. Ausnahme: Mit der Taste with the keys of the instrument. Exception: „Power“ auf der Fernbedienung kann das Gerät With the „POWER“ key of the remote control nur aus-, jedoch nicht eingeschaltet werden. - Page 8 E MPFÄNGER FR 45 mit Halteklammer RECEIVER FR 45 with clamp BEDIENELEMENTE FEATURES 1) Libelle (2) 1) Vial (2) 2) Display 2) Display 3) Referenzmarke 3) Reference rabbet 4) Empfangsfenster 4) Receiving window 5) AN- / AUS-Schalter 5) ON / OFF switch 6) Lautsprecher 6) Loudspeaker 7) Batteriefach (Rückseite) 7) Battery compartment (back side) 8) Ton an / aus 8) Sound on / off...
- Page 9 SYMBOLE SYMBOLS 1) Empfänger an / aus 1) Power indicator 2) Batteriezustandsanzeige 2) Low battery indicator 3) Empfindlichkeitsindikator 3) Detection indicator 4) Ton an / aus 4) Sound indicator 5) Empfangsposition Laserstrahl 5) Detected position indicator GENAUIGKEITSEINSTELLUNG ACCURACY - fein - normal - grob - fine - normal - coarse Der FR 45 ist mit drei Genauigkeitsstufen aus- FR 45 is equipped with three precision modes.
-
Page 10: Installation Of Batteries
E INLEGEN DER BATTERIEN INSTALLATION OF BATTERIES • Batteriefachdeckel (7) öffnen. • Open battery compartment cover (7). • 1 x 9 V AA Batterie gemäß dem Installations- • Put in 1 x 9 V AA battery according to instal- symbol (auf der Rückseite) einlegen und dabei lation symbol (take care of correct polarity!). -
Page 11: Optionales Zubehör
O PTIONALES ZUBEHÖR O PTIONAL ACCESSORIES Aluminiumstativ Kurbelstativ Kurbelstativ Kurbelstativ Aluminium tripod Elevating tripod Elevating tripod Elevating tripod FS 23 FS 30-L FS 30-M FS 30-XL Länge / Length Länge / Length Länge / Length Länge / Length 105 -170 cm 90 - 285 cm 65 - 200 cm 166 - 380 cm Gewicht / Weight... -
Page 12: Care And Cleaning
Optionales Zubehör UMGANG UND PFLEGE CARE AND CLEANING • Messinstrumente generell bitte sorgsam be- • Please handle measuring instruments with handeln. care. • Nach Benutzung mit weichem Tuch reinigen • Clean with soft cloth only after any use. If (ggfs. Tuch etwas in Wasser tränken). Wenn necessary damp cloth with some water: If das Gerät feucht war, sorgsam trocknen. - Page 13 UMSTÄNDE, DIE DAS MESSERGEBNIS SPECIFIC REASONS FOR ERRONEOUS V ERFÄLSCHEN KÖNNEN M EASUREMENTS • Messungen durch Glas- oder Plastikscheiben; • Measurements through glass or plastic win- • verschmutzte Laseraustrittsfenster; dows; • Sturz oder starker Stoß. Bitte Genauigkeit • dirty laser emitting windows; überprüfen. • after instrument has been dropped or hit. •...
- Page 14 L ASERKLASSIFIZIERUNG FL 210A LASER CLASSIFICATION FL 210A • Das Gerät entspricht der Lasersicherheits- klasse 2 gemäß der Norm DIN EN 60825- • The instrument is a laser class 2 laser pro- 1:2007. duct according to DIN IEC 60825-1:2007. • Das Gerät darf ohne weitere Sicherheitsmaß- •...
-
Page 15: Elektromagnetische Verträglichkeit
ELEKTROMAGNETISCHE VERTRÄGLICHKEIT ELECTROMAGNETIC ACCEPTABILITY (EMC) • Es kann nicht generell ausgeschlossen werden, • It cannot be completely excluded that this dass das Gerät andere Geräte stört (z.B. Navi- instrument will disturb other instruments gationseinrichtungen); (e.g. navigation systems); • durch andere Geräte gestört wird (z.B. elektro- •... -
Page 16: Exceptions From Responsibility
Hersteller verursacht wurden. by wrong movement or action due to connec- ting with other products. geo-FENNEL GmbH Kupferstraße 6 D-34225 Baunatal Tel. +49 561 49 21 45 Fax +49 561 49 72 34 Email: info@geo-fennel.de...
Need help?
Do you have a question about the FL 210A and is the answer not in the manual?
Questions and answers