Table of Contents
Advertisement
Quick Links
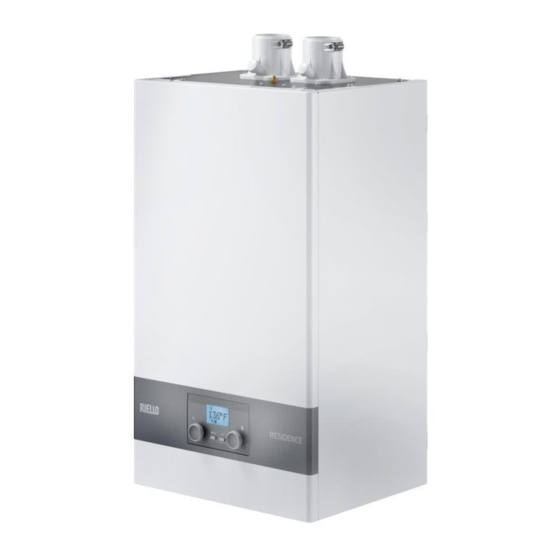
Residence PRO 32 KIS
INSTALLATION & OPERATING INSTRUCTIONS FOR CONTRACTORS
9
WARNING: If the information in this manual
is not followed exactly, a fire or explosion
may result causing property damage,
personal injury or loss of life.
Do not store or use gasoline or other flammable
vapors and liquids or other combustible
materials in the vicinity of this or any other
appliance. To do so may result in an explosion
or fire.
WHAT TO DO IF YOU SMELL GAS:
• Do not try to light any appliance.
• Do not touch any electrical switch; do not use
any phone in your building.
• Immediately call your gas supplier from a
neighbor's phone. Follow the gas supplier's
instructions.
• If you cannot reach your gas supplier, call the
fire department.
Installation and service must be performed by
a qualified installer, service agency or the gas
supplier.
This manual should be maintained in legible
condition and kept adjacent to the boiler or
in a safe place for future reference.
Advertisement
Table of Contents

Related Manuals for Riello Residence PRO 32 KIS


Summary of Contents for Riello Residence PRO 32 KIS
- Page 1 This manual should be maintained in legible condition and kept adjacent to the boiler or in a safe place for future reference. Residence PRO 32 KIS INSTALLATION & OPERATING INSTRUCTIONS FOR CONTRACTORS...
-
Page 2: Table Of Contents
CONTENTS 1 KEY TO SYMBOLS ......3 9 WIRING DIAGRAM ......36 Electrical diagram . -
Page 3: Key To Symbols
1 KEY TO SYMBOLS WARNING: Automatic filling systems are not recommended with this product as they will continually add fresh water to the system PAY ATTENTION TO THESE TERMS if there is a leak resulting in the addition of new contaminants that could reduce the lifespan of the boiler. -
Page 4: Safety
3 SAFETY − The boiler must not be installed on carpeting. − The boiler must only be installed on a wall. General safety − Do not restrict or seal any air intake or outlet openings. − If you find any defects, you must inform the owner of the To meet domestic hot water use needs, the high limit safety system of the defect and the associated hazard in writing. -
Page 5: Product Receipt
4 PRODUCT RECEIPT Installation at elevation Rated inputs are suitable for up to 10,000 ft (3048 m) elevation On receipt of your boiler it is suggested that you visually check (see technical data table). for external damage to the shipping package. No hardware changes are required to the boilers for installations If the package is damaged, make a note to that effect on the up to 10,000 ft (3048 m) (adjustments are required). -
Page 6: Structure
Structure Filling tap Condensate Trap Backflow preventer valve 4 Drain valve 5 Low Water Cutoff 6 Gas valve Injector 8 DHW sensor 9 Water Temperature High Limit 10 Supply sensor 11 Return sensor 12 Primary Heat exchanger 13 Flame sensor 14 Manual air vent hose 15 Manual upper air vent valve 16 Flue temperature sensor... -
Page 7: Boiler Front Control
Boiler front control Display Icons 136°F MODE MENU SOME OF THE ICONS SHOWN ON THE CONTROL RESET DEVICE SCREEN AT THE START-UP PHASE MIGHT NOT BE AVAILABLE DURING FUNCTIONNING. THIS DEPENDS ON YOUR BOILER CONFIGURATIONS The knob allows for the domestic hot water setpoint adjustment. adjustment It also allows you to switch from one step to another and change the value of the selected parameter within the PROGRAMMING menu. -
Page 8: Technical Data
Technical data Description Residence PRO 32 KIS (*) Country destination US/CAN Input - Output Btu/hr 85,000 Maximum CH input rate (0 - 2,000 ft / 0 - 610 m) 24.91 Btu/hr 120,000 Maximum DHW input rate (0 - 2,000 ft / 0 - 610 m) 35.17... - Page 9 Description Residence PRO 32 KIS (*) 15.81 (0 - 2,000 ft / 0 - 610 m) 0.45 16.28 (2,001 - 5,000 ft / 610 - 1,524m) 0.46 Min gas rate natural gas (A) 14.42 (5,001 - 7,500 ft / 1,524- 2,286 m) 0.41...
- Page 10 Description Residence PRO 32 KIS (*) CH system data lbs/hr Minimum relief valve capacity p.s.i. Maximum operating pressure 2.07 p.s.i. Minimum operating pressure ft. hd 4.38 Pump residual head at max flow rate mbar At system capacity of 1,000 °F Maximum temperature °C...
- Page 11 Description Residence PRO 32 KIS (*) Boiler dimensions and weight 29.13x13.7x16.5 Boiler dimensions (heigh - width- depht) 740x348x420 Weight net Components Burner Sermeta 54485 Main heat exchanger Sermeta 3+1+1 Afue 95 Gas valve Sit 849 Pump Grundfos UPS 15-58 Pressure relief valve...
-
Page 12: Hydraulic Circuit
Hydraulic circuit Residence PRO 32 KIS manual main heat air vent exchanger supply temperature return sensor temperature sensor expansion tank water temperature high limit Low water domestic hot water temperature sensor heat Cutoff exchanger check valve pump automatic air vent... - Page 13 9/16” 3/4” 9/16” 1/16” 13/16” 9/16” 7/8” 7/8” 9/16” 13/16” Residence PRO 32 KIS 3/4" NPT 1/2" NPT 3/4" NPT 1/2" NPT 3/4" NPT condensate check valve Hot water Cold water Heating return outlet 3/4" NPT inlet 3/4" NPT 1/2" NPT 1/2"...
-
Page 14: Dimensions And Connections
Dimensions and connections 3/4” 1/2” 7/8” 1/2” 1/4” 3/4” 1/16” 1/16” 15/16” 15/16” Recommended Minimum service clearances 1 in 1 in 13 3/4" 25 mm 25 mm 5 7/8" 18 in. 2 5/16" 6 15/16"... -
Page 15: Before Installation
6 BEFORE INSTALLATION Residential Garage Installation When installed in a residential garage, mount the boiler a strongly recommends that this manual be reviewed minimum of 18 in. [457 mm] above the floor. Locate or protect the thoroughly before installing your Residence PRO boiler. boiler so it cannot be damaged by a moving vehicle. -
Page 16: Prevent Combustion Air Contamination
NOTICE: The mounting bracket is shown for installation of the Residence PRO 32 KIS boiler. When an existing boiler is removed from a common venting system, the common venting system is likely to be too large for proper venting of the appliances remaining connected to it. -
Page 17: Boiler Template
Boiler template 7.2.1 Installation steps Prior to lifting the Residence PRO boiler onto the wall, use the RESIDENCE PRO 32 combi enclosed template to level and locate the wall bracket. - Fasten the boiler support plate to the wall and use a spirit level to make sure it is perfectly horizontal. -
Page 18: Installing The Condensate Check Valve
Note: The electronic low water cutoff located internally in the condensate pipe check valve Residence PRO 32 KIS is below the lowest safe permissible water level established by the boiler manufacturer. WARNING: The manufacturer is NOT responsible for any damage caused by the installation of the boiler without the 7.5.2... -
Page 19: Sizing Space Heat System Piping
7.5.3 Sizing space heat system piping WARNING: The boiler and its gas connections must be leak Size the piping and components in the space heating system tested before placing the boiler in operation. using recognized design methods. CAUTION: The boiler and its individual shut off valve must be NOTICE: The boiler, when used in connection with a disconnected from the gas supply piping system during any refrigeration system, must be installed so the chilled... - Page 20 7.7.1 OT and Room Thermostat connection to the boiler The Residence PRO 32 KIS boilers have the ability to communicate with OT (OpenTherm) thermostats such as the Riello RiCLOUD, sold as an accessory. When using the RiCLOUD thermostat it, or the WiFi box it is communicating with, needs to be connected to terminals 13 and 14 of the low voltage terminal box.
-
Page 21: Electrical Supply
A 3 way valve/pump card (BE09) is a available as an accessory for − Consult the local water treatment companies for unusually the Residence PRO 32 KIS. This card under normal circumstances hard water areas (above 9 grains hardness). allows the boiler to close a relay on the card to activate a device Chlorine concentration less than 50 ppm such as a pump when there is a call for heat. -
Page 22: Freeze Protection (When Used)
7.14 Initial filling of the system and air purge Test/replace glycol fluid − For systems using glycol fluids, follow glycol manufacturer’s instructions to verify the inhibitor level and that other fluid NOTE: The initial filling of the system and each later refill characteristics are satisfactory. -
Page 23: Draining The Heating Circuit Of The Boiler
WARNING: The venting of the boiler takes place automatically via the two air vent valves (A) and (D), the first positioned on the circulator while the second is inside the sealed combustion chamber. 7.16 Draining the heating circuit of the boiler Before draining the system, switch off the electrical supply by turning off the main switch of the system. -
Page 24: General Venting
DANGER: Ensure that the flow of combustion and ventilation of joining plastic vent and air-inlet pipes, explosive air are not obstructed. Riello requires users to install CO solvent vapors must be evacuated from the vent and air- detectors in buildings where the boiler is located, even inlet prior to start-up. -
Page 25: General Venting Rules And Guidelines
8.4 General Venting Rules and Guidelines For installations that exit the wall below grade: Excavate site to a point below where the pipes are to exit as - Prevailing Winds: Ensure the vent is located where it will not shown. be exposed to normal prevailing winds. -
Page 26: Combustion Air And Ventilation Openings
Existing Chimney Chase Way provisions of the local building codes. CAUTION: BOILER DAMAGE AND OPERATIONAL FAILURES! Exhaust Vent Provisions for combustion air and ventilation are always required through a grille, regardless whether the combustion air is taken from the outside (sealed combustion). Make sure that intake and exhaust openings are sufficiently Exhaust Vent Min. - Page 27 M i n . 1 2 " ( 3 0 5 m m ) M i n . 1 2 " ( 3 0 5 m m ) Intake Intake (*) above maximum snow level or at least 24” (610 mm) whichever is greater VENT/AIR-INLET TERMINATION CLEARANCES The quick reference table below is to be read in conjunction with the numbered notes as indicated in figures of the previous page, and the Venting Rules and Guidelines in Section 8.4.
- Page 28 Clearance to non-mechanical air supply inlet 12" (305mm) 3 ft. (0.9m) 3 ft. (0.9m) above Clearance to mechanical air supply inlet if within 10 ft. (3m) horizontally Clearance above paved sidewalk or paved driveway located on 7 ft. (2.1m)† 7 ft. (2.1m)† public property Clearance under veranda, porch, deck or balcony 12"...
- Page 29 APPROVED VENTING MATERIALS Standard Pipe diameter Material Item Standard [USA] [Canada] per boiler Flue gas or 2” (60mm) CPVC schedule 40 ANSI/ASTM F441 combustion air 3” (80mm) WARNING: all vent and air inlet 2” (60mm) materials installed PVC schedule 40 Combustion air ANSI/D1785 3”...
-
Page 30: Nearboiler Vent/Air-Inlet Piping
8.5.1 NearBoiler Vent/Air-inlet Piping WARNING: ABS/PVC venting is not approved for use as a an exhaust vent material. Failure to comply could result in The Residence PRO employs universal Exhaust-vent and Air- personal injury, death or property damage and could void inlet appliance adapters that accept 2 in. - Page 31 Fig. 1 Horizontal flue terminal 2/4 in. (ø 60-100 mm) PP flue Fig. 3 Vertical flue terminal 2/4 in. (Ø 60-100 mm) PP flue gases/air gases/air for flat roof Max length (L) 30 ft (9.14 m) Max length (L) 35 ft (10.67 m) Terminal length (L1) 2.33 ft (0.711 m) Terminal length (L1)
- Page 32 Fig. 5 Vertical flue terminal 3/5 in. (Ø 80-125 mm) PP flue Fig. 7 Twin flue system 2 in. PP (Ø 60 mm) gases/air for pitched roof Max length (L) 40.5 + 40.5 ft (12.34 + 12.34m) Max length (L) 45 ft (13.71 m) Max length (L1) 35.5 + 35.5 ft (10.82 + 10.82m)
- Page 33 Fig. 11 Twin flue system 2 in. (Ø 50,8 mm) with horizontal Fig. 9 Twin flue system 3 in. (Ø 80 mm) with horizontal terminal 3/5 in. PP flue gases/air terminal 3 in. (Ø 72,6 mm) CPVC Max length 25.5 + 25.5 ft (7.77 + 7.77m) Max length 76 + 76 ft (23.16 + 23.16m) part n...
- Page 34 Fig. 15 Horizontal twin flue system 3 in. (Ø 76,2 mm) with Fig. 13 Vertical twin flue system 2 in. (Ø 50,8 mm) with terminal terminal bend CPVC bend CPVC for pitched roof Max length 88 + 88 ft (26.82 + 26.82m) Max length 40.5 + 40.5 ft (12.34 + 12.34m) the expressed lengths are without the terminations...
- Page 35 Fig. 17 Twin flue system 3 in. (Ø 76,2 mm) with vertical terminal Fig. 19 Vertical twin flue system 3 in. (Ø 76,2 mm) with terminal 3 in. (Ø 76,2 mm) CPVC (L) bend CPVC for flat roof (L) Max length 82 + 82 ft (24.99 + 24.99m) Max length 94 + 94 ft (28.65 + 28.65m)
-
Page 36: Wiring Diagram
9 WIRING DIAGRAM Electrical diagram NOTE: L-N-E connection is advisable AKM11 Main PCB SC07 Front control BE21 24VAC Thermostat X1-X25 Connectors Jumper 1-2 enable zone valve management CN1-CN2-CN3A Connectors S.W.1 function button F .S. Flame sensor Fuse 4A T M3-M4 Terminal strip for electrical connection high power Terminal box... -
Page 37: Ladder Diagram
Ladder diagram 120V / 60 Hz / 1 ph MAINS MAINS CN1-1 CN1-2 CN1-4 CN3A-1 M20-6 NOTE 1 CN1-3 CN3A-2 M20-20 CN3A-3 M20-5 wire color code black CN2-1 X11-6 white CN2-2 X11-5 blue brown MAINS X1-3 X1-2 MAINS green yellow MAINS GND pink purple... -
Page 38: Lighting Instructions
10 LIGHTING INSTRUCTIONS There are several steps involved in starting up the boiler. POUR VOTRE SECURITE LISEZ FOR YOUR SAFETY AVANT DE METTRE EN MARCHE READ BEFORE OPERATING WARNING: AVERTISSEMENT: If you do not follow these instructions exactly, Quiconque ne respecte pas à la lettre les a fire or explosion may result causing property damage, instructions dans la présente notice risque de déclencher un incendie ou personal injury, or loss of life (death). -
Page 39: Commissioning
“RIELLO” text will appear. Press the “MODE/OK” button in order to stop the display testing Explain the user not to try to repair the boiler personally. -
Page 40: First Commissioning
AIR PURGING FUNCTION NOTICE: Each time the boiler is started up an automatic air purging cylce is carried out; lasting 2 min. When the air purging is in progress, all heat requests are inhibited and the sliding “AIR PURG.” message appears. MODE MENU blu (-) -
Page 41: Adjusting The Heating Water Temperature Without An Outdoor Temperature Sensor Connected
11.8 Adjusting the heating water temperature without an outdoor temperature sensor connected 136°F When there is no outdoor temperature sensor, the boiler operates at a fixed setpoint. If the central heating mode is active, to adjust the central heating temperature rotate the knob MODE MENU until the “... - Page 42 The display shows ”000”. Select the parameter by pressing the “MODE/OK” button. BOIL. MODE MENU MODE MENU RESET RESET Now you can enter the password menu. The password to access The display shows the value of the selected parameter. To modify the installer level is “018”.
-
Page 43: Hydraulic Configuration
Min DHW fan speed see technical data table [min:max] INSTALLER MIN Max DHW fan speed see technical data table [min:max] INSTALLER MAX Max CH fan speed see technical data table [min:max] INSTALLER MAX CH MAX CH ADJ not used [min:max] INSTALLER RANGE RATE 0 = enabled Night Comp... - Page 44 OUTDOOR TEMPERATURE RESET CURVES (°C) (°F) (°C) 13 - 22 - 31 - 40 - 49 - 58 - 67 - 76 - (°F) OUTSIDE TEMPERATURE (°C) − the display shows the value of the selected parameter. To modify it rotate one of the two knobs. −...
-
Page 45: Checks During And After The First Commissioning
By modifying HEATING on the user interface, the HEATING SET POINT − the display shows the value of the selected parameter. To will no longer be available but just a value that can be set from modify it rotate on one of the two knobs. +5 to -5 as required. -
Page 46: Lights And Faults / Reset Procedure
− confirm the parameter value by pressing the “MODE/OK” WARNING: The gas valve DOES NOT REQUIRE ADJUSTMENTS and button. the possible tampering can cause a malfunction or failure of the boiler which may result in substantial property damage, severe personal injury or death. NOTICE: When the sweeper function is in progress all the heat requests are inhibited. - Page 47 Boiler faults list ERROR DESCRIPTION OF TYPE ERROR MESSAGE CODE OF ALARM E010 flame lockout/ACF electronic fault definitive E011 parasitic flame transitional E020 water high limit/thermal fuse definitive E030 fan fault definitive E040 low water cutoff - check system water pressure definitive E041 low water cutoff - check system water pressure...
-
Page 48: Temporary Switch-Off
11.18 Temporary switch-off 11.20 Replacing of the PCB board In the event of temporary absences (weekends, short breaks, The configuration operations should be carried out by professionally qualified personnel. etc.) set the status of the boiler to OFF by pressing the “MODE/OK” When replacing the AKM11 electronic board, the spare part PCB is button until the display shows “-OFF-“. -
Page 49: Servicing Instructions
12 SERVICING INSTRUCTIONS WARNING: Properly reassemble and reseal the air-vent system, follow the vent manufacturer’s instructions in their 12.1 General entirety. To ensure the continued safe and efficient operation of the WARNING: Failure to properly reassemble and reseal the boiler, it is recommended that it is checked and serviced at air-vent system may result in substantial property damage, regular intervals. -
Page 50: Maintenance Of The Combustion Control System
12.3 Maintenance of the combustion control system Flame sensor The flame/ionization sensor has an important function in the boiler ignition phase and in the maintenance of proper combustion; in case of replacement, it is necessary to always ensure that it is correctly positioned and to strictly observe the reference shown in the figure below. -
Page 51: Annual Servicing Check List
Gas and Propane Installation Code. Failure to do so may result in substantial property damage, severe injury or death. WARNING: This document is intended as a guideline only, the Riello Residence PRO 32 KIS US/CAN Installation & Operations Instructions For Contractors must be read and followed in its entirety. Failure to do so may result... -
Page 52: Warranty
Company) warrants to the original purchaser or original For Contractors (service records or proof of maintenance user that all RIELLO GAS FIRED WALL HUNG BOILERS sold by it and documentation are required). all parts thereof are free of defects in material or workmanship −... -
Page 53: Commonwealth Of Massachusetts
14 COMMONWEALTH OF MASSACHUSETTS 14.1 Important instructions for the (b) EXEMPTIONS commonwealth of Massachusetts The following equipment is exempt from 248 CMR 5.08(2)(a)1 through 4: The Commonwealth of Massachusetts requires compliance with regulation 248 CMR 4.00 and 5.00 for installation of through – The equipment listed in Chapter 10 entitled “Equipment Not the –... - Page 54 ...
- Page 55 ...
- Page 56 NORTH AMERICAN DISTRIBUTOR: Evergreen Products International Inc. 1815 Sismet Rd. Mississauga, ON L4W 1P9 RIELLO S.p.A. CANADA Via Ing. Pilade Riello, 7 - Technical Support Hotline: 1.844.387.4663 37045 - Legnago (VR) - Email: info@egproductsolutions.com Italy Professional Resources: egproductsolutions.com The Company is constantly working to perfect all of its production processes, therefore the aesthetics and size, technical data,...
Need help?
Do you have a question about the Residence PRO 32 KIS and is the answer not in the manual?
Questions and answers