
Related Manuals for Zanussi ZOB31301WK


Summary of Contents for Zanussi ZOB31301WK
- Page 1 User Manual GETTING STARTED? EASY. ZOB31301WK ZOB31301XK EN User Manual Oven FR Notice d'utilisation Four...
-
Page 2: Safety Information
SAFETY INFORMATION Before the installation and use of the appliance, carefully read the supplied instructions. The manufacturer is not responsible for any injuries or damages that are the result of incorrect installation or usage. Always keep the instructions in a safe and accessible location for future reference. -
Page 3: Safety Instructions
Ensure that the appliance is switched off before replacing the • lamp to avoid the possibility of electric shock. Do not use a steam cleaner to clean the appliance. • Do not use harsh abrasive cleaners or sharp metal scrapers to •... -
Page 4: Internal Light
• Do not change the specification of this CARE AND CLEANING appliance. WARNING! Risk of injury, fire, or • Make sure that the ventilation openings are not damage to the appliance. blocked. • Do not let the appliance stay unattended during •... -
Page 5: Product Description
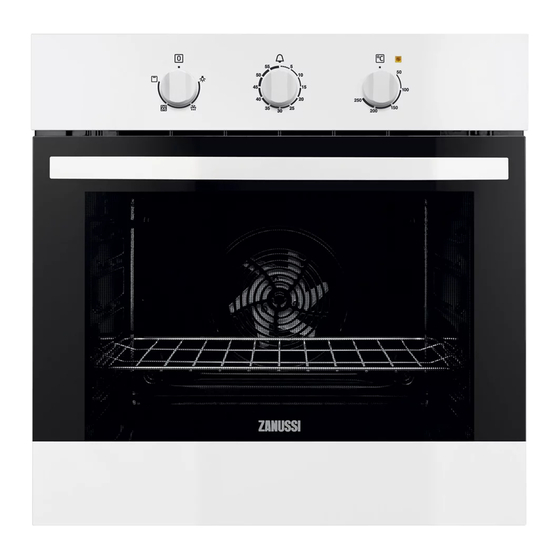
PRODUCT DESCRIPTION GENERAL OVERVIEW Control panel Knob for the oven functions Knob for the timer Knob for the temperature Temperature indicator / symbol Heating element Lamp Shelf positions ACCESSORIES For roasting and grilling. • Wire shelf Use the trivet only with the Grill- / For cookware, cake tins, roasts. -
Page 6: Clock Functions
ACTIVATING AND DEACTIVATING THE 1. Turn the knob for the oven functions to select APPLIANCE an oven function. 2. Turn the knob for the temperature to select a It depends on the model if your temperature. appliance has lamps, knob 3. -
Page 7: Additional Functions
1. Put the trivet into the deep pan so that the supports of the wire shelf point up. Deep pan: Push the deep pan between the guide bars of the 2. Put the deep pan into the oven on the shelf support. - Page 8 • Moisture can condense in the appliance or on COOKING MEAT AND FISH the door glass panels. This is normal. Always • Use a deep pan for very fatty food to prevent the stand back from the appliance when you open oven from stains that can be permanent.
- Page 9 True Fan Cooking Food Time (min) Comments Temperature (°C) Shelf position Small cakes - 140 - 150 2 and 4 25 - 35 In a baking tray two levels Small cakes - 140 - 150 1, 3 and 5 30 - 45 In a baking tray three levels Biscuits / pastry...
- Page 10 Bread and pizza True Fan Cooking Food Time (min) Comments Temperature (°C) Shelf position 60 - 70 1 - 2 pieces, White bread 500 gr per piece Rye bread 30 - 45 In a bread tin 2 (2 and 4) 25 - 40 6 - 8 rolls in a Bread rolls...
- Page 11 True Fan Cooking Food Time (min) Comments Temperature (°C) Shelf position English roast 50 - 60 On a wire shelf beef, rare English roast 60 - 70 On a wire shelf beef, medium English roast 70 - 75 On a wire shelf beef, well done Shoulder of pork 120 - 150...
- Page 12 Quantity Time (min) Temperature Shelf posi- Food (°C) tion Pieces 1st side 2nd side Fillet max. 12 - 15 12 - 14 steaks Beef max. 10 - 12 6 - 8 steaks Sausages max. 12 - 15 10 - 12 Pork max.
-
Page 13: Drying - True Fan Cooking
Defrosting time Further defrosting Food Quantity (g) Comments (min) time (min) Cream 2 x 200 80 - 100 10 - 15 Cream can also be whip- ped when still slightly fro- zen in places. Gateau 1400 DRYING - TRUE FAN COOKING •... -
Page 14: Stainless Steel Or Aluminium Appliances
• To clean metal surfaces, use a dedicated CLEANING THE DOOR GASKET cleaning agent. • Regularly do a check of the door gasket. The • Clean the appliance interior after each use. Fat door gasket is around the frame of the oven accumulation or other food remains may result cavity. -
Page 15: Replacing The Lamp
REPLACING THE LAMP Put a cloth on the bottom of the interior of the appliance. It prevents damage to the lamp glass cover and the cavity. WARNING! Danger of electrocution! Disconnect the fuse before you replace the lamp. The lamp and the lamp glass cover can be hot. -
Page 16: Service Data
Problem Possible cause Remedy The oven does not heat up. The fuse is blown. Make sure that the fuse is the cause of the malfunction. If the fuse is blown again and again, contact a qualified electrician. The lamp does not operate. The lamp is defective. -
Page 17: Securing The Appliance To The Cabinet
BUILDING IN SECURING THE APPLIANCE TO THE CABINET min. 550 min. 560 ELECTRICAL INSTALLATION min. 550 The manufacturer is not responsible if you do not follow the safety min. 560 precautions from the Safety chapters. This appliance is supplied without a main plug and a main cable. -
Page 18: Energy Efficiency
ENERGY EFFICIENCY PRODUCT FICHE AND INFORMATION ACCORDING TO EU 65-66/2014 Supplier's name Zanussi ZOB31301WK Model identification ZOB31301XK Energy Efficiency Index 101.2 Energy efficiency class Energy consumption with a standard load, fan-forced mode 0.85 kWh/cycle Number of cavities Heat source Electricity... -
Page 19: Informations De Sécurité
INFORMATIONS DE SÉCURITÉ Avant d'installer et d'utiliser cet appareil, lisez soigneusement les instructions fournies. Le fabricant ne pourra être tenu pour responsable des blessures et dégâts résultant d'une mauvaise installation ou utilisation. Conservez toujours les instructions dans un lieu sûr et accessible pour vous y référer ultérieurement. SÉCURITÉ... -
Page 20: Consignes De Sécurité
8 ans doivent être tenus à l'écart, à moins d'être surveillés en permanence. Utilisez toujours des gants de cuisine pour retirer ou enfourner • des accessoires ou des plats allant au four. Avant toute opération de maintenance, déconnectez • l'alimentation électrique. Assurez-vous que l'appareil est éteint et débranché... - Page 21 • Ne branchez la fiche d'alimentation à la prise de AVERTISSEMENT! Risque courant qu'à la fin de l'installation. Assurez-vous d'endommagement de l'appareil. que la prise de courant est accessible une fois l'appareil installé. • Pour éviter tout endommagement ou • Si la prise de courant est lâche, ne branchez décoloration de l'émail : pas la fiche d'alimentation secteur.
-
Page 22: Maintenance
• Nettoyez l'appareil avec un chiffon doux humide. • N'utilisez que des ampoules ayant les mêmes Utilisez uniquement des produits de lavage spécifications. neutres. N'utilisez pas de produits abrasifs, de MISE AU REBUT tampons à récurer, de solvants ni d'objets métalliques. -
Page 23: Utilisation Quotidienne
2. Laissez l'appareil en fonctionnement pendant Reportez-vous au chapitre « Entretien 1 heure. et nettoyage ». 3. Sélectionnez la fonction et réglez la température maximale. Nettoyez l'appareil et les accessoires avant de les 4. Laissez l'appareil en fonctionnement pendant utiliser pour la première fois. 15 minutes. -
Page 24: Fonctions De L'horloge
Fonction du four Utilisation Gril Pour faire griller des aliments peu épais et du pain. FONCTIONS DE L'HORLOGE MINUTERIE 1. Sélectionnez une fonction du four et la température. Utilisez cette fonction pour régler un minuteur pour 2. Tournez la manette du minuteur au maximum, une fonction du four. -
Page 25: Fonctions Supplémentaires
2. Placez le plat à rôtir dans le four, au niveau de grille souhaité. FONCTIONS SUPPLÉMENTAIRES VENTILATEUR DE REFROIDISSEMENT surchauffe dangereuse. Pour éviter cela, le four dispose d'un thermostat de sécurité interrompant Lorsque l'appareil est en cours de fonctionnement, l'alimentation électrique. Le four se remet le ventilateur de refroidissement se met automatiquement en fonctionnement lorsque la automatiquement en marche pour refroidir les... -
Page 26: Temps De Cuisson
se condense, ajoutez à nouveau de l'eau dans le Au départ, surveillez la cuisson lorsque vous plat à rôtir à chaque fois qu'il n'en contient plus. cuisinez. Ainsi, vous trouverez les meilleurs réglages (fonction, temps de cuisson, etc.) pour TEMPS DE CUISSON vos ustensiles, vos recettes et les quantités lorsque vous utiliserez l'appareil. - Page 27 Chaleur tournante Plat Durée (min) Commentaires Positions des gril- Température (°C) Petits gâteaux - 140 - 150 1, 3 et 5 30 - 45 Sur un plateau sur trois niveaux de cuisson Biscuits/Tresses 140 - 150 30 - 35 Sur un plateau feuilletées - sur de cuisson un seul niveau...
- Page 28 Pain et pizza Chaleur tournante Plat Durée (min) Commentaires Positions des gril- Température (°C) 60 - 70 1 à 2 pièces, Pain blanc 500 g par pièce Pain de seigle 30 - 45 Dans un moule à pain 2 (2 et 4) 25 - 40 6 à...
- Page 29 Viande Chaleur tournante Plat Durée (min) Commentaires Positions des gril- Température (°C) Viande de bœuf 50 - 70 Sur une grille métallique Porc 90 - 120 Sur une grille métallique Veau 90 - 120 Sur une grille métallique Rôti de bœuf, 50 - 60 Sur une grille saignant...
- Page 30 GRIL Préchauffez votre four à vide pendant 3 minutes avant la cuisson. Quantité Durée (min) Température Positions Plat (°C) des grilles Morceaux 1re face 2e face Filet de max. 12 - 15 12 - 14 bœuf Steaks de max. 10 - 12 6 - 8 bœuf Saucisses...
-
Page 31: Déshydratation - Chaleur Tournante
Durée de dé- Décongélation com- Plat Quantité (g) congélation Commentaires plémentaire (min) (min) Viande 1000 100 - 140 20 - 30 Retournez à la moitié du temps. Viande 90 - 120 20 - 30 Retournez à la moitié du temps. Truite 25 - 35 10 - 15... -
Page 32: Entretien Et Nettoyage
Fruits Positions des grilles Plat Température (°C) Durée (h) 1 position 2 positions Prunes 60 - 70 8 - 10 1 / 4 Abricots 60 - 70 8 - 10 1 / 4 Pommes, lamel- 60 - 70 6 - 8 1 / 4 Poires 60 - 70... - Page 33 Ouvrez complètement la porte et saisissez les 2 charnières de porte. Soulevez et faites tourner les leviers sur les 2 charnières. Fermez la porte du four à la première position d'ouverture (mi-parcours). Tirez la porte vers l'avant et retirez-la de son logement. Déposez la porte sur une surface stable recouverte d'un tissu doux.
-
Page 34: En Cas D'anomalie De Fonctionnement
Éclairage arrière 3. Remplacez l'ampoule par une ampoule 1. Retirez le diffuseur en verre de l'ampoule en le adéquate résistant à une température de tournant vers la gauche. 300 °C. 2. Nettoyez le diffuseur en verre. 4. Replacez le diffuseur en verre. EN CAS D'ANOMALIE DE FONCTIONNEMENT AVERTISSEMENT! Reportez-vous aux chapitres concernant la sécurité. -
Page 35: Installation Électrique
ENCASTREMENT FIXATION DE L'APPAREIL AU MEUBLE min. 550 min. 560 INSTALLATION ÉLECTRIQUE min. 550 Le fabricant ne pourra être tenu pour responsable si vous ne respectez pas les précautions de sécurité du min. 560 chapitre « Consignes de sécurité ». Cet appareil est livré... -
Page 36: Rendement Énergétique
RENDEMENT ÉNERGÉTIQUE FICHE DU PRODUIT ET INFORMATIONS CONFORMÉMENT À LA NORME EU 65-66/2014 Nom du fournisseur Zanussi ZOB31301WK Identification du modèle ZOB31301XK Index d'efficacité énergétique 101.2 Classe d'efficacité énergétique Consommation d'énergie avec charge standard et mode air 0.85 kWh/cycle pulsé... - Page 40 WWW.ZANUSSI.COM/SHOP...
Need help?
Do you have a question about the ZOB31301WK and is the answer not in the manual?
Questions and answers