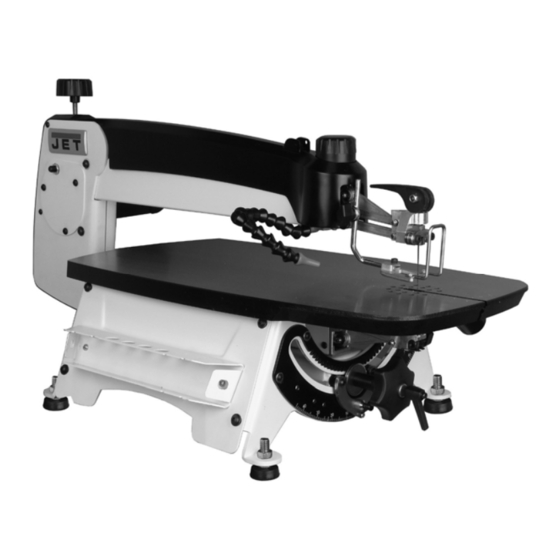
Jet JWSS-22B Operating Instructions Manual
Scroll saw
Hide thumbs
Also See for JWSS-22B:
- Operating instructions manual (32 pages) ,
- Operating instructions manual (55 pages)
Table of Contents
Advertisement
Quick Links
Advertisement
Table of Contents

Related Manuals for Jet JWSS-22B


Summary of Contents for Jet JWSS-22B
- Page 1 Scroll Saw JWSS-22B Original: Operating Instructions Translations: Gebrauchsanleitung Mode d´emploi JPW (Tool) AG Tämplerlistrasse 5 CH-8117 Fällanden Switzerland Phone +41 44 806 47 48 +41 44 806 47 58 www.jettools.com M-727200BM 2016 -09...
- Page 2 CE-Konformitä tserklä rung Dé claration de conformité CE Product / Produkt / Produit: Scroll Saw DDekupiersäge JWSS-22B 727200BM Brand / Marke / Marque: Manufacturer / Hersteller / Fabricant: JPW (Tool) AG, Tämperlistrasse 5, CH-8117 Fällanden, Switzerland We hereby declare that this product complies with the regulations Wir erklären hiermit, dass dieses Produkt der folgenden Richtlinie entspricht...
-
Page 3: Table Of Contents
Dear Customer, Many thanks for the confidence you have shown in us with the purchase of your new JET-machine. This manual has been prepared for the owner and operators of a JET JWSS-22B Scroll Saw to promote safety during installation, operation and maintenance procedures. -
Page 4: General Safety Notes
The workpiece must allow to safely be loaded and supported. The proper use also includes compliance with the operating and maintenance instructions given in this manual. Do not wear gloves while operating this machine. The machine must be operated only by persons familiar with its operation and maintenance and who are familiar with its hazards. -
Page 5: Remaining Hazards
Always use a suitable dust collection device The rotating workpiece can cause injury. Before machining, remove any nails and other foreign Workpieces that are inhomogeneous or weak can bodies from the workpiece. explode when being processed due to centrifugal force. Make sure to guide and hold the chisel with both hands safe and tight during machining. -
Page 6: Technical Data
T Hold-down 4 x Rubber washer – (HP5) U Blade Nozzle V Arm Lift Retension Screw Stand ((JET Option # 727200S) W Magnetic On/ Off Switch Refer to Figure 8, (5.3 Mounting to bench or stand) X Motor 2 x Long top braces – (#3) 2 x Short top braces –... -
Page 7: Transport And Start Up
Always lift JET stand. If mounting to a workbench, use a pad using motor and edge of table (Figure 5). (provided rubber washers) between saw and bench... -
Page 8: Assembling Stand (Optional)
Figure 8: stand assembly (optional accessory) 5.5 Blade storage The blade rack (Figure 9) can be mounted to either side of the scroll saw. It contains holes for storage of blades inside “test tubes” (not provided). Additionally, four slots provide storage for blades pre-inserted into a blade holder. -
Page 9: Installing Blade
of saw to release guide. Push blade holder into clip (E) while guiding blade through table slot. Push top end of blade into upper guide (F), making sure it rests between the contact points of guide set screws. Flip clamping lever (D) toward rear of saw to tension blade. -
Page 10: Adjusting Blade Tension
6.3 Adjusting blade tension Figure 15: arm adjustment knob If blade refuses to be clamped tightly according to the above steps, one or both of the following adjustments may be needed (Figure 14): 6.4 Material hold-down Upper clamp spring pressure can be adjusted Refer to Figure 16. -
Page 11: Adjusting Blade Oscillation
This adjustment is based upon user’s preference; as the scroller gains experience, he/she will get a feel for the oscillation that is most efficient for the work at hand. Turn off saw and unplug. First verify that upper arm is parallel to table surface (Figure 19). -
Page 12: Arm Lift Retention
Slowly rotate entire motor by hand to adjust Blade should have minimum 3 teeth in contact oscillation. Clockwise rotation will make blade with workpiece at all times. movement more aggressive on downstroke. Make relief cuts as needed to prevent binding Counter-clockwise will make blade more of blade in workpiece. -
Page 13: Procedure
Figure 24: outside curve cutting For fretwork (inside cutting): Figure 22-1 Drill pilot holes in workpiece just large enough for blade insertion. 7.3 Procedure Release clamp lever (D, Figure 25) and raise arm. Install blade appropriate for desired operation. Make sure blade is properly tensioned, and Guide blade through pilot hole in workpiece. -
Page 14: Lubrication
Keep the table clean. Periodically apply a light coat 8.4 Commutator brush inspection of paste wax or spray protectant to the table to To maintain motor efficiency, inspect the two prevent rust and maintain a smooth surface. carbon brushes every two months, or more frequently if saw is heavily used. -
Page 15: Width
The following information is general in nature. The scroller is encouraged to research specific options to meet project needs. Note that the same specifications may vary among manufacturers. A wide array of blades are available for the scroll saw. Woodworking blade sizes range from #3/0 to #12. -
Page 16: Trouble Shooting
Inspect all connections on motor for loose or shorted Regular: Standard blade form with evenly spaced terminals or worn insulation. teeth and zero-degree rake angle. Offers clean cuts at slower feed rates. Tilting mechanism difficult to move. Skip Tooth: More space between teeth, for good *Caked dust or other obstruction in trunnion chip removal and fast cuts. - Page 17 Stock number 727201 Lower Blade Holder (set of 3)
Need help?
Do you have a question about the JWSS-22B and is the answer not in the manual?
Questions and answers