Roland V-02HD Reference Manual
Multi-format video mixer
Hide thumbs
Also See for V-02HD:
- Startup manual (11 pages) ,
- Owner's manual (2 pages) ,
- Startup manual (10 pages)
Table of Contents
Advertisement
Quick Links
Contents
2
2
4
6
7
7
7
8
8
8
9
9
10
10
11
12
12
13
14
14
16
18
19
20
22
22
23
24
24
25
Use the "V-02HD RCS" dedicated software
to back up and restore settings
You can use the "V-02HD RCS" dedicated software to back up
the settings of the V-02HD to a USB-connected computer, and
restore backed-up settings when needed.
You can download "V-02HD RCS" from the Roland website.
https://proav.roland.com/
* For details on operation, refer to the Owner's Manual included with
V-02HD RCS.
Reference Manual
26
26
27
28
29
29
30
30
31
32
32
32
33
34
36
38
39
39
40
41
41
43
43
44
46
47
© 2018 Roland Corporation
Advertisement
Table of Contents

Subscribe to Our Youtube Channel
Related Manuals for Roland V-02HD


Summary of Contents for Roland V-02HD
-
Page 1: Table Of Contents
Reference Manual Use the “V-02HD RCS” dedicated software to back up and restore settings You can use the “V-02HD RCS” dedicated software to back up the settings of the V-02HD to a USB-connected computer, and restore backed-up settings when needed. -
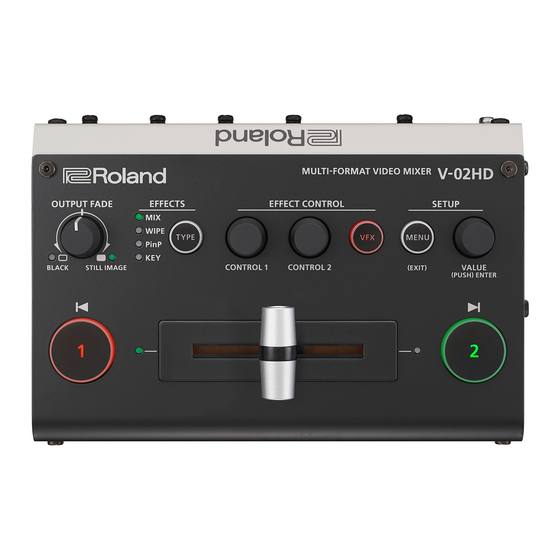
Page 2: Operating Guide (Panel Description)
Operating Guide (Panel Description) Front Panel 9 Fading video and audio in or out (p. 19) 9 Outputting a captured still image (p. 20) [OUTPUT FADE] knob Fade-in Turn counterclockwise from the center The indicators located at the left and right The program output video and audio fade in/out simultaneously. - Page 3 PROGRAM OUT connector. This is the video that is seen by the people who are This is used when attaching the V-02HD to a commercially watching the live stream or presentation. available camera tripod. The socket is threaded for a 1/4” screw.
-
Page 4: Rear Panel
HDMI input connector. * Use only the specified expression pedal (EV-5, BOSS FV-500L, or FV-500H he V-02HD menu is shown on the display that’s connected sold separately). By connecting any other expression pedals, you risk to the PREVIEW OUT connector. - Page 5 Operating Guide (Panel Description) * Do not block the ventilation openings (the slits located on the front and side panels, etc.). If the ventilation openings are blocked, the internal temperatures may rise, causing malfunctions due to excessive heat. PHONES ( ) jack [PHONES] knob AUDIO IN jack...
-
Page 6: Connecting A Footswitch
Operating Guide (Panel Description) Connecting a Footswitch FS-5U x 2 FS-5U x 1 FS-6 FS-7 Stereo 1/4” phone type 1/4” phone type Stereo 1/4” phone type Stereo 1/4” phone type Stereo 1/4” phone type 1/4” phone type x 2 1/4” phone type Stereo 1/4”... -
Page 7: Basic Operations
Here’s how to access the menu, and make video/audio settings and * Before turning the unit on/off, always be sure to turn the volume settings for the V-02HD itself. The menu is shown on the display that’s down. Even with the volume turned down, you might hear some connected to the PREVIEW OUT connector. -
Page 8: Video Input/Output Settings
Here’s how to specify the output format as appropriate for the device Input video formats that’s connected. NOTE Frame rate If the display does not support the V-02HD’s output format, the When set to “59.94 Hz” When set to “50 Hz” image might not be shown correctly. 480/59.94i 576/50i 720/59.94p... -
Page 9: Specifying The Input Format (Edid)
EDID is data that is transmitted from the V-02HD to the source device when the V-02HD is connected to a source device. EDID contains data such as the formats that can be input to the V-02HD (resolution, color space, color depth) and audio information. -
Page 10: Adjusting The Input Video
Video Input/Output Settings Adjusting the Input Video Outputting the Program Video from the PREVIEW OUT Connector Here’s how to adjust the character and scaling of the video that’s input to INPUT 1 and 2. Here’s how you can output the program video to the display that’s connected to the PREVIEW OUT connector. -
Page 11: Inputting Copy-Protected (Hdcp) Video
Video Input/Output Settings Inputting Copy-Protected (HDCP) Video If you want to input HDCP-protected video from a BD player or other device, you can enable HDCP input. * If you want to output HDCP-protected video, connect an HDCP- capable display. What’s HDCP? HDCP is copyright-protection technology that prevents unlawful copying of content by encoding the path when sending digital signals from a video playback device to a display monitor or... -
Page 12: Video Operations
Video Operations Using Mix/Wipe to Switch Video (MIX/WIPE) Here’s how to switch between input video while applying an effect, and output the program. Press the [TYPE] button several times to select the <Using the fader to switch> transition effect (MIX, WIPE). Slide the video fader to the far left or far right. -
Page 13: Using Picture-In-Picture To Composite Video (Pinp)
Video Operations Using Picture-In-Picture to Composite Video (PinP) Here’s how to composite an inset screen (a small separate screen) onto the background video. Inset screen Press the [2] button. Background video The inset screen is composited with the background video, and output as the program. -
Page 14: Using A Key To Composite Video (Key)
Video Operations Using a Key to Composite Video (KEY) Here’s how you can turn a portion of the video transparent and composite it with the background video. You can use luminance key with either a black or a white background, or a chroma key with either a blue or green background. Compositing a Logo or Image (Luminance Key) You can cut out a logo or image by turning its black or white portion transparent, and then superimpose it on the background video. - Page 15 Video Operations MEMO 5 The fade time over which the logo/image appears or disappears when you press the [2] button is specified by the setting of the TRANSITION menu item “KEY TIME. ” 5 You can also use the video fader to show or hide the logo/ image.
-
Page 16: Compositing A Subject And Background (Chroma Key)
Video Operations Compositing a Subject and Background (Chroma Key) You can cut out a video by turning its blue or green portion transparent, and then superimpose it on the background video. This lets you composite a subject that’s photographed against a blue background or green background. Video to be Compositing using chroma key superimposed... - Page 17 Video Operations MEMO To specify a desired color as the key color 5 The fade time with which the video superimposed by the [2] (sampling marker) button appears or disappears is specified by the TRANSITION menu item “KEY TIME. ” You can specify the key color to be made transparent simply by 5 You can also reveal or hide the superimposed video by sampling (detecting) a color from the video.
-
Page 18: Applying A Visual Effect To The Video (Vfx)
Video Operations Applying a Visual Effect to the Video (VFX) Here’s how you can apply an effect to the entire video, such as varying the video’s color or shape. You can apply a visual effect even while using picture-in-picture (p. 13) or key (p. 14, 16) to composite the video. Selecting a visual effect Applying visual effects [MENU] button 0 “VFX”... -
Page 19: Applying A Fade To The Program Output Video
Video Operations Applying a Fade to the Program Output Video (Output Fade) Here’s how to perform a fade-out from the program output video to a black screen, or a fade-in from a black screen to the program output video. You can insert a black screen into the program output video at times where you don’t want to output a picture, such as at intervals in presentations or band performances. -
Page 20: Using A Captured Still Image
Video Operations Using a Captured Still Image A still image captured from the input video can be output in the same way as the video. You can also use it as a source for key compositing (p. 14, 16). Specifying how the still image is saved Capturing a still image The captured still image can be saved in either of two ways: saved Here’s how to capture a still image from the input video. - Page 21 Video Operations < To capture by operating the menu > Outputting a Still Image [MENU] butto 0 “ CAPTURE IMAGE ” 0 select “ CAPTURE Turn the [OUTPUT FADE] knob fully clockwise. SOURCE.” The [OUTPUT FADE] knob indicator is lit red, and the still image is output from preview/program.
-
Page 22: Audio Operations
It indicates a too-low volume level. * If the volume level of speaker output is unsuitable even when the volume level on the V-02HD has been adjusted so that level meter light up in yellow, adjust the volume for the speakers and amplifiers. -
Page 23: Applying Effects To Input Audio
Correcting a time difference between video and audio (delay) The V-02HD provides effect presets that are appropriate for specific environments. Simply by selecting a preset you can easily apply the Here’s how you can correct a time difference between the video and appropriate effect for your purpose. -
Page 24: Applying Effects To Output Audio
Audio Operations Applying Effects to Output Audio Silencing Only Specific Audio (Mute) You can modify the tonal character by applying effects to the audio Here’s how to temporarily silence specific input audio or output output. audio (the mute function). Muting input audio [MENU] button 0 “AUDIO OUTPUT”... -
Page 25: Interlinking Audio Output To Video Switching
Audio Operations Interlinking Audio Output to Video Switching (Audio Follow) Here’s how the audio output can be automatically switched in tandem with video switching (the audio follow function). When you switch video, only the audio of the currently selected input video is output, and the audio of the other input video is automatically muted. Applying audio follow to the audio from AUDIO IN As described in “Adjusting the Volume Level”... -
Page 26: Other Features
About the last memory function The V-02HD has a built-in Last Memory feature. Last Memory is a feature that saves the state of the unit that is in effect immediately before power-down, and automatically restores the state at the next startup. The Last Memory feature is enabled by default. If you want the unit to recall a specific preset memory when it starts up, use the PRESET MEMORY menu item “START UP”... -
Page 27: Using A Footswitch
Other Features Using a Footswitch You can use a footswitch connected to the V-02HD to control the V-02HD with your foot. You can assign various functions to the footswitch. [MENU] button 0 “ CTL/EXP” 0 select “ CTL/EXP TYPE .”... -
Page 28: Using An Expression Pedal
Other Features Using an Expression Pedal You can use an expression pedal connected to the V-02HD to control the V-02HD with your foot. Adjusting the pedal (pedal calibration) Assigning a function to the pedal The first time you use an expression pedal, you must calibrate (adjust) You can assign various functions to the expression pedal. -
Page 29: Preventing Unintended Operation (Panel Lock)
(Factory Reset) Here’s how you can lock the V-02HD’s buttons and knobs to prevent Here’s how you can return the settings of the V-02HD to their factory- unintended operation. set state. If following the procedures described in this manual does not cause the result you expect, try executing a factory reset. -
Page 30: Menu List
SVGA (800 x 600) Specifies the input format (EDID). XGA (1024 x 768) If this is “INTERNAL, ” EDID information for all formats that can be input to the V-02HD will WXGA (1280 x 800) be transmitted. FWXG (1366 x 768) -
Page 31: 2: Video Output
Menu List 2: VIDEO OUTPUT Menu item Value Explanation (bold text: default value) PROGRAM OUT Adjusts the program output video (the video that is output from the PROGRAM OUT connector). Displays information about the output video (format and presence or absence of an HDCP OUTPUT STATUS —... -
Page 32: 3: Transition Time
Menu List 3: TRANSITION TIME Menu item Value Explanation (bold text: default value) MIX/WIPE TIME 0.0–1 0–4.0sec Specifies the video transition time. Specifies the fade time with which the inset screen appears or disappears when using Picture in PinP TIME 0.0–1 0–4.0sec Picture (PinP) compositing. -
Page 33: 6: Key
Menu List 6: KEY Menu item Value Explanation (bold text: default value) Specifies the source of the logo or video that is overlaid when using key compositing. KEY SOURCE INPUT 1, 2 The video of INPUT 1 or 2 STILL IMAGE A captured still image Specifies the key type used during key composition. -
Page 34: 7: Vfx
Menu List 7: VFX The menu items named “CONTROL 1–” and “CONTROL 2–” for each visual effect can be controlled by the [CONTROL 1] and [CONTROL 2] knobs when the visual effect is on. Menu item Value Explanation (bold text: default value) Turns the visual effect on/off. - Page 35 Menu List VFX TYPE = RGB REPLACE (Exchanges the colors.) Menu item Value Explanation (bold text: default value) G, G.B.R, R.B.G, G.R.B, B.G.R CONTROL 1 TYPE OFF (R.G.B), Specifies the type of RGB replace. CONTROL 2 N/A - - - (no settings) —...
-
Page 36: 8: Audio Input
Menu List VFX TYPE = HUE OFFSET (Changes the visual character by controlling the hue.) Menu item Value Explanation (bold text: default value) CONTROL 1 VALUE 0–180–359 Specifies the reference value for hue. CONTROL 2 N/A - - - (no settings) —... - Page 37 Menu List Menu item Value Explanation (bold text: default value) Turns the equalizer on/off. OFF, ON EQUALIZER Effect Adjusts the sound quality for each frequency band. Hi GAIN -15.0–0 0–15.0dB Boosts or attenuates the high band. Hi FREQUENCY 0–20.0kHz 1.0–10 Adjusts the center frequency when changing the tone quality in the high band.
-
Page 38: 9: Audio Output
Menu List 9: AUDIO OUTPUT Menu item Value Explanation (bold text: default value) OUTPUT LEVEL -INF–0 0–10.0dB Adjusts the output volume. OUTPUT MUTE OFF, ON Turns the mute function on/off. If this is “ON, ” the output audio is temporarily silenced. Turns the limiter on/off. -
Page 39: 10: Audio Follow
Menu List 10: AUDIO FOLLOW Menu item Value Explanation (bold text: default value) Turns the audio follow function on/off. Audio follow is a function that automatically switches the INPUT 1 OFF, audio output in tandem with video switching. If this is “ON, ” only the audio of the selected input video is output, and audio of the other input INPUT 2 OFF, video is automatically muted. -
Page 40: 12: Ctl/Exp
Menu List 12: CTL/EXP Menu item Value Explanation (bold text: default value) Specifies the device (footswitch, expression pedal) that is connected to the CTL/EXP jack. Disables the CTL/EXP jack. CTL/EXP TYPE CTL A & CTL B Choose this if a footswitch is connected. Choose this if an expression pedal is connected. -
Page 41: 13: Capture Image
Menu List 13: CAPTURE IMAGE Menu item Value Explanation (bold text: default value) Specifies the input video from which to capture the still image. CAPTURE SOURCE INPUT 1, INPUT 2 Capture a still image from the input video. CAPTURE EXECUTE (EXEC) Specifies how the captured still image is saved. - Page 42 Turns the Auto Off function on/off. If this is “ON, ” the power to the V-02HD turns off automatically when all of the following states persist for 240 minutes. AUTO OFF...
-
Page 43: Appendices
Appendices Troubleshooting If you suspect a malfunction, please check the following points. If this does not resolve the problem, contact a nearby Roland Service Center. Problem Items to check Action Page Video-related problems Could you be inputting copy-protected (HDCP) If you want to input copy-protected (HDCP) video, set the No picture is input. -
Page 44: Block Diagram
Appendices Video MIxer Block Block Diagram Video MIxer Block Video block Audio Mixer Block Audio block Audio Mixer Block... - Page 45 V-02HD Block Diagram Appendices V-02HD Block Diagram OUTPUT FADE OUTPUT FADE...
-
Page 46: Main Specifications
BOSS FS-5U, FS-6, FS-7 Options (sold separately) Expression Pedal EV-5, BOSS FV-500L, FV-500H * 0 dBu=0.775 Vrms * This document explains the specifications of the product at the time that the document was issued. For the latest information, refer to the Roland website. -
Page 47: Dimensions
Appendices Dimensions Unit: mm... - Page 48 5 Roland is an either registered trademark or trademark of Roland Corporation in the United States and/or other countries. 5 Company names and product names appearing in this document are registered trademarks or trademarks of their respective owners.
Need help?
Do you have a question about the V-02HD and is the answer not in the manual?
Questions and answers