Advertisement
Quick Links
Download this manual
See also:
Owner's Manual
®
ÂØÒňÎ
Introduction
Topics
©
1999 Roland Corporation U.S.
Supplemental
Supplemental
©
The Basics of the
VM-3100/VM-3100Pro
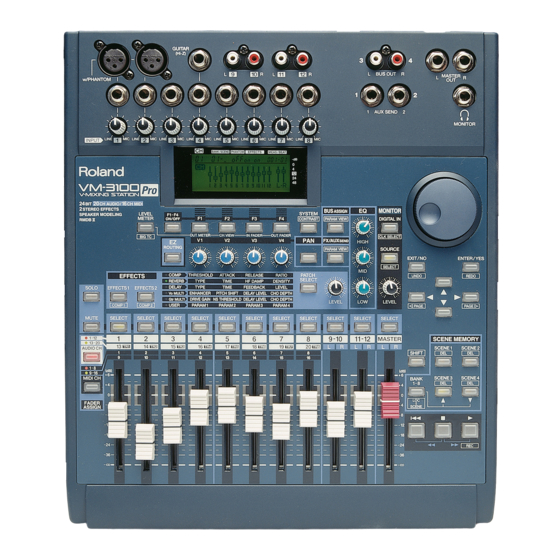
The Roland VM-3100 and VM-3100Pro V-Mixing Stations place the
quality and power of digital mixing within the grasp of all musicians,
producers and engineers. These easy-to-use, affordable mixers are
perfectly suited for project studios, rehearsal spaces, sound
reinforcement, post-production suites, broadcasting, and an endless
number of other applications. The VM-3100 and VM-3100Pro feature
24-bit audio, onboard high-quality effects, flexible routing and Scene
memory, as well as digital inputs and outputs. The VM-3100 and
VM-3100Pro are also powerful MIDI mixers that can control external
MIDI devices and MMC-compatible sequencers and recorders.
This Supplemental Note provides a basic introduction to the VM-3100
and VM-3100Pro using real-life mixing examples. Everything you'll
encounter in the Supplemental Note applies to both mixing stations
except as noted.
We'll cover the following topics in this document:
I.
How to Set Up Inputs 1-8
II.
How to Set Up Inputs 9-12
III.
Activating Phantom Power on Inputs 1 and 2
IV.
How to Route Inputs to Channels
V.
How to Set Up Digital Inputs
VI.
How to Route Digital Inputs to Channels
VII.
How to Solo Channels
VIII.
How to Mute Channels
IX.
Using Channel EQ
X.
How to Use the EQ Library
XI.
How to Use the Onboard Compressors
XII.
How to Use the Compressor Library
XIII.
Understanding Effects
XIV.
Setting Up a Send-and-Return Effect
XV.
Setting Up an Insert Effect
XVI.
Understanding Busses
XVII.
Choosing a Bussing Method
XVIII.
Bussing—The BUS Method
XIX.
Bussing—The SND Method
XX.
Listening to the VM-3100's Busses
XXI.
The VM-3100's Outputs
XXII.
How to Save Mixer Settings as a Scene
XXIII.
How to Recall Scenes
XXIV.
How to Delete Scenes
XXV.
How to Initialize the VM-3100
XXVI. Conclusion
XXVII. Where to Turn for Additional Help
XXVIII. Get Connected
The Basics of the VM-3100/VM-3100Pro
Notes
Notes
November 15, 1999 SN118 v1.0
Faxback# 21099
Page 1
Advertisement

Subscribe to Our Youtube Channel
Related Manuals for Roland VM-3100


Summary of Contents for Roland VM-3100
- Page 1 The VM-3100 and VM-3100Pro feature 24-bit audio, onboard high-quality effects, flexible routing and Scene memory, as well as digital inputs and outputs. The VM-3100 and VM-3100Pro are also powerful MIDI mixers that can control external MIDI devices and MMC-compatible sequencers and recorders.
- Page 2 The the VM-3100 best way to listen to the VM-3100 is to connect one of its stereo digital outputs to a pair of Roland DS-90 Powered Monitors. The MONITOR LEVEL knob controls your monitoring listening volume.
- Page 3 CD player or cassette deck for this example, though any stereo device with RCA output jacks will do. 1. With the VM-3100 powered down, plug the left side of your device’s stereo signal into Input 9 and its right side into Input 10.
- Page 4 One of the great features of the VM-3100 is its routing flexibility. Any input on the VM-3100 can be routed to any channel so you don’t have to physically unplug a cable when you want to control its signal using a different channel.
- Page 5 Generally, the device sending the data will provide the master clock. Before you can hear digital audio coming into the VM-3100, you must first tell the VM-3100 which digital connection you’re using so that it knows where to find the master clock. There are two ways to do this.
- Page 6 How to Set Up Digital Inputs (continued) Method Two 1. With the VM-3100 and the digital device powered down, connect the device’s digital output to either of the VM-3100’s digital inputs. 2. Power on the digital device you’re connecting to the VM-3100.
- Page 7 SELECT” screen, and when “Digital IN Lock” has been confirmed. 4. Press LEVEL METER (BIG T.C.) to exit. Method Two You can also route digital inputs to channels using the VM-3100’s EZ Routing feature: 1. Press EZ ROUTING. The “EZR SEL” screen appears.
- Page 8 3. Press SOLO once more to exit Solo mode. You can solo a channel’s signal at various places along its journey through the VM-3100. Use the following procedure to choose what you’ll hear when you solo any channel: 1. Hold down SOLO—as you continue to hold down the button, the “SOLO MODE”...
- Page 9 Your EQ settings are retained by the VM-3100 when you power down. Even so, we recommend you save your EQ settings along with the rest of your mixer settings in one of its mixer Scenes or in the VM-3100’s EQ Library for safekeeping. We’ll discuss Scenes and the EQ Library later.
- Page 10 Let’s say we’re recording a blues duo: an electric rhythm guitar player and a slide guitarist. Channel 1 is controlling the rhythm guitar signal, while the slide guitar’s on Channel 2. The presets in the VM-3100’s EQ Library quickly provide the ideal EQ settings for these instruments.
- Page 11 Each of the two onboard compressors can process the signal in any one of the VM-3100’s channels. The VM-3100’s compressors are available in addition to the standard effects produced by the VM-3100’s effect processor(s). Here’s how to compress a channel’s signal using Compressor 1: 1.
- Page 12 4. Press the RIGHT page button to scroll to the OutLv setting. 5. Turn V1 to adjust the compressor’s output level. You can compress a stereo signal from two channels or the VM-3100’s Master Out by linking the two mono compressors so that they function as one single stereo compressor: 1.
- Page 13 You can send a copy of a channel’s signal to an effect for processing, and return the output of the effect directly into the VM-3100’s main mix or to a bus that you’re sending to an external device such as a multitrack recorder. Such an effect is called a “send-and-return effect.”...
- Page 14 14. Use the UP, DOWN, LEFT or RIGHT page buttons to select “MIX” since we want to route the reverb into the VM-3100’s main mix. 15. Turn the VALUE dial to add a check mark to the box next to “MIX.”...
- Page 15 “FX/AUX SEND” screen. Setting Up an Insert Effect To illustrate how to use insert effects in the VM-3100, let’s add some distortion to a guitar using one of Roland’s exclusive COSM™ effects— COSM effects are typically applied as insert effects. Let’s connect the guitar directly to Channel 4’s special high-impedance guitar input jack.
- Page 16 MASTER OUT L and R (for “Left” and “Right”) jacks and also to the MONITOR headphone jack. Busses in the VM-3100 often carry signals to output jacks. To route a signal to a particular output jack, therefore, you can simply send the signal down the bus that’s connected to it.
- Page 17 ®ÂØÒňΠSupplemental Notes The Basics of the VM-3100/VM-3100Pro XVII. Choosing a Bussing Method You can send a signal to a bus in either of two ways: • BUS —You can send a signal to a bus with the flip of an on/off switch.
- Page 18 You can control the sends to all of the VM-3100’s busses from this screen—with the exception of the main mix bus—including its FX bus (or both FX busses on the VM-3100Pro).
- Page 19 Pre setting. When you’re sending a signal to an external effect processor, you’ll probably want to use Pst. Listening to the VM-3100Õs Busses You can listen to any of the VM-3100’s busses through its MONITOR headphone jack. It’s a good idea to listen to: •...
- Page 20 The Basics of the VM-3100/VM-3100Pro XXI. The VM-3100Õs Outputs The VM-3100 provides an assortment of output jacks that allow you to send your signals to a variety of places. For example, you can use: • the AUX SEND jacks—also labeled as Jacks 1 and 2—to send...
- Page 21 The Basics of the VM-3100/VM-3100Pro How to Save Mixer Settings as a Scene (continued) The VM-3100 can store up to 32 different Scenes arranged into eight sets—or “banks”—containing four Scenes each. Once you’ve chosen the desired bank, you can select the desired Scene by pressing one of the four dedicated Scene buttons located in the VM-3100’s SCENE...
- Page 22 9. Press ENTER/YES (REDO). The VM-3100 executes the initialized process. XXVI. Conclusion That’s it for this VM-3100 Supplemental Note . We hope it helps you realize the full potential of your powerful VM-3100. Additional Supplemental Notes regarding the VM mixer series are available from Roland’s Faxback system.
-
Page 23: Get Connected
The Basics of the VM-3100/VM-3100Pro XXVIII. Get Connected For the latest info on new products, support documents, upcoming Roland events and more, visit our Website, www.rolandus.com, or www.rolandgroove.com. 24 hours a day, 7 days a week, you can receive a library of support materials and product information on your fax machine - and it’s all...
Need help?
Do you have a question about the VM-3100 and is the answer not in the manual?
Questions and answers