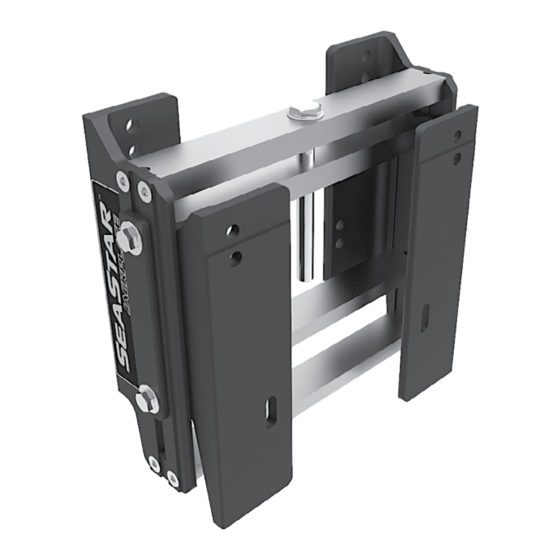
Seastar Solutions Seastar Manual Jackplate Installation Instructions And Owner's Manual
Manual jackplates
Hide thumbs
Also See for Seastar Manual Jackplate:
- Installation instructions and owner's manual (24 pages)
Summary of Contents for Seastar Solutions Seastar Manual Jackplate
- Page 1 INSTALLATION INSTRUCTIONS AND OWNER'S MANUAL w w w . s e a s t a r s o l u t i o n s . c o m T H I R T Y N I N E ISO 9001 Manual Jackplates...
- Page 2 To the Installer and End User (Owner) Thank you for choosing a SeaStar Manual Jackplate by SeaStar Solutions. These Installation Instructions contain all the information that you and others will require for the safe installation and use of your Jackplate. Throughout this manual, information for the safe installation and operation of the Jackplate will be distinguished in one of the following ways;...
-
Page 3: Table Of Contents
3.2 Return Goods Procedure ......... 11 3.3 Technical Support ........... 11 Introduction Congratulations on your purchase of a SeaStar Manual Jackplate. You have chosen to install one of the sleekest and most durable engine Jackplates available. Prepare for increased performance, gains in fuel economy and the ability to run in shallow water. - Page 4 This page left intentionally blank. SeaStar Manual Jackplate...
-
Page 5: Safety Information
It is critical that you read and understand ALL the points noted. If you have any questions regarding any of these warnings, contact SeaStar Solutions. 1.1 Before Installation The safe operation of the SeaStar Jackplate is dependent upon proper installation and maintenance, common sense, safe judgment and the knowledge/expertise of the operator. -
Page 6: Prior To Each Use
1. Ensure the transom bolts and engine bolts are torqued to their recommended values. 2. Inspect the Jackplate(s) for damage, cracks, wear and binding. Inspect the Jackplate brackets, adjustment screw and sliding mechanism. DO NOT OPERATE BOAT IF ANY COMPONENT IS NOT IN PROPER WORKING CONDITION. SeaStar Manual Jackplate... -
Page 7: Jackplate Installation
Before proceeding with the installation, read these instructions thoroughly. SeaStar Solutions cannot accept responsibility for installations where instructions have not been followed, where substitute parts have been used, or where modifications have been made to our products. -
Page 8: Mount Jackplate To Boat
TRANSOM SIDE OF JACKPLATE ENGINE SIDE OF JACKPLATE INSERT 4X ENGINE BOLTS AND WASHERS PRIOR TO MOUNTING JACKPLATE TO TRANSOM Figure 2. Engine bolt insertion. 3. Seal all holes in the transom with an appropriate marine sealant. SeaStar Manual Jackplate... - Page 9 WARNING Use of non-approved bolts, nuts and washers may lead to separation of engine from boat. Figure 3. Jackplate to transom connection. WARNING Follow the outboard engine manufacturer’s recommendations for tightening torque. 4 X BOLT 4 X NUT WITH NYLON LOCKING FEATURE 4 X WASHER OR TRANSOM STIFFENER...
-
Page 10: Mount Outboard To Jackplate
All engine mounting hardware must conform to the standards specified in Section 2.1. WARNING The MAXIMUM supported dry engine weight is 585 lbs. WASHER Figure 5. Outboard installation. CAUTION Perform the Clearance Checks prior to water testing. See Section 2.5. SeaStar Manual Jackplate... - Page 11 WASHER BOLT WASHER NOTE: ALL HARDWARE TO BE SUPPLIED OR APPROVED BY THE OUTBOARD ENGINE MANUFACTURER JACKPLATE ENGINE BRACKET OUTBOARD ENGINE MIDSECTION Figure 6. Outboard Engine to Jackplate connection. Installation Instructions and Owner's Manual...
-
Page 12: Adjusting The Jackplate
Raising the outboard too high will result in a water pressure drop and overheating of engine will occur. Proper water pressure must be maintained at all times during operation of the outboard. SeaStar Manual Jackplate... -
Page 13: Clearance Checks
2.5 Clearance Checks WARNING Jackplate clearance checks MUST be completed after installation and before use. Failure to adhere to this warning may result in the loss of vessel control, leading to possible ejection from vessel causing property damage, personal injury and/or death. 1. - Page 14 This page left intentionally blank. SeaStar Manual Jackplate...
-
Page 15: Warranty
In such a case SeaStar Solutions products found to be defective and covered by this warranty, will be replaced at SeaStar Solutions’ option, and returned to the customer. - Page 16 SEASTAR SOLUTIONS 3831 NO.6 ROAD RICHMOND, B.C. CANADA V6V 1P6 FAX 604-270-7172 www.seastarsolutions.com © 2014 MARINE CANADA ACQUISITION INC. DBA SEASTAR SOLUTIONS PRINTED IN CANADA 04/18 ISO 10592 Please scan FORM NO. 469223 REV. C this QR code and watch our latest Boating Safety video.


Need help?
Do you have a question about the Seastar Manual Jackplate and is the answer not in the manual?
Questions and answers