Table of Contents
Advertisement
Available languages
Available languages
Quick Links
No: 24305 – 10/16 rev. 1
Catalog Number • Numéro de Catalogue • Número de Catálogo: PW-203
Country of Origin: Made in China • Pays d'origine: Fabriqué en Chine • País de origen: Hecho en China
DESCRIPTION AND OPERATION
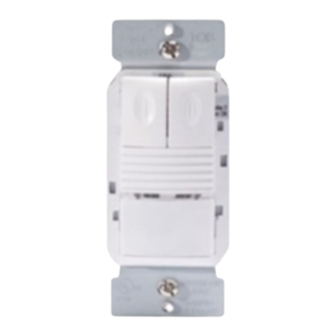
The PW-203 Passive Infrared Multi-Way Dual Relay
Wall Switch sensors use advanced passive infrared
(PIR) technology. The PW-203 contains two relays
and two ON/OFF buttons to allow control of one or
two loads independently. Pressing a button toggles
the state of the corresponding relay.
The relays can also turn loads ON and OFF
automatically with occupancy. They can be set to
manual or automatic-ON operation independently
from each other, allowing for bi-level control.
Up to four PW-203 sensors can be connected to the
same circuit. When set for Automatic-ON, the first
sensor to detect occupancy turns ON all the lights
that are connected to the same circuit. The occupant
can turn OFF the load at any time by pressing the
ON/OFF button of any sensor that is connected to the circuit. If the occupant forgets to turn OFF the lights, the last sensor to detect
occupancy turns them all OFF after the time delay expires.
A Walk-Through mode can turn lights OFF after only 3 minutes, if no activity is detected after 30 seconds following an occupancy
detection.
PW sensors contain a light level sensor. If adequate daylight is present, the sensor holds the load OFF until light levels drop, even if the
area is occupied. In the PW-203, light level only affects the load on Relay 2. Users can overrule this function by pressing the ON/OFF
button. See Light Level Adjustment.
Presentation Mode
This is a feature of the Auto ON mode. When both relays are manually turned OFF the PW holds the lights OFF until no motion has
been detected for the duration of the Time Delay. With subsequent occupancy, the PW turns the load ON. If both relays are ON and one
relay is manually turned OFF this relay remains OFF until both the Time Delay and retrigger delay expires for the relay that is ON, after
that time the ON Mode control settings again apply.
Time Delays
The PW sensor holds the load ON until no motion is detected for the selected time delay. Both relays use the same delay. Select the
time delay using DIP Switch Settings.
NOTE: Shaded cells below indicate default operation and switch setting.
Test Mode
(DIP# 1, 2, & 3 OFF)
Fixed Time Delay
(DIP 1 ON, 2 & 3 OFF)
Service Mode
(DIP# 1, 2, & 3 ON)
Walk-Through
The Walk-Through mode shortens the time delay to reduce the amount of time the load is ON after a brief moment of occupancy, such
as returning to an office to pick up a forgotten item, then immediately exiting.
Walk-Through Mode
(DIP# 4 ON)
No Walk-Through
(DIP# 4 OFF)
A Test Mode with a short time delay of 5 seconds is set when DIP switches 1, 2, & 3 are OFF. It cancels
automatically after ten minutes, or when you set a fixed time delay. When the Test Mode times out, the
sensor will assume a 20 minute time delay. To restart Test Mode, change the time delay setting to any fixed
amount and then return it to the Test setting.
Time delays are 5, 10, 15, 20 (default), 25, or 30 minutes. See table in Installation section for DIP settings.
Service bypasses occupancy and light level functions. Control the load manually using ON/OFF button. Red
LED is always lit when the PW is in Service mode.
The PW sensor turns the load OFF three minutes after the area is initially occupied, if no motion is detected
after the first 30 seconds. If motion continues beyond the first 30 seconds, the set time delay applies.
Walk-Through mode disabled.
Wattstopper
Passive Infrared Multi-Way Dual Relay Wall Switch Occupancy Sensor v3
Détecteur de présence interrupteur mural infrarouge passif à deux relais
et plusieurs voies
Sensor de ocupación PIR con interuptor de dos relés y múltiples vías
Installation Instructions • Instructions d'Installation • Instrucciones de Instalación
Voltages .................................................120/277VAC, 50/60Hz
Load Limits for each relay:
@120VAC ................ 0-800W tungsten or ballast, 1/6 HP
@277VAC .............................................. 0-1200W ballast
Load Type Compatibility:
Incandescent, fluorescent, magnetic or electronic ballast
Horsepower Rating (each relay) ..........1/6 HP @120VAC
Time Delay Adjustment ....................................5 to 30 minutes
Walk-Through Mode .....3 minutes if no activity after 30 sec.
Test Mode ........ 5 sec. for 10 min. with DIP switch setting
PIR Adjustment ................................. High or Low (DIP Switch)
Light Level Adjustment .........................................8fc to 180+fc
Alerts .............................................Selectable Audible & Visual
US Patents: 5640113, 6617560
®
SPECIFICATIONS
Advertisement
Table of Contents

Subscribe to Our Youtube Channel
Related Manuals for LEGRAND Wattstopper PW-203


Summary of Contents for LEGRAND Wattstopper PW-203
-
Page 1: Specifications
Wattstopper ® Passive Infrared Multi-Way Dual Relay Wall Switch Occupancy Sensor v3 Détecteur de présence interrupteur mural infrarouge passif à deux relais et plusieurs voies No: 24305 – 10/16 rev. 1 Sensor de ocupación PIR con interuptor de dos relés y múltiples vías Installation Instructions •... -
Page 2: Coverage Patterns
PIR Sensitivity Adjustment The PW sensor constantly monitors the controlled environment and automatically adjusts the PIR to avoid common ambient conditions that can cause false detections, while providing maximum coverage. High Default setting. Suitable for most applications. (DIP #5 OFF) Low, 50% Reduces sensitivity by approximately 50%. -
Page 3: Installation
INSTALLATION 1. Make sure that the power has been turned OFF at the circuit breaker. WARNING: TURN THE POWER OFF AT THE 2. Connect wires to the PW flying leads as shown in the wiring diagram. The ground wire (green) must be fastened to ground for the CIRCUIT BREAKER BEFORE WIRING. -
Page 4: Troubleshooting
Sensor Light Level Adjustment The light level can be set with loads ON or OFF. The light level feature operates as a Hold OFF function, meaning that once the light level in a room reaches a set point the lights will not turn ON until the light level drops below the set point. In order to achieve the maximum energy savings that the light level feature offers, pick a time during the day when there is enough ambient light in the room to perform the necessary tasks without the aid of artificial light. -
Page 5: Caractéristiques
INSTRUCTIONS EN FRANÇAIS DESCRIPTION ET FONCTIONNEMENT DE L'UNITÉ CARACTÉRISTIQUES Le détecteur interrupteur mural infrarouge passif à deux relais et Courant électrique ........120/277 V c.a., 50/60 Hz plusieurs voies PW-203 utilise la technologie avancée de l'infrarouge Limites de charge pour chaque relais : passif (IRP). - Page 6 Alarmes Le PW est doté d’alarmes sonores et/ou visuelles avertissant de la COUPURE imminente de la charge. Alarme visuelle Lorsqu’il ne reste qu’une minute de temporisation, la charge connectée au relais se COUPE pendant une seconde. Cette action constitue un avertissement une minute avant la COUPURE de la/des charge(s) par (DIP 6 sur MARCHE) le détecteur.
- Page 7 INSTALLATION 1. Assurez-vous que le courant a bien été COUPÉ au niveau du AVERTISSEMENT : COUPER LE disjoncteur de circuit. COURANT AU DISJONCTEUR PRINCIPAL 2. Raccordez les fils aux câbles volants du PW comme illustré dans le AVANT D’INSTALLER LE CÂBLAGE. schéma de câblage.
-
Page 8: Dépannage
RÉGLAGES DES INTERRUPTEURS DIP Boutons MARCHE/ARRÊT Mode relais 1 Relais 1 Temporisation Alarmes Mode relais 2 Relais 2 visuelles 1 2 3 Temporisation Alarmes sonores Test/20 min Activé 5 minutes Désactivé 10 minutes 5 minutes Mode Passage Alarmes sonores Mode relais 1 Sensibilité... -
Page 9: Especificaciones
INSTRUCCIONES EN ESPAÑOL DESCRIPCIÓN Y FUNCIONAMIENTO ESPECIFICACIONES Los sensores PW-203 utilizan tecnología de infrarrojo Voltajes ..................120/277 V CA, 50/60 Hz pasivo (PIR) avanzada. El PW-203 contiene dos relés Límites de carga para cada relé: y dos botones de Encendido/Apagado para permitir A 120 V CA ...... - Page 10 Alta Configuración predeterminada. Adecuada para la mayoría de las aplicaciones. (Interruptor DIP n.º 5 apagado) Baja, 50 % Reduce la sensibilidad en aproximadamente un 50 %. Útil en casos donde el PIR detecta movimiento fuera del área deseada (también considere enmascarar la lente) y donde las fuentes de (Interruptor DIP n.º...
-
Page 11: Instalación
INSTALACIÓN 1. Asegúrese de haber apagado la energía en el disyuntor. ADVERTENCIA: DESCONECTE LA 2. Conecte los cables a los cables de interconexión PW tal como se muestra ALIMENTACIÓN EN EL DISYUNTOR en el diagrama de cableado. El cable a tierra (verde) debe ajustarse a ANTES DEL CABLEADO. -
Page 12: Solución De Problemas
No. 24305 – 10/16 rev. 1 © Copyright 2016 Legrand All Rights Reserved. 800.879.8585 © Copyright 2016 Tous droits réservés Legrand. www.legrand.us/wattstopper © Copyright 2016 Legrand Todos los derechos reservados.
Need help?
Do you have a question about the Wattstopper PW-203 and is the answer not in the manual?
Questions and answers