Table of Contents
Advertisement
Advertisement
Table of Contents

Subscribe to Our Youtube Channel
Related Manuals for Eaton 9E-IN 1K


Summary of Contents for Eaton 9E-IN 1K
- Page 1 Eaton 9E- IN Series 1000/2000/3000(XL) USER MANUAL...
-
Page 2: Table Of Contents
CONTENT 1. SAFETY AND EMC INSTRUCTIONS ............1 1.1 I ..................1 NSTALLATION 1.2 O ..................... 2 PERATION 1.3 M ............. 3 AINTENANCE SERVICING AND FAULTS 1.4 T .................... 5 RANSPORT 1.5 S ....................5 TORAGE 1.6 S .................... 5 TANDARDS 2. - Page 3 9. MAINTENANCE ..................34 9.1 O ................... 34 PERATION 9.2 S ....................34 TORAGE 10. TECHNICAL DATA ................. 35 10.1 E ............... 35 LECTRICAL SPECIFICATIONS 10.2 O ..............35 PERATING NVIRONMENT 10.3 D ..............36 IMENSIONS AND WEIGHTS 11. COMMUNICATION PORT ..............37 11.1 RS-232 C ............
-
Page 4: Safety And Emc Instructions
1. Safety and EMC Instructions Please read carefully the following user manual and the safety instructions before installing or operating the unit! 1.1 Installation ★ See installation instructions before connecting to mains power. ★ Condensation may occur if the UPS is moving directly from a cold to a warm environment. -
Page 5: Operation
★ The building wiring socket outlet (shockproof socket outlet) must be easily accessible to close to the UPS. ★ With the installation of the equipment, the sum of the leakage current of the UPS and the connected load does not exceed 3.5mA. -
Page 6: Maintenance, Servicing And Faults
UPS or the building wiring socket (grounded shockproof socket) during operation, the grounding for the UPS and all loads connected will be disconnected. ★ The UPS features its own, internal current source (batteries). You may be electric shocked when you touch the UPS output sockets or output terminal block even if the UPS is not connected to the building wiring socket. - Page 7 from the mains power supply (building wiring socket), components inside the UPS are still connected to the battery which are potentially dangerous. ★ Before carrying out any kind of service and/or maintenance, disconnect the batteries. Verify that no current is present and no hazardous voltage exists in the capacitor or BUS capacitor terminals.
-
Page 8: Transport
1.4 Transport ★ Please transport the UPS only in the original packaging (to protect against shock and impact). 1.5 Storage ★ The UPS must be stockpiled in the room where it is ventilated and dry. 1.6 Standards * Safety IS 16242(Part 1)/IEC/EN 62040-1 * EMC IEC/EN 62040-2 (Only for 1K/2K/3K) ★... -
Page 9: Description Of Commonly Used Symbols
2. Description of Commonly Used Symbols Some or all of the following symbols may be used in this manual. It is advisable to familiarize yourself with them and understand their meaning:... -
Page 10: Introduction
Single Phase input 3000VA/ 9E-IN 3K Tower Standard model Single Phase 2700W Output Single Phase input 1000VA/ Long Backup 9E-IN 1K XL Tower Single Phase 800W time model Output Single Phase input 2000VA/ Long Backup 9E-IN 2K XL Tower Single Phase... -
Page 11: Panel Description
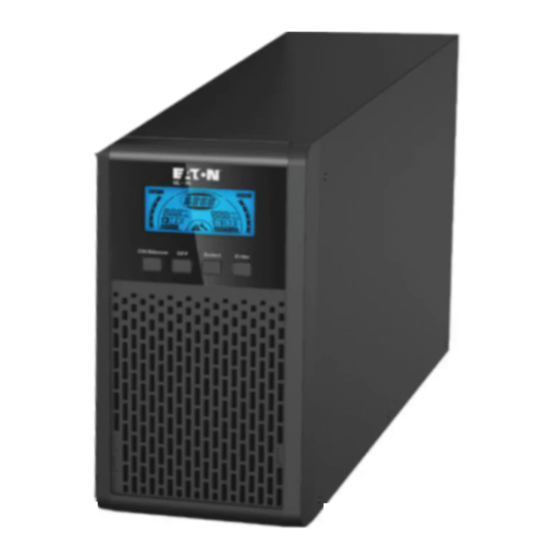
4. Panel Description The display panel of 1K/1KXL/2K/2KXL/3K/3KXL is the same, which is shown as below: The Display Panel ■ Figure 4.1 4.1 Button Switch Function ON/Silence Turn on UPS system: Button By pressing the ON-Button continuously for more than 1 second the UPS system is turned on. -
Page 12: Lcd Description
By pressing this Button, an acoustic alarm and LCD blue background blinking can be deactivated in the bypass mode. Release the UPS from fault mode and EPO status. Select The output voltage, frequency, Bypass disable/enable and operating Button External Battery Ah mode in No output or Bypass mode, , Battery remain time display disable/enable(only for 1K/2K/3K) and Charger... - Page 13 It indicates the input is connected with mains, and the input power is single phase input. Output Information It indicates output voltage/frequency value, which are displayed alternately. Load Information It indicates the load level. Every grid represents the level of 20%. The lowest grid would be displayed if the level is 5%~20%.
- Page 14 It indicates the UPS is in Fault mode or has some warnings. LCD idle function: If you enable LCD background idle function, When UPS is off to standby mode, LCD background will be turned off within 5 seconds. After any key pressed, the LCD background will be lighted on.
-
Page 15: Connection And Operation
5. Connection and Operation The system may be installed and wired only by qualified electricians in accordance with applicable safety regulations! When installing the electrical wiring, please note the nominal amperage of your incoming feeder. 5.1 Inspection: Inspect the packaging carton and its contents for damage. Please inform the transport agency immediately if you find signs of damage. - Page 16 ■ Figure 5.1 Input and Output Connection diagram of 3KXL /3K The UPS System has an input breaker on the standard cabinet. When installing the 3KXL, the user needs to connect the external breakers and protective components before connecting the input wire with the input terminals.
- Page 17 (2) UPS Output Connection The output sockets and types of the UPS are shown below: Output Socket (number & type) Model No. 4 IEC type 9E-IN 1K 4 IEC type+1 terminal 9E-IN 2K 4 IEC type +1 terminal 9E-IN 3K...
- Page 18 Remove the small cover of terminal block, prepare the battery cable which should be able to carry the current. And battery ★ wire color is recommended as following: Table 5.1 The Details for battery wire recommended Silkscreen on the Battery GND rear panel +...
- Page 19 ■ Figure 5.2 1KXL Battery Connection diagram -16-...
- Page 20 ■ Figure 5.3 2KXL Battery Connection diagram For 3KXL battery connection, it is needed to prepare the battery wire with the accessory of battery connecter in the package. During this process please be careful while dealing with the sharp part of the terminal and pay attention to the potential electric shock .It is suggested to choose the proper battery wire according to the Table 5.1.
-
Page 21: Battery Recharge
(4) Slot Card Connection (Optional): In order to use the Slot Card function the user should remove the Slot card cover with tool in the case which is shown below: ■ Figure 5.4 Slot Card Installation For more information please refer to the slot card user manual. 5.3 Battery recharge: Fully charge the batteries (external) of the UPS system by leaving the UPS system connected to the mains power for 1-2 hours approximately. -
Page 22: Test Function
of the UPS. Note: The default setting for bypass mode is no output after UPS is connecting mains power and breaker is turned on. This can be configurable. 5.5 Test function: Test function is checking battery performance of the UPS system by pressing the On-Switch for more than 1 second while UPS is operating in Line mode, the UPS would detect whether the battery is connected or the battery is weak. - Page 23 it by press ON button less than 0.5 second, and enable it by press ON button less than 0.5 second again. If the new warning or fault alarm is appeared, the buzzer will beep again. Using the CVCF mode, you may use it without batteries, if the open battery alarm is too annoying, you can mute it through software.
-
Page 24: Operating Mode For All Models
6. Operating Mode for All Models Different messages/strings will be displayed on the LCD screen corresponding to different UPS operating modes, as shown in the following table 6.1. Different Warning/fault code, as shown in the following table 6.2. Only one normal operating string or fault string is presented a time. However if several warnings happen at the same time, they will be displayed on the LCD alternately. -
Page 25: Line Mode
Fault String Inverter short SHOR Overload fault OVLD Inverter soft start fail ISFT Bus soft start fail bSFT Over temperature fault OVTP Inverter Volt Low INVL Inverter Volt High INVH Bus volt over bUSH Bus volt Low bUSL Bus short bUSS Inverter NTC open NTCO... -
Page 26: Bypass Mode
time (in unit Min or Sec) would display in turn every 2s. When the UPS is running in battery mode, the buzzer beeps once every 4 seconds. If the “ON” button on the front panel is pressed for more than 1 second, the buzzer will stop beeping (in silence mode). Press the “ON”... -
Page 27: Eco Mode (Economy Mode)
information about the mains power, the battery level, the UPS output and the load level could be displayed. The “STbY” string indicates UPS working in the No output mode. ■ Figure 6.4 The No output mode 6.6 ECO mode (Economy mode) It is also called high efficiency mode. -
Page 28: Abnormal Mode
6.7 Abnormal mode In abnormal mode such as Bus fault etc., the corresponding fault string would be shown on LCD display to indicate the status of the UPS, and the background light will become red color. For example “SHOR” would be shown when the connected load or the UPS output is in short-circuited, the LCD display is shown as figure6.5 followings. -
Page 29: Setting By Lcd Module
7. Setting by LCD Module The output voltage/frequency, Auto bypass status, operating mode in No output mode or Bypass mode, charger current, external Battery AH and battery remaining time(only for 1K/2K/3K) function in all mode could be set directly through LCD module. The output frequency could be set to 50Hz and 60Hz. - Page 30 ■ Figure 7.1 Setting by LCD To exit the setting mode that requests a pressing once on the “Enter” button; to continue setting, press “Select” button. If no any pressing on the “Select” or “Enter” button lasting for more than 10 seconds, the setting mode will exit automatically.
- Page 31 ■ An example for changing the Operating mode from normal mode to converter mode through the LCD display. Step 1: “OPV” after pressing the “Enter” button. Step 2: “OPF” after pressing the “Select” button. Step 3: “bYPA” after pressing the “Select” button. -28-...
- Page 32 Step 4: “MOdE” after pressing the “Select” button. “UPS” is flickering after pressing the “Enter” button. Step 5: “ECO” flickering after pressing the “Select” button. Step 6 : “CVF” flickering after pressing the “Select” button. Press the “Enter” button Short touch “Enter” button exit setting mode. Be same with the way of setting CVCF mode which is showed above, it is easy to set the bypass status and other work mode through the LCD panel.
- Page 33 -30-...
-
Page 34: Trouble Shooting
8. Trouble Shooting If the UPS system does not operate correctly, check the operating status on the LCD display. The Warning code or fault code is shown in Warning& Fault Code Table 8.1 If the UPS system does not operate correctly, please attempt to solve the problem using the table below. - Page 35 bLOW Battery low Battery voltage When audible alarm is low sounding every second, battery is almost empty. bOPN Battery open Battery pack is Do the battery test to not connected confirm. correctly Check the battery bank is connected to the UPS. Check the battery breaker is turn on.
- Page 36 SHOR Inverter short Output short Remove all the loads. circuit Turn off the UPS. Check whether the output of UPS and loads is short circuit. Make sure the short circuit is removed, and the UPS has no internal faults before turning on again.
-
Page 37: Maintenance
9. Maintenance 9.1 Operation The UPS system contains no user-serviceable parts. 9.2 Storage If the batteries are stored in temperate climatic zones, it is recommended to recharge those batteries every three months for 1~2 hours. It is highly suggested to shorten the recharging intervals in every two months at locations where subjects to high temperatures. -
Page 38: Technical Data
10. Technical Data 10.1 Electrical specifications INPUT Model No. 9E-IN 1K 9E-IN 1KXL 9E-IN 2K 9E-IN 2KXL 9E-IN 3K 9E-IN 3KXL Phase Single Frequency 40~70 Hz OUTPUT Model No. 9E-IN 1K 9E-IN 1KXL 9E-IN 2K 9E-IN 2KXL 9E-IN 3K 9E-IN 3KXL Power 1kVA/0.9kW 1kVA/0.8kW 2kVA/1.8kW 2kVA/1.6kW 3kVA/2.7kW 3kVA/2.4kW... -
Page 39: Dimensions And Weights
10.3 Dimensions and weights Dimensions W×H×D Net Weight Model No. (mm) (kg) 144*228*356 9.2kg 9E-IN 1K 190*327*399 17.4kg 9E-IN 2K 190*327*399 22.7kg 9E-IN 3K 102*228*346 3.8kg 9E-IN 1KXL 102*327*390 6.0kg 9E-IN 2KXL 102*327*390 6.1kg 9E-IN 3KXL -36-... -
Page 40: Communication Port
11. Communication Port On the rear panel of the UPS (see Appendix), RS232 connector is standard, Slot for optional connectivity cards are optional. 11.1 RS-232 Communication Ports To establish communication between the UPS and a computer by use an RS-232 communication cable. 11.2 AS400 Interface (Optional) It owns isolated dry contact relay outputs for UPS status: such as Mains/Utility failure, Battery low, UPS alarm/OK, or on Bypass and so on. -
Page 41: Software
12. Software Free Software Download – WinPower WinPower is brand new UPS monitoring software, which provides user-friendly interface to monitor and control your UPS. This unique software provides safely auto shutdown for multi-computer systems while power failure. With this software, users can monitor and control any UPS on the same LAN no matter how far from the UPSs. -
Page 42: Appendix 1: Rear Panel
Appendix 1: Rear panel 1KXL -39-... - Page 43 Output TB 2KXL -40-...
- Page 44 3KXL -41-...
Need help?
Do you have a question about the 9E-IN 1K and is the answer not in the manual?
Questions and answers