Table of Contents
Advertisement
Available languages
Available languages
RDS MEDIA CENTER RECEIVER
AUTORADIO MULTIMEDIA RDS
RICEVITORE MULTIMEDIALE CON RDS
RECEPTOR Y CENTRO DE COMUNICACIONES RDS
RDS-MULTIMEDIA-EMPFÄNGER
RDS MEDIA CENTER ONTVANGER
ЦИФРОВОЙ МЕДИА-РЕСИВЕР
Owner's Manual
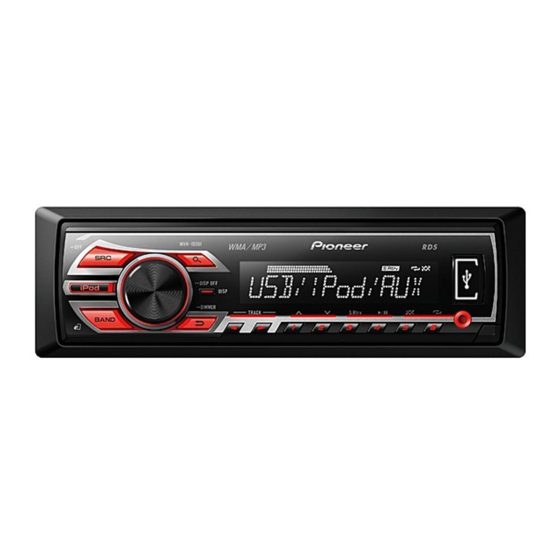
MVH-350BT
Mode d'emploi
Manuale d'istruzioni
MVH-150UI
Manual de instrucciones
Bedienungsanleitung
Handleiding
Руководство пользователя
Advertisement
Table of Contents

Related Manuals for Pioneer MVH-350BT


Summary of Contents for Pioneer MVH-350BT
- Page 1 RDS MEDIA CENTER RECEIVER AUTORADIO MULTIMEDIA RDS RICEVITORE MULTIMEDIALE CON RDS RECEPTOR Y CENTRO DE COMUNICACIONES RDS RDS-MULTIMEDIA-EMPFÄNGER RDS MEDIA CENTER ONTVANGER ЦИФРОВОЙ МЕДИА-РЕСИВЕР Owner’s Manual MVH-350BT Mode d’emploi Manuale d’istruzioni MVH-150UI Manual de instrucciones Bedienungsanleitung Handleiding Руководство пользователя...
-
Page 2: Before You Start
If you want to dispose this product, do not ! The Pioneer CarStereo-Pass is for use only in mix it with general household waste. There is Germany. a separate collection system for used elec-... -
Page 3: Operating This Unit
Local seek tuning is on. menu will not be displayed. ! Use an optional Pioneer USB cable (CD- 1 Turn M.C. to select the FM tuning step. # If you prefer not to set up at this time, turn M.C. -
Page 4: Basic Operations
Section Operating this unit Operating this unit Press M.C. to select. Tuner Removing the front panel to protect your unit from Selecting a source 1 Press SRC/OFF to cycle between: theft Notes Basic operations 1 Press the detach button to release the front ! You can set up the menu options from the TUNER (tuner)—USB (USB)/iPod (iPod)—... - Page 5 Section Operating this unit Operating this unit Press one of the preset tuning buttons Searching for an RDS station by PTY information OTHERS (others) Local seek tuning lets you tune in to only those to 6/ ) to select the desired station. You can search for general types of broadcasting radio stations with sufficiently strong signals for EDUCATE (Education), DRAMA (Drama), CUL-...
-
Page 6: Usb Storage Device
Section Operating this unit Operating this unit USB storage device Switching the display Operations using special buttons iPod Basic operations Basic operations Selecting the desired text information Selecting a repeat play range 1 Press DISP to cycle between the following: 1 Press 6/ to cycle between the following: Playing songs on a USB storage device... - Page 7 Section Operating this unit Operating this unit % Press BAND/ Note Operations using special buttons Turn M.C. to change the mode; press to to switch the control select. mode. TRACK INFO text information will change auto- ! ARTIST – Plays an album of the artist cur- ! CONTROL iPod –...
-
Page 8: Using Bluetooth Wireless Technology
Answering an incoming call ing this operation. 1 When a call is received, press ! Connected devices may not operate properly Only for MVH-350BT Press one of the preset tuning buttons if more than one Bluetooth device is con- Ending a call... - Page 9 ! To complete the connection, check the de- If the connection is established, * is indicated 2 Turn M.C. to select the first letter of the name vice name (Pioneer BT Unit) and enter the DEV. INFO (Bluetooth device address display) on the device name.
-
Page 10: Audio Adjustments
Section Operating this unit Operating this unit ! Since there are a number of Bluetooth audio Function and operation Basic operations Pausing playback players available on the market, available op- 1 Press 4/PAUSE to pause or resume. Display PHONE FUNC. erations will vary extensively. -
Page 11: System Menu
OFF (subwoofer off) Once selected, the following system menu func- tions can be adjusted. SUB.W CTRL (subwoofer adjustment) ! MUTE MODE is not available for MVH-350BT. ! BT AUDIO, BT MEM CLEAR and BT VERSION are not available for MVH-150UI. -
Page 12: Switching The Dimmer Setting
Section Operating this unit Operating this unit Initial menu LANGUAGE (multi-language) Sound from this system is automatically muted or Bluetooth device data stored on this unit can be attenuated when a signal from equipment with a cleared. To protect personal information, we rec- Press and hold SRC/OFF until the unit This unit can display the text information from a mute function is received. -
Page 13: Installation
— Do not connect the yellow cable to the battery 1 Power cord input by passing it through the hole to the engine Turn M.C. to change the menu option 2 Microphone input (MVH-350BT only) compartment. System menu and press to select SYSTEM. - Page 14 Section Installation Installation ! Optimum performance is obtained when the 9 Blue/white Hard-wired remote control adapter can be Power amp (sold separately) connected (sold separately). The pin position of the ISO connector will dif- unit is installed at an angle of less than 60°. Perform these connections when using the op- fer depending on the type of vehicle.
-
Page 15: When Installing The Microphone On The Sun Visor
Secure the mounting sleeve by using a Removing the unit Installing the microphone screwdriver to bend the metal tabs (90°) into Remove the trim ring. Only for MVH-350BT place. CAUTION It is extremely dangerous to allow the micro- phone lead to become wound around the steer- ing column or shift lever. -
Page 16: Additional Information
Error messages changed (NO Adjusting the microphone angle When you contact your dealer or your nearest TITLE, for ex- Pioneer Service Center, be sure to note the error ample). message. The unit is You are using a Move electrical... - Page 17 The USB device menu is dis- er or an author- switch OFF and connected to is Mass Storage played, reconnect ized Pioneer back ON, or dis- not supported Class compliant the iPod and reset Service Station connect the iPod by this unit.
-
Page 18: Handling Guidelines
CAUTION Incompatible text saved on the iPod will not be dis- ing. Do not let the USB storage device fall onto the ! Pioneer cannot guarantee compatibility with 22.05 kHz and 44.1 kHz (MS ADPCM) played by the unit. floor, where it may become jammed under the all USB mass storage devices and assumes brake or accelerator pedal. -
Page 19: Bluetooth Profiles
(e.g., ! PBAP (Phone Book Access Profile) Microsoft Corporation and cannot be used or A Pioneer CD-IU51 interface cable is also avail- 001xxx.mp3 and 099yyy.mp3). ! A2DP (Advanced Audio Distribution Profile) distributed without a license from Microsoft 2 Put those files into a folder. -
Page 20: Specifications
Appendix Additional information Specifications Maximum current supply ........1 A USB Class ....... MSC (Mass Storage Class) General File system ....... FAT12, FAT16, FAT32 Power source ....14.4 V DC (10.8 V to 15.1 V al- MP3 decoding format ..MPEG-1 & 2 Audio Layer 3 lowable) WMA decoding format .. -
Page 22: Avant De Commencer
à la poubelle avec vos de l’appareil. ordures ménagères. Il existe un système de ! Le Pioneer CarStereo-Pass est utilisable seu- collecte séparé pour les appareils électroni- lement en Allemagne. ques usagés, qui doivent être récupérés, trai- ! Maintenez le niveau d’écoute à... - Page 23 PRÉCAUTION ENG (Anglais)—РУС (Russe) La fonction Sound Retriever ! Utilisez un câble USB Pioneer optionnel (CD- 2 Appuyez sur M.C. pour confirmer la sélection. (sound re- est activée. U50E) pour connecter le périphérique de Menu de configuration triever) CLOCK SET (réglage de l’horloge)
- Page 24 Section Utilisation de l’appareil Utilisation de l’appareil ! Pour éviter d’endommager le périphérique Opérations de menu FM STEP (incrément d’accord FM) Mise hors service de l’appareil ou l’intérieur du véhicule, retirez tous les câ- 1 Maintenez la pression sur SRC/OFF jusqu’à ce fréquemment utilisées Normalement, l’incrément d’accord FM employé...
-
Page 25: Utilisation De L'appareil
Section Utilisation de l’appareil Utilisation de l’appareil Changement de l’affichage Accord manuel (pas à pas) Recherche d’une station RDS en utilisant le code L. CLASS (Musique classique légère), CLASSIC 1 Appuyez sur c ou d. (Musique classique) ! Sélectionnez MAN (accord manuel) sous Sélection des informations textuelles souhaitées Vous pouvez rechercher une station qui diffuse un OTHERS (autres) -
Page 26: Périphérique De Stockage Usb
Section Utilisation de l’appareil Utilisation de l’appareil Sélection et lecture des fichiers/ Quand la fonction AF est utilisée, la fonction de re- SEEK (réglage de la touche droite/gauche) Retour au dossier racine plages à partir de la liste des noms 1 Appuyez sur BAND/ cherche des stations régionales limite la sélection de façon prolongée. - Page 27 Section Utilisation de l’appareil Utilisation de l’appareil ! L’iPod sera mis hors service environ deux mi- Opérations à l’aide de touches Tournez M.C. pour changer l’option de Affichage d’une liste des plages musicales dans menu et appuyez pour sélectionner nutes après que le contact d’allumage est spéciales la catégorie sélectionnée FUNCTION.
- Page 28 Section Utilisation de l’appareil Utilisation de l’appareil ! CONTROL AUDIO – La fonction iPod de cet Opérations à l’aide de touches Remarques Pause de la lecture ! La plage musicale/l’album sélectionné peut appareil peut être utilisée à partir de cet appa- spéciales 1 Appuyez sur 4/PAUSE pour mettre en pause reil.
- Page 29 à 6/ ) pour du menu du téléphone. ! Exécution d’un appel l’enregistrer sur la touche de présélection ap- Seulement pour MVH-350BT Réponse à un appel entrant propriée. Remarque 1 Lors de la réception d’un appel, appuyez sur Les fonctions ci-dessous peuvent être utilisées Pour plus de détails sur les fonctions de recon-...
- Page 30 1 Appuyez sur M.C. pour afficher le mode de ré- de cette fonction. C. vous ramène à l’écran de saisie du code de l’appareil (Pioneer BT Unit) et entrez le glage. PIN, et vous pouvez changer le code PIN. ADD DEVICE (connexion d’un nouveau périphé- 2 Tournez M.C.
-
Page 31: Fonction Et Utilisation
Section Utilisation de l’appareil Utilisation de l’appareil ! La lecture continue même si vous basculez Tournez M.C. pour sélectionner la fonc- PRESET 1-6 (numéros de téléphone présélection- PB INVT (affichage des noms de l’annuaire) tion. de votre lecteur audio Bluetooth vers une nés) Une fois sélectionnées, les fonctions suivantes autre source pendant l’écoute d’une plage... -
Page 32: Réglages Sonores
Section Utilisation de l’appareil Utilisation de l’appareil Changement de l’affichage Pause de la lecture S.RTRV (sound retriever) FADER (réglage de l’équilibre avant-arrière) 1 Appuyez sur 4/PAUSE pour mettre en pause Améliore automatiquement l’audio compressé et Sélection des informations textuelles souhaitées 1 Appuyez sur M.C. -
Page 33: Menu Système
1 Appuyez sur M.C. pour sélectionner le réglage 0 à +6 sont les valeurs affichées tandis que le variations d’amplitude sonore lorsque vous passez MVH-350BT. ! BT AUDIO, BT MEM CLEAR et BT VERSION niveau augmente ou diminue. souhaité. -
Page 34: Mise En Service Ou Hors Service De L'atténuateur De Luminosité
Section Utilisation de l’appareil Utilisation de l’appareil Appuyez sur M.C. pour afficher le menu L’appareil peut rechercher automatiquement une BT MEM CLEAR (suppression des données du pé- FM STEP (incrément d’accord FM) principal. autre station avec le même type de programme, y riphérique Bluetooth enregistrées sur cet appareil) Normalement, l’incrément d’accord FM employé... -
Page 35: Utilisation D'une Source Aux
Section Utilisation de l’appareil Utilisation de l’appareil Remarque La sortie des bornes du haut-parleur arrière et la S/W UPDATE (mise à jour du logiciel) Vous ne pouvez pas sélectionner AUX à moins sortie RCA de cet appareil peuvent être utilisées Cette fonction est utilisée pour effectuer une mise que le réglage auxiliaire soit activé. -
Page 36: Installation
! Lorsque cet appareil est sous tension, les si- 1 Entrée cordon d’alimentation gnaux de commande sont transmis via le 2 Entrée microphone (MVH-350BT unique- câble bleu/blanc. Connectez ce câble à la té- ment) lécommande du système d’un amplificateur... -
Page 37: Amplificateur De Puissance (Vendu Séparément)
Section Installation Installation 9 Bleu/blanc Remarques Installation Montage avant/arrière DIN ! Changez le menu initial de cet appareil. Re- La position des broches du connecteur ISO Cet appareil peut être installé correctement soit Important est différente selon le type de véhicule. portez-vous à... -
Page 38: Installation Du Microphone
Retrait et remontage de la face avant Installation du microphone Vous pouvez retirer la face avant pour protéger Seulement pour MVH-350BT l’appareil contre le vol. Appuyez sur la touche de retrait, puis poussez la face avant vers le haut et tirez-la vers vous. -
Page 39: Informations Complémentaires
Section Installation Informations complémentaires Installez le clip microphone sur la colonne Dépannage Symptôme Causes possi- Action correc- de direction. bles tive Symptôme Causes possi- Action correc- L’appareil ne Vous utilisez un Éloignez tous les bles tive fonctionne autre appareil, appareils électri- pas correcte- tel qu’un télé- ques qui pourrait... -
Page 40: Messages D'erreur
Action correc- Quand vous contactez votre distributeur ou le bles tive bles tive bles tive Service d’entretien agréé par Pioneer le plus ! Connectez un NO AUDIO Absence de pla- Transférez les fi- N/A USB L’appareil USB CHECK USB L’iPod fonc- Assurez-vous que proche, n’oubliez pas de noter le message d’er-... -
Page 41: Conseils Sur La Manipulation
Panne iPod. Déconnectez le tible radio. tretien agréé par câble de l’iPod. Pioneer. Quand le menu iPod principal de l’iPod est affiché, recon- Conseils sur la manipulation Extension de fichier : .mp3 Ne laissez pas l’iPod dans un endroit soumis à... - Page 42 Exemple de hiérarchie PRÉCAUTION ! iPhone 4 (version logicielle 5.1.1) ! Pioneer ne garantit pas la compatibilité avec ! iPhone 3GS (version logicielle 5.1.1) Seuls les 32 premiers caractères d’un nom de fi- tous les périphériques de stockage de masse ! iPhone 3G (version logicielle 4.2.1)
-
Page 43: Profils Bluetooth
........+10 dB (100 Hz), +6,5 dB Les accessoires électroniques portant la men- Puissance de sortie ..+4 dBm maximum PIONEER CORPORATION est faite sous licence. (10 kHz) (volume : –30 dB) (Classe de puissance 2) tion « Made for iPod » et « Made for iPhone »... -
Page 44: Prima Di Iniziare
Se si vuole eliminare questo prodotto, non ! Il CarStereo-Pass Pioneer può essere usato gettarlo insieme ai rifiuti domestici. Esiste un solo in Germania. sistema di raccolta differenziata in conformità... -
Page 45: Funzionamento Dell'unità
È possibile configurare le opzioni di menu ripor- tate di seguito. La ricerca di sintonia in modo ATTENZIONE locale è attiva. ! Utilizzare un cavo USB Pioneer opzionale Dopo aver installato l’unità, portare l’in- (CD-U50E) per collegare un lettore audio (ripeti- È attiva la funzione di riprodu- terruttore della chiave di avviamento su ON. -
Page 46: Funzionamento Di Base
Sezione Funzionamento dell’unità Funzionamento dell’unità ! Per evitare danni ai dispositivi o agli interni Operazioni col menu più FM STEP (passo di sintonizzazione FM) Spegnimento dell’unità del veicolo, accertarsi di scollegare gli even- 1 Premere e tenere premuto SRC/OFF fino a frequentemente utilizzate Normalmente il passo per la sintonizzazione in FM tuali cavi e i dispositivi collegati al frontalino,... - Page 47 Sezione Funzionamento dell’unità Funzionamento dell’unità Commutazione del display Sintonizzazione manuale (passo per passo) Ricerca di una stazione RDS tramite le informazio- L. CLASS (Musica classica leggera), CLASSIC (Mu- 1 Premere c o d. ni PTY sica classica) ! Selezionare MAN (sintonizzazione manuale) Selezione delle informazioni di testo desiderate È...
- Page 48 Sezione Funzionamento dell’unità Funzionamento dell’unità Dispositivo di memoria USB Commutazione del display La ricerca di sintonia in modo locale consente di Visualizzazione di un elenco dei file (o delle cartel- sintonizzare solo le stazioni radio con segnali le) nella cartella selezionata Funzionamento di base Selezione delle informazioni di testo desiderate 1 Quando è...
- Page 49 Sezione Funzionamento dell’unità Funzionamento dell’unità Impostazioni delle funzioni Note Utilizzare M.C. per selezionare una cate- Operazioni con i pulsanti speciali ! Non è possibile accendere o spegnere l’iPod goria/brano. Premere M.C. per visualizzare il menu se la modalità di controllo è impostata su Selezione di un intervallo di ripetizione principale.
- Page 50 Risposta a una chiamata in arrivo ! È possibile controllare il volume solo da que- CONTROL iPod non è compatibile con i seguen- 1 Quando si riceve una chiamata, premere sta unità. ti modelli di iPod. Solo per il modello MVH-350BT...
- Page 51 Sezione Funzionamento dell’unità Funzionamento dell’unità % Premere e tenere premuto M.C. per pas- Memorizzazione e richiamo di numeri Fine di una chiamata DEVICELIST (collegamento o scollegamento di un di telefono sare alla modalità di riconoscimento vocale. 1 Premere dispositivo dall’elenco dei dispositivi) I comandi disponibili con questa unità...
- Page 52 M.C. meri di telefono. sizione successiva. 2 Ruotare M.C. per selezionare un nome o un nome del dispositivo (Pioneer BT Unit) e TOP (alfabeto)–ΟΛΑ (alfabeto greco)–В- 4 Una volta immesso il codice PIN, premere e te- СЕ (alfabeto cirillico) immettere il codice PIN sul dispositivo.
- Page 53 Sezione Funzionamento dell’unità Funzionamento dell’unità — Profilo A2DP (Advanced Audio Distribution Operazioni con i pulsanti speciali PHONE FUNC (funzione telefono) 1 Collegamento Profile): sul proprio lettore audio è possibile Utilizzare il menu dei collegamenti del telefono È possibile impostare A. ANSR, R.TONE e PB unicamente la riproduzione di brani.
-
Page 54: Regolazione Dell'audio
Sezione Funzionamento dell’unità Funzionamento dell’unità ! SUB.W CTRL e HPF SETTING non sono di- PLAY (riproduzione) Questa unità è dotata di un’uscita subwoofer che 1 Premere M.C. per visualizzare la modalità di sponibili se l’impostazione SUB.W è selezio- può essere attivata o disattivata. nata in OFF. - Page 55 FM, che rimane immutato. ne consentita quando questa funzione è attiva. desiderata. lo MVH-350BT. ! Con questa funzione è anche possibile regola- 1 Premere M.C. per attivare o disattivare la mo- ! BT AUDIO, BT MEM CLEAR e BT VERSION 12H (formato orologio a 12 ore)—24H (formato...
- Page 56 Sezione Funzionamento dell’unità Funzionamento dell’unità Premere M.C. per selezionare l’imposta- Menu di sistema È possibile cancellare i dati dei dispositivi Le uscite degli altoparlanti posteriori e l’uscita zione desiderata. Bluetooth memorizzati in questa unità. Per proteg- RCA di questa unità possono essere utilizzate per Premere e tenere premuto SRC/OFF fino OFF (disattivato)—ON (attivato) gere i dati personali, si consiglia di cancellare tali...
-
Page 57: Installazione
Sezione Funzionamento dell’unità Installazione — Non accorciare i cavi. Se viene visualizzato un Collegamenti — Non condividere mai l’alimentazione con altri display indesiderato Importante dispositivi tagliando l’isolante del cavo di ali- ! Quando si installa questa unità in un veicolo Per disattivare il display indesiderato, utilizzare mentazione dell’unità. - Page 58 Collegare al terminale controllato dall’inter- In alcuni veicoli, il connettore ISO potrebbe ! Non utilizzare componenti non approvati, 3 Microfono (solo per il modello MVH-350BT) ruttore di accensione (12 V CC). essere diviso in due. In questo caso, accertar- poiché potrebbero provocare malfunziona- 7 Collegare insieme i cavi dello stesso colore.
-
Page 59: Installazione Del Microfono
Rimuovere la guarnizione. Solo per il modello MVH-350BT metalliche (90°) in posizione. za l’unità, accertarsi di lasciare ampio spazio dietro il pannello posteriore e avvolgere even-... -
Page 60: Informazioni Supplementari
Sezione Installazione Informazioni supplementari Installare la clip del microfono sul pianto- Risoluzione dei problemi Sintomo Causa Azione ne dello sterzo. Malfunziona- Si sta utilizzan- Spostare il dispo- Sintomo Causa Azione mento dell’u- do un dispositi- sitivo elettrico che nità. vo, ad esempio causa interferen- Il display Non è... -
Page 61: Messaggi Di Errore
Trasferire i file CHECK USB Il connettore Verificare che il ERROR-19 Errore di comu- Eseguire una Pioneer più vicino, accertarsi di annotare il mes- brani. audio nel disposi- USB o il cavo connettore USB o nicazione. delle operazioni saggio di errore. - Page 62 (32 kHz, 44,1 kHz, 48 kHz per l’enfatizzazione) l’acceleratore. Pioneer più vici- Versioni tag ID3 compatibili: 1.0, 1.1, 2.2, 2.3, 2.4 (alla tag ID3 Versione 2.x viene data la priorità ri- spetto alla Versione 1.x.)
-
Page 63: Compatibilità Ipod
: Ч : Ъ del software 1.1.3) Щ Esempio di gerarchia ! iPod nano di prima generazione (versione del ATTENZIONE ! Pioneer non garantisce la compatibilità con : Ы : Ь : Э : Ю : Я software 1.3.1) ! iPhone 4S (versione del software 5.1.1) -
Page 64: Dati Tecnici
File system ....... FAT12, FAT16, FAT32 Messa a terra ....Negativa Inc. e sono utilizzati in licenza da PIONEER agli standard operativi stabiliti da Apple. Apple Formato di decodifica MP3 Consumo massimo ..10,0 A CORPORATION. -
Page 66: Antes De Comenzar
Además, el contacto con líqui- dos puede causar daños en la unidad, humo y recalentamiento. ! El CarStereo-Pass de Pioneer solo debe usar- Si desea deshacerse de este producto, no lo se en Alemania. mezcle con los residuos generales de su ! Mantenga siempre el volumen lo suficiente- hogar. -
Page 67: Utilización De Esta Unidad
ENG (Inglés)—РУС (Ruso) PRECAUCIÓN 2 Pulse M.C. para confirmar la selección. Sintonización por búsqueda ! Utilice un cable USB Pioneer opcional (CD- Menú de configuración CLOCK SET (ajuste del reloj) local activada. U50E) para conectar el dispositivo de alma-... -
Page 68: Funcionamiento Básico
Sección Utilización de esta unidad Utilización de esta unidad ! Para evitar que el dispositivo o el interior del Sintonizador FM STEP (paso de sintonía de FM) Apagado de la unidad vehículo sufran daños, retire todos los cables 1 Mantenga pulsado SRC/OFF hasta que se apa- Funcionamiento básico Normalmente, el paso de sintonía de FM emplea- o dispositivos conectados al panel delantero... - Page 69 Sección Utilización de esta unidad Utilización de esta unidad Almacenamiento y recuperación Búsqueda de una emisora RDS por información OTHERS (otros) La sintonización por búsqueda local le permite de emisoras para cada banda sintonizar solo las emisoras de radio con señales EDUCATE (educación), DRAMA (drama), CULTU- Se pueden buscar programas de tipo general, lo suficientemente intensas como para asegurar...
-
Page 70: Dispositivo De Almacenamiento Usb
Sección Utilización de esta unidad Utilización de esta unidad Dispositivo de Cambio de la visualización Gire M.C. para cambiar la opción de Visualización de una lista de los archivos (o las menú y pulse para seleccionar FUNCTION. almacenamiento USB carpetas) de la carpeta seleccionada Una vez seleccionado, se puede ajustar la fun- Selección de la información de texto deseada 1 Tras seleccionar una carpeta, pulse M.C. - Page 71 Sección Utilización de esta unidad Utilización de esta unidad Cambio de la visualización Operaciones con botones especiales Reproducción de canciones Reproducción de una canción de la categoría se- relacionadas con la canción que leccionada Selección de la información de texto deseada 1 Tras seleccionar una categoría, mantenga pul- Selección de un intervalo de repetición de repro- se está...
-
Page 72: Uso De La Tecnología Inalámbrica Bluetooth
Realización de una llamada telefónica CONTROL iPod no es compatible con los si- esta unidad. Solo para MVH-350BT 1 Consulte Funcionamiento del menú del teléfono guientes modelos de iPod: en la página 74. ! iPod nano 1ª generación Ajustes de funciones Uso del teléfono Bluetooth... -
Page 73: Funcionamiento Del Menú De Conexión
! Estacione siempre el vehículo en un lugar se- DEL DEVICE (eliminación de un dispositivo de la nombre del dispositivo (Pioneer BT Unit) e guro y ponga el freno de mano para realizar Pulse uno de los botones de ajuste de lista) introduzca el código PIN en su dispositivo. -
Page 74: Funcionamiento Del Menú Del Teléfono
Sección Utilización de esta unidad Utilización de esta unidad Para conectar su dispositivo a esta unidad a través MISSED (historial de llamadas perdidas) PB INVT (visualización de nombres del directorio 1 Pulse M.C. para mostrar el modo de ajuste. de tecnología inalámbrica Bluetooth, debe intro- DIALLED (historial de llamadas marcadas) de teléfonos) 2 Gire M.C. -
Page 75: Ajustes De Audio
Sección Utilización de esta unidad Utilización de esta unidad ! Según el tipo de reproductor de audio Cambio de la visualización Gire M.C. para cambiar la opción de Pausa de la reproducción Bluetooth que haya conectado a esta unidad, menú y pulse para seleccionar AUDIO. 1 Pulse 4/PAUSE para pausar o reanudar. -
Page 76: Menú Del Sistema
Sección Utilización de esta unidad Utilización de esta unidad ! BT AUDIO, BT MEM CLEAR y BT VERSION Solo las frecuencias más bajas que aquellas en el SLA (ajuste del nivel de fuente) 1 Pulse M.C. para mostrar el modo de ajuste. no están disponibles para MVH-150UI. -
Page 77: Cambio Del Ajuste Del Atenuador De Luz
Sección Utilización de esta unidad Utilización de esta unidad Pulse M.C. para seleccionar el ajuste de- El sonido proveniente de este sistema se silencia Los datos del dispositivo Bluetooth almacenados La salida de cables de altavoces traseros y la sali- seado. -
Page 78: Instalación
Sección Utilización de esta unidad Instalación — Nunca corte el aislamiento del cable de ali- Menú del sistema Si aparece un display no Conexiones mentación de esta unidad para compartir la deseado Importante Mantenga pulsado SRC/OFF hasta que se corriente con otros equipos. La capacidad de ! Cuando esta unidad se instale en un ve- apague la unidad. - Page 79 Accesorio (o reserva) den causar fallos de funcionamiento. Notas 6 Rojo 2 Entrada micrófono (sólo MVH-350BT) ! Consulte a su distribuidor si para la instala- ! Cambie el menú inicial de esta unidad. Con- 3 Micrófono (solo MVH-350BT) Conectar al terminal controlado por la llave ción es necesario taladrar orificios o hacer...
-
Page 80: Instalación Del Micrófono
Retire el anillo de guarnición. Solo para MVH-350BT metálicas (90°) y colocarlas en su lugar. unidad, asegúrese de dejar un amplio espa- cio por detrás del panel trasero y enrolle los cables sueltos de modo que no bloqueen las PRECAUCIÓN... -
Page 81: Información Adicional
4 Ajuste el cable del micrófono en la ranura. (NO TITLE, oficial de Pioneer más cercano. # El micrófono puede instalarse sin necesidad de por ejemplo). la pinza, si lo hace así, separe primero la base del La unidad no Está... - Page 82 Servi- ción, conecte úni- vos del disposi- vos de audio no cio técnico oficial camente disposi- dispositivo de al- tivo de integrados con Pioneer. tivos de macenamiento almacenamien- Windows Media almacenamiento USB. to USB están in- DRM 9/10 al dis- –Cambie a una...
-
Page 83: Pautas Para El Manejo
2.2, 2.3, 2.4 (la etiqueta ID3 versión 2.x tiene priori- atascado debajo del freno o del acelerador. técnico oficial de dad sobre la versión 1.x) Pioneer. -
Page 84: Compatibilidad Con Ipod
El cable de la interfaz CD-IU51 de Pioneer también 1 Cree un nombre del archivo que incluya nú- tibles. -
Page 85: Copyright Y Marcas Registradas
Inc., y cualquier uso de dichas marcas por que un accesorio electrónico ha sido diseñado miento masivo) ........Tipo negativo PIONEER CORPORATION se hace bajo licencia. para ser conectado específicamente a un iPod o Sistema de archivos ..FAT12, FAT16, FAT32 Consumo máximo de corriente Otras marcas y nombres comerciales son pro- Formato de decodificación MP3... -
Page 86: Bevor Sie Beginnen
Haus- — Stempel des Händlers tionieren, dann wenden Sie sich an Ihren Händ- haltsabfällen. Es gibt ein getrenntes ler oder an die nächstgelegene PIONEER- Diese Informationen dienen als Eigentums- Sammelsystem für gebrauchte elektronische Kundendienststelle. nachweis. Im Fall eines Diebstahls teilen Sie Produkte, über das die richtige Behandlung,... -
Page 87: Bedienung Des Geräts
1 Drehen Sie M.C., um die gewünschte Einstel- USB-Speichergeräts ein optionales USB- ordnete Ordner- oder Menü- riever) Kabel von Pioneer (CD-U50E), da direkt an ebene vorhanden ist. lung zu wählen. Die Lokal-Suchlaufabstim- diese Einheit angeschlossene Zusatzgeräte ENG (Englisch)—РУС (Russisch) mung ist aktiviert. -
Page 88: Grundlegende Bedienvorgänge
Abschnitt Bedienung des Geräts Bedienung des Geräts Grundlegende Bedienvorgänge Entfernen der Frontplatte zum Schutz vor Dieb- Wählen einer Programmquelle 1 Drehen Sie M.C., um die Stunde einzustellen. 1 Drücken Sie SRC/OFF, um zwischen den fol- stahl Wichtig 2 Drücken Sie auf M.C., um die Minuten auszu- 1 Drücken Sie die Taste zum Entriegeln der genden Optionen umzuschalten: ! Gehen Sie beim Abnehmen bzw. - Page 89 Abschnitt Bedienung des Geräts Bedienung des Geräts Häufig verwendete Umschalten der Anzeige Manuelle (schrittweise) Abstimmung Suchen nach RDS-Stationen anhand eines Pro- Menüschritte 1 Drücken Sie c oder d. grammtyps ! Wählen Sie MAN (manuelle Abstimmung) Wählen der gewünschten Textinformationen Sie können nach Programmen eines allgemeinen 1 Drücken Sie auf DISP, um zwischen den fol- unter SEEK, um diese Funktion verwenden zu Typs suchen, wie die, die nachfolgend aufgelistet...
- Page 90 Abschnitt Bedienung des Geräts Bedienung des Geräts USB-Speichermedium Umschalten der Anzeige L. CLASS (Leichte klassische Musik), CLASSIC LOCAL (Lokal-Suchlaufabstimmung) (Klassische Musik) Grundlegende Bedienvorgänge Mit der Lokal-Suchlaufabstimmung wird nur nach Wählen der gewünschten Textinformationen OTHERS (Sonstiges) Stationen mit ausreichender Signalstärke für 1 Drücken Sie auf DISP, um zwischen den fol- einen guten Empfang gesucht.
- Page 91 Abschnitt Bedienung des Geräts Bedienung des Geräts iPod Umschalten der Anzeige Anzeige einer Liste der Dateien (oder Ordner) im Pausieren der Wiedergabe 1 Drücken Sie 4/PAUSE, um die Wiedergabe an- gewählten Ordner Grundlegende Bedienvorgänge 1 Drücken Sie nach Auswahl eines Ordners auf Wählen der gewünschten Textinformationen zuhalten oder fortzusetzen.
- Page 92 Abschnitt Bedienung des Geräts Bedienung des Geräts Bedienvorgänge mit speziellen Hinweise Wiedergabe eines Musiktitels der gewählten Kate- Pausieren der Wiedergabe ! Die Wiedergabe des ausgewählten Musikti- Tasten 1 Drücken Sie 4/PAUSE, um die Wiedergabe an- gorie tels/Albums wird ggf. abgebrochen, wenn 1 Drücken und halten Sie M.C.
- Page 93 Bluetooth-Verbindung. Siehe Bedienen des Ver- um die angezeigte Option zu wählen. bindungsmenüs auf Seite 94. Hinweise Nur für MVH-350BT 2 Funktionseinstellungen ! Wenn auf dem Mobiltelefon der Privatmodus Drehen Sie M.C., um die gewünschte Bedienen Sie das Menü mit den Bluetooth-Te- gewählt wurde, ist der Freisprechmodus ggf.
- Page 94 ! Um den Verbindungsaufbau abzuschlie- ! Verbundene Geräte funktionieren unter Um- Drücken Sie eine der Stationstasten (1/ DEL DEVICE (Löschen eines Gerätes aus der Gerä- ßen, prüfen Sie den Gerätenamen (Pioneer ständen nicht ordnungsgemäß, wenn jeweils bis 6/ ), um die gewünschte Telefonnum- BT Unit) und geben Sie die PIN in Ihr Gerät...
- Page 95 Abschnitt Bedienung des Geräts Bedienung des Geräts Drücken Sie auf , um das Telefonme- Um die Verfügbarkeit dieser Einheit von anderen PHONE FUNC (Telefonfunktion) ! Das Adressbuch Ihres Mobiltelefons wird auto- nü anzuzeigen. Geräten aus zu überprüfen, kann die Bluetooth- # Ist PW SAVE eingeschaltet, kann das Telefonme- matisch übertragen, sobald das Mobiltelefon Über dieses Menü...
-
Page 96: Audio-Einstellungen
Abschnitt Bedienung des Geräts Bedienung des Geräts — Profil A2DP (Advanced Audio Distribution ! Je nach Gerät können die Textinformationen Vorbereiten der Verwendung eines Drehen Sie M.C., um die gewünschte Profile): Sie können mit Ihrem Audio-Player Bluetooth-Audio-Players geändert werden. Funktion zu wählen. nur Musiktitel wiedergeben. - Page 97 Abschnitt Bedienung des Geräts Bedienung des Geräts ! SUB.W, SUB.W CTRL und HPF SETTING ste- Dieses Gerät ist mit einem Subwoofer-Ausgang Wenn die im Ausgabe-Frequenzbereich des Sub- 1 Drücken Sie auf M.C., um den Einstellmodus hen nicht zur Verfügung, wenn in ausgestattet, der ein- und ausgeschaltet werden woofers enthaltenen Basstöne nicht über den SP-P/O MODE die Option REAR/REAR ge-...
-
Page 98: Umschalten Der Dimmer-Einstellung
3 Drehen Sie M.C., um die Uhrzeit einzustellen. 2 Drücken Sie M.C., um den Speicher zu lö- temmenüfunktionen angepasst werden. PW SAVE (Energiesparmodus) schen. ! MUTE MODE steht unter MVH-350BT nicht 12H/24H (Uhrzeitformat) CLEARED wird angezeigt und die Bluetooth- zur Verfügung. Wenn Sie diese Funktion einschalten, reduzieren Gerätedaten werden gelöscht. - Page 99 Abschnitt Bedienung des Geräts Bedienung des Geräts Drücken Sie auf M.C., um das Hauptmenü FM STEP (UKW-Kanalraster) Der Hecklautsprecher-Leitungsausgang und S/W UPDATE (Aktualisieren der Software) anzuzeigen. Cinch-Ausgang dieses Geräts können zum An- Bei der Suchlaufabstimmung wird normalerweise Diese Funktion ermöglicht die Aktualisierung die- schluss eines Vollbereichslautsprechers oder Sub- Drehen Sie M.C., um die Option ILLUMI das 50-kHz-UKW-Kanalraster verwendet.
-
Page 100: Installation
Abschnitt Bedienung des Geräts Installation — Führen Sie das gelbe Batteriekabel nicht Hinweis Anschlüsse durch ein Loch in den Motorraum, um die AUX kann nur gewählt werden, wenn die AUX- Wichtig Verbindung mit der Fahrzeugbatterie herzu- Einstellung eingeschaltet wurde. Für weitere ! Bei der Installation des Geräts in einem stellen. - Page 101 Sie diesen Draht mit dem Draht der Audio-Stummschaltung dieses Geräts. Andernfalls sollte der Draht 1 Netzkabelzugang der Audio-Stummschaltung (Mute) frei blei- 2 Mikrofoneingang (nur MVH-350BT) ben. 3 Mikrofon (nur MVH-350BT) d Lautsprecherkabel 1 Zum Netzzugang 1 Systemfernbedienung 2 Je nach Fahrzeugtyp können die Funktionen...
- Page 102 Abschnitt Installation Installation ! Installieren Sie dieses Gerät keinesfalls an DIN-Frontmontage Ziehen Sie auf jeder Seite zwei Schrau- Ziehen Sie das Gerät aus dem Armaturen- folgenden Orten: ben fest. brett. Führen Sie den Montagerahmen in das — Orte, an denen das Gerät die Steuerung des Armaturenbrett ein.
-
Page 103: Installieren Des Mikrofons
Installation Installation Installieren des Mikrofons Bringen Sie den Mikrofonclip an der Lenksäule an. Nur für MVH-350BT VORSICHT Eine Führung des Mikrofonkabels um die Lenk- säule oder den Schalthebel kann sich als über- aus gefährlich erweisen. Achten Sie bei der Installation des Geräts stets darauf, dass die Lenkung des Fahrzeugs in keiner Weise behin- dert wird. -
Page 104: Zusätzliche Informationen
Zusätzliche Informationen Fehlerbehebung Fehlermeldungen Symptom Ursache Abhilfemaßnah- Meldung Ursache Abhilfemaßnah- Vor der Kontaktaufnahme mit Ihrem Händler oder der nächstgelegenen Pioneer-Kunden- Symptom Ursache Abhilfemaßnah- Im Gerät ist Sie verwenden Lassen Sie einen NO AUDIO Es sind keine Übertragen Sie dienststelle sollten Sie sich die angezeigte Feh- eine Fehlfunk- in der Nähe die-... - Page 105 Anhang Zusätzliche Informationen Zusätzliche Informationen Meldung Ursache Abhilfemaßnah- Meldung Ursache Abhilfemaßnah- Meldung Ursache Abhilfemaßnah- Meldung Ursache Abhilfemaßnah- ! Schließen Sie N/A USB Das ange- CHECK USB Der iPod funk- Kontrollieren Sie, ERROR-19 Kommunikation Führen Sie einen ERROR-16 Die iPod-Firm- Aktualisieren Sie schlossene ein dem Standard tioniert ord-...
- Page 106 Je nach der Anwendung, die für die Codierung der WMA-Dateien verwendet wurde, funktioniert Ihren Händler iPod dieses Gerät ggf. nicht ordnungsgemäß. oder eine Pioneer- Kundendienststel- Dateierweiterung: .mp3 Nach dem Wiedergabestart kann es bei Audio-Da- Bewahren Sie den iPod nicht an Orten auf, an teien, in die Bilddaten eingebettet wurden bzw.
-
Page 107: Russischer Zeichensatz
5.1.1) Nutzung dieser Marken durch die PIONEER Russischer Zeichensatz ! iPod touch der 2. Generation (Softwarever- Pioneer haftet in keinem Fall für den Verlust von CORPORATION erfolgt unter entsprechender Li- Daten auf einem iPod, selbst dann nicht, wenn sion 4.2.1) zenz. -
Page 108: Technische Daten
Anhang Zusätzliche Informationen Zusätzliche Informationen men, z. B. „Pay-Audio”- oder „Audio-on-de- Technische Daten Maximale Stromversorgung ........1 A mand”-Anwendungen. Für eine derartige Nut- USB-Klasse ..... MSC (Massenspeicher-Klas- Allgemein zung ist eine separate Lizenz erforderlich. Stromversorgung ..... 14,4 V Gleichspannung (Tole- Detaillierte Informationen hierzu finden Sie Dateisystem ..... -
Page 110: Vóór U Begint
Deponeer dit product niet bij het gewone veroorzaken. huishoudelijk afval wanneer u het wilt verwij- ! De Pioneer CarStereo-Pass wordt alleen in deren. Er bestaat een speciaal wettelijk voor- Duitsland gebruikt. geschreven verzamelsysteem voor de juiste... -
Page 111: Bediening Van Het Toestel
! Sluit een USB-opslagapparaat via een dit toestel. 100 kHz als de functie AF of TA is ingeschakeld. lokale zenders is ingescha- Pioneer USB-kabel (CD-U50E, optioneel) op SET UP verschijnt. Maar soms krijgt u een beter resultaat als ook bij keld. - Page 112 Hoofdstuk Bediening van het toestel Bediening van het toestel Draai aan M.C. en selecteer YES om de in- Tuner Het voorpaneel tegen diefstal verwijderen Een signaalbron selecteren stelling te voltooien. 1 Druk op de toets Verwijderen om het voorpa- 1 Druk op SRC/OFF om over te schakelen tus- # Als u de instelling wilt wijzigen, draait u M.C.
- Page 113 Hoofdstuk Bediening van het toestel Bediening van het toestel Zenders voor de verschillende RDS-zenders zoeken via PTY-informatie OTHERS (andere) Als deze functie is ingeschakeld, stemt het toestel frequentiebanden opslaan en U kunt naar bepaalde soorten uitzendingen zoe- alleen af op zenders waarvan het signaal vol- EDUCATE (educatief), DRAMA (theater), CUL- oproepen ken, zoals de uitzendingen die in het volgende ge-...
- Page 114 Hoofdstuk Bediening van het toestel Bediening van het toestel USB-opslagapparaat Een ander display kiezen Een lijst van de bestanden (mappen) in de gese- S.RTRV (sound retriever) lecteerde map weergeven Basisbediening Deze verbetert automatisch de weergave van ge- De gewenste informatie selecteren 1 Selecteer een map en druk op M.C.
- Page 115 Hoofdstuk Bediening van het toestel Bediening van het toestel Een ander display kiezen Opmerkingen Een song in de geselecteerde categorie afspelen Alle songs in willekeurige volgorde afspelen (shuf- ! De geselecteerde song of het geselecteerde 1 Selecteer een categorie en houd M.C. inge- fle all) album kan worden geannuleerd als u een an- De gewenste informatie selecteren...
-
Page 116: Bluetooth-Technologie
Bluetooth-technologie functies in het geheugen opslaan. Raadpleeg geven. Een inkomend gesprek beantwoorden voor meer informatie Het telefoonmenu op de Alleen voor MVH-350BT 1 Druk op wanneer u gebeld wordt. volgende bladzijde. Draai aan M.C., selecteer de menuoptie ! MISSED (gemiste gesprekken) Een gesprek beëindigen... - Page 117 M.C. ingedrukt. ! Houd M.C. ingedrukt om over te schakelen De volgende functies kunnen met dit toestel ge- de naam van het apparaat (Pioneer BT ! Als u na het invoeren M.C. indrukt, keert u tussen het Bluetooth-apparaatadres en de bruikt worden.
-
Page 118: Functies En Bediening
Hoofdstuk Bediening van het toestel Bediening van het toestel ! Afhankelijk van het aangesloten type Draai aan M.C. om de gewenste functie PRESET 1-6 (voorkeuzenummers) PB INVT (sorteerwijze telefoonboek) te selecteren. Bluetooth-audiospeler kunnen sommige be- U kunt de volgende functies aanpassen. dienings- of informatiefuncties niet beschik- 1 Druk op M.C. -
Page 119: Audio-Instellingen
Hoofdstuk Bediening van het toestel Bediening van het toestel Een ander display kiezen Audio-instellingen Het afspelen onderbreken 1 Druk op M.C. om de instellingenmodus weer 1 Druk op 4/PAUSE om het afspelen te onderbre- Druk op M.C. om het hoofdmenu weer te te geven. - Page 120 Hoofdstuk Bediening van het toestel Bediening van het toestel ! MUTE MODE is niet beschikbaar voor MVH- SUB.W CTRL (subwoofer aanpassen) SLA (bronniveauregeling) Schakel deze instelling in als een extern apparaat 350BT. op dit toestel is aangesloten. ! BT AUDIO, BT MEM CLEAR en BT VERSION De subwoofer geeft alleen frequenties beneden de Met de functie SLA (bronniveauregeling) kunt u 1 Druk op M.C.
- Page 121 Hoofdstuk Bediening van het toestel Bediening van het toestel Druk op M.C. en selecteer de gewenste Systeemmenu Bluetooth-apparaatgegevens op dit toestel kunnen Op de uitgang voor de achterluidspreker en de instelling. gewist worden. Om uw persoonlijke gegevens RCA-uitgang van dit toestel kan een luidspreker Houd SRC/OFF ingedrukt tot het toestel OFF (uit)—ON (aan) beter te beschermen, verdient het aanbeveling om...
- Page 122 — Sluit de gele kabel niet op de accu aan via een gat in het motorcompartiment. — Dek alle ongebruikte kabelaansluitingen af met isolatietape. — Maak de kabels niet korter. 1 Ingang stroomkabel 2 Microfooningang (alleen MVH-350BT)
- Page 123 Hoofdstuk Installatie Installatie ! Neem contact op met uw dealer als er voor 3 Microfoon (alleen MVH-350BT) 6 Rood Opmerkingen ! Wijzig het beginmenu van het toestel. Raad- Aansluiten op een aansluiting die door de de installatie gaten moeten worden geboord...
-
Page 124: De Microfoon Installeren
Het voorpaneel verwijderen en terug De microfoon installeren bevestigen Schuif de montagebehuizing in het dash- Alleen voor MVH-350BT U kunt het voorpaneel verwijderen om het toe- board. stel tegen diefstal te beveiligen. Gebruik voor installatie in een ondiepe ruimte de... -
Page 125: Aanvullende Informatie
Hoofdstuk Installatie Aanvullende informatie Plaats de microfoonklem op de stuurko- Problemen verhelpen Symptoom Oorzaak Actie lom. Het toestel Er wordt nabij Gebruik nabij dit Symptoom Oorzaak Actie functioneert dit toestel een toestel geen elek- niet correct. ander apparaat trische apparaten Het display U hebt gedu- Voer de handeling... - Page 126 USB-opslagap- standen af die USB-opslagap- USB-opslagappa- fout. gende mogelijk- uw leverancier of Pioneer-servicecentrum. paraat bevat be- niet met Windows paraat verbruikt raat en gebruik heden. – Zet het contact standen die met...
-
Page 127: Aanwijzingen Voor Het Gebruik
Bitsnelheid: 8 kbps tot 320 kbps (CBR), VBR USB-opslagapparaat Pioneer Service- Bemonsteringsfrequentie: 8 kHz tot 48 kHz centrum. (32 kHz, 44,1 kHz, 48 kHz voor de beste kwaliteit) Mappenhiërarchie: maximaal acht niveaus diep (Voor praktisch gebruik kunt u beter niet meer dan Compatibele ID3-tag-versie: 1.0, 1.1, 2.2, 2.3, 2.4... - Page 128 Bluetooth sies van de iPod-software worden hieronder ge- De afspeelvolgorde op draagbare USB-audiospe- Pioneer is niet verantwoordelijk voor verlies van SIG, Inc. PIONEER CORPORATION gebruikt noemd. Oudere versies worden wellicht niet lers is verschillend en hangt af van de gebruikte gegevens op de iPod, ook niet tijdens gebruik deze onder licentie.
-
Page 129: Technische Gegevens
Aanhangsel Aanvullende informatie Aanvullende informatie Technische gegevens USB-specificatie ....USB 2.0 volledige snelheid Dit product is uitsluitend bedoeld voor niet-com- Algemeen Maximaal stroomverbruik mercieel privégebruik. Het mag niet in een com- ........1 A Spanningsbron ....14,4 V gelijkstroom (10,8 tot merciële omgeving worden gebruikt voor USB-klasse ...... -
Page 130: Сведения Об Этом Устройстве
причиной его выхода из строя, перегрева щать использованные электронные изделия и появления дыма. в специализированные пункты приема или в ! Pioneer CarStereo-Pass предназначен для магазин (при покупке аналогичного нового использования только в Германии. устройства). ! Всегда сохраняйте уровень громкости до- Если... - Page 131 ремешать) функция “перемешать” или # Если в течение 30 секунд не выполняется ни- “перемешать все”. каких операций, установочное меню не будет вы- водиться. Только для MVH-350BT Индика- # Если вы хотите выполнить настройку позже, Элемент Элемент Состояние Отображается, если вклю- тор...
-
Page 132: Основные Операции
Раздел Управление данным устройством Управление данным устройством Основные операции Снятие передней панели в целях защиты от Выбор источника сигнала 1 Поворачивайте M.C., чтобы установить кражи 1 Нажимайте кнопку SRC/OFF для выбора из Важно часы. 1 Чтобы отсоединить переднюю панель, на- следующих... -
Page 133: Переключение Дисплея
Раздел Управление данным устройством Управление данным устройством Тюнер Сохранение и вызов из памяти Использование функций PTY POP MUS (поп-музыка), ROCK MUS (рок-музы- радиостанций для каждого Можно настроиться на радиостанцию с по- ка), EASY MUS (легкая музыка), OTH MUS Основные операции мощью... - Page 134 Раздел Управление данным устройством Управление данным устройством ! В зависимости от версии iTunes, исполь- BSM (запоминание лучших станций) Ускоренная перемотка вперед или назад 1 Нажмите M.C., чтобы включить или выклю- зуемой для записи файлов МР3, или от 1 Нажмите и удерживайте кнопку c или d. чить...
- Page 135 Раздел Управление данным устройством Управление данным устройством Функции с использованием Поворачивайте M.C. для прокрутки ! Перед подключением iPod к данному ус- С помощью M.C. выберите категорию/ пунктов меню; нажмите, чтобы выбрать тройству отсоедините от него наушники. композицию. специальных кнопок ! Выключение iPod происходит примерно FUNCTION.
- Page 136 Раздел Управление данным устройством Управление данным устройством Функции с использованием Выбранная композиция или альбом будет % Переключение между режимами упра- Приостановка воспроизведения воспроизводиться после окончания вос- вления производится нажатием BAND/ . специальных кнопок 1 Нажмите кнопку 4/PAUSE, чтобы включить произведения текущей композиции. ! CONTROL iPod –...
- Page 137 Использование функции голосового технологии Bluetooth режим закрытой связи, функция громкой управления связи может оказаться недоступной. Только для MVH-350BT Эту функцию можно использовать для iPod с ! Продолжительность вызова отобразится функцией голосового управления, подклю- на дисплее (это показание может незна- ченного через Bluetooth, при выбранном ис- чительно...
- Page 138 соединения проверьте название устрой- ! Если одновременно подключены не- дующего символа нажимайте M.C. DEL DEVICE (удаление устройства из списка) ства (Pioneer BT Unit) и введите PIN-код сколько устройств Bluetooth (например, 4 Введите PIN-код, а затем нажмите и удер- на устройстве.
- Page 139 Раздел Управление данным устройством Управление данным устройством Нажмите , чтобы отобразить меню PB INVT (отображение имен в телефонном ! Телефонный справочник переносится авто- 1 Для отображения установочного меню на- телефона. справочнике) матически при подключении телефона к жмите M.C. # В режиме PW SAVE меню телефона не выво- данному...
- Page 140 Раздел Управление данным устройством Управление данным устройством ! Во время использования Bluetooth-ауди- Переключение дисплея Приостановка воспроизведения S.RTRV (sound retriever, технология преобраз- оплеера невозможно автоматически под- 1 Нажмите кнопку 4/PAUSE, чтобы включить ования звука) ключиться к Bluetooth-телефону. Выбор текстовой информации паузу или возобновить воспроизведение. ! Если...
- Page 141 Раздел Управление данным устройством Управление данным устройством FADER (регулировка баланса) Это устройство имеет выход канала сабвуфе- Если Вы не хотите, чтобы низкочастотные 1 Для отображения установочного меню на- ра, который можно включать и выключать. звуки из диапазона частот выхода канала саб- жмите...
- Page 142 стемы можно настраивать. Активируйте эту настройку при подключении к Включение этой функции позволяет снизить ные об устройстве Bluetooth удаляются. ! MUTE MODE недоступно для MVH-350BT. данному устройству вспомогательного устрой- потребляемую мощность аккумуляторной ба- ! Во время выполнения этой операции не...
- Page 143 Раздел Управление данным устройством Управление данным устройством Поверните M.C., чтобы отобразить Нажмите кнопку SRC/OFF, чтобы вы- Выход на провода заднего громкоговорителя и S/W UPDATE (обновление ПО) ILLUMI, затем нажмите. брать AUX в качестве источника сигнала. выход заднего канала RCA можно использо- Данная...
-
Page 144: Шнур Питания
белый провод. Подключите этот провод к 1 Гнездо шнура питания тройства. клемме пульта управления внешнего уси- 2 Вход для микрофона (только MVH-350BT) 1 К гнезду шнура питания — Транспортные средства с 12-вольтовым лителя мощности или клемме реле упра- 3 Микрофон (только MVH-350BT) 2 В... - Page 145 Раздел Установка Установка Установка 9 Синий/белый Примечания ! При установке необходимо обеспечить Расположение штекера разъема ISO на эффективный отвод тепла, оставив до- ! Требуется изменение стартового меню Важно различных автомобилях может отличать- статочное пространство за задней пане- данного устройства. См. SP-P/O MODE ! Перед...
-
Page 146: Установка Микрофона
Установка Установка микрофона Закрепите обойму, подогнув с по- Демонтаж устройства мощью отвертки металлические язычки Снимите рамку. Только для MVH-350BT (90°). ВНИМАНИЕ Не допускайте наматывания провода микро- фона вокруг колонки рулевого управления или рычага переключения передач. Это очень опасно! Установите это устройство... -
Page 147: Дополнительная Информация
Раздел Установка Дополнительная информация Устранение неисправностей Установите держатель микрофона на Признак Причина Действие колонке рулевого управления. Устройство Рядом с ус- Уберите прибор, Признак Причина Действие функциони- тройством ис- вызывающий по- рует с ошиб- пользуется мехи, от этого Дисплей ав- В течение 30 Повторите... -
Page 148: Сообщения Об Ошибках
CHECK USB ставителю или в ближайший сервисный отсутствуют. диофайлы на за- ное устройство запоминающее но не подзаря- сутствии корот- центр Pioneer, обязательно запомните сооб- поминающее ус- USB не под- устройство USB жается. кого замыкания щение об ошибке. тройство USB и... - Page 149 Чтобы устройство функционировало надлежа- или FAT32. свяжитесь с ди- Windows Media Audio Professional, Lossless, щим образом, подключите iPod с помощью ка- лером или бли- Voice/DRM Stream/Stream с поддержкой видео: беля dock connector непосредственно к жайшим сервис- не поддерживается данному устройству. ным центром Pioneer.
- Page 150 ! iPod nano 3-го поколения (версия про- Последовательность ВНИМАНИЕ ровка русского текста должна соответствовать граммного обеспечения 1.1.3) ! Pioneer не гарантирует совместимость со воспроизведения одному из следующих наборов символов: ! iPod nano 2-го поколения (версия про- всеми устройствами USB mass storage и...
- Page 151 Licensing, Inc. гистрированным товарным знаком и принад- лежит компании Bluetooth SIG, Inc.; iPod и iPhone Таблица символов для использование PIONEER CORPORATION iPhone, iPod, iPod classic, iPod nano и iPod этих товарных знаков разрешено соответ- русского языка touch являются товарными знаками компа- ствующей...
-
Page 152: Технические Характеристики
правительства Российской Федерации № Файловая система ..FAT12, FAT16, FAT32 Формат декодирования файлов MP3 720 от 16.06.97 компания Pioneer Europe Шасси ....178 мм × 50 мм × 165 мм ........MPEG-1 и 2 Audio Layer 3 NV оговаривает следующий срок службы... - Page 156 Col.Lomas de Chapultepec, Mexico, D.F. 11000 TEL: 55-9178-4270 先鋒股份有限公司 台北市內湖區瑞光路407號8樓 電話: 886-(0)2-2657-3588 先鋒電子(香港)有限公司 香港九龍長沙灣道909號5樓 電話: 852-2848-6488 ã 2012 PIONEER CORPORATION. All rights reserved. ã 2012 PIONEER CORPORATION. Tous droits de reproduction et de traduction réservés. Printed in Malaysia Imprimé en Malaisie <KOKZX> <12F00000> <QRD3133-A/M> EW...
Need help?
Do you have a question about the MVH-350BT and is the answer not in the manual?
Questions and answers