Table of Contents
Advertisement
Advertisement
Table of Contents
Troubleshooting

Related Manuals for ZyXEL Communications NSG50


Summary of Contents for ZyXEL Communications NSG50
- Page 1 User’s Guide NSG Series NSG50 / NSG100 Nebula Cloud-Management Security Gateway Default Login Details Version 1.20 Edition 1, 03/2017 LAN IP Address https://(IP assigned by NCC) https://192.168.1.1 User Name admin Password Assigned by NCC 1234 Copyright © 2017 Zyxel Communications Corporation...
- Page 2 IMPORTANT! READ CAREFULLY BEFORE USE. KEEP THIS GUIDE FOR FUTURE REFERENCE. This is a User’s Guide for a series of products. Not all products support all firmware features. Screenshots and graphics in this book may differ slightly from your product due to differences in your product firmware or your computer operating system.
-
Page 3: Table Of Contents
1.1 Overview ............................5 1.2 Management Overview ........................5 1.3 Good Habits for Managing the NSG ....................6 1.4 LEDs ..............................6 1.4.1 NSG50 ............................6 1.4.2 NSG100 ............................. 7 1.5 Web Configurator ..........................8 1.5.1 Web Configurator Access ...................... 8 1.5.2 Web Configurator Screens Overview ................. - Page 4 Table of Contents 4.4 USB Storage ............................. 25 Chapter 5 Maintenance............................26 5.1 Diagnostics Overview ........................26 5.2 Diagnostics Screen ......................... 26 5.2.1 Diagnostics Files Screen ....................... 27 5.3 Packet Capture Screen ......................... 28 5.3.1 Packet Capture Files Screen ....................30 5.4 Network Tool Screen ........................
-
Page 5: Chapter 1 Introduction
Introduction 1.1 Overview This User’s Guide covers the following models: NSG50 and NSG100. The NSG (Nebula Security Gateway) comes with one or two USB ports for storing the packet capture files and/or diagnostic information in the connected USB storage devices. The NSG’s security features include VPN, firewall, ADP (Anomaly Detection and Protection), and certificates. -
Page 6: Good Habits For Managing The Nsg
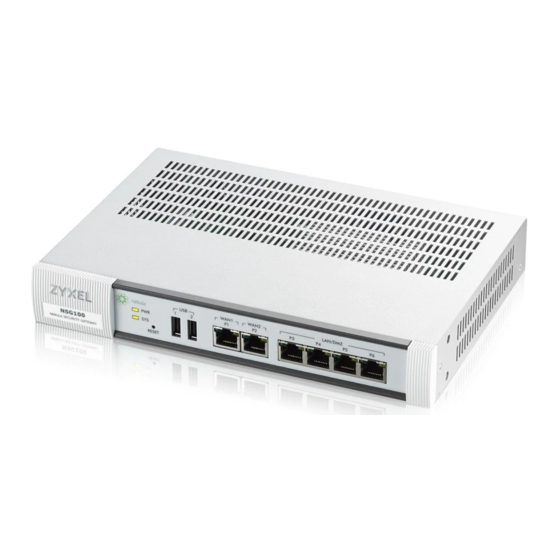
• Write down the password and put it in a safe place. 1.4 LEDs Following are LED descriptions for the NSG series models. 1.4.1 NSG50 The following are the LED descriptions for your NSG50. NSG Series User’s Guide... -
Page 7: Nsg100
Chapter 1 Introduction Figure 2 NSG50 LEDs The following table describes the LEDs. Table 1 NSG50 LED Descriptions COLOR STATUS DESCRIPTION The NSG is turned off. Green The NSG is turned on. There is a hardware component failure. Shut down the device, wait for a few minutes and then restart the device. -
Page 8: Web Configurator
Chapter 1 Introduction The following table describes the LEDs. Table 2 NSG100 LED Descriptions COLOR STATUS DESCRIPTION The NSG is turned off. Green The NSG is turned on. There is a hardware component failure. Shut down the device, wait for a few minutes and then restart the device. - Page 9 Chapter 1 Introduction Type the user name (default: “admin”) and password (default: “1234”). If the NSG is being managed or has been managed by the NCC, check the NCC's Site-Wide > Configure > General setting screen for the NSG's current password. Click Login.
-
Page 10: Web Configurator Screens Overview
Chapter 1 Introduction 1.5.2 Web Configurator Screens Overview The Web Configurator screen is divided into these parts : • A - title bar • B - navigation panel • C - main window Title Bar Figure 4 Title Bar The title bar icons in the upper right corner provide the following functions. Table 3 Title Bar: Web Configurator Icons LABEL DESCRIPTION... -
Page 11: Tables And Lists
Chapter 1 Introduction Monitor Menu The monitor menu screens display status and information about the connected USB device. Table 4 Monitor Menu Screens Summary FOLDER OR LINK FUNCTION USB Storage Storage Displays details about USB device connected to the NSG. Information Configuration Menu Use the configuration menu screens to configure the NSG’s features. - Page 12 Chapter 1 Introduction • Sort in ascending or descending (reverse) alphabetical order • Select which columns to display • Group entries by field • Show entries in groups • Filter by mathematical operators (<, >, or =) or searching for text Figure 6 Common Table Column Options Select a column heading cell’s right border and drag to re-size the column.
- Page 13 Chapter 1 Introduction Figure 10 Table Icons Working with Lists When a list of available entries displays next to a list of selected entries, you can often just double-click an entry to move it from one list to the other. In some lists you can also use the [Shift] or [Ctrl] key to select multiple entries, and then use the arrow button to move them to the other list.
-
Page 14: Chapter 2 Dashboard
H A P T E R Dashboard 2.1 Overview Use the Dashboard screens to check status information about the NSG. 2.1.1 What You Can Do in this Chapter Use the main Dashboard screen to see the NSG’s general device information, system status, and extension slot status. - Page 15 Chapter 2 Dashboard Table 7 Dashboard (continued) LABEL DESCRIPTION Close Widget (E) Click this to close the widget. Use Widget Settings to re-open it. Device Information Model Name This field displays the model name of this NSG. Serial Number This field displays the serial number of this NSG. The serial number is used for device tracking and control.
-
Page 16: Chapter 3 Monitor
H A P T E R Monitor 3.1 Overview Use the Monitor screens to check status and information about the connected USB device. 3.2 USB Storage Screen This screen displays information about a connected USB storage device. Click Monitor > USB Storage to display this screen. - Page 17 Chapter 3 Monitor Table 8 Monitor > System Status > USB Storage (continued) LABEL DESCRIPTION Status Ready - you can have the NSG use the USB storage device. Click Remove Now to stop the NSG from using the USB storage device so you can remove it.
-
Page 18: Chapter 4 Configuration
H A P T E R Configuration 4.1 Interface Use the Interface screen to configure the NSG’s WAN interfaces. 4.1.1 Ethernet This screen lists the WAN Ethernet interfaces on the NSG. To access this screen, click Configuration > Interface > Ethernet. You cannot create new Ethernet interfaces nor can you delete any of them. -
Page 19: Ethernet Edit
Chapter 4 Configuration Table 9 Configuration > Interface > Ethernet (continued) LABEL DESCRIPTION Mask This field displays the interface’s subnet mask in dot decimal notation. Reset Click Reset to return the screen to its last-saved settings. 4.1.2 Ethernet Edit The Ethernet Edit screen lets you configure IP address assignment. To access this screen, select an interface and click its Edit icon in the Ethernet screen. - Page 20 Chapter 4 Configuration Figure 16 Configuration > Network > Interface > Ethernet > Edit (Ethernet Fixed IP) PPPoE Select PPPoE if you want to connect to the Internet using a dial-up connection. This way, you do not have to install or manage PPPoE software on each computer in the network. •...
-
Page 21: Ssh
Chapter 4 Configuration 4.2 SSH You can use SSH (Secure SHell) to securely access the NSG’s command line interface. Specify from which IP address the access can come. SSH is a secure communication protocol that combines authentication and data encryption to provide secure encrypted communication between two hosts over an unsecured network. -
Page 22: Ssh Implementation On The Nsg
Chapter 4 Configuration Host Identification The SSH client sends a connection request to the SSH server. The server identifies itself with a host key. The client encrypts a randomly generated session key with the host key and server key and sends the result back to the server. -
Page 23: Secure Telnet Using Ssh Examples
Chapter 4 Configuration The following table describes the labels in this screen. Table 10 Configuration > SSH LABEL DESCRIPTION Allow WAN to Select the check box to allow the computer with the IP address that matches the IP address in Device the Client IP Address field to access the NSG CLI using SSH. -
Page 24: User
Chapter 4 Configuration Figure 22 SSH Example 2: Test $ telnet 192.168.1.1 22 Trying 192.168.1.1... Connected to 192.168.1.1. Escape character is '^]'. SSH-1.5-1.0.0 Enter “ssh –1 192.168.1.1”. This command forces your computer to connect to the NSG using SSH version 1. If this is the first time you are connecting to the NSG using SSH, a message displays prompting you to save the host information of the NSG. -
Page 25: Usb Storage
Chapter 4 Configuration 4.4 USB Storage The NSG can use a connected USB device to store the packet capture files and diagnostic information. Use this screen to turn on this feature and set a disk full warning limit. Note: Only connect one USB device. It must allow writing (it cannot be read-only) and use the FAT16, FAT32, EXT2, or EXT3 file system. -
Page 26: Chapter 5 Maintenance
H A P T E R Maintenance 5.1 Diagnostics Overview Use the diagnostics screens for troubleshooting. 5.2 Diagnostics Screen The Diagnostics screen provides an easy way for you to generate a file containing the NSG’s configuration and diagnostic information. You may need to send this file to customer support for troubleshooting. -
Page 27: Diagnostics Files Screen
Chapter 5 Maintenance Table 13 Maintenance > Diagnostics LABEL DESCRIPTION Apply Click Apply to save your changes. Collect Now Click this to have the NSG create a new diagnostic file. Wait while information is collected. 5.2.1 Diagnostics Files Screen Click Maintenance > Diagnostics > Files to open the diagnostic files screen. This screen lists the files of diagnostic information the NSG has collected and stored in the NSG or a connected USB storage device. -
Page 28: Packet Capture Screen
Chapter 5 Maintenance 5.3 Packet Capture Screen Use this screen to capture network traffic going through the NSG’s interfaces. Studying these packet captures may help you identify network problems. Click Maintenance > Diagnostics > Packet Capture to open the packet capture screen. Note: New capture files overwrite existing files of the same name. - Page 29 Chapter 5 Maintenance Table 15 Maintenance > Diagnostics > Packet Capture (continued) LABEL DESCRIPTION Host IP Select a host IP address object for which to capture packets. Select any to capture packets for all hosts. Select User Defined to be able to enter an IP address. Host Port This field is configurable when you set the IP Type to any, tcp, or udp.
-
Page 30: Packet Capture Files Screen
Chapter 5 Maintenance Table 15 Maintenance > Diagnostics > Packet Capture (continued) LABEL DESCRIPTION Capture Click this button to have the NSG capture packets according to the settings configured in this screen. You can configure the NSG while a packet capture is in progress although you cannot modify the packet capture settings. -
Page 31: Network Tool Screen
Chapter 5 Maintenance The following table describes the labels in this screen. Table 16 Maintenance > Diagnostics > Packet Capture > Files LABEL DESCRIPTION Remove Select files and click Remove to delete them from the NSG or the connected USB storage device. - Page 32 Chapter 5 Maintenance The following table describes the labels in this screen. Table 17 Maintenance > Diagnostics > Network Tool LABEL DESCRIPTION Network Tool Select PING IPv4 to ping the IP address that you entered. Select TRACEROUTE IPv4 to perform the traceroute function. This determines the path a packet takes to the specified computer.
-
Page 33: Chapter 6 Troubleshooting
H A P T E R Troubleshooting This chapter offers some suggestions to solve problems you might encounter. None of the LEDs turn on. Make sure that you have the power cord connected to the NSG and plugged in to an appropriate power source. -
Page 34: Resetting The Nsg
Chapter 6 Troubleshooting My packet capture captured less than I wanted or failed. The packet capture screen’s File Size sets a maximum size limit for the total combined size of all the capture files on the NSG, including any existing capture files and any new capture files you generate. If you have existing capture files you may need to set this size larger or delete existing capture files. -
Page 35: Appendix A Customer Support
• Brief description of the problem and the steps you took to solve it. Corporate Headquarters (Worldwide) Taiwan • Zyxel Communications Corporation • http://www.zyxel.com Asia China • Zyxel Communications (Shanghai) Corp. Zyxel Communications (Beijing) Corp. Zyxel Communications (Tianjin) Corp. • http://www.zyxel.cn India • Zyxel Technology India Pvt Ltd • http://www.zyxel.in Kazakhstan •... - Page 36 • Zyxel Singapore Pte Ltd. • http://www.zyxel.com.sg Taiwan • Zyxel Communications Corporation • http://www.zyxel.com/tw/zh/ Thailand • Zyxel Thailand Co., Ltd • http://www.zyxel.co.th Vietnam • Zyxel Communications Corporation-Vietnam Office • http://www.zyxel.com/vn/vi Europe Austria • Zyxel Deutschland GmbH • http://www.zyxel.de Belarus • Zyxel BY • http://www.zyxel.by...
- Page 37 Appendix A Customer Support Belgium • Zyxel Communications B.V. • http://www.zyxel.com/be/nl/ • http://www.zyxel.com/be/fr/ Bulgaria • Zyxel България • http://www.zyxel.com/bg/bg/ Czech Republic • Zyxel Communications Czech s.r.o • http://www.zyxel.cz Denmark • Zyxel Communications A/S • http://www.zyxel.dk Estonia • Zyxel Estonia • http://www.zyxel.com/ee/et/ Finland •...
- Page 38 • Zyxel Communications Poland • http://www.zyxel.pl Romania • Zyxel Romania • http://www.zyxel.com/ro/ro Russia • Zyxel Russia • http://www.zyxel.ru Slovakia • Zyxel Communications Czech s.r.o. organizacna zlozka • http://www.zyxel.sk Spain • Zyxel Communications ES Ltd • http://www.zyxel.es Sweden • Zyxel Communications • http://www.zyxel.se Switzerland •...
- Page 39 Appendix A Customer Support • http://www.zyxel.ch/ Turkey • Zyxel Turkey A.S. • http://www.zyxel.com.tr • Zyxel Communications UK Ltd. • http://www.zyxel.co.uk Ukraine • Zyxel Ukraine • http://www.ua.zyxel.com Latin America Argentina • Zyxel Communication Corporation • http://www.zyxel.com/ec/es/ Brazil • Zyxel Communications Brasil Ltda.
- Page 40 Appendix A Customer Support North America • Zyxel Communications, Inc. - North America Headquarters • http://www.zyxel.com/us/en/ Oceania Australia • Zyxel Communications Corporation • http://www.zyxel.com/au/en/ Africa South Africa • Nology (Pty) Ltd. • http://www.zyxel.co.za NSG Series User’s Guide...
-
Page 41: Appendix B Legal Information
The contents of this publication may not be reproduced in any part or as a whole, transcribed, stored in a retrieval system, translated into any language, or transmitted in any form or by any means, electronic, mechanical, magnetic, optical, chemical, photocopying, manual, or otherwise, without the prior written permission of Zyxel Communications Corporation. Published by Zyxel Communications Corporation. All rights reserved. - Page 42 Appendix B Legal Information List of national codes COUNTRY ISO 3166 2 LETTER CODE COUNTRY ISO 3166 2 LETTER CODE Austria Liechtenstein Belgium Lithuania Bulgaria Luxembourg Croatia Malta Cyprus Netherlands Czech Republic Norway Denmark Poland Estonia Portugal Finland Romania France Serbia Germany Slovakia...
- Page 43 Appendix B Legal Information Die folgende Symbol bedeutet, dass Ihr Produkt und/oder seine Batterie gemäß den örtlichen Bestimmungen getrennt vom Hausmüll entsorgt werden muss. Wenden Sie sich an eine Recyclingstation, wenn dieses Produkt das Ende seiner Lebensdauer erreicht hat. Zum Zeitpunkt der Entsorgung wird die getrennte Sammlung von Produkt und/oder seiner Batterie dazu beitragen, natürliche Ressourcen zu sparen und die Umwelt und die menschliche Gesundheit zu schützen.
- Page 44 Appendix B Legal Information Environmental Product Declaration NSG Series User’s Guide...
- Page 45 Appendix B Legal Information 台灣 安全警告 - 為了您的安全,請先閱讀以下警告及指示 : • 請勿將此產品接近水、火焰或放置在高溫的環境。 • 避免設備接觸任何液體 - 切勿讓設備接觸水、雨水、高濕度、污水腐蝕性的液體或其他水份。 • 灰塵及污物 - 切勿接觸灰塵、污物、沙土、食物或其他不合適的材料。 • 雷雨天氣時,不要安裝,使用或維修此設備。有遭受電擊的風險。 • 切勿重摔或撞擊設備,並勿使用不正確的電源變壓器。 • 若接上不正確的電源變壓器會有爆炸的風險。 • 請勿隨意更換產品內的電池。 • 如果更換不正確之電池型式,會有爆炸的風險,請依製造商說明書處理使用過之電池。 • 請將廢電池丟棄在適當的電器或電子設備回收處。 • 請勿將設備解體。 • 請勿阻礙設備的散熱孔,空氣對流不足將會造成設備損害。 • 請插在正確的電壓供給插座 ( 如 : 北美 / 台灣電壓 110V AC,歐洲是 230V AC)。 •...
- Page 46 North American products. Trademarks ZyNOS (Zyxel Network Operating System) and ZON (Zyxel One Network) are registered trademarks of Zyxel Communications, Inc. Other trademarks mentioned in this publication are used for identification purposes only and may be properties of their respective owners.
-
Page 47: Index
Index Index Internet access troubleshooting Internet Explorer access Java capturing packets permissions cellular JavaScripts status certifications viewing configuration information contact information LED troubleshooting cookies LEDs copyright logout Web Configurator current date/time customer support MAC address range device access troubleshooting managing the device good habits diagnostics model name... - Page 48 Index packet captures downloading files 27, 31 pop-up windows warranty problems note product registration Web Configurator access requirements supported browsers registration product reset RESET button screen resolution serial number client requirements encryption methods for secure Telnet how connection is established versions with Linux with Microsoft Windows...
Need help?
Do you have a question about the NSG50 and is the answer not in the manual?
Questions and answers