
Related Manuals for Tippmann X7 Basic


Summary of Contents for Tippmann X7 Basic
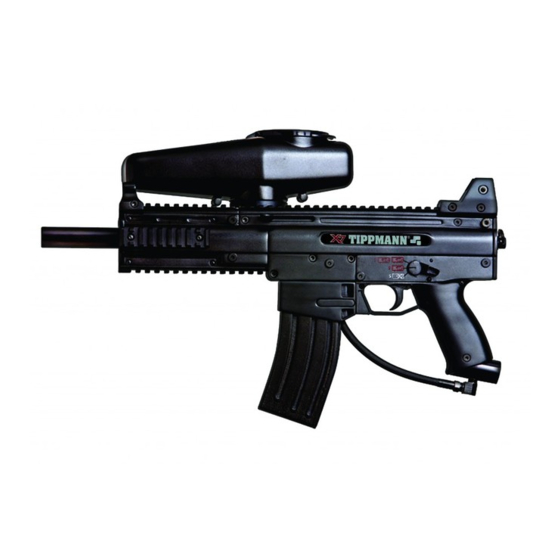
- Page 1 TIPPMANN ® MARKER BACK COVER LINE • Owner’s Manual • Le Manuel du Propriétaire • Manual del Usuario BASIC TP04110 Date: 01/09...
- Page 2 WARNING WARNING THIS IS NOT A TOY. MISUSE MAY CAUSE SERIOUS BARREL SLEEVE SAFETY IS YOUR RESPONSIBILITY INJURY OR DEATH. EYE, FACE AND EAR PROTECTION READ, FAMILIARIZE DESIGNED FOR PAINTBALL MUST BE WORN BY THE YOURSELF AND ANY OTHER USER OF THIS USER AND ANY PERSON WITHIN RANGE.
-
Page 3: Table Of Contents
PAINTBALL MUST BE WORN BY THE USER AND ANY PERSON www.tippmann.com WITHIN RANGE. WE RECOMMEND AT LEAST 18 YEARS OLD TO PURCHASE. PERSONS UNDER 18 MUST HAVE ADULT CONGRATULATIONS on your purchase of your Tippmann ® SUPERVISION WHEN USING THIS PRODUCT. READ THE paintball marker. We believe our X7 line of markers to be the OWNER’S MANUAL BEFORE USING THIS PRODUCT. -
Page 4: Warning/Liability Statement
• Handle this and any marker as if it were loaded at all times. Tippmann Sports, LLC shall not be liable for personal injury, loss of • Keep your finger off the trigger until ready to shoot. -
Page 5: Getting Started
4) To install the air supply cylinder, ❏ lubricate the cylinder valve or counterclockwise . Do not remove velocity screw. NOTE: You o-ring with a little Tippmann paintball marker oil then insert the ® must turn the velocity screw all the way in before doing any disassembly. -
Page 6: Tm Basic Parts List
TIPPMANN ® BASIC PARTS LIST WARNING DO NOT DISASSEMBLE THIS MARKER WHILE IT IS PRESSURIZED WITH AIR. DO NOT PRESSURIZE A PARTIALLY ASSEMBLED MARKER. -
Page 7: Unloading Your Marker
• To clean your paintball marker: ❏ use a damp towel with water to may push a ball into the chamber or down into the barrel in which wipe off paint, oil, and debris. ❏ Use Tippmann ® paintball marker case the ball will be hidden from view. - Page 8 2) ❏ Inspect and replace any damaged parts. Lubricate ❏ the front bolt o-ring, ❏ the rear bolt o-ring, ❏ the linkage arm and the drive spring/ guide pin with a few drops of Tippmann paintball marker oil (or other ®...
- Page 9 Receiver Disassembly / Assembly (continued from page 13) Receiver Disassembly / Assembly (continued from page 14) Lower Receiver Disassembly/Assembly: Barrel and Front Grip: • To disassemble the lower receiver: • To install Barrel: Insert barrel and turn clockwise 1) ❏ Follow the Marker / Receiver Disassembly instructions on pages •...
-
Page 10: Repairing Air Supply Leaks
NOTE: If new valve o-ring does not resolve air supply leak, do not applying side pressure with edge of spring in end of spring attempt to repair air supply cylinder. Contact Tippmann Sports, index finger pushing in cutout bowed as shown below LLC or your local paintball dealer. -
Page 11: Warranty And Repair Policy
THIS PAGE INTENTIONALLY LEFT BLANK WARRANTY AND REPAIR POLICY Tippmann Sports, LLC warrants that this product is found free from defects in materials and workmanship for a period of 2 years from the original date of purchase by the initial owner/purchaser. - Page 12 2955 Adams Center Road, Fort Wayne, IN 46803 USA BLESSURE SÉRIEUSE OU LA MORT. LA PROTECTION POUR LES YEUX, P) 260-749-6022 • F) 260-749-6619 • www.tippmann.com LE VISAGE ET LES OREILLES CONSTRUITE POUR LA BALLE DE PEINT DOIT ÊTRE PORTÉE PAR L'UTILISATEUR ET N'IMPORTE QUELLE FÉLICITATIONS sur votre achat d'un marqueur de balle de peint,...
-
Page 13: Avertissement/Communiqué Official De Responsabilité
Tippmann Sports, LLC pose que vous n’utilisez pas un marqueur • Retenez la chemise du canon installée sur le marqueur de Tippmann Sports, LLC. En utilisant ce marqueur de balle de quand on ne tire pas (voyez page 1). peint, vous libérez Tippmann Sports, LLC de toute la responsabilité... -
Page 14: Pour Commencer
Evitez d’exposer la peau en jouant le jeu de balle de peint. Même 4) ❏ Pour installer le cylindre d’air, ❏ lubrifiez la valve cercle d’O un peu de vêtements légers peut absorber un peu d’impact et du cylindre avec un peu Tippmann ® huile de marqueur, et puis peut vous proteger des balles de peint. -
Page 15: Le Réglage De Vélocité
MODÈLE SPÉCIFICATIONS d’un tour, la goupille de valve de réservoir n’a pas encore fermé et vous ® Modèle de base ............TIPPMANN devrez tourner le réservoir un peu plus dans la direction à gauche ou Munitions ....................68 au sens contre l’horloge Action ...... - Page 16 TIPPMANN ® PARTIES DE BASE AVERTISSEMENT NE PAS DÊSASSEMBLER CE MARQUEUR PENDANT QUE C’EST PRESSURISÉ AVEC L’AIR. NE PAS PRESSURISER UN MARQUEUR MOITIÉ ASSEMBLÉ. Ç Ç...
-
Page 17: Désassemblage / Assemblage Du Marqueur
❏ utilisez une serviette mouillée d'eau pour effacer le peint, l'huile et glissez le magasin en bas et puis le débris. ❏ Utilisez Tippmann ® l'huile de marqueur ou une autre sortez - le. - Page 18 ❏ le boulon cercle d'O arrière, ❏ l'arme liée et ❏ le ressort d'actionnement/l'épingle guidant avec quelque gouttes de ® l'huile Tippmann pour les marqueurs de balle de peint (ou une autre huile supérieure pour les marqueurs de balle de peint) avant de les réinstaller.
- Page 19 Désassemblage / Assemblage du marqueur (continué de la page 14) Désassemblage / Assemblage du marqueur (continué de la page 15) Le Receveur Inférieur Désassembler/Assembler: Le Canon et la Poignée Avant: ❏ La protection des yeux faite exprès pour la balle de peint doit être •...
- Page 20 . Ensuite, les pressions élévées du réserve d’air. Ceux peuvent être achetés de fleches contre la saisissez le receveur gauche avec la de Tippmann ® ou votre vendeur local de balle de peint. NOTE: Si poignée armante. main droite comme montré.
-
Page 21: Garantie Et La Policie De Réparations
THIS PAGE INTENTIONALLY LEFT BLANK GARANTIE ET LA POLICIE DE RÉPARATIONS Tippmann Sports, LLC justifie que ce produit se trouve sans les défauts en matériaux et que le métier pour une période de deux années du date originel de l'achat par le propriétaire initiel. Cette garantie n'applique pas aux défauts découverts après l'achat qui étaient causés... - Page 22 Antes de cargar o disparar este marcador por favor tome tiempo para USAR ESTE PRODUCTO LEA EL MANUAL DEL USUARIO. leer completamente este manual y empezar a familiarizarse con las partes, operación y todas las precauciones de seguridad del Tippmann ® ADVERTENCIA marcador.
-
Page 23: Advertencia
Este marcador esta clasificado como una arma peligrosa y es entregada operación mecánica y características de manejo. por Tippmann Sports, LLC; con el entendimiento que el comprador asume • Mantenga su dedo lejos del gatillo hasta que este listo a disparar. -
Page 24: Inicio
❏ Para disminuir la velocidad, ® válvula del cilindro con un poco de aceite para marcador Tippmann mueva el tornillo en forma constante en el sentido de la manecillas del inserte la válvula del cilindro, dentro del adaptador de suministro de . - Page 25 TIPPMANN ® PARTES BÁSICAS ADVERTENCIA NO DESENSAMBLE ESTE MARCADOR MIENTRAS ESTE PRESURIZADO. NUNCA PRESURISE UN MARCADOR PARCIALMENTE ENSAMBLADO. Ñ Ñ...
-
Page 26: Descargando Su Marcador
❏ Los protectores para ojos diseñados para paintball deben ser usados con agua, limpie y remueve pintura, aceite y desechos. por los jugadores y cualquier persona que este en el rango de alcance. ❏ Use el aceite Tippmann para marcadores u otro aceite de calidad, ®... - Page 27 Desensamble / Ensamble del Marcador (continued from page 10) Desensamble / Ensamble del Marcador ( viene de la página 11 ) Desensamble del Recibidor gatillo y suelte la manija hacia adelante con lo cual quedara ❏ Los protectores para ojos diseñados para paintball deben ser usados desengatillado el marcador 3) ❏...
- Page 28 Desensamble / Ensamble del Recibidor ( viene de la página 12 ) Recibidor Inferior Desensamble / Ensamble: ( viene de la página 13 ) marcador esta engatillado, sontenga el tornillo de la manija del gatillo hacia atràs 3/4, luego hale el gatillo y suelte la manija hacia adelante con lo cual quedara desengatillado el marcador.
- Page 29 Desensamble / Ensamble del Recibidor ( viene de la página 14 ) Recibidor Superior Desensamble / Ensamble ( viene de la página 15 ) Remosión De El Sistema Cyclone los tornillos largos del recibidor sosteniendo las 2 mitades 1) ❏ Primero siga las instrucciones para ❏ Descargar su Marcador y ❏ superiores juntas y levante la mitad derecha de recibidor.
-
Page 30: Garantía Y Poliza De Reparación
Tippmann ® esta dedicado a proveerle el ultimo marcador reparar el cilindro de suministro de aire. Contacte a Tippmann Sports, paintball con el soporte da calidad necesario para un necesario para un LLC o su distribuidor de paintball más cercano. - Page 31 THIS PAGE INTENTIONALLY LEFT BLANK...
- Page 32 INSIDE BACK COVER...
Need help?
Do you have a question about the X7 Basic and is the answer not in the manual?
Questions and answers