Table of Contents
Advertisement
VALUED CUSTOMER
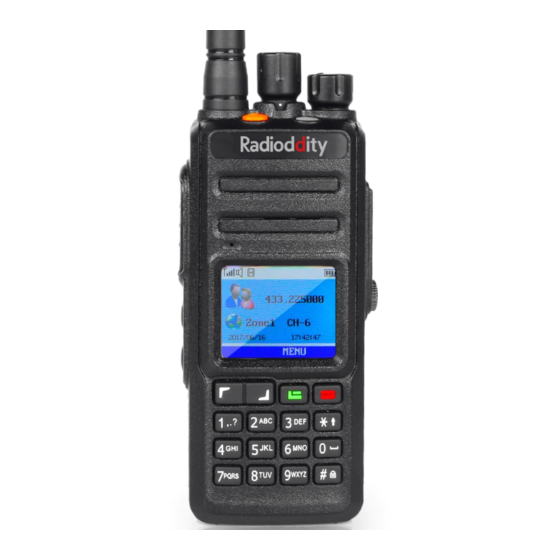
Radioddity' s first proprietary radio is designed to meet the most demanding of
conditions, and dole out unmatched power while at the same time, being one
of the safest, most comfortable radios on the market. Featuring 10W High
Power output, IP-67 Waterproofing, a 2800mAh Li-Po battery, true dual time
slot and a user-friendly heat dissipating design, we introduce you Radioddity
GD-55 Plus.
This manual is intended to help you find out how to operate the GD-55 Plus
more easily and to inform you the detailed specification and features. If you
have any problems, please feel free to email support@radioddity.com.
Customer means everything to us. Your concerns are our concerns.
Advertisement
Table of Contents

Related Manuals for Radioddity GD-55 Plus


Summary of Contents for Radioddity GD-55 Plus
- Page 1 Radioddity GD-55 Plus. This manual is intended to help you find out how to operate the GD-55 Plus more easily and to inform you the detailed specification and features. If you have any problems, please feel free to email support@radioddity.com.
- Page 2 Frequency band:UHF:400.000-470.000MHz Dual time slot 1024 channels Conversely alarm GPS function(Optional) IP67 waterproofed function PC Programmed function Software online updating Radioddity GD-55 Plus VOX Chinese and English voice selection CTCSS/DCS Busy channel lock Two-way Radios Battery save function TOT High&Low Power selection Talk around function...
-
Page 3: Table Of Contents
Cotent Use Single key To Launch A Group Call Or Single Call Emergency Function Receive the Emergency Call Using tips Reply the Emergency Call Unpacking and checking equipments Emergency Alarm Installing and uninstalling of supplied accessories Logout Emergency Mode Getting Familiar Menu Operation Safety and Overview Character Input... - Page 4 Edit and Send Message Scanning instructions and methods Send Quick message Start and stop scanning Send Quick Text with A Key Scanning reply Forward Message Settings Editing message Radio attributes Manage the Sent message Radio configurati on Check the sent message Transmitting frequency Send the sent message Receiving frequency...
- Page 5 Date Time Date format Tone Setting Profiles Keypad tone set Power Tone set Message Tones Use Tips & Unboxing and GPS Setting GPS information Equipment Check RX GPS information Specifications...
-
Page 6: Using Tips
Using tips Unpacking and checking Please read the following brief instructions, non-compliance with these rules may cause Carefully unpacking the radio. We recommend you check the items listed in the following table before discarding the package. If any item is missing or has been damaged during danger or violate the law. -
Page 7: Installing And Uninstalling Of Supplied Accessories
Installing and uninstalling of supplied accessories Installing and removing the antenna 1. Align the threaded end of antenna and the treaded hole at the top of radio, rotate the antenna Installing/Removing the battery clockwise until it is tight. 1. Align the two grooves of battery and the guide rail on the back of aluminum shell, ensuring 2. - Page 8 Installing external headset Installing and removing the belt clip Reveal (do not remove) the mic/speaker jack cover, insert the headset into the mic/speaker jack. 1. Align the two holes of belt clip and the two holes of the radio, fix them with the supplied M2.5 X 5 screw.
- Page 9 Getting Channel-selecting knob Select the working channel, total 16 channels. Antenn Power/volume Mic/Speaker jack/ PTT switch Programming To power on/off and adjust the LED indicator Used to connect headset or volume. Rotate it clockwise, a the indicator light turns "click" sound is heard and a external programmable via red when transmit, turns "Du"...
-
Page 10: Safety And Overview
Safety and Overview Product safety and RF radiation for handheld two way radio. Before using this two way radio ,please read the operational instructions carefully in the manual of product safety and RF radiation for safe usage of two way radio. This two way radio can only satisfy the vocational applications for FCC RF energy exposure requirements. -
Page 11: Overview
Overvie Launch and Receive Switch On Zone Selection Clockwise to turn on the radio volume knob there will be a "KADA" sound , message Zones is a channel group .Each radio can set 64 zones and each zone with max 16 sound and the screen will show you "Welcome", while the LED indi cator lightsup channels. -
Page 12: Receive And Reply The Single Call
conversation time will be showed on the last line ( this happens only under Digital mode ). When receiving all calls 3.Hold or keep the radio in a vertical position and place it between your lip within 2.5~5.0cm. 1.LED indicator becomes green. 4.Press[PTT]key to answer the callLED indicator light change to red color. -
Page 13: Single Call
4. Let go [PTT] key to receive ,when target radio is replying ,LED indicator becomes green. User under the channel can not reply the all call . Screen shows group name or ID and Tx radio's name or ID. Use Single key To Launch A Group Call Or Single Call 5.when the walkie talkie back to home screen ,you can also make a group call using contact Single key call function is convenient for you to set a name or ID for group call or single lists. -
Page 14: Emergency Function
Emergency Function Emergency alarm only use to transfer emergency situations, you can release a emergency call at anytime and anywhere. Even the walkie talkie is busy in transferring or receiving. Radio supports 3 types of emergency call: Emergency call Call follow emergency alarm A voice follow emergency alert Receive the Emergency Call Use Tips &... -
Page 15: Emergency Alarm
Menu 3. Press[PTT] key to have a call. LED indicator becomes red. Walkie talkie under the emergency call mode. Character Input 4. Let go[PTT] key to receive, when reply the emergency, LED indicator becomes green. Users can use the 3X4 alphanumeric keypad to access the radio's function. When you're The screen shows group mark or ID and call ID. -
Page 16: Chinese Typing
Chinese Typing: 2. Press [ ], select a function or go into a sub menu 3. Press [ ] to return the higher level menu Number 1 is a button of punctuation/s selection input, number 2-9 are correspond Pinyin input, when user input something, the screen shows the Pinyin input interface, the first line Radio Check of interface shows the contents inputted by user, the second line of interface shows Chinese If there are any activation, this feature allows you to determine whether there is other two... -
Page 17: Monitor
Monitor Contacts is "address book" for handheld two way radio. Each entry correspond to an alias or ID used to start the call. In addition, each item, according to the different content setting, Using monitoring function to open the target two way radio microphone ( only the user alias or ID ). -
Page 18: Call Log
Note: the difference between private call icon, group call icon and all call icon Call Log. 1. Press [ ]key to enter Menu Deleting Calling Log's Record 2. Press [ ] to contacts, then press [ ] to choose, entries arrange in alphabetical 1. -
Page 19: Send Quick Message
press the [ ] key to delete any useless character, otherwise when editing area without move to the left, press [ ]key to move to the right, when editing area have content, press content to return to the higher level menu. ]key to delete any useless character otherwise when editing area without content to 5. -
Page 20: Editing Message
Editing message Check the sent message Choosing edit to edit message before you edit. Using the menu function: Note: if you have a subject line (receive text messages from email program ), you can't 1. Press [ ] button to enter the menu mode. edit the subject line. -
Page 21: Receive Message
Manage Received Message Select delete, deleting required message. Using Menu: Use your inbox to manage messages. inbox can store up to 20 text messages at Most. 1. Press [ ]key to enter the menu Two way radio supports the following text options: Reply, 2. -
Page 22: Deleting The Inbox Message
3. Press [ ] to the inbox, and then press [ ] key to choose 5. Press again [ ] key to enter submenu. 4. Press the [ ] key to the required message, and then press [ ] key to choose. 6. -
Page 23: Dtmf
talkies and launch radio has the same "encryption keys" (suitable for basic encryption). emit a beep and the screen displays radio fail to kill. If your radio to receive different encryption keys or key values and key encryption call ID, During radio kill operation, do not press the [ ] key, because you will not get a you will hear the sound of the transport chaos encryption (basic). -
Page 24: Start And Stop Scanning
Auto Scan: When you select an already activated auto scan channels / contact groups, radio scans from the activated auto scan channel. Start and stop scanning Press Pre-programmed scan on / off key or enter the scan menu function When the scan is activated, LED indicator flashes red and displays scan icon ; or when scanning is disabled, LED light goes out and does not display the scan icon. -
Page 25: Settings
Settings squelch grade/level Transmit limit time Set ti ngs incl udes the fol lowi ng cont ent s: Color code Attributes Time slot Configuration Power-on display Selct Set ti ngs Transmitting frequency GPS information 1. Press [ ] key to ent er the menu mode. Receive GPS information 2. -
Page 26: Setting Squelch Level
Receiving frequency hod fortex tediting. 6. Af ter the change is compl et ed, press [ ] key, the screen displ ays channel name has 1. Press [ ] key to ent er the menu mode. 2. Press [ ] key to Set ti ngs, and then press [ ] key to select . -
Page 27: Color Code
5. Press [ ] key to transmitting limit time, and then press [ ] key to select. 4. Press [ ] key to Dis Selct, then press [ ] key to select. 6. The screen displays infinite,30S ... and other options (increasing 30S each time), press 5.Select the display mode you want. -
Page 28: Lock Key Setting
5. Press [ ] key to the corresponding language option, then press [ ] key. 5. The screen displays on,5sec,15sec,30sec four choices, Select "on " , the screen will 6. Screen displays to select corresponding language, and then jump back to the main remain lit and won't turn off,.If select the other choices ,The screen backlight will be off if interface. -
Page 29: Zone Setting
4. Press [ ] key to power, and then press [ ] key to select. 2. Press [ ] key to Settings, and then press [ ] key to select. 5. Follow the on-screen instructions to change the current settings. 3. - Page 30 Keypad tone set 1. Press the [ ] key to enter the menu mode. 2. Press [ ] key to Settings, and then press [ ] key to select. 1. Press the [ ] key to enter the menu mode. 3.
- Page 31 Specification 5. Press [ ] key to Message Tones selection, and then press [ ] key. 6. Press [ ] key to select Ring1 to Ring5 according to your need. 7. Press [ ] key to save. Genera GPS Setting Frequency Range VHF:136-174MHz UHF: 400-470MHz 1.
- Page 32 Rated audio power •1W Warranty card Rated audio distortion 3%(Type) Audio response =1dB~-3dB Transmitter Customer's name: Gender: Output power High:10W Note: Low: 4 W Add and postal code: 1. This warranty card is only Frequency stability +/-1.0ppm applicable to two-way radio Customer's Tel: Adj acent channel Power •-60dB...
- Page 33 Maintenance record Thank you for buying Radioddity two-way radios, we will do our best to provide you with a stable, Carry-in date clear and efficient wireless communication services. In order for you to enjoy a better Completion date quality warranty service, please focus on the...
Need help?
Do you have a question about the GD-55 Plus and is the answer not in the manual?
Questions and answers