Advertisement
Advertisement
Table of Contents

Related Manuals for Radioddity QT60


Summary of Contents for Radioddity QT60
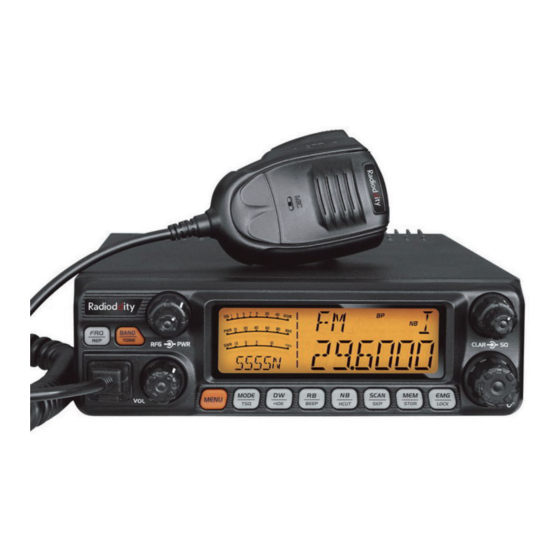
- Page 1 QT60...
-
Page 2: Table Of Contents
CONTENTS FUNCTIONS & FEATURES ..............1 STANDARD ACCESSORIES ..............2 INSTALLATION ..................2 GETTING ACQUAINTED ..............5 HOW TO USE YOUR RADIO ...............8 KEYPAD FUNCTION ................9 BACKGROUND FUNCTION MENU OPERATION ......12 SPECIFICATIONS ................15 CTCSS/DCS CHART ................17... -
Page 3: Functions & Features
FUNCTIONS & FEATURES Big LCD displays frequency and all kinds of information FM AM USB LSB PA mode Frequency Tuning Step 100Hz 1KHz 10KHz 100KHz 1MHz ±1.5KHz CLARLFILER Adjustment Flexible Menu Function and PC Program Software ECHO Function SQ, ASQ Function (FM and AM mode only) RF GAIN Adjustment RF PWR Adjustment SCAN Function... -
Page 4: Standard Accessories
Radio Microphone Mounting Bracket Microphone Non-slip Hanger Screws for Pads for Adjusting Spare Fuses Self-tapping Pads bracket bracket screws Screws (10A, 125V) Choose the most appropriate setting from a simple and practical point of view. Your radio should not interfere with the driver or crash the driver's knee or leg when rush brake. -
Page 5: Installation
ANTENNA INSTALLATION Before using this radio, please install a high efficent and harmonious adjusted CB antenna, suitable antenna type and correct installation will bring excellent communication. To match with the radio, the antenna and cable shall with characteristic impedance of electronics. - Page 6 Replacing Fuse This radio adopt 15A, 250V fuse. If the fuse blows, determine the reason, then correct the problem. After the problem is resolved, replace the fuse. If newly installed fuses continue to blow, disconnect the power cable and contact your autho-rized dealer or an authorized servicecenter: 1.
-
Page 7: Getting Acquainted
GETTING ACQUAINTED Front Panel No. Key Functions Switch between channel mode and frequency mode offset setup BAND Switch band: A-I ECHO setup MENU Function Menu key MODE Switch mode(FM AM USB LSB PA TSQ setup RB function Beep voice prompt function NB function HI-CUT function SCAN Scan Scan add Scan delete... - Page 8 Rear Panel 20 23 19 ANT. PA.SP. EXT.SP. POWER + No. Functions External SP Jack External PA Jack Antenna Jack Power Supply Jack Programming jack Microphone...
- Page 9 LCD Display 25 26 13 14 15 16 9 10 18 19 RX Signal strength indicator. TX Signal strength indicator. SWR strength indicator. Model name Indicator. Appears when the Keypad lock function is ON. Appears when press MENU key. FUNC Appears when using Emergency channel.
-
Page 10: How To Use Your Radio
HOW TO USE YOUR RADIO OFF/ON Radio 1. Turn VOL clockwise to switch on the radio, the radio emit a beep. When the LCD displays frequency or channel, the radio is on. 2. Turn VOL anti-clockwise to switch off the radio, the radio is OFF when hear Ka Ta from the switch. -
Page 11: Keypad Function
Frequency control 1. In frequency mode, press PUSH key, then you can adjust frequency for present channel; clockwise to reduce frequency. PUSH again to adjust frequency step size KEYPAD FUNCTION MENU+MODE Press MENU MODE together to enter weather channel mode. FRQ/REP Short press to switch between frequency display mode and channel... - Page 12 CTCSS/DCS Function for 2seconds to enter CTC/DCS setting. Press Push to choose turn on or off CTCSS/DCS function. When CTCSS/DCS is turned on, the LCD displays CTC or DCS. DW/+10K Dual-Watch function 1. Short press DW to turn on Dual watch, LCD displays "DW"; 2.
- Page 13 SCAN/SKP Scan function 1. Short press SCAN to enter scan function, LCD displays "SC"; 2. In scan mode, Turn channel switch will change scan direction. 3. Short press SCAN again to exit. Add/delete scan list function 1. Long press SCAN for 2 seconds to add or delete the current channel from scan list;...
-
Page 14: Background Function Menu Operation
BACKGROUND FUNCTION MENU OPERATION 1. Press MENU for 2 seconds to enter menu list; 2. Turn Channel switch to select menu list; 3. Press PUSH to enter the menu setup; 4. Turn channel switch to select wanted setup; 5. Press any other key or wait 5 seconds, the setting will be stored and exit. Function LCD Display Values and Descriptions... - Page 15 Function LCD Display Values and Descriptions OFF: Shut voltage protectio; Voltage ON: Open voltage protection; protection Default: ON. SQ: SQ scan function; 13 Scan Type TI: Time scan function; Default: SQ. OFF: Shut frequency adjustment; R: Open RX frequency adjustment; T: Open TX frequency adjustment;...
- Page 16 01~32: Total 32 Levels for echo volume. 25 Echo volume Default:19 01~32: Total 32 Levels for echo delay time set. 26 Echo delay Default:19 OFF: Shut weather alert function; 27 Weather alert ON: Open weather alert function; Default:OFF. 01~05: Total 5 Levels for RX noise reduction 29 RXNR OFF:Turn off RX noise reduction Default:OFF...
-
Page 17: Specifications
SPECIFICATIONS GENERAL Frequency Range 28.000-29.700MHz(Programmable) Frequency Band A/B/C/D/E/F/G/H/I 40 channels in each band (a total of 60 Channel programmable channels) Frequency Control Phase-Locked-Loop Synthesizer Frequency Step 100Hz,1KHz,5KHz,10KHz,100KHz,1MHz Frequency Tolerance ±5.00ppm Temperature Range to +50 Microphone with push-to-talk /UP/DN and coiled cord Input Voltage 13.8V Dimensions (in mm) - Page 18 RECEIVER 1/2-watt of audio output Sensitivity greater than 1/2watt of audio output watt of audio output Adjacent-Channel Selectivity AM/FM: 60dB SSB: 70dB Image Rejection More than 65dB AM/FM: 10.695MHz 1st IF, 455KHz 2nd IF IF Frequency SSB: 10.695MHz RF Gain Control 45dB adjustable for optimum signal reception Less than 10dB change in audio output for inputs Automatic Gain Control(AGC)
-
Page 19: Ctcss/Dcs Chart
CTCSS/DCS CHART 38 SETS ANALOG FRQ LIST(CTCSS) Freq.(Hz) Freq.(Hz) Freq.(Hz) Freq.(Hz) 67.0 97.4 136.5 192.8 71.9 100.0 141.3 203.5 74.4 103.5 146.2 210.7 77.0 107.2 151.4 218.1 79.7 110.9 156.7 225.7 82.5 114.8 162.2 233.6 85.4 118.8 167.9 241.8 88.5 123.0 173.8 250.3... - Page 20 SAIN3 LLC Address: 36 Berkley Drive Newark Delaware 19702 United States support@radioddity.com...
Need help?
Do you have a question about the QT60 and is the answer not in the manual?
Questions and answers
Hi.... I'm new to these type of radios and need a little help. I can't find how to tune into the weather frequencies on my new QT60 radio. Can you please help me with this, what steps to take ? Thank you
The Radioddity QT60 radio has a WX weather channel and a Weather Alert function. To tune into weather frequencies, switch to the WX weather channel mode using the menu or keypad functions. This will allow you to receive weather broadcasts. If the Weather Alert function is enabled, the radio will notify you of emergency weather alerts.
This answer is automatically generated