
Related Manuals for Samsung SCX-4216F Series


Summary of Contents for Samsung SCX-4216F Series
-
Page 1: Table Of Contents
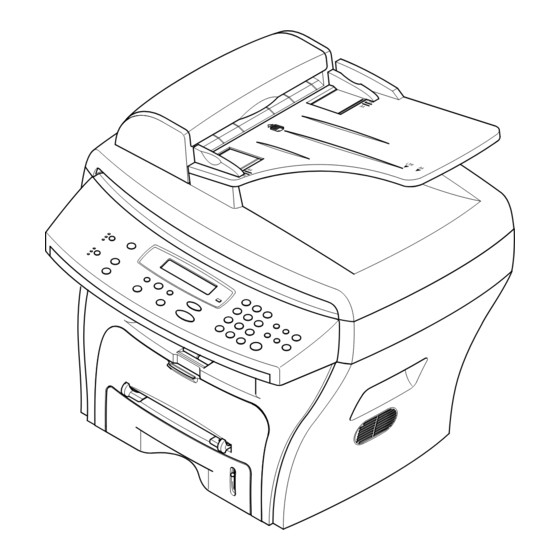
DIGITAL LASER MFP SCX-4216F Series SCX-4216F SCX-4116 SCX-4016 SERVICE Manual DIGITAL LASER MFP CONTENTS 1. Precautions 2. Specifications 3. Disassembly and Reassembly 4. Troubleshooting 5. Exploded Views and Parts List 6. Block Diagram 7. Connection Diagram... -
Page 3: Precautions
VARNING - OSYNLIG LASERSTR LNING N R DENNA DEL R PPNAD OCH SP RREN R URKOPPLAD. BETRAKTA EJ STR LEN. STR LEN R FARLIG. VARO! - AVATTAESSA JA SUOJALUKITUS OHITETTAESSA OLET ALTTIINA N KYM TT M LLE LASER- S TEILYLLE L KATSO S TEESEEN. Samsung Electronics... - Page 4 (12) Turn off the power and take off the plug when a smoke, strange smell, or sound from the machine. If you keep using it, a fire can be occurred. (13) Do not insert steel or metal piece inside/outside of the machine. Do not put steel or metal piece into a ventilator. An electric shock could be happened. Samsung Electronics...
- Page 5 (7) Be careful not to change the location of small parts such as screws when assembling and disassembling. (8) Do remove dust or foreign matters completely to prevent fire of tracking, short, or etc. (9) After finished repair, check the assembling state whether it is same as before the repair or not. Samsung Electronics...
- Page 6 9. Minimize bodily motions when handling unpackaged replacement ESDs. Normal motions, such as the brushing together of clothing fabric and lifting one’s foot from a carpeted floor, can generate static electricity sufficient to dam- age an ESD. Samsung Electronics...
- Page 7 Standard : For general home use, for medical service. Electronic Scale Standard: Equipment to check the weight of consumables supplied by Samsung Electronics. (The gram unit can be mea- sured.) Cleaning Equipments a IPA (Isopropyl Alcohol)dry cloth or a soft stuff neutral detergent.
- Page 8 Read Only Memory graphics device interface Second Cassette Feeder ground SMPS Switching Mode Power Supply Host Based Printing SPGP Samsung Printer Graphic Processor Hard Disk Drive Samsung Printer Language high voltage Spool Simultaneous Peripheral Operation Online HVPS High Voltage Power Supply...
-
Page 9: Specifications
Print Language Power Save Yes(5/10/15/30/45min.) Resolution Normal 600 *600dpi Toner Save Memory FPOT Stand by Approx. 12 seconds Power Save Less than 42 seconds Duplex Print Manual (driver support provided) Printable Area 208 x 273 mm (Letter) Toner Save Samsung Electronics... - Page 10 Multi Copy 1~99 Preset Contrast Control SCX-4016/SCX-4116 : 3 level(by LED) SCX-4216F : 5 level" Copy Mode AUTO/TEXT/PHOTO Collation Copy Yes(300dpi only) Auto return to default mode Yes(after 1 minute) N-up copy 2-up, 4-up AutoFit Copy Clone Poster Samsung Electronics...
- Page 11 2 types available (with Image TCR, w/o image TCR) Help List Auto Dial List System Data List List all user setting Sound Control Ring Volume Yes(Off,Low,MED,HIGH) Key Volume Yes(On,Off) Speaker Yes(On,Off) Junk Fax barrier Security Mode Battery Backup Samsung Electronics...
- Page 12 Capacity 2MB (160 pages) Optional Memory Max locations to 49 locations store to 1 Group Dial Fax Forward Yes(On/Off) Broadcasting 59 locations Forced Memory TX Cover page Delayed fax Memory RX Functions Voice Request Polling Earth/Recall Auto Reduction Samsung Electronics...
- Page 13 127 mm - 356mm(5" - 14.0") 2.8 Software Items Descriptions Remarks Compatibility Win 3.x Win 95 Win 98&WinME Win NT 4.0 Win 2000 Win XP Mac Printer Only Linux Driver Printer TWAIN PC Fax is only avail- able through PC Modem PC-FAX Samsung Electronics...
- Page 14 In/Out Guide Printer Cable 2.10 Consumables Items Descriptions Remarks Type Single Cartridge How to install Front door open and front loading Toner Life Initial 1,000 sheets Letter size, 5% running 3,500 sheets Character Pattern Level Sensor Toner Count Samsung Electronics...
-
Page 15: Disassembly And Reassembly
2. Be sure to remove the toner cartridge before you dis- assemble parts. 3. Unplug the power cord. 4. Use a flat and clean surface. 5. Replace only with authorized components. 6. Do not force plastic-material components. 7. Make sure all components are in their proper position. Samsung Electronics... - Page 16 1. Remove the four screws securing the Rear Cover. 3. Unlatch the (Cover Face Up) securing the Rear cover, as shown below.Then lift the (Cover Face Up) out. Cover Face Up 2. Remove the Rear Cover from the Frame Ass'y and Scanner Ass'y. Rear Cover Samsung Electronics...
- Page 17 Main PBA - Rear Cover (see page 3-2) - Engine Shield Ass,y (see page 3-3) 2. Unplug the one connector and remove the five screws securing the Main PBA. Then lift the Main PBA out, as shown below. Samsung Electronics...
- Page 18 - Engine Shield Ass,y (see page 3-3) as shown below. 2. Unplug the one connector and remove the one screw securing the Inlet Ass'y SMPS 3. Unlatch the Inlet Ass'y and remove it, as shown below. Inlet Ass'y Samsung Electronics...
- Page 19 5. Remove the one screw securing the Idle Gear and remove it. Idle Gear 3. Remove the two screws securing the Thermostat. Then lift the Thermostat out Thermostat 6. Remove the four screws securing the Fuser Cover and remove it, as shown below. Fuser Cover Samsung Electronics...
- Page 20 - Rear Cover (see page 3-2) Side Cover(LH) 2. Unplug the FPC Cables and Speaker Harness, as shown below. Speaker Harness FPC cable Side Cover(RH) Note : You should connector remove the FPC Cable vertically to avoid the FPC cable pin damage. Samsung Electronics...
- Page 21 - Side Cover (LH, RH) (see page 3-6) ADF Motor Connector 2. Remove the two screws securing the Scanner Ass'y, as shown below. 3. Pull up the Scanner Ass'y, as shown below. 5. Pull the Platen Cover upward and remove it.. Scanner Ass’y Samsung Electronics...
- Page 22 10. Remove the two screws securing the Window Cover. and remove it. Scanner 8. Remove the three screws securing the Scan Lower 11. Unlatch the Window Cover securing the Scan Lower Ass'y. Ass'y Then pull the Window Cover upward and remove it.. Window Cover Samsung Electronics...
- Page 23 Module. CCD Cable Scanner Module CCD Shaft Belt Holder 13. Push the Belt Holder and take out the Belt, as shown 15. Remove the Reduction Gear and Idle Gear, as below. shown below. Reduction Gear Belt Idle Gear Samsung Electronics...
- Page 24 Disassembly and Reassembly 16. Remove the two screws and take out the Motor 18. Unlatch the Open Sensor and remove it, as shown Bracket. below. Motor Bracket Open Sensor 17. Unplug the one connector from the Open Sensor Ass'y. 3-10 Samsung Electronics...
- Page 25 3. Remove the Open Cover, as shown below. Open Cover 6. Unplug the one connector and remove four screws securing the ADF Motor Ass'y. Then take out the ADF Motor Ass'y. ADF Motor Ass’y ADF Lower Ass’y 3-11 Samsung Electronics...
- Page 26 - Side Cover (LH, RH) (see page 3-6) - Scanner Ass’y (see page 3-7) 2. Remove the six screws securing the OPE PBA from the OPE Cover. OPE Cover Key Pad OPE PBA 3. Remove the Contact Rubber from the OPE Cover. Contact Rubber 3-12 Samsung Electronics...
- Page 27 - Rear Cover (see page 3-2) - Scanner Ass’y (see page 3-7) Exit Gear Bearing - Side Cover (LH, RH) (see page 3-6) Exit Roller 2. Remove the two screws securing the Cover-Rear Upper, as shown below. Samsung Electronics 3-13...
- Page 28 Disassembly and Reassembly 3-12 Front Cover 1. Take out the Cassette. 3. Unlatch the Front Cover securing the Frame Ass'y. Then remove the Front Cover, as shown below. Cassette 2. OPen the Front Cover. Front Cover 3-14 Samsung Electronics...
- Page 29 1. Before you remove the Fan, you should remove: 2. Unplug the connector from the SMPS and remove the - Rear Cover (see page 3-2) one screw. Then take out the Fan. - Side Cover (RH) (see page 3-6) DC Fan Samsung Electronics 3-15...
- Page 30 3. Take out the Drive Ass'y, then unplug the connector remove: from the Main PBA, as shown below. - Rear Cover (see page 3-2) - Side Cover (LH) (see page 3-6) Drive Ass’y 2. Remove the six screws securing the Drive Ass'y. 3-16 Samsung Electronics...
- Page 31 - Middle Cover (see page 3-15) 2. Remove the three screws securing the Transfer Earth and remove it. Transfer Earth 4. Unlatch the Bush and remove it. Then lift the Transfer Roller out, as shown below. Transfer Roller Bush Samsung Electronics 3-17...
- Page 32 2. Remove the two screws securing the Guide Paper and remove it. Guide paper 5. Remove the Idle Gear and Feed Gear2. Feed Gear2 3. Pull up the Feed Idle Bush and Feed Idle Shaft, as shown below. Idle Gear Feed Idle Shaft Bush 3-18 Samsung Electronics...
- Page 33 Disassembly and Reassembly 6. Remove the Feed Gear1 Ass'y. 7. Pull up the Feed Roller and Feed Roller1. Feed Roller Feed Gear1 Ass'y Feed Roller1 Samsung Electronics 3-19...
- Page 34 5. Remove the two screws securing the Manual Solenoid and Pick up Solenoid. Then remove Manual Solenoid and Pick up Solenoid. 3. Remove the Pick up Gear Ass,y. (Pick up) Solenoid (Manual) Pick up Gear Solenoid Ass'y 3-20 Samsung Electronics...
-
Page 35: Troubleshooting
4.9.8 Defective motor operation 4.14.2 Service for the Life of Toner Cartridge 4.9.9 No Power 4.14.3 Service for Judgement of Inferior Expendables and the Standard of Guarantee 4.9.10 Vertical Line Getting Curved 4.14.4 Signs and Measures at Poor toner cartridge Samsung Electronics... - Page 36 3) Close the ADF top cover.Then load the documents back into the ADF. NOTE : To prevent document jams,use the document glass for the thick,thin or mixed documents. 2) Pull the document gently to the right and out of the ADF. Samsung Electronics...
- Page 37 2) Turn the release knob so that you can easily seize the misfed document,and remove the document from the ADF or the feed area by carefully pulling it rightwards by using both hands. 3) Close the document cover.Then load the documents back into the ADF. Samsung Electronics...
- Page 38 If there is any resistance when you pull the paper or the paper is not seen in this area,skip to the fuser area around the toner cartridge 4) Insert the paper tray into the machine until it snaps into place. Samsung Electronics...
- Page 39 3) If there is any resistance when you pull the paper or the paper is not seen in the front output tray,open the rear cover. 4) Remove the jammed paper by gently pulling it straight out.. 5) Close the rear cover. 6) Open and close the front cover to resume printing. Samsung Electronics...
- Page 40 NOTE : The fuser area is hot.Take care when removing paper from the machine. 1) Open the front cover and remove the toner cartridge. 2) Remove the jammed paper by gently pulling it straight out. 3) Replace the toner cartridge and close the front cover. Printing automatically resumes. Samsung Electronics...
- Page 41 • Do not mix paper types in the paper tray.. • Use only recommended print materials..See “Paper Specifications ” • Ensure that the recommended print side is facing down when loading paper in the paper tray and facing up in the Bypass tray. Samsung Electronics...
- Page 42 The cycle period given below is for reference only. COMPONENT REPLACEMENT CYCLE ADF Rubber 20,000 Pages ADF Roller 50,000 Pages Pick-up Roller 60,000 Pages Friction Pad 60,000 Pages Transfer Roller 60,000 Pages Fuser 60,000 Pages Toner Cartridge 3,000 Pages Samsung Electronics...
- Page 43 Charge Roller 37.7mm Black spot Supply Roller 37.0mm Horizontal density band Develop Roller 35.2mm Horizontal density band Transfer Roller 45.3mm Black side contamination/transfer fault Heat Roller 64.1mm Black spot and fuser ghost Pressure Roller 75.5mm Black side contamination Samsung Electronics...
- Page 44 Troubleshooting Paper Paht Scanner Part ADF-Roller Pickup-Roller Doc-Paper(30Sheets) ADF-Idle Roller Sensor-Regi Sensor-Regi Sensor-Doc Sensor-Doc Exit-Roller Feed-Roller Sensor-Scan Sensor-Scan White-Sheet White-Sheet CCD-Module Engine Part L S U Fuser Toner Cartridge 4-10 Samsung Electronics...
- Page 45 Solution : Either delete unnecessary documents, or retransmit after more memory becomes available, or split the transmission into more than one operation. NO ANSWER Meaning : The remote machine was not answered after all the redial attempts. Solution : Try again. Make sure the remote machine is OK. Samsung Electronics 4-11...
- Page 46 Solution : Toner may be unevenly distributed. Remove the toner cartridge and shake it gently to evenly dis- tribute the toner. Then replace the toner cartridge. Scanner Locked Meaning : Scanner is locked by locker. Solution : Check locker. Connect the Flat-Cable. 4-12 Samsung Electronics...
- Page 47 NORMAL / TEXT / IMAGE MEMORY CLEAR SYSTEM ID SYSTEM DATA PHONE BOOK / MEMORY TX-RX JOURNAL DELAY TX MEMORY TX PRIORITY TX POLLING ADD/CANCEL ADD / CANCEL GROUP DIAL MAINTENANCE CLEAN DRUM NEW DRUM NOTIFY TONER LOW ON / OFF Samsung Electronics 4-13...
- Page 48 BYPASS PAPER LETTER / A4 / LEGAL POWER SAVE ON / OFF SELECT LANGUAGE ENG/GER/FRE/ITA/SPA/POR/DUT USB MODE FAST / SLOW HELP LIST HELP LIST PRINTOUT MAINTENANCE CLEAN DRUM NEW DRUM REPORTS SYSTEM DATA HELP LIST HELP LIST 4-14 Samsung Electronics...
- Page 49 To return to normal user mode, press MENU, #, 1, 9, 3, 4 in sequence again, or turn the power off, then on by unplugging and plugging the power cord. Options changed while in service mode do not remain changed unless you clear the machine’s memory. Samsung Electronics 4-15...
- Page 50 The same as User Mode SCHEDULE JOB The same as User Mode PHONE BOOK The same as User Mode SYSTEM LIST USER MODE TX JOURNAL The same as User Mode RX JOURNAL The same as User Mode 4-16 Samsung Electronics...
- Page 51 PATTERN1-7, QAPATTERN1-4 , ALL CLEAR COUNT PASSWORD CRU PRINTS COUNT FLT SCAN COUNT ADF SCAN COUNT USED DRUM COUNT USED TONER COUNT TOTAL PAGE COUNT ADJUST SHADING FLASH UPGRADE REPORTS SYSTEM DATA HELP LIST HELP LIST ERROR CODE Samsung Electronics 4-17...
- Page 52 Communication is done with modem speed automatically set at lower speed when communicating with the modem with lower speed since communication is done on the standard of the side where modem speed is low for transmission/reception. It is better set 33.6Kbps as default setting. 4-18 Samsung Electronics...
- Page 53 FIRMWARE VERSION 1.00 ENGINE VERSION V0.7.6.i EMULATION VERSION QPDL 1.13 12-11-2002 TOTAL PAGE COUNTS TOTAL TONER COUNT CRU PRINTS REPLACED TONER COUNTS REPLACED DRUM COUNTS PLATEN SCAN PAGE COUNTS ADF SCAN PAGE COUNTS < SYSTEM DATA LIST > Samsung Electronics 4-19...
- Page 54 T HV T es t 1: On, 2: Off (1300v) T HV T rigger T est 1: On, 2: Off F or SMD T est, Pus h up k ey : Next function All Function Test All Function : No.0~4 4-20 Samsung Electronics...
- Page 55 4. Replace the Housing-Pickup and/or whether the assembly slot between Shaft-Pickup. shaft-pickup and housing-pickup become open or is broken away. 5. If the paper feeds into the printer rand Jam 0 occurs, perform DCU to check feed-sensor of the engine board. Samsung Electronics 4-21...
- Page 56 3. Remove the jammed paper after disas- sembling the fuser : Clean the surface of the pressure roller with dry gauze. • Remove the toner particles stained on the rib. • Check the assemblage and perfor- mance of the exit. 4-22 Samsung Electronics...
- Page 57 1. Disassemble the fuser, clean the area between the (Background, Hot off set) Heat-roller and Thermistor and remove the foreign matter of the pressure roller. 2. If background appears badly in the printing, fix it by referring to the solutions for background. (See 4.5.8 Background) Samsung Electronics 4-23...
- Page 58 1. Replace the contaminated or damaged part. aged. 2. Check if the document sensors of OPE ASS'Y 2. If you cannot confirm the damaged part with the (2 paper sensors) are normal. naked eye, try to replace the OPE ASS'Y. 4-24 Samsung Electronics...
- Page 59 2. Confirm to catch a click sound, while a key on the OPE 2. Even after the key has been replaced, it is still wrong, panel is pressed on. try to replace the OPE ASS'Y and the Main B'D in sequence. Samsung Electronics 4-25...
- Page 60 1. Bending or deformation of the actuator of the paper sen- 1. Replace the defective actuator. sor. 2. The function of the engine board is defective Perform. 2. Replace the engine board. DCU mode : Perform DCU diagnostic code 8. 4-26 Samsung Electronics...
- Page 61 1. Check the insertion of the Cover Open S/W department in the Main Control board. Perform DCU Connect. mode : If Error state '64' occurs, Check the related codes of the Cover Open Error 2. Replace the Main Control board or Cover Open S/W. Samsung Electronics 4-27...
- Page 62 1. Replace the power supply cord or SMPS. 2. Check the inferiority of LED-Panel on the front-cover if 2. Replace the control board. the LED of Panel does not appear after normal warming- 3. Replace the LED-panel. 4-28 Samsung Electronics...
- Page 63 Solution 1. If the supply of +24v is unstable in the Main Control board 1. Replace LSU. linking with LSU, check drive by DCU Mode: LSU Check -05- LSU Motor on. 2. Replace the Main Control board. Samsung Electronics 4-29...
- Page 64 4. No. 4. : Open the front cover and check odically at the top of a black image. ribs that corresponds to the position of the voids. Remove if found. 5. If the problems are not solved, replace the developer cartridge. 4-30 Samsung Electronics...
- Page 65 4. In case of 38.5 mm interval unremovable in 1, take measures as to replace the develop- er cartridge and try to print out. 5. Clean the inside of the set against the paper particles and foreign matter in order not to cause the trouble. Samsung Electronics 4-31...
- Page 66 HVPS. in the side of the Developer and charge terminal of HVPS. 3. Replace the HVPS if not solved by the above direction 1 and 2. 4-32 Samsung Electronics...
- Page 67 3. The up-to-down movement of the trans- 3. Clean the busing part of the transfer roller. fer roller is swift? 4. The HVPS is normal? 4. Replace the Developer if not solved by the (Perform DCU diagnostic code 01~04) above direction 1~3. Samsung Electronics 4-33...
- Page 68 Select 'Thick Mode' on paper type menu from Digital Printer mal paper or transparencies such as OHP, the software application and after using return- Digital Printer higher transfer voltage is required. ing to the original mode is recommended. Digital Printer Digital Printer Digital Printer 4-34 Samsung Electronics...
- Page 69 2. If the transfer roller is contaminated, satins 2. If the transfer roller is contaminated, run PC on the face of page will occur. Cleaning Mode Print 2 or 3 times. Digital Printer And perform Self-Test 2 or 3 times to remove contamination. Samsung Electronics 4-35...
- Page 70 2. Perform the engine self test using DCU to check if the Solenoid is normal.(refer to code 06) 3. If not solved by the above directions 1-2, Replace the engine board. 4. Turn the power off, delete the data of PC and try printing again. 4-36 Samsung Electronics...
- Page 71 Main PBA, try to replace the HARNESS. 3. Check the connection of HARNESS between the LIU and the Main PBA. 3. The problem still persists, then replace the LIU and the main B'D in sequence. Notes: Product supports the MF DIAL type only. Samsung Electronics 4-37...
- Page 72 2. Check the RECEIVE condition by trying to forward a FAX to another fax machine from the forwarding side FAX. 3. Check if the telephone line connected to the Product is contaminated or gets stripped off or down. 4-38 Samsung Electronics...
- Page 73 Check and Cause Solution Check if the RECEIVE mode is TEL MODE or FAX Even when the RECEIVE mode is changed to FAX MODE. MODE, it cannot receive, then replace the LIU and the Main B'D in sequence. Samsung Electronics 4-39...
- Page 74 1. If the RECEIVE mode is set to the TEL MODE, reset it MODE. to the FAX MODE. 2. Even after the RECEIVE mode is changed to the FAX mode, it cannot receive, then try to replace the LIU and the Main B'D in sequence. 4-40 Samsung Electronics...
- Page 75 2. Perform the Adjust Scanner in the TECH MODE. Scanner, replace the CCD Module, while replace the (See page ?? Main B'D in normal. 4.12.2 Block Copy • Description Black page is printed out when receiving.. Check and Cause Solution Samsung Electronics 4-41...
- Page 76 4. After confirming the CIS waveform and cleaning the nozzle, if the vertical black lines still occur, then try to replace the Main B'D. 4.12.4 Defective image quality • Description The copied image is light or bad. Check and Cause Solution 4-42 Samsung Electronics...
- Page 77 CCD ASS’Y. 2. Check if the resolution is set too low in PC Scan 2. If the resolution is set to low, let the user be acquaint- options. (Refer to User's Manual.) ed with the using method well. Samsung Electronics 4-43...
- Page 78 4.14 Toner Cartridge Service It is not guaranteed for the default caused by using other toner cartridge other than the cartridge supplied by the Samsung Electronic or caused by non-licensed refill production. 4.14.1 Precautions on Safe-keeping of Toner Cartridge Excessive exposure to direct light more than a few minutes may cause damage to the cartridge.
- Page 79 (1)Check whether foreign sub- stances or toner are stuck to the terminal (contact point) of the developer. (2)Check whether the state of the terminal assembly is normal. 3. If it cannot be recycled: Replace the developer. Samsung Electronics 4-45...
- Page 80 (1)It occurs when the developer the developer. is recycled over 2 times. (2)Check whether the state of (2)If toner nearly being expired the terminal assembly is nor- are collected to use, it is mal. judged as the recycled devel- oper. 4-46 Samsung Electronics...
- Page 81 Clean the terminals of the (point of contact) of the developing roller, then recheck it. developer and the state of assembly. (Especially check the devel- oping roller terminal.) Samsung Electronics 4-47...
-
Page 82: Exploded Views And Parts List
5. Exploded Views and Parts List 5-1 Main Assembly Exploded view ................page(5-2) 5-2 ADF Assembly Exploded view ................page(5-5) 5-3 PLATEN COVER Assembly Exploded view ............page(5-8 5-4 OPE Assembly Exploded view ................page(5-10) 5-5 Scanner Assembly Exploded view ................. page(5-12) 5-6 Frame Ass’y Exploded view .................. -
Page 83: Main Assembly Exploded View
Exploded Views and Parts List 5-1 Main Assembly Exploded view... - Page 84 Exploded Views and Parts List < Main Assembly Parts List > SA. : Service Available DESCRIPTION SEC CODE Q’TY REMARK UNIT-SCAN ASSY ELA HOU-ADF JC96-02654A ELA HOU-PLATEN JC96-02657A ELA HOU-OPE JC96-02658A CBF-ROCKY_ADF_HARNESS ADF_HARNESS PMO-COVER WINDOW COVER WINDOW ROCKY_CONN_PBA CONN_PBA ELA HOU-FRAME(220V) JC96-02710A ELA HOU-RX DRIVE 1400 NEW-DRIVE ASSY...
- Page 85 Exploded Views and Parts List < Main Unit Parts List > SA. : Service Available DESCRIPTION SEC CODE Q’TY REMARK MEA ETC-COVER FRONT 10-1 ADJUST-MANUAL R JC70-00303A 10-2 ADJUST RACK-MANUAL JC70-00304A 10-3 COVER-FRONT JC63-00103A 10-4 ADJUST-MANUAL L JC70-00302A 10-5 GEAR-RACK_PINION JC66-00387A MEA ETC-CASSETTE 1400 ELA HOU COVER SIDE L...
- Page 86 Exploded Views and Parts List 5-2 ADF Unit Exploded view 1-3-4 1-3-1 1-3-2 1-3-3 3-11 3-15 3-14 3-10 3-13 2-15 2-15 2-16 2-15 2-12 2-13 2-10 2-11 2-14...
- Page 87 Exploded Views and Parts List < ADF Unit Parts List > SA. : Service Available DESCRIPTION SEC CODE Q’TY REMARK ELA HOU-ADF JC96-02654A MEA UNIT-ADF UPPER ASS`Y COVER-M-ADF UPPER JC63-00145A ROLLER-M-ADF IDLE JC66-00461A HOLDER-ADF ASSY JC97-01709A 1-3-1 RMO-ADF RUBBER JB73-00052A 1-3-2 HOLDER-M-ADF JC61-00694A...
- Page 88 Exploded Views and Parts List < ADF Unit Parts List > SA. : Service Available DESCRIPTION SEC CODE Q’TY REMARK 3-13 GEAR-REMOVE ADF JC66-00557A 3-14 WASHER-PLAIN 6031-000023 3-15 SPRING ETC CLUTCH JB61-70922A MEA-COVER PLATEN(4IN1) JC97-01708A MEA-COVER OPEN JC97-01706A COVER-M-OPEN JC63-00147A PMO-GUIDE PAPER JB72-00843A ROCKY_ADF_PBA...
- Page 89 Exploded Views and Parts List 5-3 COVER PLATEN Exploded view...
- Page 90 Exploded Views and Parts List < COVER PLATEN Unit Parts List > SA. : Service Available DESCRIPTION SEC CODE Q’TY REMARK MEA-COVER PLATEN(4IN1) JC97-01780A COVER-M-PLATEN(4IN1) JC63-00146A WHITE SPONGE WHITE SPONGE MEA-TX STACKER ASS’Y JB97-01544A PMO-TX STACKER JB72-01166A PMO-DOC GUIDE(L) JB72-01171A GEAR-PINION JG66-40003A PMO-DOC GUIDE(R)
- Page 91 Exploded Views and Parts List 5-4 OPE Unit Exploded view 5-10...
- Page 92 Exploded Views and Parts List < OPE Unit Parts List > SA. : Service Available DESCRIPTION SEC CODE Q’TY REMARK ELA HOU-OPE JC96-02658A COVER-M-OPE(4IN1) JC63-00153A KEY-M-RESOLUTION JC64-00059A KEY-M-COPY JC64-00054A KEY-M-SCROLL JC64-00056A KEY-M-STOP JC64-00055A KEY-M-START JC64-00057A KEY-M-TEL JC64-00053A KEY-M-FAX JC64-00060A KEY-M-TONER SAVE JC64-00058A KEY-M-TOLL SAVE JC64-00061A...
-
Page 93: Scanner Assembly Exploded View
Exploded Views and Parts List 5-5 Scanner Assembly Exploded view 1-3-1 1-3-2 1-3-3 1-3-4 2-16 2-11 2-10 2-13 2-15-7 2-15-4 2-15-6 2-15-3 2-14 2-15-5 2-15-1 2-17 2-15 2-15-2 CONNECTION_PBA FLAT CABLE 5-12... - Page 94 Exploded Views and Parts List < Scanner Assembly Parts List > SA. : Service Available DESCRIPTION SEC CODE Q’TY REMARK ELA HOU-PLATEN JC96-02657A SCAN UPPER ASSY JC97-01712A COVER-M-SCAN UPPER JC63-00151A GLASS-SCAN JC01-00001A MEA-SCAN DUMMY(4IN1) JC97-01711A 1-3-1 COVER-M-SCAN DUMMY(4IN1) JC63-00152A 1-3-2 MCT-GLASS ADF JC74-00019A 1-3-3...
-
Page 95: Frame Ass'y Exploded View
Exploded Views and Parts List 5-6 Frame Ass’y Exploded view 5-14... - Page 96 Exploded Views and Parts List < Frame Ass’y Parts List > SA. : Service Available DESCRIPTION SEC CODE Q’TY REMARK ELA UNIT-FRAME ASSY 220V FRAME-Base JC61-00579A GUIDE-TR JC61-00607A PLATE-SAW JC61-00604A GUIDE-TR RIB JC61-00594A PMO-GEAR_EXIT_DRV16 JC72-00143A RING-CS 6044-000001 RMO-RUBBER_FOOT JC73-00027A IPR-GROUND TR JC70-00311A MEC-TERMINAL JC75-00049A...
- Page 97 Exploded Views and Parts List < Frame Ass’y Parts List > SA. : Service Available DESCRIPTION SEC CODE Q’TY REMARK BUSH-FEED IDLE JC61-00585A SPRING-FEED IDLE IPR-P_GROUND_DRIVE2 JC70-00335A SPRING-CAM PICK-UP CAM-PICK_UP JC66-00377A IPR-GROUND DRIVE JC70-00308A SOLENOID-HB (PICK-UP) JC33-00009A SOLENOID-HB (MANUAL) JC33-00010A 45-1 PMO-GEAR PICK_UP B JC72-00980A...
-
Page 98: Rx Drive Ass'y Exploded View
Exploded Views and Parts List 5-7 RX Drive Ass’y Exploded view HARNESS-MOTOR < RX Drive Ass’y Parts List > SA. : Service Available DESCRIPTION SEC CODE Q’TY REMARK ELA HOU-RX DRIVE 1400 JC96-02733A BRACKET-GEAR 1400 JC61-00598A GEAR-FUSER DRV JC66-00388A GEAR-RDCN Z132/19 JC66-00391A GEAR-PICK_UP DRV JC66-00389A... -
Page 99: Fuser Ass'y Exploded View
Exploded Views and Parts List 5-8 Fuser Ass’y Exploded view 5-18... - Page 100 Exploded Views and Parts List < Fuser Ass’y Parts List > SA. : Service Available DESCRIPTION SEC CODE Q’TY REMARK ELA HOU-FUSER 110V JC96- COVER-FUSER J C63-00105A HOLDER-PLATE CLAW JC61-00584A SPRING ETC-CLAW JC61-00064A PMO-ROLLER EXIT JC72-60059A SPRING-EXIT F_UP JC61-70976A THERMOSTAT-150 JC47-00005A PMO-GEAR_EXIT_DRV16 JC72-00143A...
-
Page 101: Cassette Ass'y Exploded View
Exploded Views and Parts List 5-9 Cassette Ass’y Exploded view 5-20... - Page 102 Exploded Views and Parts List < Cassette Ass’yu Parts List > SA. : Service Available DESCRIPTION SEC CODE Q’TY REMARK CASSETTE JC96-01750A FRAME-CASSETTE JC61-00578A PMO-EXTENSION LARGE JC72-00970A PMO-EXTENSION SMALL JC72-00971A PLATE-KNOCK_UP JC61-00603A SPRING-KNOCK_UP 6107-001166 HOLDER-PAD JC61-00580A SPRING-FRICTION PAD JC61-70911A ROLLER-IDLE FEED JC66-00529A SPRING-FEED 6107-001047...
-
Page 103: Screws
Exploded Views and Parts List 5-10 Screw DESCRIPTION SEC CODE SPEC 6001-000485 SCREW-MACHINE PH,+,M2.6,L4,ZPC(YEL),SM20 6002-000101 SCREW-TAPPING BH,+,2,M3,L10,ZPC(BLK),SM2 6002-000175 SCREW-TAPPING PWH,+,2,M3,L8,ZPC(YEL),SM2 6002-000308 SCREW-TAPPING PH,+,2,M2.6,L6,ZPC(YEL),SM 6002-001065 SCREW-TAPPING PWH,+,2,M2.5,L5,ZPC(YEL),SM2 6003-000196 SCREW-TAPTITE PWH,+,B,M3,L10,NI PLT,SWRC 6003-000269 SCREW-TAPTITE BH,+,S,M3,L6,ZPC(YEL),SWRC 6009-001251 SCREW-SPECIAL SM20C,P12,+,M3,L8,ZPC(YEL),MACHIN 5-11 SMPS Parts Lists DESCRIPTION SEC. -
Page 104: Block Diagram
1 6 P TRNSFORMER EXT. PHONE FLATEN LINE 600 : 600 SEPERATING ADF POS SEN. MOTOR TX : RX PART MOTOR ADF DET SEN. DRIVER EXT.PHONE LINE EXT. PHONE (TEA3718X2) INTERFACE MOTOR ADF REGI SEN. INTERFACE PART SCX-4216F only Samsung Electronics... -
Page 105: Connection Diagram
MOTOR : CLK2 : CP 12.nA DF _P _DE T : +5V : HOME 4.M B CN 6 : +24V : INV_POW 14.nA DF _P _P OS 16.nA DF _P _RE G 1.MA FLATEN 2.MB 3.MA MOTOR 4.MB Samsung Electronics... - Page 106 ELECTRONICS This service manual is also provided on the web, © Samsung Electronics Co.,Ltd. February. 2003 the ITSELF system f Samsung Electronics Co., Ltd. Printed in Korea. http://itself.sec.samsung.co.kr VERSION NO. : 1.00 CODE : JC-0085A...
Need help?
Do you have a question about the SCX-4216F Series and is the answer not in the manual?
Questions and answers