Table of Contents
Advertisement
Quick Links
Advertisement
Table of Contents

Related Manuals for Philips FC8822


Summary of Contents for Philips FC8822
- Page 1 FC8822, FC8812...
- Page 3 FC8822 Wheels stuck Top cover or dust container not placed properly Bumper stuck Robot lifted up from oor Colour of oor too dark Battery not inserted properly / Charging error (switch is o )
- Page 5 English 6 简体中文...
-
Page 6: General Description
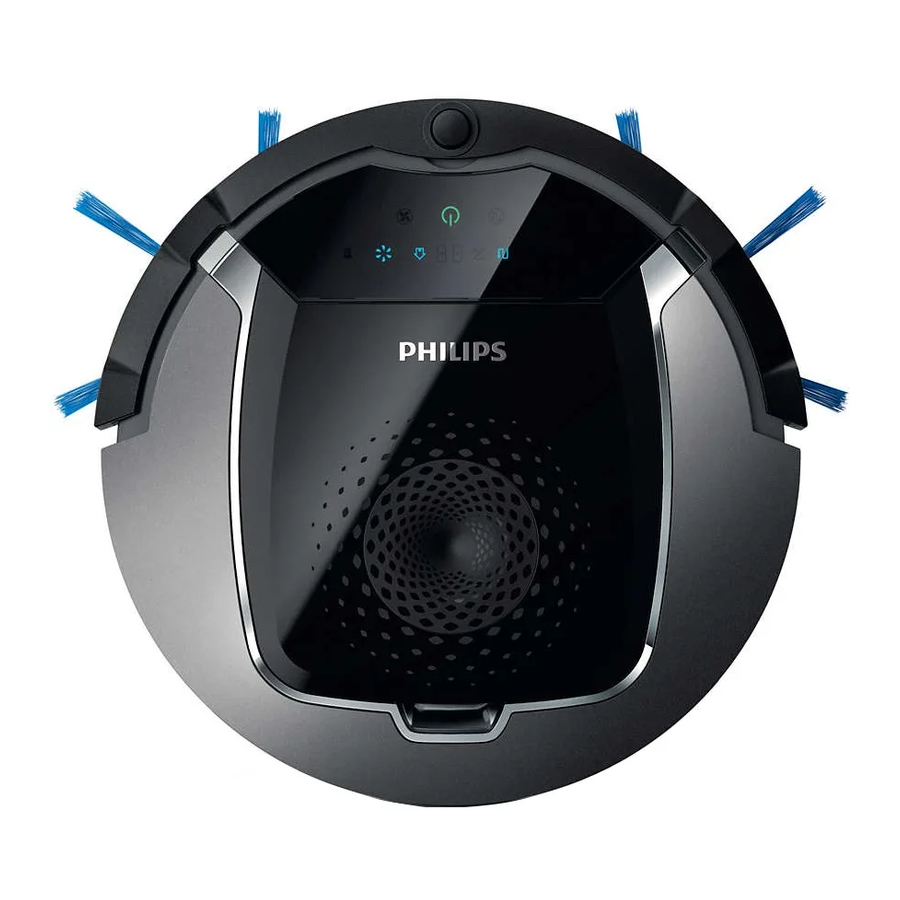
English Introduction Congratulations on your purchase and welcome to Philips! To fully benefit from the support that Philips offers, register your product at www.philips.com/welcome. General description Handle of dust container lid 2 Dust container lid 3 Filter 4 Dust container... -
Page 7: How Your Robot Works
English 2 Cleaning time buttons 3 Cleaning mode buttons 4 Fan speed buttons 5 Docking button Control panel of docking station Display with time, day and programming indications (Fig. 4) 2 Adjusting and setting buttons How your robot works What your robot cleans This robot is equipped with features that make it a suitable cleaner to help you clean the floors in your home. -
Page 8: Before First Use
English Caution: In some cases, the drop-off sensors may not detect a staircase or other height difference in time. Therefore monitor the robot carefully the first few times you use it, and when you operate it near a staircase or another height difference. It is important that you clean the drop-off sensors regularly to ensure the robot continues to detect height differences properly (see 'Cleaning and maintenance') . -
Page 9: Using Your Robot
English The robot enters deep sleep mode when you press the start/stop button for 5 seconds. It may also enter the deep sleep mode when its battery is empty. The battery may, for instance, run empty if the robot is unable to find its docking station. Charging When charging for the first time and when the rechargeable battery of the robot is empty, the charging time is four hours. -
Page 10: Error Codes
English Signal Description of signal Meaning of signal The start/stop button flashes slowly green and the The robot is charging. display on the robot shows a moving blue light (the charging indicator). The start/stop button is continuously orange. The rechargeable battery is low and the robot is searching for the docking station. -
Page 11: Manual Driving
English 2 The robot cleans in the auto-cleaning mode until its battery runs low. In the auto-cleaning mode, it follows repeated sequences of Z-pattern, random, wall-following and spiral patterns (Fig. 6). Note: To select an individual mode, press one of the mode buttons on the remote control or on the robot (see 'Cleaning mode selection'). - Page 12 English Using the cleaning time buttons - By default, the robot cleans in auto cleaning mode until its rechargeable battery runs low. The robot will then automatically return to its docking station. If you selected one of the other cleaning times (see below), you can switch back to the default mode by pressing the maximum cleaning time button on the remote control (Fig.
- Page 13 English 3 Use the + and - buttons on the docking station to set the hour. The set hour appears on the display. 4 Press the select button to confirm the hour set. The minutes indication starts flashing. 5 Use the + and - buttons on the docking station to set the minutes. The set minutes appear on the display.
-
Page 14: Cleaning And Maintenance
Note: You cannot rinse or wash the dry wipes. Using the invisible wall (FC8822 only) You can use the invisible wall to prevent the robot from entering a room or area that you want to keep it out of. -
Page 15: Ordering Accessories
Ordering accessories To buy accessories or spare parts, visit www.shop.philips.com/service or go to your Philips dealer. You can also contact the Philips Consumer Care Center in your country (see the international warranty leaflet for contact details). Replacement Replacing the filter Replace the filter if it is very dirty or damaged. -
Page 16: Replacing The Rechargeable Battery
Philips service center to have the battery replaced when you can no longer recharge it or when it runs out of power quickly. You can find the contact details of the Philips Consumer Care Center in your country in the international warranty leaflet or go to www.philips.com/support. -
Page 17: Troubleshooting
This chapter summarizes the most common problems you could encounter with the appliance. If you are unable to solve the problem with the information below, visit www.philips.com/support for a list of frequently asked questions or contact the Consumer Care Center in your country. - Page 18 English Problem Possible cause Solution The robot is cleaning a Close the curtains to block sunlight from floor that reflects sunlight entering the room. You can also start quite strongly. This triggers cleaning when the sunlight is less bright. the drop-off sensors and causes the robot to move in an unusual pattern.
- Page 19 13 跌落传感器 14 滚轮 15 吸口 16 TriActive XL 吸嘴 17 侧毛刷 18 干巾固定块 19 干巾架 20 干巾 21 电池舱 22 遥控器 23 隐形墙 (FC8822) 24 底座 25 适配器 26 小插头 显示屏和遥控器 智能自动真空吸尘器显示屏 1 螺旋模式指示灯 2 沿墙模式指示灯 3 之字形方向图模式指示灯 4 随机模式指示灯...
- Page 20 简体中文 2 清洁时间按钮 3 清洁模式按钮 4 风速按钮 5 插接按钮 底座的控制面板 1 带时间、日期和设定指示 (图 4)的显示屏 2 调节和设置按钮 扫地机器人如何工作 扫地机器人清洁哪些物体 本扫地机器人具有许多功能,是一款适合帮助您在家中清洁地板的理想清洁工具。 此扫地机器人尤其适合清洁硬地板,例如木制、瓷砖或油毡地板。 清洁软地板时可能会出现问题,例如地毯 或地垫。 如果您在地毯或地垫上使用扫地机器人,请在第一次使用之前先留心观察扫地机器人是否能够处理 这种类型的地板。 另外,当您在极暗或有光泽的坚硬地板上使用扫地机器人时,需要对其加以监控。 智能自动真空吸尘器如何清洁 清洁系统 智能自动真空吸尘器利用 3 重清洁系统来高效清洁地面。 1 两个侧毛刷有助于智能自动真空吸尘器清洁角落以及墙角沿线。 它们还可帮助清除地板上的灰尘,并将其 移向吸口 (图 5)。 2 智能自动真空吸尘器的吸力可吸入松动的污垢,然后通过吸口将污垢输送到集尘桶。 3 智能自动真空吸尘器配有干巾架,用干巾可以更彻底地清洁硬地板。 清洁方向图...
- Page 21 简体中文 首次使用之前 安装侧毛刷 1 打开侧毛刷包装,将智能自动真空吸尘器翻转过来,置于桌子或地板上。 2 将侧毛刷推入智能自动真空吸尘器 (图 8)底部的轴上。 注意: 确保您已正确安装侧毛刷。 将侧毛刷按在轴上,直至您听到其咔哒一声锁定到位。 取下遥控器上的保护贴 遥控器由 CR2025 纽扣电池供电。 该电池采用保护贴保护,使用前须取下。 1 抽出遥控器电池仓中的电池保护贴。 遥控器就可以使用 (图 9)了。 使用准备 安装底座 1 将适配器的小插头插入底座上的插座 (1),将适配器插入电源插座 (2) (图 10)。 底座的显示屏会亮起。 2 将底座放在靠墙的水平地板上。 注意: 确保底座 (图 11)正面 80 厘米、右侧 30 厘米、左侧 100 厘米没有障碍物或高度差。 提示:...
- Page 22 简体中文 2 启动/停止按钮开始呈绿色闪烁。 因为这是首次充电,智能自动真空吸尘器的显示屏会显示充电指示灯 (图 13)。 3 当充电电池充满电时,启动/停止按钮将持续 (图 14)亮起绿灯。 使用扫地机器人 准备房间以进行清洁操作 在启动智能自动真空吸尘器进行清洁操作之前,确保清除地板上的所有松散和易碎物体。 另外,移除地板上 的所有电缆、电线和绳索。 启动/停止按钮的功能 启动/停止按钮具有以下功能 (图 16): 启动/停止按钮的按键方式 智能自动真空吸尘器的响应方式 按住启动/停止按钮 1 秒 智能自动真空吸尘器从睡眠模式切换到待机模式 短按启动/停止按钮 智能自动真空吸尘器开始或停止清洁 按住启动/停止按钮 5 秒 开关智能自动真空吸尘器。 用户界面信号及其含义 智能自动真空吸尘器通过显示屏和启动/停止按钮发出指示灯信号。 下表说明了这些信号的含义。 信号 信号描述 信号含义 启动/停止按钮持续亮起绿灯。 吸尘器已做好清洁准备。 启动/停止按钮缓慢闪烁绿色,智能自动真空吸尘器上 吸尘器正在充电。...
- Page 23 简体中文 错误代码 可能的原因 解决方法 顶盖或集尘盒未放好 放入集尘盒并盖好智能自动真空吸尘器的上盖。 错误代码会从显示屏上自动消失。 缓冲装置卡住 将智能自动真空吸尘器从障碍物处移开。 错误代 码会从显示屏上自动消失。 从地板提起了智能自动真 将智能自动真空吸尘器放在地板上以使错误代码 空吸尘器 消失。 地板颜色太深 将智能自动真空吸尘器置于地板的浅色区。 清洁 跌落传感器。 电池问题 请联系客户服务中心检查问题所在。 拍手响应 如果您未见到智能自动真空吸尘器,则只需拍一次手即可以找到它。 智能自动真空吸尘器将通过发出蜂鸣音 以及点亮显示屏上的所有图标做出响应。 在以下情况下,拍手响应会在智能自动真空吸尘器进入睡眠模式时启用: 当智能自动真空吸尘器因出错而停止清洁时 当智能自动真空吸尘器无法在 20 分钟内找到底座时 启动和停止 1 按智能自动真空吸尘器 (图 17)或遥控器 (图 18)上的启动/停止按钮。 启动/停止按钮持续亮起绿灯,智能自 动真空吸尘器开始清洁。 2 智能自动真空吸尘器以自动清洁模式进行清洁,直至电池电量不足。 在自动清洁模式下,智能自动真空吸 尘器按照之字形方向图、随机、沿墙和螺旋方向图...
- Page 24 简体中文 沿墙模式 在该模式下,智能自动真空吸尘器将沿着房间的墙壁对墙边区域进行特别清洁 (图 22)。 螺旋模式 在该模式下,智能自动真空吸尘器将按照螺旋方向图移动,以清洁小范围区域。 如果灰尘检测传感器检测到 污垢,智能自动真空吸尘器会自动将风速切换至强力风速 (图 23)。 手动驱动 1 使用遥控器启动/停止按钮的上、下、左、右箭头按钮在房间 (图 24)内对智能自动真空吸尘器进行导航。 注意: 当您手动驱动智能自动真空吸尘器靠近有高度差的地方和楼梯时,请小心谨慎。 注意: 吸尘功能和侧毛刷只有在智能自动真空吸尘器向前驱动时才可用。 左右或后退按钮仅用于操纵智能 自动真空吸尘器。 使用清洁时间按钮 默认情况下,智能自动真空吸尘器以自动清洁模式进行清洁,直至充电电池的电量不足。 智能自动真空吸 尘器随后将自动返回其底座。 如果您选择了其他某个清洁时间(参见下方),您可以按遥控器 (图 25)上的 最长清洁时间按钮切换回默认模式。 遥控器上的其他清洁时间按钮可使智能自动真空吸尘器分别 (图 26)运行 60、45 和 30 分钟。 显示屏上的 清洁时间标志将显示清洁时间设置。 清洁时间结束后,智能自动真空吸尘器会返回其底座。 显示屏上的插 接图标将变为亮蓝色。...
- Page 25 简体中文 设定 显示屏上的指示 工作日清洁 周一至周五指示亮起 连续清洁 2 天 2 天指示亮起,例如周五和周六 一周清洁 1 天 选定的日期指示亮起 1 按设置按钮。 设置模式标志和清洁设定标志将开始闪烁。 2 按选择按钮一次。 小时显示开始闪烁。 3 使用底座上的 + 和 - 按钮设置小时。 显示屏上会显示设置的小时。 4 按选择按钮确认小时设置。 分钟显示将开始闪烁。 5 使用底座上的 + 和 - 按钮设置分钟。 显示屏上会显示设置的分钟。 6 按选择按钮确认分钟设置。 表示星期日的“Su”显示将开始闪烁。 7 使用底座上的...
- Page 26 简体中文 使用隐形墙(仅限 FC8822) 您可以使用隐形墙防止智能自动真空吸尘器进入您不想让其接近的房间或区域。 将电池装入隐形墙内 隐形墙使用四节 AA 电池。 1 推动后盖底部的两个释放钮 (1),将后盖向上滑动,从隐形墙上取下 (2) (图 32)。 2 拆开四节 AA 电池的包装,将其装入隐形墙 (图 33)的电池仓。 注意: 确保电池的 + 和 - 极方向正确。 3 将后盖重新 (图 34)滑入隐形墙。 定位隐形墙以阻止智能自动真空吸尘器 1 将装置置于您不想让智能自动真空吸尘器跨越的位置,例如,如果您想禁止吸尘器 (图 35)进入某房间,即 可将其安装在该房间打开的房门上。 2 用隐形墙 (图 36)顶部的开/关滑钮将其打开。...
- Page 27 3 小心地提起集尘桶的盖子 (1) 并取出滤网 (2) (图 45)。 4 在垃圾箱上晃动集尘桶将其倒空。 用布或软毛牙刷清洁滤网和集尘盒内部。 另外清洁集尘桶底部的吸口。 警告: 切勿用水或在洗碗机中清洁集尘盒和滤网。 5 将滤网放回集尘盒中 (1)。 然后将盖子放在集尘桶上 (2) (图 47)。 6 将集尘桶放回集尘桶仓,盖好吸尘器 (图 48)的上盖。 警告: 务必确保集尘盒内已放置好滤网。 如果您在集尘盒内未放置滤网的情况下使用智能自动真空吸尘 器,马达会受损。 订购配件 要购买附件或备件,请访问 www.shop.philips.com/service 或联系您的飞利浦经销商。 您还可以联系所在国 家/地区的飞利浦客户服务中心(请参阅全球保修卡了解详细联系信息)。 更换 更换滤网 如果滤网很脏或已损坏,请进行更换。 您可以订购新的滤网套件,型号为 FC8066。 有关如何从集尘盒中取 出滤网以及如何将滤网放入集尘盒的说明,请参阅“清洁和保养”一章中的“倒空并清洁集尘盒”。 更换侧毛刷 一段时间后,请更换侧毛刷,以确保正常的清洁效果。...
- Page 28 健康造成不良后果。 拆下充电电池 警告: 必须在丢弃产品前取出充电电池。在取出电池时请确保电池电量已耗尽并与电源断开连 接。 按照以下步骤拆下充电电池。 您也可以将智能自动真空吸尘器送往飞利浦服务中心,由其拆下充电电池。 您 可联系所在国家/地区的飞利浦客户服务中心,获取您附近的服务中心地址。 1 启动智能自动真空吸尘器时,应将其置于房间内,不可从底座上启动智能自动真空吸尘器。 2 让吸尘器运转,直至充电电池电量完全耗尽,以确保在您取出并弃置充电电池前,其已完全放电。 3 拧下电池仓的螺丝,然后取下仓盖 (图 51)。 4 取出充电电池并断开连接 (图 52)。 5 将智能自动真空吸尘器和充电电池送往电子电器垃圾回收点。 故障处理方法 本章归纳了使用本产品时最常见的一些问题。 如果您无法根据以下信息解决问题,请访问 www.philips.com/support 查阅常见问题列表,或联系您所在国家/地区的客户服务中心。 故障处理方法 问题 可能的原因 解决方法 按启动/停止按钮时智能自 充电电池的电量已耗尽。 为充电电池充电。 动真空吸尘器无法开始清 洁。 智能自动真空吸尘器无法正 一个或两个侧毛刷的刷毛已 将毛刷在温水中浸泡一会儿,并将其置于平面上...
- Page 29 简体中文 问题 可能的原因 解决方法 智能自动真空吸尘器在清洁 按启动/关闭按钮,然后将智能自动真空吸尘器 颜色极深或有光泽的地面时 移至颜色较浅的地板。 如果在颜色较浅的地板 会触发跌落传感器。这将导 上问题仍然存在,请访问 致智能自动真空吸尘器沿异 www.philips.com/support 或联系您所在国家/地 常的方向图移动。 区的客户服务中心。 智能自动真空吸尘器正在清 关闭窗帘,阻止太阳光射入房间。 您还可以在 洁强烈反射太阳光的地板。 阳光不那么明亮时开始清洁。 这可能会触发跌落传感器, 导致智能自动真空吸尘器沿 异常的方向图移动。 开/关按钮持续亮起红色, 智能自动真空吸尘器正在发 查看错误代码表,了解代码 (请参见 '错误代码 显示屏上显示错误代码。 出错误信号。 ')的含义。 智能自动真空吸尘器在绕圈 智能自动真空吸尘器处于螺 这属于正常现象。 在地板上检测到大量灰尘 运动。 旋模式。 时,可能会激活螺旋模式以进行彻底清洁。 这...
- Page 31 www.philips.com/support...
- Page 32 fillpage std...
- Page 33 1 0 0 1 0 0 3 0 c 1 sec. 10 sec. 3 sec. 20 sec.
- Page 36 >75% recycled paper >75% papier recyclé...
Need help?
Do you have a question about the FC8822 and is the answer not in the manual?
Questions and answers