Subscribe to Our Youtube Channel
Summary of Contents for SEAL AQUASEAL AS-1600
- Page 1 AquaSEAL AS-1600 Seal Brands … the finishing touch. Owner’s Operation Manual Important: Read and understand all safety information before operating. AquaSEAL AS-1600 Liquid Laminator...
- Page 2 This manual contains the following Sections: Section 1. Introduction – provides a basic overview of the AquaSEAL™ AS- 1600 liquid laminator, and contains illustrations of the basic hardware components. Section 2. Operating Procedures – describes procedures for setting up, starting, stopping, and controlling the machine.
-
Page 3: Table Of Contents
Hardware Overview ………………………………………………………. Section 2. Operating Procedures Tools / Supplies Needed …………………………………………………… Loading the Sealant ………………………………………………………… Loading the Media…………………………………………………………... Pre-heat the Laminator ………………………..…………………………… Web the Laminator……………………………………………………...…… Run the Laminator ………………………………………………………..…. Cleaning the Laminator……………………………………………..………. Section 3. Troubleshooting/Miscellaneous Troubleshooting ……………………………………………………..……… After Sales Support……..……………………...……………………………... -
Page 4: Warranty Statement
SEAL Graphics. SEAL Graphics assumes no responsibility for any errors that may appear in this document. Nor does it make expressed or implied warranty of any kind with regard to this material, including, but not limited to, the implied warranties of merchantability and fitness for a particular purpose. -
Page 5: Safety Information
Graphics can vary in widths up to 1.6M (5 ft.) in width and can be up to 90M (295 ft.) in length (dependent on thickness of media used). The AquaSEAL™ AS-1600 liquid laminator is intended for use with AquaSEAL™ water based sealant only. Use of solvent-based or other manufacturers sealants may damage the machine and may void any warranty. -
Page 6: Safety Information
Safety Information General Do not operate the machine until it is connected to the proper power source. Refer to Installation instructions located inside control cabinet. It is strongly recommended that the machine is fed from an “Earth Leakage” protected electrical outlet – if in doubt, please contact Hunt Technical Services (contact details in “Miscellaneous”... -
Page 7: Section 1. Introduction
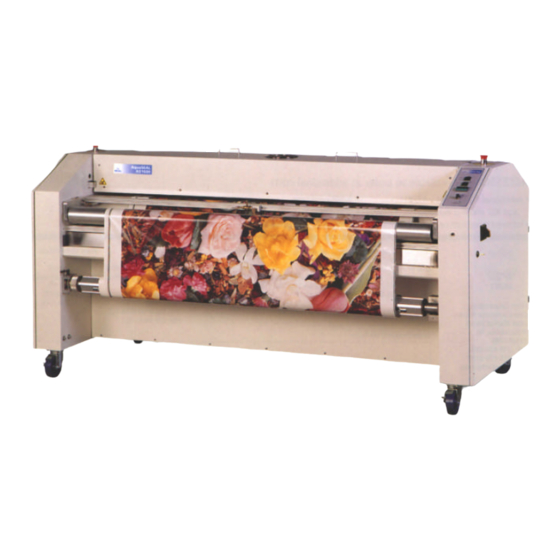
Section 1. Introduction The AquaSEAL™ AS-1600 is a medium to large format media liquid laminator used to coat graphics with a protective sealant. threaded under the applicator mechanism, under the drying assembly, and onto the take-up roller. During operation, the liquid laminator applies sealant onto the printed graphics and then cures and dries it before winding the media onto the take-up core. - Page 8 The Drip Tray is located directly under the Draw Down Assembly and is used to catch any drips of coating that may fall off the edge or end of the media during operation.
- Page 9 The Control Panel contains all the displays, controls, and indicators required to operate the laminator. Refer to Figure 1.2 and its accompanying descriptions. Main Power is used to turn power On and Off to the machine. It is also used to reset the machine after an E-stop switch has been depressed.
- Page 10 Maximum Power Consumption: 6000 Watts It is strongly recommended that the machine is fed from an “Earth Leakage” protected electrical outlet – if in doubt, please contact Seal Graphics Technical Services (listed at rear of manual) or consult a licensed electrician.
-
Page 11: Section 1. Introduction
Section 1. Introduction Hardware Overview (continued) Figure 1.3 shows the rear view of the liquid laminator. Major components (safety items shown in red) include the following: Take-up Mandrel Figure 1.4 Rear View... -
Page 12: Section 2. Operating Procedures
All operating functions are initiated at the control panel. outlines general procedures and describes specific functions used to coat media. This section is divided into the following sub-headings: 1. Loading Materials 2. Pre-heat the laminator 3. Web the laminator 4. Run the laminator 5. Cleaning the laminator... -
Page 13: Pre-Heat The Laminator
Section 2. Operating Procedures 2. Pre-heat the Laminator All Pre-heat control operations are controlled from the Control Panel as shown in Figure 2.2 1. Switch machine to START at the Main Power Switch Laminator will power-up Dryer Panel is in the UP position. -
Page 14: Web The Laminator
Section 2. Operating Procedures 3. Web the Laminator A Web diagram is provided in Figure 2.3 Below Method 1. Lift Unwind Assembly to the UP position. 2. Load a take-up core onto the Take-up Mandrel and align with the edge of the roll of media on the Unwind Mandrel. -
Page 15: Run The Laminator
Section 2. Operating Procedures 4. Run the Laminator 1. Lower Draw Down Assembly and secure locking pins. 2. Align right and l e ft Dam Stop brackets into position at the edges of the media. The inner brackets align with the outer edges of the media and lock down by turning the red knob on top of the bracket. - Page 16 Section 2. Operating Procedures 6. Adjust Brake tension so that the material is pulling through smoothly with no wrinkles. Figure 2.5 Unwind Mandrel Brake Adjust 7. When the media being coated comes to an end, the last piece will loose tension; you will need to manually provide back-tension as the media runs out.
-
Page 17: Cleaning The Laminator
Section 2. Operating Procedures 5. Cleaning the Laminator 1. It is important to clean the machine immediately after the end of the material is completely through the Dryer panel. 2. Switch the machine to Stop on the Main Power Switch. -
Page 18: Section 3. Troubleshooting
Section 3. Troubleshooting The following table lists problems that may occur when using the AS1600 Liquid Laminator. Recommended corrective actions are provided for all commonly encountered problems. Problem / Symptom Very thin coating Heavy coating Streaked finish Media wrinkles Telescoping media... - Page 19 Section 3. Troubleshooting...
-
Page 20: After Sales Support
(For information and placing orders) Tel: 1-800-257-7325 Fax: 1-800-966-4554 Note: SEAL Graphics recommends that your main power be installed by a licensed electrician in accordance with electrical codes in your area. Specifications subject to change without notice. Seal Graphics Seal Graphics...


Need help?
Do you have a question about the AQUASEAL AS-1600 and is the answer not in the manual?
Questions and answers