Advertisement
Advertisement
Table of Contents

Subscribe to Our Youtube Channel
Related Manuals for UNIVIEW IPC3612ER3-PF28


Summary of Contents for UNIVIEW IPC3612ER3-PF28
- Page 1 Mini Dome Cameras Quick Guide Manual Version: V1.03...
- Page 2 Thank you for purchasing our product. If there are any questions, or requests, please do not hesitate to contact the dealer. Notice The default password is used for your first login. To ensure account security, please change the password after your first login.
- Page 3 Due to uncertainties such as physical environment, discrepancy may exist between the actual values and reference values provided in this manual. The ultimate right to interpretation resides in our company. Use of this document and the subsequent results shall be ...
- Page 4 Symbols Symbol Description Contains important safety instructions and indicates situations that could cause bodily WARNING! injury. Means reader be careful and improper operations may cause damage or CAUTION! malfunction to product. Means useful or supplemental information NOTE! about the use of product. Safety and Compliance Information Conventions Used Symbol The symbols in this chapter are shown in the following table.
- Page 5 Safety Symbol Description Electric shock symbol: To suggest a danger of high voltage. Safety Information WARNING! Installation and removal of the unit and its accessories must be carried out by qualified personnel. You must read all of the Safety Instructions supplied with your equipment before installation and operation.
- Page 6 Do not touch sensor modules with fingers. If cleaning is necessary, use a clean cloth with a bit of ethanol and wipe it gently. If the camera will not be used for an extended period of time, put on the lens cap to protect the sensor from dirt. Do not aim the camera lens at the strong light such as sun or ...
- Page 7 Use the power cable connector delivered with the camera. Make sure the connector is in good condition (clip) and secured into place. Do not fully stretch the power cord, otherwise, the connector may be loose or disconnected due to vibration or shake. Use waterproof tape to protect the end of the tail cable.
- Page 8 Caution: Fiber optic ports – optical safety. Never look at the transmit laser while the power is on. Never look directly at the fiber ports and the fiber cable ends when they are powered on. Caution: Use of controls or adjustments to the performance or procedures other than those specified herein may result in hazardous laser emissions.
- Page 9 equipment in a residential area is likely to cause harmful interference in which case the user will be required to correct the interference at his own expense. This product complies with Part 15 of the FCC Rules. Operation is subject to the following two conditions: This device may not cause harmful interference.
- Page 10 WEEE Directive–2002/96/EC The product this manual refers to is covered by the Waste Electrical & Electronic Equipment (WEEE) Directive and must be disposed of in a responsible manner.
-
Page 11: Table Of Contents
Contents 1 Appearance Description ............1 Dimensions and Appearance ........... 1 Camera Structure ..............1 2 Mounting Your Camera ............3 Ceiling Mount ................3 Waterproof Components for RJ45 Plug ........6 Starting the Camera ..............9 3 Setting Your Camera over the LAN ......... 9 4 Accessing Your Camera ............ -
Page 12: Appearance Description
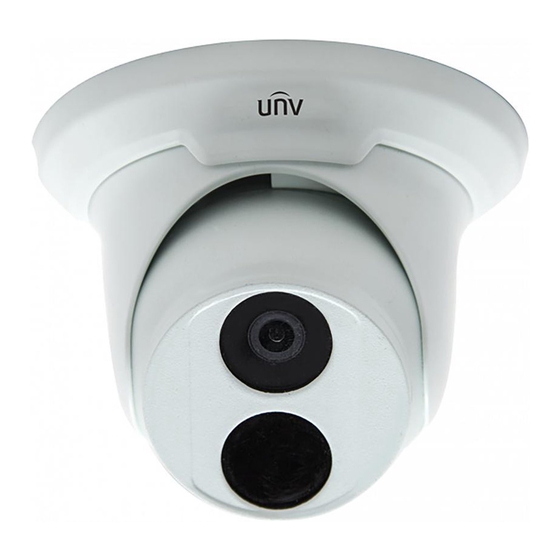
Appearance Description Dimensions and Appearance Φ126mm (4.96") 93mm (3.66") Camera Structure Type A with Waterproof Ethernet Copper Interface... - Page 13 Type B with Common Ethernet Copper Interface Description Description Bottom ring Housing Lens Infrared indicator Power interface (12 VDC) Ethernet interface For the latest specifications, see the product datasheets. To protect RJ45 plug (see Type A with Waterproof ...
-
Page 14: Mounting Your Camera
Mounting Your Camera You can use ceiling mount or wall mount, but you need to buy the mount accessories separately. Make sure that the ceiling or wall can hold the weight of the camera. The steps for ceiling mount and wall mount are similar. The following takes ceiling mount as an example. - Page 15 Drill a hole to lead cables out of the ceiling Knock in plugs Remove the bottom ring. Turn bottom ring anticlockwise to loosen it Connect the cable and then secure the dome. Connect cable and protect it with waterproof tape Attach dome to ceiling with taping screws Adjust the monitoring direction.
- Page 16 The dome can rotate 360 degrees horizontally The lens can rotate 80 degrees vertically Mount the bottom ring. Push bottom ring back up and turn it clockwise to lock into position The above steps are for concealed installation. To use open installation, lead the cables out from the open slots on the bottom ring and see Mount the bottom ring.
-
Page 17: Waterproof Components For Rj45 Plug
Lock Open slot on bottom ring When you use open installation, make sure that the cable can be led out through the open slot on the bottom ring and then screw the dome to the wall as shown in the step Waterproof Components for RJ45 Plug This section only applies to the RJ45 plug (see Type A with... - Page 18 Seal ring Mount the waterproof components. You can crimp the inner wires of the cable with the RJ45 plug first and then cover the waterproof components. You may also cover the waterproof components first. Insert in order Insert the cylindrical waterproof ring into bolt. Cylindrical waterproof ring Waterproof bolt...
- Page 19 Insert the cable into the Ethernet copper interface and screw the waterproof bolt in. Screw in the waterproof bolt lid. Bolt lid Finish the waterproof installation.
-
Page 20: Starting The Camera
Starting the Camera To power on the camera you need to buy a power adapter separately. After you have mounted the camera properly, connect the camera to power. Setting Your Camera over the LAN To view and configure your camera via the LAN (Local Area Network), you need to install the EZStation to find your camera and change its IP address. -
Page 21: Accessing Your Camera
Use EZStation to search online cameras automatically. Modify the camera settings if necessary, including its IP address and subnet mask. The default IP address is “192.168.0.13”. The default username is “admin”, and the default password is “admin” or “123456”. To access your camera from a different subnet, set the ... -
Page 22: System Requirements For Your Pc
System Requirements for Your PC Item Requirements Microsoft Windows 8/Windows 7/Windows XP Operating (32-bit or 64-bit). Microsoft Windows 7 (32-bit) is system recommended. 2.0 GHz or higher, dual-core. Intel i3 CPU or higher is recommended. Memory At least 1 GB. 2 GB (or higher) is recommended. At least 128 MB display memory. - Page 23 Your camera is operating properly and connected to the network. The PC client you are using is installed with Internet Explorer 7.0 or later. IE 8.0 is recommended. Follow these steps to access your camera through the web interface: Open the IE on your PC.
-
Page 24: Installing The Activex
Installing the ActiveX The following takes the IE browser as an example to describe the installation steps. Click Download. Click Run. You may also click Save to download the file to your computer first. Close the browser and follow the steps to complete the installation. - Page 25 For your first login with Windows 7, if the system does not prompt you to install ActiveX, follow these steps to turn off UAC: click the Start button, and then click Control Panel. In the search box, type uac, and then click Change User Account Control Settings.
- Page 26 BOM: 3101C066...
Need help?
Do you have a question about the IPC3612ER3-PF28 and is the answer not in the manual?
Questions and answers