Table of Contents

Related Manuals for WEG WGM20 Series


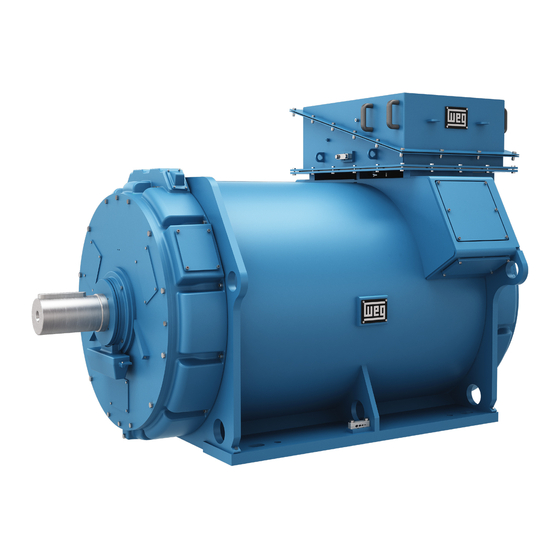
Summary of Contents for WEG WGM20 Series
- Page 1 Motors I Automation I Energy I Transmission & Distribution I Coatings Three phase induction motors cooled by water jacket WGM20 line - Squirrel cage rotor Horizontal and Vertical Installation, Operation and Maintenance Manual...
- Page 3 Installation, Operation and Maintenance Manual Document Number: 10005256831 Material number: 14108242 Model: WGM20 Language: English Revision: 01 March 2018...
- Page 5 1. The total or partial reproduction of information supplied in this manual is authorized, provided that reference is made to its source. If this manual is lost, an electronic PDF file is available at www.weg.net or another printed copy may be requested.
-
Page 7: Table Of Contents
TABLE OF CONTENTS INTRODUCTION ....................11 SAFETY WARNINGS IN THE MANUAL ................... 11 GENERAL INSTRUCTIONS ................12 QUALIFIED PERSONNEL ........................ 12 SAFETY INSTRUCTIONS ........................ 12 STANDARDS ........................... 12 ENVIRONMENTAL CONDITIONS ....................13 OPERATING CONDITIONS ......................13 VOLTAGE AND FREQUENCY ......................13 RECEIVING, HANDLING AND STORAGE ............ - Page 8 4.5.8 Water temperature sensor ........................23 COOLING ............................24 4.6.1 Cooling system ...........................24 4.6.1.1 Cooling system characteristics ................... 24 4.6.1.2 Cooling water characteristics ....................24 4.6.1.3 Cooling water temperature ....................24 4.6.1.4 Protective devices ......................24 ELECTRICAL ASPECTS ......................... 25 4.7.1...
- Page 9 7.10 BEARING MAINTENANCE ......................36 7.10.1 Bearing data ............................36 7.10.2 Instructions for lubrication ........................36 7.10.3 Procedures for bearing lubrication ....................... 36 7.10.4 Type and amount of grease ........................ 37 7.10.5 Alternative greases ..........................37 7.10.6 Procedure for changing the grease ..................... 37 7.10.7 Low temperature greases ........................
-
Page 11: Introduction
If any additional explanation about motors with major special features is necessary, consult WEG. All procedures and standards contained in this manual must be observed in order to ensure proper operation of the motor and the safety of the personnel involved in its operation. -
Page 12: General Instructions
2 GENERAL INSTRUCTIONS All the personnel involved with the assembly, operation or maintenance of electrical installations must be permanently informed and updated on the standards and safety instructions that guide the job and are advised to strictly comply with them. -
Page 13: Environmental Conditions
2.4 ENVIRONMENTAL CONDITIONS 2.6 VOLTAGE AND FREQUENCY The motor was designed according to the specific It is very important to ensure a proper power supply for environmental conditions (temperature and altitude) of the motor. The conductors and the entire protection... -
Page 14: Receiving, Handling And Storage
The lifting lugs on the heat exchanger, end carrier, the insurer and WEG. The non- shields, bearings, radiator, terminal box, communication of this damage will void the etc. are designed to handle these warranty. -
Page 15: Vertical Motor Handling
3.3 STORAGE 3.2.2 Vertical motor handling If the Motor is not installed immediately after reception, it Vertical motors must be handled as shown in Figure 3.3; must remain inside the package and stored in a location Always use the upper lifting lugs of the motor for handling... -
Page 16: Storage Location
If any of these requirements is not met in the storage site, After drying, the water inlet and outlet should be closed. WEG suggests that additional protections be added to the motor package during the storage period, as follows: 3.3.3.2... -
Page 17: Insulation Resistance
30 rpm to circulate the grease and WEG recommends that, every 3 years of storage, the preserve the internal parts of the bearings. stored motor be sent to a WEG Authorized Repair Shop or to WEG own factory, in order to perform a complete predictive maintenance. -
Page 18: Maintenance Plan During Storage
3.3.3.11 Maintenance plan during storage During the storage period, the motor maintenance must be performed and recorded according to the plan described in Table 3.1. Table 3.1: Storage plan Before Monthly 2 years Notes months months start-up STORAGE LOCATION... -
Page 19: Installation
4 INSTALLATION 4.1 INSTALLATION SITE to establish fixed rules for the actual value of winding insulation resistance, as it varies according to the environmental conditions (temperature, humidity), machine Electric motors must be installed in easily accessible cleanliness conditions (dust, oil, grease, dirt) and quality places, allowing periodic inspections, on-site maintenance and condition of the insulating material used. -
Page 20: Additional Information
If the total winding measurement presents a value below the recommended, the neutral connections must be opened and the insulation resistance of each phase must be measured separately. ATTENTION Much higher values may be frequently obtained from motors in operation for long periods of time. -
Page 21: Protections
ATTENTION The motor protection devices are listed in the WEG drawing – Connection diagram. Not using these devices is the sole responsibility of the user and, in case of damage to the motor, it will void the warranty. -
Page 22: Installation Of Temperature Sensors
4.5.4 Installation of temperature sensors To avoid noise in the Pt100 sensor signals, which may cause errors in temperature readings, the following precautions should be taken when installing these equipment: The connecting cables must be shielded and the shield must be grounded;... -
Page 23: Temperature And Ohmic Resistance Of The Pt100 Thermoresistance
4.5.5 Temperature and ohmic resistance of the PT100 thermoresistance Table 4.6 shows the temperature as a function of the ohmic resistance measured across PT100 RTDs. Formula: Ω - 100 = °C 0.386 Table 4.6: Temperature X Resistance (Pt100) º C 100.00... -
Page 24: Cooling
4.6 COOLING 4.6.1.1 Cooling system characteristics Only the correct installation of the motor and of the cooling Table 4.7: Cooling system technical characteristics (referential values) system can ensure its continuous operation without overheating. Maximum Maximum Water Operation Motor system... -
Page 25: Electrical Aspects
4.7 ELECTRICAL ASPECTS 4.7.1.2 Grounding The motor frame and the main terminal box must be 4.7.1 Electrical connections grounded before connecting the motor to the supply system. Before beginning the connection of the main cables and Connect the metallic sheath of the cables (if any) to the those of the accessories, analyze carefully the electrical common grounding conductor. -
Page 26: Base Loads
4.8.2 Base loads The rail closer to the driving pulley must be mounted so that the positioning bolt is placed between the motor and Based on Figure 4.6, base loads can be calculated by the the driven machine. The other rail must be mounted with equations: the bolt in the opposite position, as shown in Figure 4.7. -
Page 27: Leveling
In order to verify if the criteria of the standard are being Figure 4.9 shows the parallel misalignment of the two met, the following potential vibration excitation frequencies shaft ends and the practical way to measure it by using generated by the motor and coupled machine must be suitable dial gauges. -
Page 28: Doweling
It is recommended to keep a safety margin for these commercial agreement). values. WEG is not liable for damages to the motor, In the alignment/leveling, the influence of the associated equipment and installation temperature on the motor and the driven machine must occurred because of: be taken into account. - Page 29 Avoid using too small pulleys, since they cause flexion of the motor shaft because of the belt traction force that, which increases as the diameter of the pulley decreases. ATTENTION Consult WEG for the correct sizing of the pulley. NOTE Always use properly balanced pulleys. Avoid...
-
Page 30: Starting
5 STARTING 5.1 DIRECT ON-LINE STARTING 5.2 DIRECT ONLINE STARTING FREQUENCY It is the simplest and most economically feasible method; however, it must only be used when the starting current Since induction motors have a high starting current, the does not affect the power grid. -
Page 31: Commissioning
6 COMMISSIONING When the motor is started for the first time or after a prolonged standstill, several aspects must be considered besides the regular operation procedures. ATTENTION Avoid any contact with electric circuits; Even low-voltage circuits may be life threatening;... -
Page 32: Temperatures
DE bearings, in the vertical, horizontal and axial directions. When the customer sends the half coupling to WEG, the motor is balanced with the half coupling mounted on the shaft. Otherwise, according to the standards above, the motor is balanced with half-key (i.e., the key slot is filled with a bar of the same width, thickness and height of the key slot during the balancing operation). -
Page 33: Maintenance
Use the device supplied with the of the "Maintenance Plan" of this manual. If motor to lock the shaft. reimpregnation is necessary, consult WEG. If the motor requires reconditioning or The windings may be cleaned with an industrial vacuum replacement of any damaged part, consult cleaner with a non-metallic crevice tool or just a dry cloth. -
Page 34: Reimpregnation
(in this case, consult WEG). If there is an increase in the pressure drop and/or an increase in cooling water temperature, it indicates an 7.4.3... -
Page 35: Cooling Heads Disassembly
7.5.1.2 Cooling heads disassembly 7.7 MOTOR OUT OF OPERATION After removing the motor end shields, loosen all cables When the motor is stopped, water may condense inside it. fastened by clamps on the cooling heads. In horizontal motors, this water must be removed through... -
Page 36: Encoder Maintenance
If any further explanations are necessary, consult WEG. bearing cap; 7.10 BEARING MAINTENANCE It is important to clean the grease nipples prior to lubrication in order to prevent 7.10.1 Bearing data... -
Page 37: Type And Amount Of Grease
LGHP 2 1800 1800 1800 1800 1800 ATTENTION Unirex N3 1800 1800 1800 1500 1800 WEG does not recommend the use of 1800 1800 1800 1200 1800 Alvania RL3 greases different from the motor original Lubrax Industrial 1800 1800 1500 1200 1800 grease. -
Page 38: Low Temperature Greases
NOTE ATTENTION WEG is not liable for the grease change or for Greases with different types of base must any damages arising from this change. never be mixed. For example: Lithium-based greases must never be mixed with sodium or calcium- 7.10.7 Low temperature greases... -
Page 39: De Horizontal Bearing Disassembly
7.10.9.1 DE horizontal bearing disassembly 7.10.9.2 NDE horizontal bearing disassembly Figure 7.7: NDE horizontal bearing Figure 7.7 Legend: 1. Shaft 2. DE end shield Figure 7.6: DE horizontal bearing 3. Bearing 4. Grease flinger Figure 7.6 legend: 5. External bearing cap 6. -
Page 40: De Vertical Bearing Disassembly
7.10.9.3 DE vertical bearing disassembly 7.10.9.4 NDE vertical bearing disassembly Figure 7.8: DE vertical bearing Figure 7.9: NDE vertical bearing Figure 7.8 legend: Figure 7.9 legend: 1. Shaft 2. DE end shield 1. Shaft 3. Bearing 2. NDE end shield 4. -
Page 41: Bearing Assembly
7.10.9.5 Bearing assembly Clean the bearings completely and inspect the disassembled parts and the inside of the bearing caps; Make sure the rolling bearing, shaft and bearing cap surfaces are perfectly smooth; Fill up to ¾ of the inner and outer bearing cap deposits with the recommended grease (Figure 7.10) and... -
Page 42: Accessories Maintenance
7.11 ACCESSORIES MAINTENANCE The accessories shown in Table 7.8 have threaded connection cables and can be replaced without disconnecting the connection cables in the terminal box. Table 7.8: Accessories maintenance Threaded connection cable 1. Motor accessory 2. Accessory connection cable... -
Page 43: Motor Disassembly And Assembly
All the repair, disassembly and assembly services must be performed only by properly qualified and trained professionals; otherwise, equipment damage and personal injury may occur. If any further explanations are necessary, consult WEG. The disassembly and assembly sequence s depend on the motor model. -
Page 44: Vertical Motors
8.2 VERTICAL MOTORS Figure 8.2: Vertical motor Figure 8.2 legend: Frame Grease reservoir 13. Water leakage sensor DE cooling head NDE bearing 14. Inspection cover NDE cooling head 15. Encoder protective cover DE end shield 10. Shaft 16. KMT nut NDE end shield 11. -
Page 45: Air-Gap Measurement
8.5 SPARE PARTS points diametrically opposed must be less than 10% of the average air gap. WEG recommends that the spare parts required for the maintenance procedures recommended in the item 9 8.4 TIGHTENING TORQUE Maintenance Plan, be kept in stock, as follows: Table 8.1 and Table 8.2 shows the tightening torques of... -
Page 46: Maintenance Plan
9 MAINTENANCE PLAN The maintenance plan described in Table 9.1 is only referential, and the intervals between each maintenance intervention may vary according to the motor location and operating conditions. For the associated equipment, such as the water supply unit or control and protection system, it is necessary to refer to their specific manuals. -
Page 47: Abnormalities, Causes And Solutions
10 ABNORMALITIES, CAUSES AND SOLUTIONS NOTE The Table 10.1 present a basic list of abnormalities, causes and corrective actions. In case of questions, consult WEG. Table 10.1: Basic list of abnormalities, causes and corrective actions ABNORMALITY POSSIBLE CAUSES CORRECTION... -
Page 48: Environmental Information
All each state to carry out these activities. the wood used in the packaging of WEG motors comes from reforestation and receives anti-fungal treatment. 11.3 HAZARDOUS WASTE 11.2 PRODUCT... -
Page 49: Declaration Of Conformity
12 DECLARATION OF CONFORMITY 14108242 Installation, operation and maintenance manual – Squirrel cage motor – WGM20 Line l 49... -
Page 50: Service Network
The repair and/or replacement of parts or components, when effected by WEG within the Warranty period do not give Warranty extension, unless otherwise expressed in writing by WEG. This constitutes WEG's only warranty in connection with this sale and is in lieu of all other warranties, expressed or implied, written or oral. - Page 51 WEG NETHERLANDS * WEG INDUSTRIAS VENEZUELA C.A. FRANCE WEG FRANCE SAS * Sales Office of WEG Benelux S.A. Hanzepoort Centro corporativo La Viña Plaza, ZI de Chenes - Le Loup13 / 38297 Saint 23C, 7575 DB Oldenzaal Cruce de la Avenida Carabobo con la calle Phone: +31 541 571090 Uzlar de la Urbanización La Viña / Jurisdicción...
Need help?
Do you have a question about the WGM20 Series and is the answer not in the manual?
Questions and answers