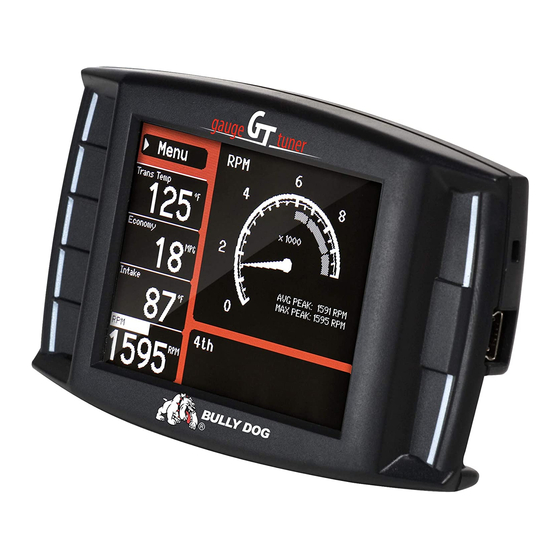
Bully Dog GT Quick Start Manual
Hide thumbs
Also See for GT:
- Owner's manual (84 pages) ,
- Quick install manual (2 pages) ,
- Manual (52 pages)
Advertisement
Quick Links
QUICK START GUIDE
WWW.BULLYDOG.COM
SECTION 3
UPDATING THE GT SOFTWARE
INSTALLING THE UPDATE AGENT SOFTWARE
1. Go to:
bullydog.com
and click on the
"Support"
tab at the top of the page.
2. Locate and click the
"Software"
option and
then click on
"Light Duty Update Agent, Device
Updater, and Livelink
Downloads". You will
see
"Bully Dog Update Agent (Updater for
GT
devices)". Click to begin downloading and
installing on your computer.
3. Wait for the program to download, then double
click and
"Run"
the
BullyDogDeviceUpdater.exe
file if it does not open automatically.
4. Follow the on-screen instructions to complete the
installation of the software.
CONNECTING THE MICRO SD CARD
1. The SD card is located in a paper envelope,
which is located in an envelope inside the
product packaging.
2. Insert the memory card into the
included card reader.
SECTION 4
GT INSTALLATION
NOTE: Complete physical installation is not required to install the tune to the vehicle. To use features
like automatic (ignition-controlled) power on/off and the Driving Coach, complete installation is
recommended. Instructions for complete installation are located in section 9.
1. Connect the adapter plug to the vehicle
diagnostic port (OBDII) located under the dash
on the driver's side.
SECTION 1:
PARTS & CHECKLIST
GT DEVICE
OBDII ADAPTER PLUG
WINDSHIELD MOUNT
HDMI CABLE
SD CARD READER
TOOLS NEEDED:
Fuse Puller | Voltage Tester | Battery Charger | Pliers
3. Insert the card reader with memory card to a USB
port on the computer.
If the computer does not read the SD card, try a
different USB port. If that does not work, retry this
step with the SD card plugged into the GT tuner
that is referred to in the next step.
1. To power on the GT, slide the power switch on
the adapter plug to BAT position.
1. Using the HDMI cable, connect the GT to the
adapter plug.
SD CARD
MINI USB CABLE
POWER CABLE
FUSE TAP
FUSE SPADE
INSTALLING THE MEMORY CARD IN THE GT.
1.
Remove the card reader from the computer.
2.
Remove the memory card from the card reader and
insert the memory card into the GT.
CONNECT GT TO COMPUTER
1.
Connect the GT to the computer with the included
USB cable.
2.
Press the second button from the top on the left
side of the GT.
3.
The GT may display "Initializing Communication" on
the Main Screen. This is normal and will not change
while the GT is connected to the computer; there
is no need to wait for the message to disappear to
complete the update.
SECTION 6
GT MAIN MENU
Touch to enter or
to return to the
previous menu
Menu
Speed
0
RPM
0
Load
0
Coolant
0
Touch to select the
menu item
highlighted
on the screen
SECTION 2:
PRE-INSTALL CHECKLIST
INTERNET ACCESS
During installation process, you will need to connect
the GT to the Internet using a home computer or
laptop with a Windows
®
operating system.
ALLOW TIME FOR INITIAL SETUP
Make sure you allow up to 30 minutes to complete
the initial setup and installation process.
NEED FURTHER SUPPORT?
For additional troubleshooting and support, see our
knowledge base on-line at bullydog.com/support.
Alterations made to the OEM configuration of a vehicle
may violate the Clean Air Act if such alterations bypass,
defeat, or render inoperative Elements of Design installed
on a vehicle in compliance with the Clean Air Act. Users
who alter Derive's products in any way are required to
make their own individual determination that the altered
products do not violate the Clean Air Act.
This device is not legal for sale or use in California
on pollution controlled vehicles.
GT MAIN MENU
1.
The GT may display a race tree demo mode; the
Main Menu cannot be accessed during demo
mode. Wait until the GT has returned to the main
screen.
2.
Scroll up and select Change Vehicle.
3.
Select the vehicle make.
4.
Select the vehicle year and model.
5.
Confirm the selection by pressing YES (press the
top right button).
6.
The GT will load files and reboot to USB mode.
Press and hold to
daytime mode
MPH
Use these buttons
RPM
%
ECON TIP: Econ Goal
Set a more achievable
°F
fuel economy goal.
Press and hold to
nighttime mode
switch to
to scroll
though menus
switch to
Advertisement

Summary of Contents for Bully Dog GT
- Page 1 Instructions for complete installation are located in section 9. Touch to enter or Press and hold to to return to the switch to 1. To power on the GT, slide the power switch on previous menu daytime mode the adapter plug to BAT position. Menu...
- Page 2 MOUNTING THE GT Steps below will enable the vehicle key position to control the power state (on/off) of the GT; if you do not want the GT to automati- cally power on and off according to the key position, skip these steps.


Need help?
Do you have a question about the GT and is the answer not in the manual?
Questions and answers