
Related Manuals for Bully Dog Gauge GT Tuner


Summary of Contents for Bully Dog Gauge GT Tuner
- Page 1 INSTALLATION OWNERS MANUAL Part 1: Physical Installation Part 2: Operations and Downloading Part 3: Internet Updates Appendix: OEM pyrometers, pyrometer calibration, and other topics.
- Page 2 GT software before installation on vehicle. This will ensure that the GT has the lat- est programming avail- able from Bully Dog. Plug the USB cable into a PC that has the Bully Dog Internet Update software: The Update Agent.
- Page 3 INSTALLATION INTRODUCTION Congratulations on the purchasing of the GT. The GT is one of the most technologically advanced tuning and monitoring devices available in the market place, second only to our Performance Management Tool (GT). The GT includes our Patent pending feature called the Driving coach which assist users in maximizing driving efficiency.
- Page 4 INSTALLATION PART 1 Physical Installation These operating instructions are split into four sections: SECTION 1: Parts Included SECTION 2: Parts Description SECTION 3: Installation Overview SECTION 4: Installation SECTION 5: Mounting the GT using the Windshield mount...
- Page 5 INSTALLATION SECTION 1: Parts Included The list below includes by name the major parts included in your GT package. The tools list indicates all of the tools necessary to complete the GT install. TOOLS NEEDED EXTRA PARTS (optional) • Fuse Puller •...
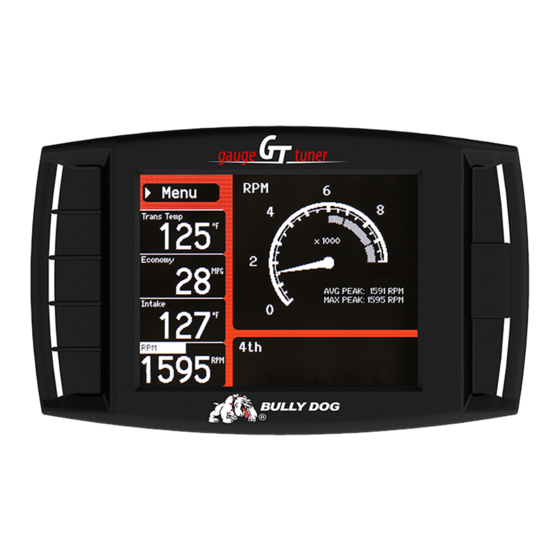
- Page 6 INSTALLATION SECTION 2: Parts Description This section describes each of the parts in the Parts List, each description provides a physical set of attributes and a purpose for each part. The parts descriptions also list everything that is included in each assembly. THE GAUGE TUNER: The main component is the GT Head Unit.
- Page 7 4. Power Supply Switch: use this switch to change power from running off of the Power Wire to OBD ll power as a power supply for the GT. 5. Four Pin USB: This port is used if a Bully Dog pyrometer kit is purchased for the GT. 6. Five Pin USB...
- Page 8 INSTALLATION GT MAIN WIRE HARNESS The main harness connects the GT to the OBD ll Adapter Plug and acts as the main line of com- munication for the GT. POWER WIRE The Power wire connects the OBD ll Adaptor Plug to the vehicle fuse box to supply power to the GT.
- Page 9 INSTALLATION MICRO SD CARD The Micro SD Card holds all of the elec- tronic files necessary to properly start up the GT, the SD card must be installed into the micro SD card slot on the side of the GT at all times. UNIVERSAL WINDSHIELD MOUNT This universal windshield mount is used to install the GT firmly onto the windshield, it is a suction cup mount that will work on any vehicle...
- Page 10 INSTALLATION SECTION 3: Installation Overview The installation overview illustrates a properly installed GT. This overview is meant to help refer- ence the general location of installed parts and pieces of the GT. Note that some fuse boxes will be located inside the cab of the vehicle and will not require that the power wire go through the vehicle fire wall.
- Page 11 INSTALLATION OBDII Adapter Plug SECTION 4: Installation These installation instructions are split into five Easy Steps. Follow the steps for the easi- est installation of this product. STEP 1: CONNECT THE OBD ll ADAPTER TO THE VEHICLE OBD ll PORT This step involves locating the vehicle’...
- Page 12 INSTALLATION GT & Windshield Mount STEP 2: CONNECT THE POWER WIRE TO THE VEHICLE FUSE BOX Step two involves locating the correct fuse within the vehicle fuse box, and connecting the power wire from the OBD ll Adaptor plug to the fuse in the fuse box. Fuse Box OBDII Adapter Plug OBDII Port...
- Page 13 INSTALLATION FOR A CLEAN INSTALL INTO THE FUSE LOCATIONS: There are multiple different fuse types in OEM vehicles. For a clean install, use a fuse tap and spade connector that will work with the specific fuse being used for this install. 1.
- Page 14 INSTALLATION STEP 3: RUN GT MAIN WIRE HARNESS In this section you will connect the GT Main Harness to the OBD ll Adaptor plug and then run the other end of the main harness up the side of the vehicle dash and connect it to the back of the GT. 1.
- Page 15 INSTALLATION SECTION 5: Mounting the GT using the Windshield mount The final step to installation is mounting the GT to the windshield using the univer- sal windshield mount. 1. Locate the T-shaped mount socket on the back side of the GT. 2.
-
Page 16: Operating Instructions
OPERATION PART 2 Operating Instructions These operating instructions are split into four sections: SECTION 1: Button Navigation SECTION 2: Set up Wizard for installing download SECTION 3: Exploring the General Display SECTION 4: The Driving Coach SECTION 5: Main Menu and Sub Menus... - Page 17 OPERATION SECTION 1: Button Navigation Capacitive Touch Buttons: The buttons used on the GT are Capacitive touch. Capaci- tive touch buttons only require a touch on the button area rather than a push like regular buttons require. It is not necessary to apply any significant force to the but- ton while navigating through product screens.
- Page 18 OPERATION SECTION 2: Set up Wizard for installing download The Setup Wizard is a step by step process through the vehicle selection process and download process. The Setup Wizard appears on the screen automatically and will only appear the very first time the GT is installed. Opting out of the Setup Wizard is OK, the vehicle selection process and download process can also be performed through the main menu.
- Page 19 OPERATION STEP 2: VEHICLE SELECTION Select the option from the vehicle selection screen that most matches the vehicle in use; the GT will not be able to perform a download or monitor correctly if the correct vehicle type is not specified. The list of vehicles in the illustration below demonstrate the vehicle selection list for the Diesel version of the GT;...
- Page 20 OPERATION STEP 3 THE DOWNLOAD: In Step 2, select whether to install a performance download now or later. The setup wizard will initiate the download. For details on the download process see the Install download sec- tion on page 34. It is OK to opt out of the Download at this point in the setup wizard. It is very easy to load and unload the download from the main menu.
- Page 21 OPERATION SECTION 3: Exploring the main screen The Main Screen is the screen that displays vehicle activity, it is also the screen from which the main menu is accessed. The main screen has a multitude of different functions; the diagrams in this section fully explain each function accessed from the main menu.
- Page 22 OPERATION FIVE BUTTON FUNCTIONS OF THE MAIN SCREEN: 1: Press the top left button to enter the Main Menu, also use this button to exit menus. FUNCTION ® 4: Diesel Only 2: Press any of the four buttons on FUNCTION FUNCTION Power Level Up the left side of the GT adjacent to one of the...
- Page 23 OPERATION LARGE GAUGE STYLES/ THE DRIVING COACH The large gauge can display in three different gauge styles plus the Driving Coach. Hold the button down next to the vehicle parameter currently displayed in the large gauge area to switch between the different large gauge display types. Analog gauge The Driving with average...
- Page 24 OPERATION SECTION 4: The Driving Coach The Driving Coach is a special feature designed to help drivers drive more effi- ciently. It coaches drivers into better driving habits by providing real time visual and audio feedback as to how efficient a driver is driving. The driving coach also provides the driver with a “grade,”...
- Page 25 OPERATION THE DRIVING COACH DISPLAY DIAGRAM The large gauge area is where the Driving Coach information is displayed. The diagram below illustrates the information that is collected and displayed by the Driving Coach. Real Time Fuel Economy: The first bar graph dis- play fuel economy in gallons per hour or liters per 100 kilometers in real time.
- Page 26 OPERATION SECTION 5: Exploring the Main Menu and submenu systems The diagram below shows all of the Main Menu items, some menu items are vehicle specific as noted adjacent to those menu items. Section 5 includes comprehensive information on each main menu item and all sub menus. MAIN MENU Go Back Change Vehicle...
- Page 27 OPERATION CHANGE VEHICLE: The Change Vehicles Menu is only used for two reasons: 1. The GT is being transferred to a new vehicle. Note the GT Installed Download feature must be returned to stock before it is transferred another vehicle. 2.
- Page 28 OPERATION INSTALL DOWNLOAD The install download feature is the feature that reprograms the vehicle for improved Horsepower and Torque and improved fuel economy. The available tuning is different on diesel vs. gasoline applications. The charts below show the estimated horsepower gains for both gas and diesel. Be sure to read the cautionary information for gasoline engines, and read the Download Installation precautions on the following page.
- Page 29 Performance products must always be removed before taking the vehicle in for any kind of service. The Bully Dog software will be lost if an OEM scan tool is used to reflash the engine computer.
- Page 30 OPERATION REMOVING FUSES FOR ’01-’02 GM DURAMAX VEHICLES IMPORTANT: Skip the steps on this page if your vehicle is not an ’01-’02 GM 6.6L Duramax . WARNING: Failure to remove the fuses while downloading the programs into the computer may result in computer hardware failure.
- Page 31 OPERATION REMOVING FUSES FOR ’03-’05 GM DURAMAX VEHICLES IMPORTANT: Skip the steps on this page if your vehicle is not an ’03-’05 GM 6.6L Duramax . WARNING: Failure to remove the fuses while downloading the programs into the computer may result in computer hardware failure.
- Page 32 OPERATION FUSE INFORMATION GM ‘99-’06 ONLY Before installing a download into the vehicle always pull the fuses mentioned below for the GM applications mentioned below. Be sure to replace all of the fuses back into the vehicle fuse box once a download has been completed. ‘99-’02 GM C/K w/4.8/5.3/6.0/8.1L Engines Remove these Fuses from the Fuse Box Located Inside the Vehicle (located near the driver’...
- Page 33 OPERATION PERFORMING A VEHICLE DOWNLOAD: Performing a download is a very simple operation, simply follow the instructions dis- played on the GT screen. Before downloading to a vehicle be sure to read all download installation precautions and remove all fuses on GM brand vehicles. Note fuses must be replaced after a download is complete.
- Page 34 OPERATION Engine Tuning: During the download the GT will prompt all gasoline users to select the desired engine tune. At this point simply specify the engine tune; the table below illustrates the three settings available: Premium, Regular, and Stock. Diesel users do not have to select an engine tune, the diesel GT automatically loads the tuning information into the vehicle.
- Page 35 OPERATION Vehicle Specific Download Features: The second step in the download process is selecting vehicle specific download features. This part of the process includes choosing to modify vehicle speed limiters, rev limiters, shift points and so on. Not all features will be available on each vehicle so this section highlights both features that are available for most or all vehicles and vehicle specific sec- tions that contain features on available on the vehicle addressed.
- Page 36 3. FORD AND LINCOLN GASOLINE VEHICLE SPECIFIC DOWNLOAD FEATURES TRANSMISSION TUNING (AUTOMATIC TRANSMISSIONS ONLY): Two different options exist for transmission tuning, choose to accept a Bully Dog Custom transmission tune or to leave transmission tuning stock. Firm Tune - This tune will affect shift firmness and shift points. It is an optimized tune designed for performance.
- Page 37 OPERATION 4. GM GASOLINE VEHICLE SPECIFIC DOWNLOAD FEATURES TRANSMISSION FIRMNESS* (AUTOMATIC TRANSMISSIONS ONLY): This feature will turn up the pressure in the transmission so that shifts feel solid. It also helps reduce transmission slippage under heavy stress. Performance: Pressure is greater than tow and stock. This setting is recommended to be used in combi- nation with, but is certainly not limited to the High Performance Horsepower program.
- Page 38 OPERATION GM GASOLINE VEHICLE SPECIFIC DOWNLOAD FEATURES (CONTINUED) CALIBRATE OEM SPEEDOMETER FOR GEAR RATIO (AUTOMATIC TRANSMISSIONS ONLY): If no gear ratio modifications have been made to the vehicle then choose the stock setting when the tuner prompt appears to choose a gear ratio. This will ensure that no modifications are made to the stock program.
- Page 39 Wide open throttle refers to a throttle position governor placed on stock Nissan vehicles. It limits the driver from using 100% of the vehicle throttle from 0-40 mph. Bully Dog’ s Wide Open Throttle feature will remove this governor from the vehicle.
- Page 40 OPERATION Changing Download Settings/ Returning To stock settings: To return the vehicle to stock or to change any of the Download settings: Engine Tune, Speed Limiter, or Tire Size follow the steps below. 1. Select Install Download from the main menu 2.
- Page 41 OPERATION GAUGE SETUP Enter to change the vehicle parameters (PIDs) displayed on the four gauge locations in the Main Screen. To see a list of all vehicle parameters available see the following page for parameters and descriptions. Selecting a vehicle parameter to display in a particular location is done by highlighting the gauge location and then highlighting the desired vehicle parameter.
- Page 42 See the appendix for more information on these vehicles. For all other vehicle applications pyrom- eters can be installed, a Bully Dog pyrometer is required for use with the GT and is the only pyro that will work with the GT.
- Page 43 OPERATION DRIVING COACH SETUP WIZARD For the driving coach to work properly it must be calibrated to the vehicle application in use. Select the Driving Coach Setup from the main menu and then follow the on screen instructions for guidance through the setup process. The Driving Coach Setup Wizard will ensure that the results displayed on the driving coach screen are accurately calibrated to the vehicle.
- Page 44 OPERATION STEP 1: ENGINE DISPLACEMENT: Choose Engine Displacement in liters, refer to vehicle owners manual. To continue to step 2 simply press the “Next,” button. Next ENGINE SIZE to step 2 The selected Value for Engine Sizes Engine Size is displayed in the box below: Engine Sizes 1.
- Page 45 OPERATION STEP 3: CHOOSE CURB WEIGHT OF VEHICLE The curb weight of a vehicle is usually posted on a sticker on the inside of the drivers door jam. If the curb weight cannot be found on the door jam, refer to the vehicle owners manual or look for the curb weight on the internet. The vehicle can also be weighed on a vehicle scale.
- Page 46 OPERATION STEP 5: COMMUNICATION PROTOCOL The GT will automatically determine the correct communication protocol to communicate with the vehicle. This step simply ensures that the GT is properly communicating with the vehicle. STEP 5 Next To continue to step 6 simply press the “Next,” button. to comm setup The Following menu will setup communication to your vehicle.
- Page 47 • CALIBRATE ECONOMY: Calibrate for vehicle characteristics. • • ENGLISH/METRIC UNITS: Choose units of measurement RESET TO DEFAULT SETTING: Revert back to Bully Dog factory settings. • USER OPTS Go Back Adjust Backlight Set Screen Colors Adjust Volume Calibrate Speedo Calibrate Econ.
- Page 48 OPERATION BACKLIGHTING ADJUSTMENT: The backlighting for the GT can be set for both a Day and Night mode. The GT switches be- tween day and night modes based on whether the vehicle head lights are turned on or off. If the vehicle headlights are turned off the GT backlighting will switch to day mode settings, if the lights are on the backlighting will switch to night mode settings.
- Page 49 OPERATION AUDIO FEEDBACK ON/OFF The audio on the GT is either on or off, highlight the button adjacent to the on or off area on the screen to turn audio on and off. Exit the menu and the selection will automatically take effect. Use the appropriate but- ton to select the function of the drivers preference.
- Page 50 OPERATION ENGLISH/ METRIC UNITS The GT contains the ability to display vehicle parameters and fuel economy in either Metric units or English standard units. simply exit the menu and the selection will auto- matically take effect. Use the buttons adjacent to the unit of measure preferred RESET TO DEFAULT SETTING...
-
Page 51: Vehicle Options
OPERATION VEHICLE OPTIONS: In this sub menu you get to manually setup the parameters that the Driving Coach uses to calculate fuel economy and wasted energy. These parameters can also be setup in the Driving Coach Setup Wizard. The descriptions for all the vehicle options are listed below. - Page 52 OPERATION ENGINE SIZE (DISPLACEMENT) Choose the correct engine size or displacement to help calibrate the driving coach to work correct with the vehicle application. To select the cor- Once the correct Go Back ENGINE SIZE rect displacement displacement is amount use the highlighted press The selected Value for Engine Sizes...
- Page 53 OPERATION FUEL TYPE Specify the correct fuel type to help calibrate the driving coach to work correct with the vehicle application. Once the correct fuel type is highlighted press FUEL TYPE Go Back to main menu Set Gas or Diesel Fuel the “Go Back”...
- Page 54 OPERATION DEFUELING PARAMETERS (DIESEL VEHICLES ONLY) Set up defueling parameters based on a number of different vehicle parameters. In this menu you can also turn defueling for vehicle parameters off. The defueling pa- rameters available are vehicle specific, so not all defueling parameters are available for every make and model.
- Page 55 OPERATION SET DEFUEL LEVELS: When entering a setup menu for any of the defuel options the menu will have a list of defuel levels to select from based on that specific defuel parameter. The selected value is displayed on the left, to select a defuel level highlight the amount and then exit the setup menu.
- Page 56 OPERATION MOBILE DESOOT (DODGE 6.7L CUMMINS ‘07.5-’09 VEHICLES ONLY) The mobile Desoot feature will send a request to the vehicle to start the Desoot process of the diesel particulate filter. This feature should only be used if the diesel particulate filter gets clogged and will not go into mobile Desoot mode.
- Page 57 OPERATION SPECIAL FUNCTIONS (DODGE GAS AND DIESEL VEHICLES ONLY) The special functions are available for use only on the Dodge vehicles These functions can be performed at any time. The descriptions below tell what each function does to the vehicle. Go Back OPTIONS MENU Idle Up “Auto Only”...
- Page 58 OPERATION SPECIAL FUNCTIONS (CONTINUED) FOG LAMP Enabling this feature will allow the fog lights and high beams to operate at the same time. This feature is for Off-road use only. HORN CHIRP ON LOCK Enabling this feature will sound a horn chirp each time the doors are locked when using a remote door lock system.
- Page 59 OPERATION TRANSMISSION TUNE: FORD 6.0L POWER STROKE ‘03-’07 ONLY This allows you to set a specific transmission tune style for each on-the-fly power set- ting. There are three transmission tune styles available: stock, smooth, and aggres- sive. Not all of the tunes are available for every power setting. Notice that upon entering the transmission tune menu that, Extreme, is highlighted in black.
-
Page 60: Adjust Tire Size
OPERATION ADJUST TIRE SIZE The tire size function allows you to adjust the speed that the GT will display in one of the gauge locations to account for larger or smaller than stock tire sizes. The range of tire sizes that the GT will adjust for starts at 28” and goes up to 39” and it adjusts in incre- ments of .25”. - Page 61 OPERATION DIAGNOSTICS This sub menu allows you to check vehicle Diagnostic Trouble Codes (DTCS). Upon entering this menu, the GT will auto- matically begin to check the vehicle for DTCs and it will then display those DTCs on the GT screen. Once it displays the DTCs value and description on the screen it will allow you to erase the DTCs from the vehicle.
- Page 62 OPERATION SHOW SETTINGS: The Show Settings Menu will allow you to see vehicle information and also defuel set- tings. See the diagram below to see everything that is listed in this menu. Go Back SETTINGS ®...
- Page 63 Before this function is used an internet update must be performed through the Bully Dog Update Agent. This will be used only after an internet update has been performed. See the internet updating instructions in the appendix of this manual.
- Page 64 OPERATION UPDATE GT SOFTWARE (CONTINUED) The two scenarios below depict a couple of common errors seen when updating the GT software. NO SD CARD NOTICE: The screen capture below illustrates what will be seen on the screen if an update is attempted without the GT micro SD card in the SD card slot. Go Back UPDATE GT to main menu...
- Page 65 Based on the change in version numbers between the current version on the GT and the version that is available on the Bully Dog web site the GT may have to be returned to stock. SEE section 1 for details.
- Page 66 The change in the version number for any new update issued on the Update Agent can be viewed on the Bully Dog web site and compared to the version on the GT. This is how to determine if a download to stock is necessary.
- Page 67 Bully Dog Technologies specifically designed to up- date Bully Dog products. The Update Agent is easy to use, it can be loaded on any windows based PC running Windows XP or newer. The Update Agent is attainable free of charge at...
- Page 68 UPDATES SECTION 3: THE UPDATE PROCESS Follow the steps listed below to update the GT software to the latest version. 1. Plug the GT into a PC that has a high speed internet and is loaded with the Update Agent 2.0 using a mini USB cable.
- Page 69 APPENDIX PART 4 Appendix The appendix contains important information for the GT and is split into four sections. SECTION 1: Pyrometer calibration procedure SECTION 2: Transmission relearn procedures: Ford & GM SECTION 3: OEM pyrometer locations SECTION 4: Troubleshooting/error codes SECTION 5: Formatting SD Card...
- Page 70 APPENDIX SECTION 1: Pyrometer calibration procedure BEFORE THIS STEP CAN BE COMPLETED, COMPLETELY INSTALL THE GT AND ALL OF ITS COMPONENTS. 1. Vehicle must be set to Stock HP/TQ levels-meaning no HP/TQ modifications of any kind (tuner or plug- in modules). 2.
- Page 71 APPENDIX SECTION 2: Transmission Relearn Process After completing the download process, it is recommended on a 6.6L Duramax with an automatic Allison and a 6.0L Ford Power Stroke with an automatic Torque Shift trans- mission, that the transmission be relearned. Relearning the transmission can help the transmission adjust to the higher levels of power offered by the GT resulting in a better shifting transmission.
- Page 72 APPENDIX SECTION 3: OEM Pyrometer Locations (vehicle w/DPF only) PYROMETER LOCATION AND OVERVIEW: The diagrams below shows where Pyro 1 and Pyro 2 are installed on the 2007.5 and newer light duty diesel trucks. There is no installation required for these pyrometers; each pyrometer is OEM. The temperatures at each location are displayed on the GT as a vehicle parameter under the gauge setup menu.
- Page 73 APPENDIX DODGE CUMMINS GM DURAMAX...
- Page 74 APPENDIX SECTION 4: GT Troubleshooting CONDITION POSSIBLE SOURCES ACTION Make sure that the fuse jack is securely fastened to the fuse socket. Installation/ Connec- Check that the fuse is working properly. GT will not turn on tions Make sure that all of the harnesses are properly installed.
-
Page 75: Formatting Sd Card
APPENDIX SECTION 5: Formatting SD card The SD card should only be taken out of the GT to perform internet upgrades. It is the primary means of performing internet upgrades for the GT. In case an SD Card is lost or broken, a new SD Card can be purchased and used to update the GT. - Page 76 4. With the formatting dialog box open click the drop down men for “File System.” Highlight and click on FAT. 5. Then change the Volume Label to read “Bully Dog,” by typing it into the dialog box below that title.
-
Page 77: Driving Coach
- 4.8L (Trucks, SUVs) - 5.3L (Trucks, SUVs) - 6.0L (Trucks, SUVs) - 6.2L (Trucks, SUVs) - 8.1L (Trucks, SUVs) NISSAN/INFINITY - 5.6L (Trucks, SUVs) - 4.0L (Trucks, SUVs) - 2.5/3.5L (Cars & SUVs) Coming Soon BULLY DOG PERFORMANCE CHIPS PERFORMANCE PROGRAMMERS...
Need help?
Do you have a question about the Gauge GT Tuner and is the answer not in the manual?
Questions and answers
What page do you go to update the new SD card?
To update the SD card for the Bully Dog Gauge GT Tuner:
1. Purchase a new SD card if the original is lost or broken.
2. Insert the SD card into a PC using a USB to SD Card Reader.
3. Open "My Computer" and locate the SD card under “Devices with removable storage.”
4. Right-click the SD card and select “Format.”
5. In the formatting dialog box, select “FAT” as the file system.
6. Change the Volume Label to “Bully.”
7. Use the formatted SD card with the Update Agent software to perform internet upgrades.
This answer is automatically generated
@Mr. Anderson is FAT32 work or exfat
What color wire goes with what number in the block coming off obd