Advertisement
Table of Contents
- 1 Important Safeguards
- 2 Understanding the Model 115
- 3 Procedure for Sharpening Straight Edge Blades
- 4 Optimizing the Knife Edge
- 5 Gourmet Food Preparation:
- 6 For Game and Fish
- 7 Procedure for Sharpening Serrated Blades
- 8 Resharpening Knives
- 9 Suggestions
- 10 Normal Maintenance
- 11 Clean-Out Cover
- 12 Service
- Download this manual
Advertisement
Table of Contents

Related Manuals for Chef's Choice Diamond Hone 115


Summary of Contents for Chef's Choice Diamond Hone 115
- Page 1 INSTRUCTIONS MODEL 115 ® iamond Hone Sharpener Read these instructions before use. © 2008 EdgeCraft Corp.
-
Page 2: Important Safeguards
IMPORTANT SAFEGUARDS When using electrical appliances, basic safety precautions should always be followed including the following: 1. Read all instructions. ® 2. To protect against electrical hazards, do not immerse the Chef’sChoice in water or other liquid. 3. Make sure that knife blades are always washed clean - free of dirt, oils and foods ®... - Page 3 YOU MADE A GOOD CHOICE rofessional chefs and serious cooks worldwide rely on ® ® Chef’sChoice Diamond Hone sharpeners to maintain high performance multi-bevel edges on their favorite cutlery. Now ® with your Chef’sChoice Model 115 you will share the professional advantage of knives that are extremely sharp and durable.
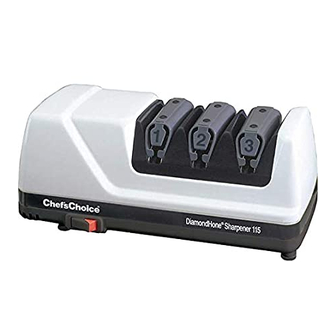
- Page 4 UNDERSTANDING THE MODEL 115 ® DIAMOND HONE SHARPENER ® ® This unique Chef’sChoice Diamond Hone Sharpener is designed to sharpen knives with either straight or serrated edges. This three (3) stage sharpener has three precision conical sharpening / honing stages with 100% diamond abrasives. This combination can be used to create either an ultra sharp, smooth faceted edge for effortless cutting and presentations or one with a selected amount of residual “bite”.
- Page 5 Apply just enough downward pressure when sharpening to insure uniform and consistent contact of the blade with the abrasive disks on each stroke. The sharpening pressure is controlled by built-in springs. Additional pressure is unnecessary and will not speed the sharpening process.
- Page 6 Move the blade down in the slot until you feel it contact the diamond disk. Pull it towards you lifting the handle slightly as you approach the tip. This will give you a feel for the spring tension. Remove the knife and press the Power Switch. A red “indicator” on the switch appears when this switch is turned “ON.”...
- Page 7 the presence of the burr after a pull in the left slot and then also after a pull through the right slot before proceeding to Stage 2. Stage 2: Using the above procedure described for Stage 1, sharpen the blade in Stage 2. Pull the blade once through the left slot of Stage 2 (Figure 7) and once through the right slot (Figure 8).
- Page 8 OPTIMIZING THE KNIFE EDGE GOURMET FOOD PREPARATION: Where the finest and smoothest cuts are preferred in preparing smooth unmarked sections of fruits or vegetables, sharpen in Stage 2 (or Stage 1 and 2 as described above) and make twice the normal number of pairs of fast pulls thru Stage 3. The added pairs of fast pulls in the left and right slots of Stage 3 will refine the third facet and create remarkably smooth and sharp edges, (Figure 10) ideal for the gourmet chef.
- Page 9 followed directly by only one or two pairs of fast pulls in Stage 3 as described (for meats) above may be preferable. For filleting fish use a thin but sturdy blade sharpened in Stages 2 and 3. PROCEDURE FOR SHARPENING SERRATED BLADES Serrated blades are similar to small saw blades with scalloped depressions and a series of pointed teeth.
- Page 10 SUGGESTIONS 1. Because of the ultra fine diamond abrasives used in this sharpener, it is extremely important to always clean all food, fat, and foreign materials from knife before sharpening or resharpening. If knife is soiled, wash it thoroughly before sharpening. If food, oil or fats accumulate on the ultrafine diamonds of Stage 3 you will notice that it will sharpen more slowly.
- Page 11 6. The edge of the knife blade while sharpening should be held in a level position relative to the top of the counter or table. To sharpen the blade near the tip of a curved blade, lift the handle up slightly as you approach the tip so that each section along the curved length of the edge is maintained “level”...
- Page 12 SERVICE In the event post-warranty service is needed, return your sharpener to the EdgeCraft factory where the cost of repair can be estimated before the repair is undertaken. Outside the USA, contact your retailer or national distributor. Please include your return address, daytime telephone number and a brief description of the problem or damage on a separate sheet inside the box.
Need help?
Do you have a question about the Diamond Hone 115 and is the answer not in the manual?
Questions and answers