Table of Contents
Advertisement
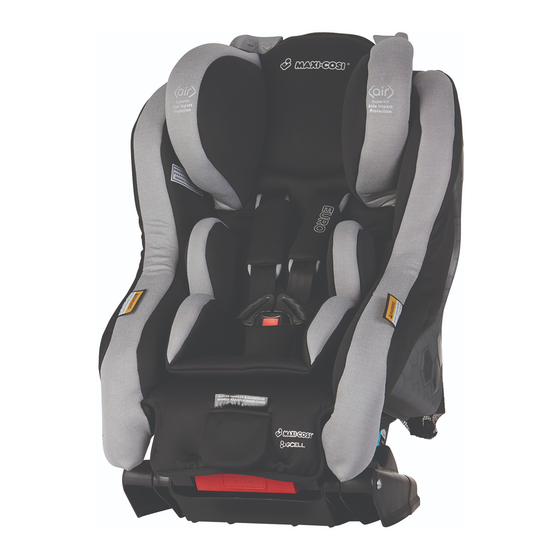
Euro & Hera
Convertible Car Seat
To be used only in a rearward-facing position
until the infant's shoulders either reach the lower
shoulder height marker (approx. 12 months of age)
or reach the middle height marker (approx. 2 to 3
years of age). Then to be used in a forward-facing
position until the child's shoulders reach the upper
shoulder height marker (approx. 4 years of age).
IMPORTANT: KEEP THIS BOOKLET IN THE PLACE
PROVIDED ON THE CHILD RESTRAINT.
Styles and designs may vary.
Advertisement
Table of Contents

Related Manuals for Maxi-Cosi Hera


Summary of Contents for Maxi-Cosi Hera
- Page 1 Euro & Hera Convertible Car Seat To be used only in a rearward-facing position until the infant’s shoulders either reach the lower shoulder height marker (approx. 12 months of age) or reach the middle height marker (approx. 2 to 3 years of age).
-
Page 2: Quick Start Installation
QUICK START INSTALLATION rearward-facing using seatbelt Newborn up to 30 months HIGH PUSH SWING UP PUSH CLICK Front of vehicle... -
Page 3: Quick Start Installation
QUICK START INSTALLATION forward-facing using seatbelt Toddler (12 months, approx) up to 4 years SELECT: ‘LOW’ PUSH ‘MID’ ‘HIGH’ PUSH Front of vehicle... - Page 4 QUICK START INSTALLATION rearward-facing using ISOGO Newborn up to 30 months HIGH PUSH SWING UP CLICK! BOTH SIDES Press the child restraint firmly PUSH down into the vehicle seat whilst pulling on the ISOGO straps. This will help to achieve majority GREEN indication.
- Page 5 Ensure to pull loose end parallel PUSH to the belt strap until you get a PULL majority GREEN indication. tip: Always check for GREEN at eye level. Attach top tether strap...
- Page 6 QUICK START INSTALLATION forward-facing using ISOGO Toddler (12 months, approx) up to 4 years SELECT: ‘LOW’ PUSH ‘MID’ ‘HIGH’ CLICK! BOTH SIDES Press the child restraint firmly down into the vehicle seat whilst PUSH pulling on the ISOGO straps. This will help to achieve majority GREEN indication.
- Page 7 Ensure to pull loose end parallel PUSH to the belt strap until you get a PULL majority GREEN indication. tip: Always check for GREEN at eye level. Attach top tether strap...
-
Page 8: Table Of Contents
Table of Contents Quick start installation ....................2 - 7 Contents ..........................8 Introductions ........................9 Warnings ........................10 - 12 Vehicle Information Correct rearward-facing vehicle position ..............13 Correct forward-facing vehicle position ..............14 Anchor fitting location ....................15 Anchor fitting installation .................. -
Page 9: Introductions
In the event of a car accident, your Maxi-Cosi child restraint may have unseen damage from crash forces. The Maxi-Cosi Accident Exchange Service offers... -
Page 10: Warnings
WARNINGS Read and follow all of the installation instructions for maximum protection. If you have any questions regarding the installation or use of this restraint, please contact Dorel Australia or agent, or a child restraint fitting station authorised by the relevant transport authority, or in New Zealand, to consult the agent for the vehicle. - Page 11 WARNINGS • Fit the restraint firmly to the car seat. • Fit the harness firmly to the child. • A loose restraint or harness is dangerous. • Do not harness an infant wrapped in a blanket or swaddled. Any blanket or wrap must only be placed over the harness and infant.
- Page 12 WARNINGS • The use of child restraints in the front seat may be restricted for children of specific ages by local legislation. Please check with your local legislation regarding any restriction for child restraint. If a car has two or more rows of seats, children under four must not travel in the front seat.
-
Page 13: Vehicle Information
Vehicle information Correct rearward-facing vehicle position Some seating positions in your vehicle may NOT be safe for this safety seat. Some vehicles do not have any seating positions that can be used safely with the seat. If you are not sure where to place the infant seat in your vehicle, consult your vehicle’s owner’s handbook. -
Page 14: Correct Forward-Facing Vehicle Position
Vehicle information Correct forward-facing vehicle position CORRECT USE CORRECT USE INCORRECT USE... -
Page 15: Anchor Fitting Location
Vehicle information Location of anchor fitting NOTE: • The anchor point can be found in different locations in different cars. The diagram above shows possible locations of anchor points. Sometimes it is on the parcel shelf in sedans, and on the floor area in station wagons, vans and hatchbacks. - Page 16 Vehicle information Anchorage fitting installation Child restraints must be used correctly to provide proper protection for your child. The anchorage system on child restraints must be used in the correct way. CORRECT Make sure there is no slack in the top strap and the attachment clip is upright in the anchorage fitting.
-
Page 17: Anchor Fitting Installation
Vehicle information Upper anchorage fitting installation FOR CARS FITTED WITH A CHILD RESTRAINT Front of vehicle UPPER ANCHORAGE POINT Locate the upper anchorage point behind the Attachment bolt rear seating position (consult the car owner’s handbook for the location of the upper anchorage point). - Page 18 Vehicle information Upper anchorage fitting installation (cont’d) WARNINGS CHILD RESTRAINTS MUST NOT BE ATTACHED TO UNSOUND METAL OR TO WOOD OR SYNTHETIC STRUCTURES. WHEN DRILLING THE 9mm HOLE DO NOT DRILL THROUGH FUEL LINES, FUEL TANKS, ELECTRICAL WIRING, OR RADIO SPEAKERS. WEBBING STRAPS MUST BE PROTECTED FROM SHARP CORNERS AND EDGES.
-
Page 19: Angle Adjustment
Check Before Installation Angle adjustment Position seat ensuring that the angle is no greater than 40˚ from horizontal plane. Angular adjustment is achieved by adjusting 40˚ the base. Refer to page 25 for base adjustment. Front of vehicle WARNINGS • DO NOT install convertible child restraints excessively reclined, ensure the angle is no greater than 40°. -
Page 20: Parts List
Parts list 1 Air protect cell (x2) 6 Height markers (x3) 2 Stabilising arm 7 Infant insert 3 Harness release lever 8 GCELL (x2 if fitted) (under flap) 9 Base 4 Harness tightening strap 10 Buckle 5 Base adjustment button 11 Belt mates (x2) (three positions) - Page 21 Parts list 12 Headrest adjusters 18 Adjustable headrest 13 Splitter plate 19 Top tether strap adjuster 14 Top tether strap 20 Forward facing belt path 15 Hook 21 Lower connectors (x2) 16 Anchor kit (in mesh pocket) 17 Storage pocket 22 Rearward facing belt path 23 Tension indicator (x2) (instruction manual &...
-
Page 22: Transition Period From Infant To Toddler Use
SHOULDERS MUST BE Transition period from infant to toddler use ABOVE THIS LINE MUST BE REAR FACING WHEN SHOULDERS BELOW THIS LINE SHOULDERS BELOW THIS LINE WHEN HEADREST AT HIGHEST POSITION 2010-2013 Upper height marker Forward-Facing SHOULDERS ABOVE THIS LINE WHEN •... -
Page 23: Transition Period From Infant To Toddler Use
Transition period from infant to toddler use (cont’d) WARNINGS • Continue to use this child restraint until the child reaches this limit. • Do not use forward facing until child’s shoulders are above the lower shoulder height marker. • Infants are at risk of serious injury if they face forward too early. •... -
Page 24: Installation
Installation Preparing infant seat to fit your child You MUST make these adjustments with your child before you install the child restraint in the vehicle. Please adjust harness according to the infant’s shoulder height prior to installation. Configuring the harness straps for correct child fitment PULL Lift the harness release lever at the front of seat. -
Page 25: Adjust Headrest Height
WARNINGS • Always adjust the height of the shoulder straps as the child grows. • Failure to fasten and tighten the harness system correctly can result in serious injury or death. Installation Preparing infant seat to fit your child (cont’d) Adjust headrest height Rotate harness height adjustment levers inward to LIFT... -
Page 26: To Fasten Buckle Assembly
Installation Preparing infant seat to fit your child To fasten buckle assembly Release: Press the red button to release the buckle. Insert one buckle tongue as shown above (you will not hear a click). Insert the second buckle tongue as illustrated above. Now listen for a ‘CLICK’. -
Page 27: Adjusting Top Tether Strap
Installation Preparing infant seat to fit your car TO LOOSEN PULL PUSH BUTTON TO TIGHTEN PULL PUSH BUTTON Adjusting top tether strap TO LOOSEN: Press on the adjuster button with thumb and pull strap back through to loosen top tether strap using strap which is attached to the seat. -
Page 28: Rearward-Facing Installation Using Seatbelt
Installation Rearward-facing installation using seatbelt 1. Start by loosening full length of the top tether HIGH 2. Set base in position 3 (High). PUSH 3. Swing stabilising arm into position. 4. Place restraint facing rearwards on back seat of vehicle in line with a top tether strap anchorage point. -
Page 29: Forward-Facing Installation Using Seatbelt
Installation Forward-facing installation using seatbelt NOTE: Before you start installation, adjust the shoulder straps and headrest to fit your child. Refer to page 24/25. 1. Adjust the child restraint to the forward PUSH SELECT: facing position and select desired seat ‘LOW’... -
Page 30: Rearward-Facing Installation Using Isogo
Installation rearward-facing using ISOGO Newborn up to 30 months I. Set seat angle to ‘HIGH’ • Push the red button, located on the front of the base inwards and set seat angle to ‘HIGH’. • Swing stabilising bar up into position. HIGH SWING UP 2. - Page 31 Installation 3. Tighten the connector straps • Start with the strap on the inside closest to the centre PUSH and remove as much slack out as possible, then move to the outside strap and remove as much slack as possible. •...
-
Page 32: Forward-Facing Installation Using Isogo
Installation forward-facing using ISOGO Toddler (12 months, approx) up to 4 years I. Select the desired seat angle • Push the red button, located on the front of the base, inwards to select the desired seat angle: ‘LOW’, ‘MID’ or ‘HIGH’. •... - Page 33 Installation 3. Tighten the connector straps • Start with the strap on the inside closest to the centre PUSH and remove as much slack out as possible, then move to the outside strap and remove as much slack as possible. •...
-
Page 34: Next Seat For Your Child
(approximately 8 to 10 years of age). Can also be used with child harness that is approved for use with this booster seat.* for more information, visit www.maxi-cosi.com.au... -
Page 35: Care & Maintenance
Care and maintenance Cleaning instructions for buckle Follow the manufacturer’s instructions at all times. Before removal, ensure you have carefully noted the way which the various parts are attached to the seat so as to facilitate reassembly. Your child car seat is equipped with a buckle designed to give your child maximum protection during proper use. -
Page 36: Care Instructions
Care and maintenance Care instructions • Seat trim may be removed for cleaning. Don’t forget to remove the instruction manual. • Tumble dry 10-15 minutes on low heat. • Do not dry clean. • All other surfaces should be cleaned with a mild soap and water. •... -
Page 37: Removing Accessories For Cleaning
Care and maintenance Remove accessories for cleaning (Style and design may vary) To remove insert To remove the insert, undo the buckle and pull the insert out. To replace insert Feed the crotch part of the buckle through the opening slot in the insert and fasten buckle assembly. -
Page 38: Notes
Notes... -
Page 39: Guarantee
Guarantee Dorel Australia Pty Ltd warrants your new product to be free from defects in materials and workmanship for 10 years on the seat & 3 years on the trim, from the date of purchase, provided that the product is used in accordance with accompanying recommendations or instructions where provided. - Page 40 Europe’s most popular and trusted car seat brand. Australia © 2015 Dorel Australia, Pty Ltd. All Rights Reserved. CCA4 2013 L #16587 07/16...
Need help?
Do you have a question about the Hera and is the answer not in the manual?
Questions and answers