Proxim AP-8000 User Manual
Hide thumbs
Also See for AP-8000:
- User manual (178 pages) ,
- Installation and management manual (242 pages) ,
- Software management manual (187 pages)
Table of Contents
Advertisement
Quick Links
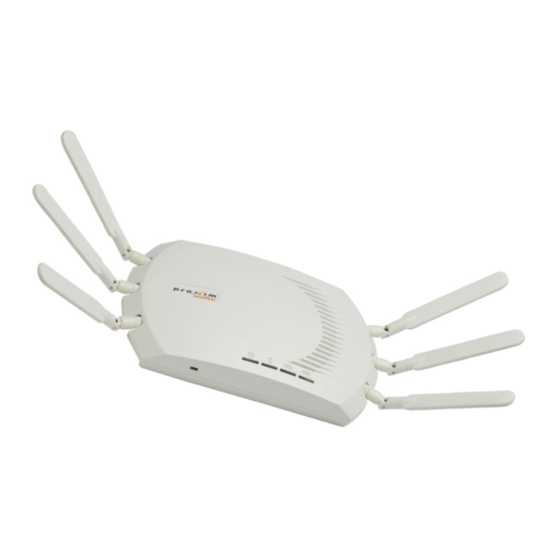
Description of the AP-8000 Unit
1
Install the Software and Documentation
Insert the CD into your computer's CD-ROM drive and install the software and
documentation.
The ScanTool progam, Help Files and User Guide are added to the Start > All
Programs > Proxim Wireless > AP-8000 menu.
In addition, software and documentation are installed in the following locations by
default:
•
ScanTool: C:\Program Files\Proxim Wireless\ORiNOCO\AP-
8000\Xtras\ScanTool
•
TFTP Server: C:\Program Files\Proxim Wireless\ORiNOCO\AP-
8000\Xtras\TFTP Server
•
Help Files: C:\Program Files\Proxim Wireless\ORiNOCO\AP-8000\eHelp
•
User Guide: C:\Program Files\Proxim Wireless\ORiNOCO\AP-8000\PDFs
NOTE: You can change the location of the software and documentation during installation.
2
Install the Antennas
The omni-antennas supplied with the product do not require professional installation,
because they have non-standard connectors.
NOTE: If you are planning to use the Range Extender Antenna (REA), then you do not
need professional installation as they are non-standard connectors.
If any other antennas are used, then professional installation is required.
Follow the procedure to connect the antennas to access points.
1.
Hand tighten the antenna screws clockwise onto the AP-8000 connectors until they
are firmly attached.
2. Position the antennas vertically and ensure that the distance between each
antenna is either 5 cms or 2 inches for best performance. The orientation of the
antennas ensure that eah antenna receives maximum signal coverage and their
radiation pattern is not effected.
2
3
Mount the AP-8000
Conduct a site survey to determine the best location for your device. Once you have
choosen a final location for your unit, mount the AP-8000 to a wall or a T-bar ceiling as
follows:
Mount the AP-8000 to a Wall:
1.
Put the mounting plate up to the wall so that the embossed letter "L" is on the top. If
the plate is correcly oriented, then the circular tab that is vertically aligned with the
square hole should be on top.
2.
Fasten the mounting plate with two screws through the circular holes of the plate.
depending on the type of the wall, you may need to use the fastners.
3.
Holding the unit so that the connectors on the rear, align the holes on the bottom of
the unit with the two tabs on the mounting plate. Press the unit down so it is flush
with the plate.
4.
Carefully slide the unit to the up until the tabs snap securely on to the narrow holes
of the unit. If the unit is mounted correctly, then no portion of the mounting plate
should protrude from any of the sides of the unit.
Mount the AP-8000 to a Ceiling:
1.
Snap the rectangular tabs on the back of the mounting plate onto a ceiling T-bar.
You may need to slightly rotate the plate until it securely snaps onto the T-bar.
2.
Fasten the mounting plate to the ceiling tile with two screws through the circular
holes of the plate.
3.
Position so that the embossed letter "L" on the mounting plate is facing up. Hold the
unit so that the connectors on the rear, align the two holes on the bottom of the unit
with the two tabs on the mounting plate. Press the unit up so it is flush with the plate.
4.
Carefully slide the unit to the "L" direction until the tabs snap securely onto the
narrow holes of the unit. If the unit is mounted correctly, no portion of the mounting
plate should protrude from any of the sides of the unit.
4
Cable the Unit
NOTE: Proxim recommends to use CAT6 cable for the length of 100 m or CAT5e cable for
lower length. Though the AP-8000 can work with CAT5 cable, there is a possibility that you
may experience a drop in Ethernet speed from 1000BaseT to 100BaseT or the Ethernet
interface may show errors.
Without Gigabit Ethernet Power over Ethernet (PoE):
1.
Plug the barrel of the power cable from the power supply into the power jack.
2.
Connect one end of an Ethernet cable CAT 6 (not supplied) to the unit's LAN port.
The other end of an Ethernet cable CAT 6 should not be connected to another
device until after installation is complete:
— Use a straight-through Ethernet cable if you intend to connect the unit to a
switch, hub, or patch panel.
— Use a cross-over Ethernet cable or adapter if you intend to connect the unit to a
single computer.
With Gigabit Ethernet Power over Ethernet (PoE):
1.
To use Gigabit Ethernet PoE, you must use a Gigabit Ethernet PoE adapter such as
ORiNOCO 1-Port Active Ethernet DC Injector (ordered separately). Connect one
end of an Ethernet cable (not supplied) to the unit's LAN port , connect the other
end of the Data and Power Out Port of the DC Injector.
— Connect one end of the second Ethernet cable to the Data In port of the DC
Injector. The other end of the cable should not be connected to another device
until after installation is complete:end of the cable should not be connected to
another device until after installation is complete:Use a straight-through cable if
you intend to connect the unit to a switch, hub or patch panel.
— Use a cross-over Ethernet cable or adapter if you intend to connect the unit to a
single computer.
3
5
Using a Console Port
You may connect your Access Point with a console port. Follow the steps provided
below if you are using the console port:
1.
Connect a nine-pin, male-to-female serial cable to the COM port on a computer or
laptop and to the DB9 connector of the Access Point.
2.
Open the Microsoft's HyperTerminal to set up the AP-8000. For more information
refer "8 Initialize the AP-8000""8 Initialize the AP-8000"Initialize the AP-8000. "8
Initialize the AP-8000"
6
Power On the Unit
There are four LED indicators of top of the AP-8000 unit (see figure):
1.
When power is applied to the access point, you will observe that Power LED is
lights up Green.
2. Connect the AP-8000 LAN port to a stand-alone PC using Ethernet cable, or to a
network hub or switch, you can monitor the Ethernet LEDs on the unit. The color
Ethernet LEDs will inform about the speed of the Ethernet traffic:
RED
100 Mbps
GREEN
1000 Mbps
BLANK
No link is available or Ethernet is not connected
NOTE: When in operational status, the Wireless LEDs will be steady green. The wireless
LEDs would blink green when the wireless traffic is being transmitted or recevied.
7
Install the Cable Security Cover
1.
When the RS-232 cable is not connected, you may install a security cover to
prevent the tampering of the power and LAN ports, and the reset and reload
buttons:
— Open the spilt end of the security cover just enough to slide the power cable (if
you are not using Gigabit Ethernet PoE) and the CAT6 Ethernet cable through
the opening until they fit inside the straight clamping portion of the cover.
Exercise care as you slide the cable (s) so you do not accidently break the
cover.
— Slide the hinging end of the security cover into the hole on the rear panel of the
unit. Once in place, pivot the cover to bring it close to the rear panel of the unit.
— Use two screws to fasten the security cover on the rear panel of the AP-8000.
8 Initialize the AP-8000
Following are the ways to initialize the AP-8000 unit:
a. DHCP Server is Available
If the DHCP server is available, then AP-8000 unit will be assigned the IP address
automatically. You can find the IP address of the device either from the DHCP server or
the ScanTool.
b. DHCP Server is Not Available
If the DHCP server is not available, then you can use the default IP address or change
the IP address of the device according to the IP address of your subnet using the
4
Advertisement
Table of Contents

Related Manuals for Proxim AP-8000


Summary of Contents for Proxim AP-8000
-
Page 1: Using A Console Port
You may connect your Access Point with a console port. Follow the steps provided choosen a final location for your unit, mount the AP-8000 to a wall or a T-bar ceiling as below if you are using the console port:... -
Page 2: Technical Support
Proxim eService Web Site Support Proceed to Configuration. The Proxim eService Web site is available 7x24x365 at: http://support.proxim.com Proxim also provides an option of using RS-232 cable to log in to the device and What is in the Kit configure it. Telephone Support...
Need help?
Do you have a question about the AP-8000 and is the answer not in the manual?
Questions and answers