Table of Contents
Advertisement
Quick Links
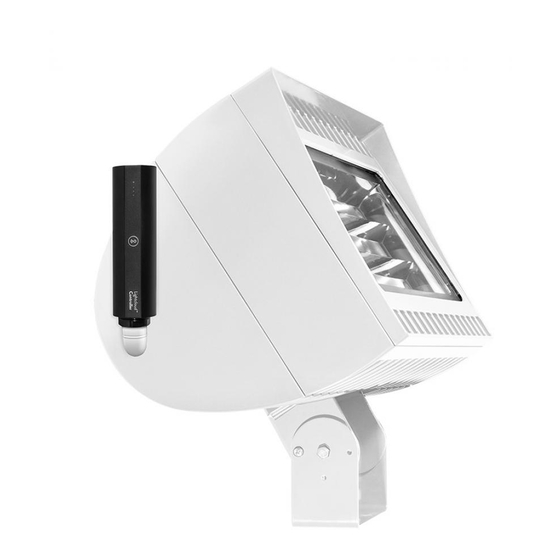
FXLED 200W 300W INSTALLATION INSTRUCTIONS
®
Thank you for buying RAB lighting fixtures. Our goal is to design the best quality products to get the job done right. We'd like to hear your comments.
Call the Marketing Department at 888-RAB-1000 or email: marketing@rabweb.com
IMPORTANT
READ CAREFULLY BEFORE INSTALLING FIXTURE. RETAIN THESE INSTRUCTIONS FOR FUTURE REFERENCE.
RAB fixtures must be wired in accordance with the National Electrical Code and all applicable local codes. Proper grounding
is required for safety. THIS PRODUCT MUST BE INSTALLED IN ACCORDANCE WITH THE APPLICABLE INSTALLATION CODE BY A
PERSON FAMILIAR WITH THE CONSTRUCTION AND OPERATION OF THE PRODUCT AND THE HAZARDS INVOLVED.
WARNING: Make certain power is OFF before installing or maintaining fixture. No user serviceable parts inside.
WARNING: RISK OF SERIOUS INJURY OR DEATH!
DO NOT MOUNT THE SLIPFITTER TO A TENON OR BRACKET THAT IS MORE THAN 20 DEGREES FROM VERTICAL. MOUNTING
AT ANY ANGLE OTHER THAN 0-20 DEGREES INCREASES THE RISK OF DISENGAGEMENT AND/OR FAILURE OF THE
SLIPFITTER. INSTALL THE POLE ON A SECURE BASE OR INSTALL THE BRACKET TO A WALL FIRST. THEN PLACE LUMINAIRE
ONTO THE POLE OR BRACKET. DO NOT LIFT ASSEMBLED LUMINAIRE OR POLE OR LUMINAIRE & BRACKET. LUMINAIRE OR
POLE/BRACKET'MAY DISENGAGE.
SLIPFITTER MOUNTING
1. The slipfitter mounting fits a 2 3 /8" O.D. Tenon. Place the
slipfitter over the Tenon and secure the fixture with the
Set Screws (2) on the side of the slipfitter.
2. Remove two screws on side of Cover Plate. Remove the
Cover Plate and adjust the angle of the fixture.
3. Loosen the Locking Bolt and swivel fixture to desired
angle.
4. Tighten the Locking Bolt and re-attach Cover Plate.
Cover Plate
Locking Bolt
Set Screws (2)
Slipfitter
Tenon
TRUNNION MOUNTING
CAUTION: UL and C-UL listed or CSA certified liquid tight
cord grip suitable for use with STW flexible cord shall be
used for connection to a wet location outlet box provided
by others.
To adjust the angle of the fixture using the trunnion:
1. Loosen the Pivot Bolts & angle locking screw.
2. Adjust fixture to desired angle.
3. Tighten Pivot Bolts & angle locking screw.
ACCESSORIES
Chrome Wire Guard:
Poly Shield:
Lens & Door Replacement:
Pivot Bolts
GDFXLED300W
GDFXLED300P
LFFXLED300A (bronze)
LFFXLED300W (white)
Advertisement
Table of Contents

Related Manuals for RAB Lighting FXLED


Summary of Contents for RAB Lighting FXLED
- Page 1 FXLED 200W 300W INSTALLATION INSTRUCTIONS ® Thank you for buying RAB lighting fixtures. Our goal is to design the best quality products to get the job done right. We’d like to hear your comments. Call the Marketing Department at 888-RAB-1000 or email: marketing@rabweb.com IMPORTANT READ CAREFULLY BEFORE INSTALLING FIXTURE.
- Page 2 FXLED 200W 300W INSTALLATION INSTRUCTIONS ® Thank you for buying RAB lighting fixtures. Our goal is to design the best quality products to get the job done right. We’d like to hear your comments. Call the Marketing Department at 888-RAB-1000 or email: marketing@rabweb.com...
- Page 21 ® Manual...
- Page 22 Some communities offer recycling or collection of rechargeable batteries— contact your local government for disposal practices in your area. DISCONNECT An external readily accessible disconnect device, such as a circuit breaker, is required. Custom manufactured in China Copyright © 2016 RAB Lighting, Inc.
-
Page 23: Table Of Contents
Contents Introduction System Overview Lightcloud Gateway Lightcloud Devices Finding a Suitable Location Best Practices Best Practices Getting Started Installation Lightcloud Gateway Lightcloud Devices & Table Setup Network Setup Gateway Activation Lightcloud Devices... - Page 25 Welcome to lighting control that just works. Lightcloud is a cloud-based wireless lighting control system that makes it easy to take charge of your lighting—from sensing to dimming, schedules to scenes, and everything in between. Control and configure your system remotely using the Lightcloud Application, or call RAB to have our experts set up your system just how you need it.
-
Page 26: System Overview
System Overview An individual Lightcloud installation, or Site, requires at least one Lightcloud Gateway depending on the environment and usage. Your Lightcloud devices communicate with each other and the Gateway via a wireless mesh network, which allows site layout to be flexible and robust. The Lightcloud Gateway and Devices require a subscription to function beyond the installation period. -
Page 27: Lightcloud Gateway
Lightcloud Gateway The Gateway connects your system to our secure, private server via a cellular signal, so you don’t have to worry about providing your own internet connection. With the Gateway powered and connected, your Lightcloud site is at your command with the Lightcloud Application. -
Page 28: Lightcloud Devices
Lightcloud Devices L I G H TC LO U D D E V I C E S T H AT CO N N EC T TO T H E G AT E WAY Lightcloud Controller The Controller switches circuits up to 20A as well as provides a 0-10V dimming interface for dimmable drivers and ballasts. -
Page 29: Finding A Suitable Location
Finding a Suitable Location The Gateway should be installed in a dry or non-condensing damp environment only. Use these guidelines when installing additional Lightcloud devices: • If there is a clear line of sight between two devices, they can be placed up to 1000 feet apart. -
Page 30: Best Practices
Best Practices Unlike an ordinary WiFi router, where all devices must be within range of the router, hardwired Lightcloud devices extend the range of the network—so Add an additional Lightcloud Device to extend network as long as each device is within range range around corners of another, you’ll have a strong, reliable system. - Page 31 Best Practices (Continued) Lastly, consider sources of invisible interference. Avoid placing Lightcloud devices near microwaves, motors (especially elevator mechanical rooms) or any other radio amplifiers and antennas. P R O B L E M D E V I C E S & S I G N A L S M I C R O W A V E S E L E V A T O R M E C H A N I C A L R O O M S A M P L I F I E R S &...
-
Page 32: Getting Started
Getting Started ACTIVATION STEPS INSIDE YOUR GATEWAY G AT E W AY DEVICE TABLE MANUAL ® PANEL/ DEVICE ID ZONE NAME PWR/ENGY NOTES CIRCUIT # CONTAINS Manual 2x Wire Nuts 2x Mounting Screws 4x Device ID Labels 1x Power Cable* *The Lightcloud Gateway must be mains powered for permanent installation. - Page 33 Installation LED Indicators The Lightcloud Gateway is rated 120-277VAC and contains an integral junction box for hard-wired P O W E R installation by a qualified electrician. Green: Fully powered C E L L U L A R Off: No or poor cellular signal. You must move the Gate- way to a location with better cellular signal.
- Page 34 Installing the Lightcloud Gateway Follow instructions and steps to successfully install your Gateway. S T E P O N E S T E P T W O S T E P T H R E E WA RNING O F F 3:14 O F F Choose a location with good...
-
Page 35: Installation Lightcloud Gateway
S T E P F O U R S T E P F I V E S T E P S I X Mount the Gateway to the Install included battery with Turn breaker back on. installation surface using size negative (-) end facing towards 10 screws appropriate for the junction box area. - Page 36 Installing Lightcloud Gateway (Continued) S T E P S E V E N S T E P E I G H T S T E P N I N E PANEL/ DEVICE ID ZONE NAME PWR/ENGY NOTES CIRCUIT # G AT E WAY D E V ICE ID s Turn on the Gateway main Confirm that the cellular power switch.
-
Page 37: Lightcloud Devices & Table
Lightcloud Devices Lightcloud devices that are mains hard-wired powered are designed Use extra Device ID TIP: to be installed on a junction box or similar enclosure, and must be stickers on or near your devices or circuits for installed by a qualified electrician. Refer to your device’s manual for easier identification. -
Page 38: Setup
Setup Gateway Activation When you power your Gateway and it shows sufficient cellular signal (solid yellow or green LED), call 1 (844) LIGHTCLOUD or 1 (844) 544-4825 to activate it and complete the rest of your site setup. Network Setup To add new devices to your Lightcloud network, call RAB at 1 (844) LIGHTCLOUD. - Page 39 20 cm from all persons and must not be co-located or operating in conjunction with any other antenna or transmitter. CAUTION: Changes or modifications to this equipment not expressly approved by RAB Lighting may void the user’s authority to operate this equipment.
- Page 41 Learn more at lightcloud.com 1 (844) LIGHTCLOUD 1 (844) 544-4825 Dimmer LCDIMMERW WE ’ RE HERE TO HELP: 1 (844) LIGHTCLOUD © RAB Lighting, Inc or 1 (844) 544-4825 170 Ludlow Avenue Northvale, NJ 07647 Custom manufactured in China...
- Page 42 Hello Lightcloud is a wireless lighting control service. The Lightcloud Dimmer is an in-wall switch that connects wirelessly to a Lightcloud Controller to provide switching, dimming and scene control. Product Features Wireless Control & Configuration Zone Switching & Dimming Dim Level Indicator Scene Selection Nightlight...
- Page 43 Contents Specifications PART NUMBER Dimmer Faceplate LCDIMMER/W INPUT 120-277VAC, 50/60Hz, 2W OPERATING TEMPERATURE 0ºC to 40ºC DIMENSIONS Faceplate Bracket Instruction Manual Dimmer: 1.77”W x 2.7”H x 1.49”D Faceplate: 2.94”W x 4.69”H x 0.06”D Faceplace Bracket: 2.8”W x 4.55”H x 0.13”D 18AWG grounding;...
- Page 44 Wiring What You Need WHITE / NEUTRAL A Lightcloud Gateway PANEL BLACK / HOT GREEN / GROUND A Ceiling Sensor CAUTION (Or similar actuator) • Use only copper wire. • Do not operate with the faceplate removed. • This product should only be installed by a qualified electrician and in compliance with local and national electrical codes.
- Page 45 Setup & Installation Finding a suitable location Lightcloud uses a wireless mesh network to connect devices such as the Dimmer to the Turn o power WARNING Gateway. Unlike a WiFi router, each Lightcloud device may connect another device to the network.
- Page 46 Setup & Installation (cont’d) Install the Lightcloud Dimmer Screw the line (black) and neutral (white) Use the two 6-32 1/2" Phillips round wires into the labeled connectors on the head screws to secure the Dimmer to back of the Dimmer. Connect the ground the junction box.
- Page 47 Setup & Installation (cont’d) Install the Lightcloud Dimmer (cont’d) Use the two 6-32 5/16" Phillips flat-head Snap the faceplate onto the screws provided to secure the faceplate faceplate bracket. bracket to the Dimmer.
- Page 48 Setup & Installation (cont’d) Power up Labeling your device To add your Lightcloud Dimmer to your system, enable Setup Mode via the Lightcloud application DE VI CE ID s or call RAB at 1 (844) 544-4825. When the Dimmer powers up, it will automatically try to join, and keep trying until it is able to join.
-
Page 49: Lightcloud Devices
Functionality (press using paperclip) DEVICE BUTTON Configuration • Single press: Indicate in Lightcloud application • Hold for 10 seconds: Force device to leave current To pair the Dimmer with a zone, assign scenes or Lightcloud network perform other configuration, use the Lightcloud web application or call RAB: DIM LEVEL INDICATOR: •... - Page 50 CAUTION: Changes or modifications to this equipment not expressly SCENE MODE: In Scene Mode, the top and bottom approved by RAB Lighting, Inc. may void the user’s authority to operate buttons activate preselected scenes. This can be configured this equipment. Custom manufactured in China.
- Page 51 Learn more at lightcloud.com 1 (844) LIGHTCLOUD Daylight 1 (844) 544-4825 support@lightcloud.com LCDAYLIGHT WE ’ RE HERE TO HELP: 1 (844) LIGHTCLOUD 1 (844) 544-4825 © RAB Lighting, Inc support@lightcloud.com 170 Ludlow Avenue Northvale, NJ 07647 Custom manufactured in China...
- Page 52 Ambient Light Sensor CAUTION: Changes or modifications to this equipment not expressly approved by RAB Lighting, Inc. Innovative Self-Powered Design may void the user’s authority to operate this equipment.
- Page 53 Contents What You Need Lightcloud Daylight Instruction Manual Mounting Screws Lightcloud Gateway A Lightcloud installation requires at least one Lightcloud Gateway to manage your devices. Straight & Angled Power Supply for Setup USB Cable for Setup Lightcloud Controller Mounting Brackets (Or similar Lightcloud actuation device) The Daylight is designed to remotely control one or more Lightcloud devices...
- Page 54 Setup & Installation Plug in the Daylight device (setup only) Contact RAB to add your Daylight To join your Daylight to a Lightcloud network, plug it in with the included Call us at 1(844) LIGHTCLOUD or email support@lightcloud.com Micro USB power adapter. The white Power Indicator will come on and and we'll get your Daylight device added to your Lightcloud network the Device Status Indicator will blink red every 10 seconds until it is joined immediately.
- Page 55 Setup & Installation (cont’d) Find a Suitable Location The Daylight needs sunlight to operate, and must be within range A skylight is a great location for the Lightcloud Daylight. Be aware of of another Lightcloud device. Direct sunlight is ideal, but indirect where shadows will land throughout the day and position the device sunlight may be acceptable if there’s enough of it.
- Page 56 Setup & Installation (cont’d) The Daylight includes an angled mounting bracket that can be used In some cases, you may want to use an extension of some kind to maximize the amount of sunlight landing on the device’s face. (not included) to mount the device from the ceiling. Just be sure it ends up in direct sunlight as much as possible.
- Page 57 Setup & Installation (cont’d) Install Configure Login at lightcloud.com and click on Devices to associate a zone Screw the straight or angled at your site. The application will show the last measured light level mounting bracket to the so you can configure actions to take at di erent levels. Or, simply mounting surface.
- Page 58 Functionality DEVICE STATUS INDICATOR: • Unlit: When not powered by USB, indicates that the device is joined to a Lightcloud network and is operating normally • Solid green: When powered by USB, indicates that the device is joined to a Overview Lightcloud network •...
- Page 59 Welcome Controller LCCONTROL20/D10 WE ’ RE HERE TO HELP: 1 (844) LIGHTCLOUD 1 (844) 544-4825 support@lightcloud.com...
- Page 61 Contents Lightcloud Controller NPT Nut O-ring Instruction Manual Wire Nuts Specifications OPERATING TEMPERATURE PART NUMBER -40ºC to +40ºC LCCONTROL20/D10 INPUT OVERALL DIMENSIONS 120-277VAC, 50/60Hz 1.55" diameter, 5.75" length <2W (Standby - 4W (Active) 1/2" NPT Mount, Male 16AWG pigtails MAXIMUM SWITCHED LOAD RATINGS WIRELESS RANGE For Control of Magnetic, Electronic Ballast or LED Line-of-Sight: 1000 feet...
- Page 62 What You Need Lightcloud Gateway A Lightcloud installation requires at least one Lightcloud Gateway to manage your devices. WE ’ RE HERE TO HELP: 1 (844) LIGHTCLOUD or 1 (844) 544-4825 support@lightcloud.com...
- Page 63 Wiring Panel WHITE/RED WHITE Load BLACK PURPLE WHITE GRAY BLACK 0-10V DIMMING SWITCHED NEUTR AL The “Switched Neutral” white with red stripe wire is the neutral line for the load being switched. This enables power measurement. See the Power Measurement section under “Functionality”...
- Page 64 Setup & Installation Turn off power WARNING Find a Suitable Location Use these guidelines when installing devices: • If there is a clear line of sight between two Lightcloud devices, they can be placed up to 1000 feet apart. • If the two devices are separated by ordinary drywall construction, try to keep them within 100 ft.
- Page 65 Setup & Installation (cont’d) Install your Lightcloud Controller Install at a Junction Box (Indoor/Outdoor) To Load WHITE WHITE/RED WHITE Lightcloud ™ Controller BLACK PURPLE GRAY 0-10V DIMMING 0-10V is a common method of low-voltage control of dimmable drivers and ballasts. Purple: 0-10V positive | Gray: 0-10V common NOTE: The National Electrical Code requires that low-voltage wiring used in the same enclosure as high-voltage wiring have an equal or better insulation rating.
- Page 66 At Lighting Panel or Trough WHITE BLACK Space and code allowing, you may install Lightcloud devices directly in your breaker box or lighting panel. Alternatively, break out lighting circuits and install Lightcloud devices in a separate trough.
- Page 67 Setup & Installation (cont’d) Labeling your device C O N T R O L L E R D E V I CE ID s Your Site Name PA NE L / DE V ICE ID ZO NE N A ME DIM MIN G CIRCUIT # Front Desk...
- Page 68 Confirm Device Connectivity Confirm Status Indicator is Solid Green (see details below) DEVICE IDENTIFICATION BUTTON • Illuminated when device is powered • Press once to highlight this device in the Lightcloud Application • Press twice to toggle circuit on and off •...
- Page 69 Functionality Configuration All configuration of Lightcloud products may be performed using the Lightcloud web or mobile application, or by calling RAB. WE ’ RE HERE TO HELP: 1 (844) LIGHTCLOUD or 1 (844) 544-4825 support@lightcloud.com Operating Modes Provides switching and dimming for a single zone CONTROLLER Detect when an attached circuit is open or closed.
- Page 70 Disables zone control and power measurement, and REPE ATER: extends the range of your network. The Lightcloud Controller is capable of P OWER ME A SUREMENT: measuring the power usage of the attached circuit. In order to utilize this function, the neutral wire of the load must be connected to the white-red sense wire.
- Page 71 20 cm from all persons and must not be co-located or operating in conjunction with any other antenna or transmitter. CAUTION: Changes or modifications to this equipment not expressly approved by RAB Lighting may void the user’s authority to operate this equipment.
- Page 72 & service. It’s powerful and flexible, yet easy to use and install. Learn more at lightcloud.com 1 (844) LIGHTCLOUD 1 (844) 544-4825 support@lightcloud.com Custom manufactured in China © RAB Lighting, Inc 170 Ludlow Avenue Northvale, NJ 07647...
- Page 73 Learn more at lightcloud.com 1 (844) LIGHTCLOUD Ceiling Sensor 1 (844) 544-4825 support@lightcloud.com LCSENSE15/D10 WE ’ RE HERE TO HELP: 1 (844) LIGHTCLOUD Custom manufactured in China 1 (844) 544-4825 © RAB Lighting, Inc support@lightcloud.com 170 Ludlow Avenue Northvale, NJ 07647...
- Page 74 Hello Lightcloud is a wireless lighting control service. The Lightcloud Ceiling Sensor is a remotely configurable passive infrared motion sensor that can switch and dim both hard- Product Features wired circuits and remote Advanced PIR Sensing Secure Cloud Control & Configuration circuits using Lightcloud Retrofit-Friendly Local Control Controllers.
- Page 75 What You Need Contents Lightcloud Ceiling Sensor Wire Nuts Instruction Manual Lightcloud Gateway A Lightcloud installation requires at least one Lightcloud Gateway to manage your devices. Specifications PART NUMBER OPERATING HUMIDITY LCSENSE15/D10 10% RH to 95% RH Non-Condensing WE ’ RE HERE TO HELP: INPUT OVERALL DIMENSIONS 120-277VAC, 50/60Hz,...
- Page 76 Wiring Setup & Installation SWITCHED NEUTR AL The “Switched Neutral” white with red stripe wire is the neutral line for the load being switched. This enables power Panel Find a suitable location measurement. See the Power Measurement section under “Functionality” for more information. Use these guidelines when installing devices: WHITE/RED WHITE...
- Page 77 Setup & Installation (cont’d) Labeling your device Install your Lightcloud Ceiling Sensor INSTALL AT A JUNCTION BOX INDOOR/OUTDOOR The Ceiling Sensor can control other Lightcloud devices, wirelessly. D E V I CE ID s If you don’t need to hard-wire a switched circuit to the Sensor, no problem—just tie the white/red wire to neutral and cap o any unused wires.
- Page 78 Setup & Installation (cont’d) STATUS INDICATOR Power up To add new devices to your Lightcloud network, call RAB at 1 (844) LIGHTCLOUD, or email us at support@lightcloud.com. Confirm device connectivity Confirm Status Indicator is solid green. If it is not, make sure your device is within range of another Lightcloud AC-powered device.
- Page 79 Setup & Installation (cont’d) Place cover Commission & Configure Your Devices Secure cover onto sensor by pushing up and twisting to the right (clockwise). All Lightcloud products can be commissioned and configured by: • Logging on to lightcloud.com • Calling RAB at 1 (844) LIGHTCLOUD •...
- Page 80 Functionality STATUS INDICATOR: • Solid GREEN when connected to your Lightcloud network • Blinking RED when not connected to a Lightcloud network. The device will automatically continue trying to connect to a network that is in Setup Mode. Overview POWER INDICATOR: STATUS INDICATOR Illuminated when powered.
- Page 81 Functionality (cont’d) Features PASSIVE INFRARED MOTION DETECTION OCCUPANCY & VACANCY SENSING: The Lightcloud Ceiling Sensor can operate in either Occupancy or Vacancy Sensor modes, selectable via the Lightcloud application. In Occupancy mode, the attached SIDE 9’ circuit will be switched on when motion is detected, and o (or dimmed) when the VIEW timeout expires.
- Page 82 20 cm from all persons and must not be co-located or operating in conjunction with any other antenna or transmitter. CAUTION: Changes or modifications to this equipment not expressly approved by RAB Lighting may void the user’s authority to operate this equipment.
Need help?
Do you have a question about the FXLED and is the answer not in the manual?
Questions and answers