Table of Contents
Advertisement
Advertisement
Table of Contents

Subscribe to Our Youtube Channel
Related Manuals for Woods D80-2


Summary of Contents for Woods D80-2
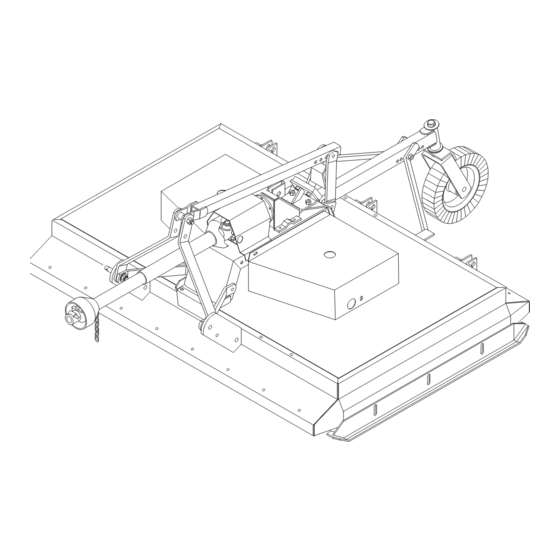
- Page 1 ROTARY CUTTER D80-2 MD80-2...
-
Page 2: Introduction
TO THE OWNER: Read this manual before operating your Woods equipment. The information presented will prepare you to do a better and safer job. Keep this manual handy for ready reference. Require all operators to read this manual carefully and become acquainted with all adjustment and operating procedures before attempting to operate. -
Page 3: Table Of Contents
TABLE OF CONTENTS INTRODUCTION ..........2 SPECIFICATIONS. -
Page 4: Specifications
SPECIFICATIONS D80-2 (Towed) MD80-2 (Mounted) Cutting Width 80" 80" Cutting Height 2" - 14" 2" (Limited by tractor lift) Overall Width 83" 83" Cutter Blade Spindles Blade Tip Speed 14,400 14,400 V-Belts Framework Channel 5/16" 5/16" Spindle Shafts 1-3/8" 1-3/8"... - Page 5 Safety Video Order Form BE SAFE! BE ALERT! BE ALIVE! BE TRAINED Before Operating Mowers! Safety Training Does Make a Difference. ASSOCIATION OF EQUIPMENT MANUFACTURERS Watch a Mower Safety Video Online The AEM (Association of Equipment Manufacturers) offers a safety training video, Industrial and Agricultural Mower Safety Practices.
- Page 6 Also, available from the Association of Equipment Manufacturers: A large variety of training materials (ideal for groups) are available for a nominal charge from AEM. Following is a partial list: Training Package for Rotary Mowers/Cutters-English ● Contains: DVD & VHS (English) Guidebook for Rotary Mowers/Cutters (English) AEM Industrial/Agricultural Mower Safety Manual (English) AEM Agricultural Tractor Safety Manual (English)
-
Page 7: Safety Rules
SAFETY RULES ATTENTION! BECOME ALERT! YOUR SAFETY IS INVOLVED! Never allow children or untrained persons to Safety is a primary concern in the design and operate equipment. manufacture of our products. Unfortunately, our efforts to provide safe equipment can be wiped PREPARATION out by an operator’s single careless act. - Page 8 SAFETY RULES ATTENTION! BECOME ALERT! YOUR SAFETY IS INVOLVED! and ensure all other controls are disengaged (Safety Rules continued from previous page) before starting power unit engine. Air in hydraulic systems can cause erratic oper- ation and allows loads or equipment components ...
- Page 9 SAFETY RULES ATTENTION! BECOME ALERT! YOUR SAFETY IS INVOLVED! Your dealer can supply genuine replacement (Safety Rules continued from previous page) Do not modify or alter or permit anyone else to blades. Substitute blades may not meet original modify or alter the equipment or any of its compo- equipment specifications and may be dangerous.
-
Page 10: Safety Decals
SAFETY & INSTRUCTIONAL DECALS ATTENTION! BECOME ALERT! YOUR SAFETY IS INVOLVED! Replace Immediately If Damaged! PULL-TYPE ONLY PULL-TYPE ONLY PULL-TYPE ONLY CD3817A FRAME FOR MOUNTED MOUNTED & DRIVE PULL-TYPE 1 - SERIAL NUMBER PLATE 2 - 18865 4 - 18866 10 Safety Decals 15914 (Rev. - Page 11 SAFETY & INSTRUCTIONAL DECALS ATTENTION! BECOME ALERT! YOUR SAFETY IS INVOLVED! Replace Immediately If Damaged! 7 - 18864 3 - 18877 11- 33347 DAN ER DANGER WARNING TO AVOID SERIOUS INJURY OR DEATH: UARD MISSIN . Read Operator's Manual (available ROTATING DRIVELINE DO NOT OPERATE.
- Page 12 Replacement safety decals can be ordered free Keep bystanders away. from your Woods dealer. To locate your nearest Keep guards in place and in good condition. dealer, check the Dealer Locator at www.WoodsEquipment.com, or in the United BLADE CONTACT OR THROWN OBJECTS CAN States and Canada call 1-800-319-6637.
-
Page 13: Operation
OPERATION On pull-type units, a pin is installed to prevent The designed and tested safety of this machine depends on it being operated within the limitations as the height adjustment crank from detaching. Do explained in this manual. Be familiar with and follow all not operate or service unit unless pin is installed. - Page 14 The drive- line must not bottom out when raised to the maximum height possible. If driveline is too short please call your Woods dealer for a longer driveline. If driveline is too long please follow the instructions for shortening the driveline.
- Page 15 7. Repeat step 6 for the other half of the drive. When using optional check chains, install them in key- hole brackets. Count the links between the cutter and 8. File and clean cut ends of both drive halves. brackets to be sure you have the same number of links on each side.
- Page 16 Connect cutter driveline to tractor PTO shaft, making PRE-OPERATION CHECK LIST sure the spring-activated locking pin slides freely and is (Owner’s Responsibility) seated firmly in tractor PTO spline groove. ___ Check that cutter is properly and securely Adjust H-frame bearing height to ensure front driveline attached to tractor.
- Page 17 Under certain conditions, tractor tires may roll some Uneven Terrain material down and prevent it from being cut at the same height as the surrounding area. When this WARNING occurs, reduce tractor ground speed but maintain 540 rpm PTO speed. The lower speed will permit material to at least partially rebound.
-
Page 18: Owner Service
OWNERS SERVICE to U-joints, gearbox, tractor PTO and/or cutter drive- line. WARNING BLADE SERVICING On pull-type units, a pin is installed to prevent the height adjustment crank from detaching. Do not operate or service unit unless pin is installed. WARNING ... - Page 19 Rear U-Joint 8 hrs No Description Frequency Slip Joint (Mounted Model) - Tailwheel Hub (Towed Model) 10 hrs Apply grease to all four sides of shaft 8 hrs Tailwheel Pivot Arm 8 hrs Front U-Joint 8 hrs Tailwheel (Mounted Model) 8 hrs 10 Center U-Joint (Towed Model) 10 hrs...
- Page 20 NOTICE ■ If blade pin is seized in crossbar and extreme force will be required to remove it, support cross- bar from below to prevent damage to spindle. DB967 CAUTION Figure 9. Belt Routing Avoid excessive force during installation. Do not use tools to pry belt into pulley groove.
- Page 21 SERVICING TIRES SAFELY Never remove split rim assembly hardware (A) with the tire inflated. Used Aircraft Tires (Figure 10) WARNING Do not attempt to mount a tire unless you have the proper equipment and experience to perform the job. Always maintain the correct tire pressure. Do not inflate tires above the recommended pressure.
-
Page 22: Dealer Service
DEALER SERVICE Check housing for visible signs of leakage. WARNING Check for leaks at vertical and horizontal seals and gaskets. On pull-type units, a pin is installed to prevent Take necessary corrective action and clean area where the height adjustment crank from detaching. Do leakage was evident. - Page 23 Do not replace gears unless deep gouges, chips, deep Gearbox Adjustment pitting or deep wear grooves are present. Place a 1/32" thick gasket between the vertical and Inspect gear shafts and sleeves. Pay specific attention horizontal housing and gearbox housing. Horizontal to areas where seals seat.
- Page 24 Proper bearing adjustment is essential to good bearing SHIELD BEARING SERVICE life. Do not leave bearing adjusted too tightly. Bearings should turn freely without any noticeable end play. When the bearings are adjusted, coat area of spindle CD3939 housing where seal seats with Permatex and press seal (4) (with spring-loaded lip up) into housing using care to prevent seal cage distortion.
- Page 25 CD1388 CD1384 Figure 14 Figure 17 2. With snap rings removed, support drive in vise, hold yoke in hand and tap on yoke to drive cup up out of yoke. See Figure 15. 3. Clamp cup in vise as shown in Figure 16 and tap on yoke to completely remove cup from yoke.
- Page 26 yokes sharply with a hammer to relieve any ten- Always maintain the correct tire pressure. Do not inflate sion. Repeat until both yokes move in all directions tires above the recommended pressure. Never weld or without restriction. heat a wheel and tire assembly. The heat can cause an increase in air pressure and result in a tire explosion.
-
Page 27: Troubleshooting
TROUBLE SHOOTING PROBLEM POSSIBLE CAUSE SOLUTION Does not cut Dull blades Sharpen blades. Worn or broken blades Replace blades. (Replace in pairs only.) Ground speed too fast Reduce ground speed. Drive not functioning (blades do Check drive shaft connection. not turn when PTO is running Check belts. -
Page 28: Assembly
When an instruction applies to a specific unit, the sec- tion heading will indicate which unit. Assembly of this cutter is the responsibility of the WOODS dealer. It should be delivered to the owner completely assembled, lubricated and adjusted for nor- mal cutting conditions. - Page 29 Remove the two rear carriage bolts from the left side Gearbox Lubrication skid. Place baffle (1) under cutter frame and attach as NOTICE shown in Figure 21. ■ The gearbox was not filled at the factory. It must be serviced before operating cutter. Failure to service will result in damage to the gearbox.
- Page 30 Wheel Yoke Installation for D80-2 Pull-Type spirol pin (4) into crank (11) to prevent crank detach- ment. Cutter The wheel yoke for use with pneumatic tires is illus- Attach axle with rim (12) and tire (not supplied) to trated. The spring-loaded wheel yoke installs the same.
- Page 31 27. Parking jack 23. 1/2 x 5-1/2" Bolt 32. Tether chain Figure 24. Tongue and H-Frame Assembly Tongue Installation for D80-2 Pull-Type Attach compression member (4) to compression bracket (7) with clevis pin (25) and cotter pin (17), then Cutter...
- Page 32 (32) around the compression link to prevent Optional Hydraulic Installation for D80-2 Pull-Type Cutter driveline shield rotation. Remove the crank (7) from pivot link holder (6), insert Align driveline in H-frame and insert clevis pin (22) pivot link (5) into pivot link holder (6), then install the through H-frame and carrier bearing (9).
- Page 33 1. Hitch pin 2. Mast plate 3. A-Frame half 4. 7/8 x 1-1/8" Sleeve 5. Support brace 6. 3/4" Flat washer 7. 13/16 x 1-9/16 Washer 29. 3/8 x 1" Bolt 8. 3/4" Slotted hex nut 30. 3/8" Flange hex nut 9.
- Page 34 Bolt rebound pad (28) to rebound pad support (27). OPTIONAL LEAF MULCHER Insert bolt (9) through gearstand and bracket (26), then INSTALLATION place rebound pad assembly on top and secure with lock nuts (10). Loosely assemble the leaf mulcher to the cutter before tightening any hardware.
- Page 35 OPTIONAL CHECK CHAIN INSTALLATION Attach chain (9) to cutter mast plate (2) with bolt (1), washer (3) and nut (4) as shown. Repeat for opposite mast plate. Attach one check chain bracket (7) to each side of the tractor top link bracket (6) with bolt (5) and nut (8) as shown.
-
Page 36: Index To Parts List
INDEX TO PARTS LIST D80-2 (Pull-Type) Main Frame Assembly (Pull-Type) ........page 37 Main Frame Assembly - Common Parts. - Page 37 D80-2 MAIN FRAME ASSEMBLY (PULL-TYPE) CD3824A PART DESCRIPTION PART DESCRIPTION 3/8 Standard lock washer 7023 Tongue 6100 1/2 NC x 1-1/4 HHCS GR5 Compression member 24576 1/2 NC x 1-3/4 HHCS GR5 7030 H-Frame 12305 1/2 NC x 5-1/2 HHCS GR5...
- Page 38 MD80-2 MAIN FRAME ASSEMBLY (MOUNTED MODEL) C D 3825 PART DESCRIPTION 31581 Inside hitch brace 27938 A-Frame half 28236 Lift arm channel assembly PART DESCRIPTION 29071 Hitch stop assembly 4548 5/8 NC x 1-3/4 HHCS GR5 ----- Tailwheel 5/8 NC x 2 HHCS GR5 29080 Tailwheel adjustment bracket 8099...
- Page 39 D80-2 & MD80-2 MAIN FRAME ASSEMBLY - COMMON PARTS 51 48 CD3855 27 - Complete English Decal Set 28 - French Safety Decal Set 29 - English Safety Decal Set 30 - Spanish Safety Decal Set (Rev. 8/28/2013) Parts 39...
- Page 40 D80-2 & MD80-2 MAIN FRAME ASSEMBLY - COMMON PARTS PART DESCRIPTION PART DESCRIPTION 55827 French safety decal set ----- Deck (not sold separately) 15827 English safety decal set 28219 Rear drive shield 1036797 Spanish safety decal set 15818 Right v-belt shield...
- Page 41 D80-2 FRONT 2/3 OF 3-JOINT DRIVE (SQUARE SHAFT) NOTE: Two styles of driveshafts have been used on the D80 series cutters. Check your driveshaft for square or two--lobe shaft and order repair parts from the correct parts list. CD3873B 1 -- COMPLETE DRIVE...
- Page 42 D80-2 FRONT 2/3 OF 3-JOINT DRIVE (TWO-LOBE SHAFT) NOTE: Two styles of driveshafts have been used on the D80 series cutters. Check your driveshaft for square or two--lobe shaft and order repair parts from the correct parts list. 12 12...
- Page 43 (includes 6 & 8) CD3872 15740 World shield outer bearing Lock pin and spring 15739 World shield tether chain, 27.5 D80-2 & MD80-2 REAR SECTION OF UNIVERSAL DRIVE CD3871A Part Part Used Description Used Description Universal joint repair kit 35N 19039 Universal joint yoke &...
- Page 44 MD80-2 COMPLETE DRIVE ASSEMBLY (TWO-LOBE SHAFT) PART DESCRIPTION 1037791 Complete 540, 1-3/8 6-Spline Driveline Assembly 38351 Yoke Assembly 1-3/8 6-Spline 38352 Cross Bearing Kit 3 90317916 Yoke, Inner Profile, Two-Lobe 40764 Spring Pin 40587 Inner Profile Tube, Heat Treated, Two-Lobe 40588 Outer Profile Tube, Two-Lobe 38353...
- Page 45 D80-2 & MD80-2 GEARBOX ASSEMBLY 20 -- Gearbox Repair Kit Part Used Description 6222 1:1 Gearbox assembly complete Seal for 1-3/4 shaft 1-1/2 x 1-3/4 x 1-3/8 Sleeve Ring seal Bearing cone 2788A Bearing cup 2720 6226 Vertical gear shaft housing with cups...
- Page 46 D80-2 & MD80-2 BLADE SPINDLE ASSEMBLY PART DESCRIPTION 15805 Spindle assembly 7143 Spindle housing with bearing cups and grease fitting 7269 3/8 NF x 3/8 Set screw 7127 5/16 x 5/32 Dowel plug 7115 1-3/8 Flanged spindle nut 5298 Seal for 1-3/4 shaft...
- Page 47 D80-2 & MD80-2 CHAIN SHIELDING ASSEMBLY CD3836A PART DESCRIPTION PART DESCRIPTION 12136 3/8 & 19-3/4 Threaded rod, 16-chain 29085 Chain shielding complete (does not include items 6 & 17) HARDWARE 29086 Chain plate assembly (does not 6698 3/8 NC Hex lock nut include items 6 &...
- Page 48 D80-2 & MD80-2 IDLER PULLEY ASSEMBLY PART DESCRIPTION 5586 Idler assembly complete 5/8 NC x 5 HHCS GR2 1/2 x 2 x 2 Square washer Seal retainer Felt seal 7016 Idler with bearings Needle bearing ----- * Grease fitting Needle bearing sleeve...
- Page 49 D80-2 HEIGHT ADJUSTMENT CRANK PART DESCRIPTION 15804 Height adjustment crank 11880 5/16 x 1-3/4 Spirol pin 10417 Height adjustment pivot block 1893 Thrust bearing 1863 1" SAE Flat washer 5895 Height adjustment pivot nut DB956A 195* Straight 1/8 pipe thread grease fitting...
- Page 50 D80-2 LAMINATED TIRE WITH HUB & AXLE 21 22 Part Part Used Description Used Description 9373 6.00 x 9 Laminated tire w/hub & 5849 3/4 NF Slotted hex nut axle 1256 * 3/16 x 1 Cotter pin 4984 Heavy hub with long axle...
- Page 51 D80-2 AIRCRAFT TIRE & HUB RIM F OR PNEUMAT IC TIRE AIRCRAFT TIRE & RIM SOL ID T IRE & R IM CD4574 HARDWARE PART DESCRIPTION PART DESCRIPTION 12080 Standard hub with long axle 838 *† 3/8 Standard lock washer...
- Page 52 MD80-2 TAILWHEEL ASSEMBLY CD3832 PART DESCRIPTION 15783 Tailwheel arm assembly (includes items 5 & 13) 15270 Tailwheel clevis 15591 Wheel hub with cups includes items 9 & 13) 4676 4.00 x 8 Rim and laminated tire 11011 1.5 x 1.00 x 1.5 Bronze bushing 15279 1.25 x 1.50 x .63 Sleeve Seal for 1-1/2 Shaft...
- Page 53 Pivot link ----- Cylinder (see page 54 ----- Crank (see page 49) Obtain locally D80-2 HYDRAULIC HOSE KIT & FITTINGS (OPTIONAL) PART DESCRIPTION 17601 1/4 x 108 Hydraulic hose kit and fittings 17628 1/4 NPT x 108 Hydraulic hose assembly...
- Page 54 D80-2 3-1/2 X 8" HYDRAULIC CYLINDER #10475 (OPTIONAL) DC1105 PART DESCRIPTION PART DESCRIPTION 1631 1 x 3-5/8 Clevis pin ----- Not available 11975 1/2 NPT Vent plug -or- 26340 Seal kit (includes 2A thru 2G) 23547 1/4 NPT Vent plug †...
- Page 55 D80-2 & MD80-2 LEAF MULCHER ASSEMBLY (OPTIONAL) Part Used Description 8757 Leaf mulcher complete 29089 Leaf mulcher adapter 1298 Front shield 15798 Right angle leaf mulcher 15797 Rear leaf mulcher 15799 Left side angle leaf mulcher 25475 1/2 x 1 Hex head cap screw GR5...
- Page 56 MD80-2 CATEGORY 2 HITCH PIN OPTIONS Part Used Description 13010 Category 2 hitch pin mounting 12275 Category 2 mounting pin, 6” long 1266 * 3/16 x 1-1/2 Cotter pin 13011 7/8 x 2-3/8 x 3/16 Flat washer 13012 7/8 NF Castle hex nut 7372 25/32 x 1 x 2 Sleeve * Obtain Locally...
-
Page 57: Dealer Check Lists
DEALER CHECK LISTS PRE-DELIVERY CHECK LIST DELIVERY CHECK LIST (DEALER’S RESPONSIBILITY) (DEALER’S RESPONSIBILITY) Inspect cutter thoroughly after assembly to be certain it ___ Show customer how to make adjustments. is set up properly before delivering it to customer. The ___ Explain importance of lubrication to customer and following check list is a reminder of points to inspect. -
Page 58: Bolt Torque Chart
BOLT TORQUE CHART Always tighten hardware to these values unless a different torque value or tightening procedure is listed for a specific application. Fasteners must always be replaced with the same grade as specified in the manual parts list. Always use the proper tool for tightening hardware: SAE for SAE hardware and Metric for metric hardware. Make sure fastener threads are clean and you start thread engagement properly. -
Page 59: Bolt Size Chart
BOLT SIZE CHART NOTE: Chart shows bolt thread sizes and corresponding head (wrench) sizes for standard SAE and metric bolts. SAE Bolt Thread Sizes 5/16 Metric Bolt Thread Sizes 10MM 12MM 14MM 16MM 18MM ABBREVIATIONS AG...............Agriculture MPa ............Mega Pascal ASABE ....American Society of Agricultural & N .............. -
Page 60: Index
Cutter Attaching Mounted Cutter to Tractor Tongue Installation for D80-2 Pull-Type Cutter Cutting Height Adjustment Wheel Yoke Installation for D80-2 Pull-Type Cutter For MD80 Mounted Cutter 15 With Tailwheel or Check Chains 15 Optional Check Chain Installation Optional Leaf Mulcher Installation... - Page 61 The limited warranty covers any defects in the material and/or workmanship. Following the proper, recommended installation by an authorized Woods Dealer and normal use of a Woods mounting and backhoe or loader, if a tractor incurs damage resulting from the attachment, Woods will cover the existing tractor warranty in the event the manufacturer voids its tractor warranty because of the attachment.
- Page 62 Woods logo are trademarks of Woods Equipment Company. All other trademarks, trade names, or service marks not owned by Woods Equipment Company that appear in this manual are the property of their respective companies or mark holders. Specifications subject to change without notice.
Need help?
Do you have a question about the D80-2 and is the answer not in the manual?
Questions and answers