Compaq AlphaServer ES40 Installation Manuals
Rackmount system
Hide thumbs
Also See for AlphaServer ES40:
- Service manual (444 pages) ,
- Upgrade installation (32 pages) ,
- Owner's manual (228 pages)

Related Manuals for Compaq AlphaServer ES40


Summary of Contents for Compaq AlphaServer ES40
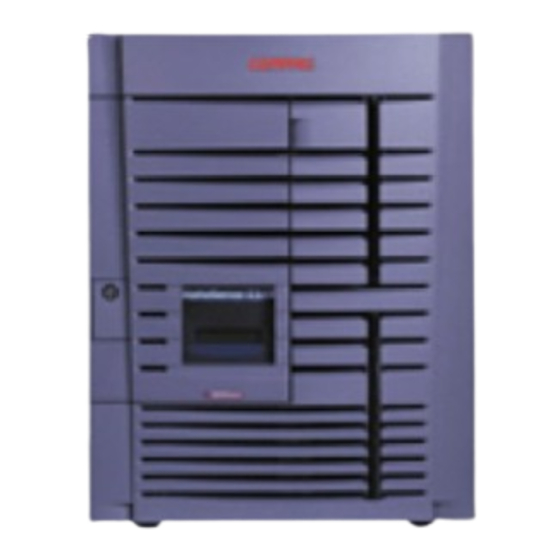
- Page 1 AlphaServer ES40 Rackmount System Installation Guide Order Number: EK–ES240–RG. B01 This guide is for service providers and self-maintenance customers who are installing an AlphaServer ES40 system into an M-Series cabinet.
- Page 2 The software may be used or copied only in accordance with the terms of the agreement. COMPAQ and the Compaq logo are registered in United States Patent and Trademark Office. Tru64 is a trademark of Compaq Computer Corporation. AlphaServer and OpenVMS are trademarks of Digital Equipment Corporation.
- Page 3 Attention! Ceci est un produit de Classe A. Dans un environnement domestique, ce produit risque de créer des interférences radioélectriques, il appartiendra alors à l'utilisateur de prendre les mesures spécifiques appropriées. FCC Notice: This equipment generates, uses, and may emit radio frequency energy. The equipment has been type tested and found to comply with the limits for a Class A digital device pursuant to Part 15 of FCC rules, which are designed to provide reasonable protection against such radio frequency interference.
-
Page 5: Table Of Contents
Contents Chapter 1 Installing a System into a Cabinet Shipment Contents Attaching Mounting Brackets to the System Marking the Cabinet Installation Area Preparing the Cabinet Attaching Slides Stabilizing the Cabinet Installing the System Installing the Interlock System Installing the Cable Management Arm 1.10 Dressing the Cables 1.11... - Page 7 Preface Intended Audience This manual is for service providers or self-maintenance customers who are installing a Compaq AlphaServer ES40 system into an AlphaServer M-Series cabinet. Document Structure This manual uses a structured documentation design. Topics are organized into small sections, consisting of two facing pages. Topics begin with an abstract that provides an overview of the section, followed by an illustration.
- Page 8 H9A15 M-Series documentation, listed in Table 1, to determine the mounting holes. The M-Series documentation also provides configuration rules. Additional information on the AlphaServer M-Series cabinets is available on the World Wide Web: http://www.digital.com/alphaserver/products/m-series.html Table 1 Compaq AlphaServer ES40 Documentation Title Order Number User Documentation Kit QZ-01BAA-GZ Owner’s Guide...
- Page 9 Chapter 1 Installing a System into a Cabinet This chapter gives procedures for installing an AlphaServer ES40 rackmount system into a cabinet. WARNING: The system is very heavy. Do not attempt to lift it manually. Use a material lift or other mechanical device to lift the system.
-
Page 10: Shipment Contents
Remove the accessories box, then lift the cardboard from the system. WARNING: Use a material lift or other mechanical device to move the system to the work area. Figure 1–1 Unpacking the System PK0249 Compaq AlphaServer ES40 Rackmount System Installation Guide... - Page 11 Check the contents of the accessories box against the list in Table 1–1. Table 1–1 Accessories List Part Number Quantity Accessories for Mounting Front bezel assembly 70-40129-01 Ball bearing slides 12-49881-01 1 set Cable management arm 70-40177-01 Pivot rod stabilizer bracket 74-48996-01 Actuator latch 74-60579-01...
-
Page 12: Attaching Mounting Brackets To The System
Attaching Mounting Brackets to the System To prepare the system for installation, attach mounting brackets. Figure 1–2 Attaching Mounting Brackets and Slides PK0241 Compaq AlphaServer ES40 Rackmount System Installation Guide... - Page 13 CAUTION: The slides are lightly greased. Handle them carefully to avoid soiling your clothing. 1. Attach a front mounting bracket along each edge, using one hex screw per bracket. Make sure that on the right side, the tab on the bracket faces up and on the left side, it faces down.
-
Page 14: Marking The Cabinet Installation Area
Marking the Cabinet Installation Area Use the cardboard template to mark the holes where you will be mounting the hardware. Figure 1–3 Hole Pattern 0.500 inch 0.625 inch 0.625 inch 0.500 inch PK0244 Compaq AlphaServer ES40 Rackmount System Installation Guide... - Page 15 The installation of the rackmount system requires 14 inches (8U) of vertical height in the cabinet. NOTE: If you do not have the cardboard template, see the AlphaServer M-Series cabinet documentation for hole numbers and instructions. Mark the Front of the Cabinet 1.
-
Page 16: Preparing The Cabinet
Preparing the Cabinet To prepare the cabinet, attach the slide brackets. Figure 1–4 Attaching Slide Brackets Back Front PK0242 Compaq AlphaServer ES40 Rackmount System Installation Guide... - Page 17 Front 1. Starting at the top marked hole, put two hex screws through the cabinet rail and the slide bracket . Fasten with a 5-hole nut bar using the second and third holes from the top. 2. Insert two cap screws through the slide bracket and the cabinet rail.
-
Page 18: Attaching Slides
Attaching Slides Attach slides to the cabinet. Figure 1–5 Attaching Slides PK0269 Compaq AlphaServer ES40 Rackmount System Installation Guide... - Page 19 The sliding segment of the slide has an access hole that provides access to three mounting holes in the stationary segment. You use two of the mounting holes. Front 1. Insert a cap screw through the access hole and the first (forward-most) mounting hole in the slide and through the hole in the slide bracket.
-
Page 20: Stabilizing The Cabinet
Stabilizing the Cabinet Stabilize the cabinet before installing the system. Figure 1–6 Activating the Stabilizer Foot PK0213 Compaq AlphaServer ES40 Rackmount System Installation Guide... - Page 21 The system is intended for installation in one of the following cabinets, which are equipped with a stabilizer bar: • H9A10 M-Series Medium Cabinet • H9A15 M-Series Tall Cabinet Pull out the stabilizer bar and extend the leveler foot to the floor before installing the system.
-
Page 22: Installing The System
Installing the System Use a material lift or other mechanical device to install the system. Figure 1–7 Installing the System PK0252 Compaq AlphaServer ES40 Rackmount System Installation Guide... - Page 23 WARNING: 1. Make sure that all other hardware in the cabinet is pushed in and attached. 2. The system is very heavy. Do not attempt to lift it manually. Use a material lift or other mechanical device. 1. Align the narrow segment of the slides attached to the system with the slides attached to the cabinet.
-
Page 24: Installing The Interlock System
The stabilizer bracket and actuator latch only work in a cabinet equipped with the interlock system. Figure 1–8 Installing the Interlock System PK0250 Compaq AlphaServer ES40 Rackmount System Installation Guide... - Page 25 CAUTION: If you are installing a cabinet that does not have the interlock system, you must ensure cabinet stability by installing rack stabilizing feet or by some other means. 1. At the back of the cabinet, release the vertical bar of the interlock system.
-
Page 26: Installing The Cable Management Arm
Installing the Cable Management Arm Attach the cable management arm to the rear rails of the cabinet. Figure 1–9 Installing the Cable Management Arm PK0248 Compaq AlphaServer ES40 Rackmount System Installation Guide... - Page 27 NOTE: Be sure that you have attached all cables to the rear of the unit before installing the cable management arm. 1. Attach all cables to the rear of the unit. 2. Start two hex screws into the two remaining marked holes on the left cabinet rail and into the 8-hole nut bar 3.
-
Page 28: Dressing The Cables
1.10 Dressing the Cables Dress the cables through the cable clamps on the cable retractor assembly at the rear of the system. Figure 1–10 Dressing the Cables PK0251 Compaq AlphaServer ES40 Rackmount System Installation Guide... - Page 29 1. Dress the cables through the cable clamps or tie wrap them to the cable retractor assembly 2. Attach all cables to the member of the cable management arm that is attached to the system CAUTION: Failure to attach the cables to the attached member of the management arm can cause cables to become disconnected.
-
Page 30: Attaching The Front Bezel
1.11 Attaching the Front Bezel To complete the installation, attach the front bezel. Figure 1–11 Attaching the Front Bezel PK0243 Compaq AlphaServer ES40 Rackmount System Installation Guide... - Page 31 1. Attach the system to the cabinet rails with a hex screw on each side. 2. If your system has a second disk cage, remove the filler bezel from the front bezel 3. Align the front bezel with the front of the system and snap it into place. Installing a System into a Cabinet...
Need help?
Do you have a question about the AlphaServer ES40 and is the answer not in the manual?
Questions and answers