Dexcom G4 PLATINUM Quick Start Manual
Continuous glucose monitoring system
Hide thumbs
Also See for G4 PLATINUM:
- User manual (234 pages) ,
- Quick start manual (230 pages) ,
- User manual (125 pages)
Advertisement
Quick Links
CONTINUOUS GLUCOSE MONITORING SYSTEM
7
Simple Steps
to Start
Quick Start Guide
Congratulations on making the Dexcom G4 PLATINUM
Continuous Glucose Monitoring (CGM) System a part of your life!
When you use the Dexcom G4 PLATINUM CGM System, you will
see real-time continuous sensor glucose readings every 5 minutes
for up to 7 days. These readings can help you find trends and
patterns in your glucose levels, allowing you to see where your
glucose levels have been, which direction they are headed, and
how fast they are rising or falling.
Before you begin and anytime you have questions, review the
User's Guide and tutorial disc from your Dexcom G4 PLATINUM
CGM System Receiver Kit.
This guide has seven simple steps to set up and use your Dexcom
G4 PLATINUM CGM System. If you need help with your
system, call 1.877.339.2664 or 1.858.200.0200 at any time.
Step 1
Getting to Know Your CGM Device
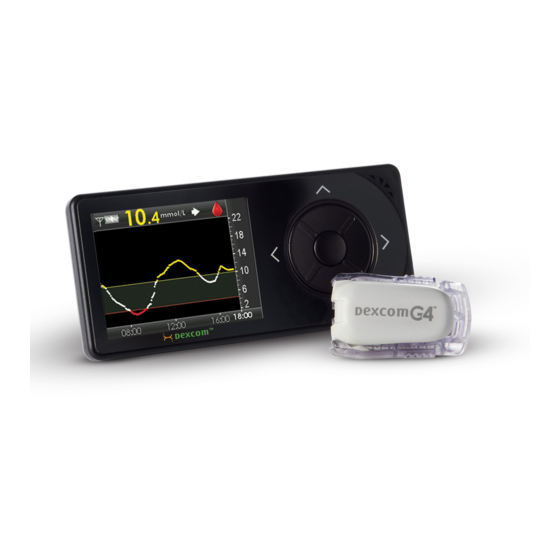
Your Dexcom G4 PLATINUM Continuous Glucose Monitoring System is
made up of 3 components: the receiver, the transmitter, and the sensor.
Dexcom G4 PLATINUM Receiver
UP button
Status area
RIGHT
High
button
Alert
SELECT
button
Low
Alert
LEFT
button
DOWN
button
The receiver is the small hand-held device that looks like a cell phone. It
shows your sensor glucose readings, trend graph, direction and rate of
change arrow.
Press the
UP
and DOWN buttons to scroll through trend screens,
highlight menu items, or set values.
Press the SELECT button to turn the receiver on or select the highlighted
option.
Press the LEFT button to go back to the last item or screen.
Press the RIGHT button to highlight the next item.
• A red line across the trend screen shows the low alert level.
• A yellow line across the trend screen shows the high alert level.
Dexcom G4 PLATINUM Transmitter (DO NOT THROW AWAY!)
The transmitter is the grey "chip" that snaps into your sensor pod.
Keep your transmitter within 20 feet of your receiver without obstruction
even during the 2 hour startup period.
The transmitter battery will last at least 6 months.
The transmitter Low Battery Screen will first show
when there is about 1 week of battery life left.
Replace your transmitter as soon as possible after
you see this screen.
Transmitter Low Battery
screen
Dexcom G4 PLATINUM Sensor Applicator (Disposable)
Plunger
Safety lock
Applicator barrel
(Contains small
introducer needle
Collar
and sensor)
Transmitter
Sensor pod
latch
Release
tab
The sensor is the piece that is inserted and
worn on your belly for the whole session (up to
7 days). If you have a problem with a sensor
session, keep the sensor until you speak with
Dexcom Technical Support.
Sensor
Step 2
Setting Up Your Device
Activating Your Transmitter:
Take the transmitter out of its tray and wait 10
minutes for it to "turn on."
Transmitter in box
Charging Your Receiver:
Charge the Dexcom G4 PLATINUM Receiver fully
before you begin. A full charge can take up to 5
hours and will last about 3 days. Open the USB
port cover to charge your receiver.
Keep the USB port cover closed when receiver is
not being charged.
Receiver USB
There are two ways you can charge your
port cover
receiver:
a. Plug the USB cable into the G4 AC
power adapter. Then plug this adapter
into an AC power outlet (such as a wall
outlet), and plug the other end of the
cable into your receiver.
OR
USB cable plugged into
b. P lug the USB cable into your computer,
receiver
and plug the other end of the c able into
your receiver. You must install Dexcom
Studio software first.
T he charging screen will appear first. After a few seconds, the battery
charging symbol
will show in the upper left corner of the 3 hour
trend graph (home screen). When the receiver is fully charged, the
charge symbol will be completely gray.
NOTE: You will keep getting sensor glucose readings while the
receiver is charging during a sensor session. A Low Battery
warning on the receiver will alert you when it needs to be charged.
Setup Wizard:
Press the SELECT button to turn the receiver on. The Setup Wizard will
walk you through the steps to set your Time/Date, Transmitter ID and
High/Low Alerts (see below).
The Setup Wizard will only start when you set up your Dexcom G4
PLATINUM receiver for the first time.
Setting the Time/Date:
a. Press the
UP
and
DOWN
buttons to enter each
number or value.
b. Press the
RIGHT
or
SELECT
button to move to the
next space.
c. A
fter setting the AM/PM, press the SELECT
button
Setting Time/Date
to accept changes.
screen
Setting Your Transmitter ID:
Your transmitter ID makes it possible for your transmitter
and receiver to communicate with each other.
a. F ind the transmitter ID on the back of your
transmitter.
The information on the
back of your transmitter
b. Press the
UP
and
DOWN
buttons to enter the
may not exactly match
letter or number in each space.
the picture above.
c. Press the
RIGHT
or
SELECT
button to move to
the next space.
d. A
fter entering the last space, press the SELECT
button to accept changes.
NOTE: You can only enter your transmitter ID when
you are not in an active sensor session.
Setting Transmitter
ID screen
Setting Your High/Low Glucose Alert Levels:
The low and high alert level defaults are 80 mg/dL and 200
mg/dL but can be changed or turned off.
a. Press the
UP
and DOWN buttons to change y our low
alert level between 60-100 mg/dL.
b. Press the
SELECT
to accept your level.
c. R epeat steps a and b to set your high alert level
Setting Low Alert screen
between 120-400 mg/dL.
NOTE: There is also a non-adjustable 55 mg/dL
low alarm.
Your receiver will show the 3 hour trend graph (home
screen) after you finish the Setup Wizard.
Setting High Alert screen
Step 3
Setting Your Alert Profile
You can choose Dexcom G4 PLATINUM "alert profiles" with different sounds
and volumes to fit your needs.
Your alert profile options are:
" Vibrate" can be used when you want to silence the receiver and
be alerted by vibration. Under this profile the fixed low alarm at 55
mg/dL will make a sound. It will alert you as a vibration first, followed
by audible beeps 5 minutes later if not confirmed.
"Soft" can be used when you want your alert to be discreet. This sets
all the alerts and alarms to lower volume beeps.
"Normal" is the default. This sets all the alerts and alarms to higher
volume beeps.
"Attentive" can be used when you want your alert to be noticeable.
This sets all the alerts and alarms to loud and with distinctive
melodies.
" Hyporepeat" can be used when you want extra alerts for severe
low sensor glucose readings. This profile is like the normal profile,
but it will keep repeating the fixed low alarm every 5 seconds until
confirmed or until your sensor glucose reading rises above 55 mg/dL.
Use the "Try It" feature under the Profiles option in the Main
Menu to hear an example of each alert profile.
Follow these steps to set your alert profile:
a. F
rom any trend graph, press the SELECT
button to
Main Menu, Try It
get to the Main Menu.
highlighted
b. Press the DOWN button to highlight Profiles. Press
the
SELECT
button.
c. Press the
UP
and DOWN buttons to highlight the alert profile you want
to use.
d. Press the SELECT button. A will appear to the right of the
profile you chose.
NOTE: No matter what profile you set, all alerts and alarms will notify
you by vibrating first. There will be no beep if you confirm the alert or
alarm after the first vibration.
Step 4
Inserting the Sensor
Before you begin, make sure you have your transmitter, receiver, a
sensor and alcohol wipes. Wash your hands thoroughly, and dry them.
a. Choose a site on your belly that is at least 3 inches from
your insulin pump infusion set or injection site and out of the
way of your waistband. Avoid areas that are likely to be
bumped or pushed or areas of your skin with scarring,
tattoos or irritation.
b. Remove the sensor from its packaging.
c. Clean your skin at the sensor placement site
with an alcohol wipe. Let dry.
d. R emove the adhesive backing from the sensor
Step d
pod one half at a time.
e. P lace the sensor horizontally, NOT vertically,
on your skin. Move your fingers around the
adhesive patch to secure the tape to your skin.
Step e
f.
Hold the applicator, and pull the
safety lock straight out away from
the applicator, in the direction of
the arrows in the picture. Save the
Safety Lock to help you remove
the transmitter at the end of your
Step f
sensor session.
g. P lace the fingers of one hand at the edge
of the white adhesive (at the opposite side of the sensor from the
transmitter latch). You may pinch up on your skin
using this hand.
h. W hile still pinching, use your other
hand to place two fingers above
the collar (see picture). Place your
thumb on the white plunger and
push down completely. You should
Step h
hear 2 clicks.
i. M ove your 2 fingers from above the collar to
" 2 CLICKS"
below the collar. Keep your thumb lightly on
top of the white plunger and pull the collar back
towards your thumb until you hear 2 "clicks" or
cannot pull back any more.
Step i
j. M ake sure the transmitter latch is down
(against your body). Squeeze the center of the
ribbed tabs on the sides of the sensor pod.
Rock the applicator barrel forward and out
away from your body.
Step j
Attaching Your Transmitter:
a. Clean the back of your transmitter with an alcohol wipe. Let dry.
b. Place the transmitter in the
Transmitter Latch
sensor pod (with the flat side
Transmitter Installed
down, and thinner side away
from the transmitter latch).
c. Place one finger on the
transmitter to keep it in place.
With your other hand, pull the
transmitter latch up and
forward until you hear 2 clicks.
d. Hold the sides of your sensor pod with
one hand. Remove the the transmitter
latch with the other hand by quickly
twisting off the latch away from your
body.
Twist Transmitter
Latch Up or Down
"2 CLICKS"
Advertisement

Subscribe to Our Youtube Channel
Related Manuals for Dexcom G4 PLATINUM


Summary of Contents for Dexcom G4 PLATINUM
- Page 1 NOTE: No matter what profile you set, all alerts and alarms will notify you by vibrating first. There will be no beep if you confirm the alert or The Setup Wizard will only start when you set up your Dexcom G4 alarm after the first vibration.
- Page 2 Dexcom G4 PLATINUM System provide additional information to help with these decisions. Advanced Features of the Dexcom G4 Sensor Troubleshooting Is it okay if my Dexcom G4 PLATINUM CGM sensor glucose readings and PLATINUM CGM System Refer to your User’s Guide or contact Dexcom Technical Support fingerstick blood glucose values don’t match exactly? at 1.877.339.2664 or 1.858.200.0200 for any unresolved The Dexcom G4 PLATINUM System has advanced features and alerts to Yes. Your sensor glucose readings are meant to be used for trending only. Your blood glucose...
Need help?
Do you have a question about the G4 PLATINUM and is the answer not in the manual?
Questions and answers