KROHNE OPTIWAVE 1010 Handbook
Radar (fmcw) level transmitter for bypass chambers and magnetic level indicators (bm 26 advanced)
Hide thumbs
Also See for OPTIWAVE 1010:
- Supplementary instructions manual (24 pages) ,
- Quick start manual (28 pages)
Table of Contents
Advertisement
Quick Links
Advertisement
Table of Contents

Related Manuals for KROHNE OPTIWAVE 1010


Summary of Contents for KROHNE OPTIWAVE 1010
- Page 1 OPTIWAVE 1010 OPTIWAVE 1010 OPTIWAVE 1010 OPTIWAVE 1010 Handbook Handbook Handbook Handbook Radar (FMCW) Level Transmitter for bypass chambers and magnetic level indicators (BM 26 Advanced) © KROHNE 10/2016 - 4003537403 - MA OPTIWAVE 1010 R03 en...
- Page 2 All rights reserved. It is prohibited to reproduce this documentation, or any part thereof, without the prior written authorisation of KROHNE Messtechnik GmbH. Subject to change without notice. Copyright 2016 by KROHNE Messtechnik GmbH - Ludwig-Krohne-Str. 5 - 47058 Duisburg (Germany) www.krohne.com 10/2016 - 4003537403 - MA OPTIWAVE 1010 R03 en...
-
Page 3: Table Of Contents
4.3.1 Non-Ex devices ........................28 4.3.2 Devices for hazardous locations................... 28 4.4 Protection category ......................29 4.5 Networks ........................30 4.5.1 General information......................30 4.5.2 Point-to-point connection ..................... 30 4.5.3 Multi-drop networks ......................31 10/2016 - 4003537403 - MA OPTIWAVE 1010 R03 en www.krohne.com... - Page 4 7.4 Availability of services ....................66 7.5 Returning the device to the manufacturer..............66 7.5.1 General information......................66 7.5.2 Form (for copying) to accompany a returned device............67 7.6 Disposal .......................... 67 www.krohne.com 10/2016 - 4003537403 - MA OPTIWAVE 1010 R03 en...
- Page 5 9.7.1 Overview Basic-DD menu tree (positions in menu tree)............81 9.7.2 Basic-DD menu tree (details for settings)................81 10 Appendix 10.1 Order code ........................83 10.2 Spare parts ........................86 10.3 Accessories........................87 10.4 Glossary ........................88 11 Notes 10/2016 - 4003537403 - MA OPTIWAVE 1010 R03 en www.krohne.com...
-
Page 6: Safety Instructions
This radar level transmitter can only be used if it is correctly installed and aligned on a bypass chamber. The bypass chamber must be metallic and electrically conductive. www.krohne.com 10/2016 - 4003537403 - MA OPTIWAVE 1010 R03 en... -
Page 7: Certification
1.4 Electromagnetic compatibility This radar level transmitter meets the requirements of the harmonized standard EN 61326-1: • Emissions: class A and class B • Immunity: basic, industrial and controlled environments 10/2016 - 4003537403 - MA OPTIWAVE 1010 R03 en www.krohne.com... -
Page 8: Radio Approvals
• whenever possible, mounting of the TLPR equipment shall be on top of the tank structure with the orientation of the antenna to point in a downward direction; • installation and maintenance of the TLPR equipment shall be performed by professionally trained individuals only. www.krohne.com 10/2016 - 4003537403 - MA OPTIWAVE 1010 R03 en... -
Page 9: U.s.a
2. This device must accept any interference received, including interference which may cause un- desired operation. Changes or modifications made to this equipment not expressly approved by KROHNE may void the FCC authorization to operate this equipment. This equipment has been tested and found to comply with the limits for a Class A digital device, pursuant to Part 15 of the FCC Rules. -
Page 10: Canada
2. This device must accept any interference received, including interference which may cause un- desired operation. Changes or modifications made to this equipment not expressly approved by KROHNE may void the IC authorization to operate this equipment. This legal information is shown on the device nameplate. -
Page 11: Safety Instructions From The Manufacturer
The manufacturer reserves the right to alter the content of its documents, including this disclaimer in any way, at any time, for any reason, without prior notification, and will not be liable in any way for possible consequences of such changes. 10/2016 - 4003537403 - MA OPTIWAVE 1010 R03 en www.krohne.com... -
Page 12: Product Liability And Warranty
This document is provided to help you establish operating conditions, which will permit safe and efficient use of this device. Special considerations and precautions are also described in the document, which appear in the form of icons as shown below. www.krohne.com 10/2016 - 4003537403 - MA OPTIWAVE 1010 R03 en... -
Page 13: Warnings And Symbols Used
In general, devices from the manufacturer may only be installed, commissioned, operated and maintained by properly trained and authorized personnel. This document is provided to help you establish operating conditions, which will permit safe and efficient use of this device. 10/2016 - 4003537403 - MA OPTIWAVE 1010 R03 en www.krohne.com... -
Page 14: Device Description
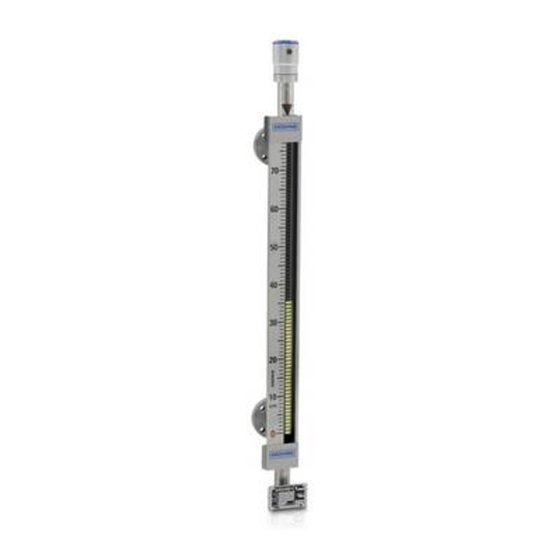
3 DVD-ROM (including Handbook, Quick Start, Technical Datasheet and related software) 2.2 Device description OPTIWAVE 1010 is an FMCW radar designed for use with the BM 26 Advanced (a magnetic level indicator or MLI) or a bypass chamber. If the device is used with an MLI, it measures the distance to the float. -
Page 15: Visual Check
16) INFORMATION! Look at the device nameplate to ensure that the device is delivered according to your order. Check for the correct supply voltage printed on the nameplate. 10/2016 - 4003537403 - MA OPTIWAVE 1010 R03 en www.krohne.com... -
Page 16: Nameplates
4 Degree of ingress protection (according to EN 60529 / IEC 60529) 5 Customer tag number 6 Date of manufacture 7 Serial number 8 Type code (defined in order) 9 Model name and number 10 Company name and address www.krohne.com 10/2016 - 4003537403 - MA OPTIWAVE 1010 R03 en... -
Page 17: Installation
2 Put the device on its side. We recommend that you use the packaging in which it was delivered. 3 Storage temperature range: -40...+85°C / -40...+185°F • Store the device in a dry and dust-free location. • Store the device in its original packing. 10/2016 - 4003537403 - MA OPTIWAVE 1010 R03 en www.krohne.com... -
Page 18: Transport
Obey the precautions that follow to make sure that the device is correctly installed. • Make sure that there is sufficient space on all sides. • Protect the signal converter from direct sunlight. • Do not subject the signal converter to heavy vibrations. www.krohne.com 10/2016 - 4003537403 - MA OPTIWAVE 1010 R03 en... -
Page 19: Pressure And Temperature Ranges
2 Ambient temperature Non-Ex devices: -40...+85°C / -40...+185°F Ex devices: see supplementary operating instructions 3 Process pressure Depends on the type of seal and process connection. Refer to the table that follows. 10/2016 - 4003537403 - MA OPTIWAVE 1010 R03 en www.krohne.com... - Page 20 Bypass chamber Process pressure temperature [°C] [°F] [barg] [psig] Metaglas® FKM/FPM with without -40...+120 -40...+248 -1...40 -14.5...580 Metaglas® Kalrez® 6375 without -20...+120 -4...+248 with Metaglas® EPDM with without -40...+120 -40...+248 Metaglas® www.krohne.com 10/2016 - 4003537403 - MA OPTIWAVE 1010 R03 en...
- Page 21 7 Device with aluminium housing and distance piece The maximum ambient temperature for non-Ex devices is +85°C / +185°F. The process connection temperature must agree with the temperature limits of the gasket material. 10/2016 - 4003537403 - MA OPTIWAVE 1010 R03 en www.krohne.com...
-
Page 22: Recommended Mounting Position
3 Distance to top process connection (bypass chamber) = minimum distance (refer to the "basic parameters" menu in the DTM) 4 Distance to bottom process connection (bypass chamber) = maximum distance (refer to the "basic parameters" menu in the DTM) www.krohne.com 10/2016 - 4003537403 - MA OPTIWAVE 1010 R03 en... -
Page 23: Mounting Restrictions
1 Weather protection cover (with an R-clip to hold the cover on the clamp) 2 Device 3 Weather protection clamp (2 parts) 4 10 mm socket wrench (not supplied) 5 2 locking nuts 10/2016 - 4003537403 - MA OPTIWAVE 1010 R03 en www.krohne.com... - Page 24 1 Put the weather protection clamp around the top of the device. Attach the two locking nuts to the threads on the weather protection clamp. Tighten the locking nuts with a 10 mm socket www.krohne.com 10/2016 - 4003537403 - MA OPTIWAVE 1010 R03 en...
-
Page 25: How To Open The Weather Protection
Do not remove the safety cable. 1 Remove the R-clip from the hole at the front of the weather protection cover. 2 Remove the weather protection cover. End of the procedure. 10/2016 - 4003537403 - MA OPTIWAVE 1010 R03 en www.krohne.com... -
Page 26: Electrical Connections
Electrical power to the output terminal energizes the device. The output terminal is also used for HART communication. ® CAUTION! Use the applicable electrical cables with the cable glands. Attach the ferrite choke (supplied with the device) to the electrical cable to prevent parasitic signals. www.krohne.com 10/2016 - 4003537403 - MA OPTIWAVE 1010 R03 en... - Page 27 Equipment needed: • Small slotted tip screwdriver (not supplied) • OPTIWAVE 1010 level transmitter attached to a BM 26 Advanced bypass level indicator • Ferrite choke. This part is supplied in a transparent plastic bag in the housing. • Electrical cable (not supplied) Procedure 1 Remove the housing cover.
-
Page 28: Electrical Connection For Current Output
(ATEX, IECEx etc.). You can find this documentation on the DVD-ROM delivered with the device or it can be downloaded free of charge from the website (Download Center). www.krohne.com 10/2016 - 4003537403 - MA OPTIWAVE 1010 R03 en... -
Page 29: Protection Category
• Make sure that the electrical cable agrees with the national electrical code. • Make a loop of cable in front of the device 1 to prevent leakage into the housing. • Tighten the cable feedthrough 2. 10/2016 - 4003537403 - MA OPTIWAVE 1010 R03 en www.krohne.com... -
Page 30: Networks
Figure 4-5: Point-to-point connection (non-Ex) 1 Address of the device (0 for point-to-point connection) 2 4...20 mA + HART® 3 Resistor for HART® communication 4 Power supply 5 HART® converter 6 HART® communication software www.krohne.com 10/2016 - 4003537403 - MA OPTIWAVE 1010 R03 en... -
Page 31: Multi-Drop Networks
1 Address of the device (each device must have a different address in multidrop networks) 2 4 mA + HART® 3 Resistor for HART® communication 4 Power supply 5 HART® converter 6 HART® communication software 10/2016 - 4003537403 - MA OPTIWAVE 1010 R03 en www.krohne.com... -
Page 32: Start-Up
For more data about how to use the DTM in PACTware, refer to on page 41. For more data about the menu tree for the Basic-DD, AMS and PDM, refer to Description of HART interface on page 78. www.krohne.com 10/2016 - 4003537403 - MA OPTIWAVE 1010 R03 en... -
Page 33: Remote Communication With Pactware
Measurements Measurements 6 DTM menu list (Login/Logout, Import/Export, Information, Basic parameters, Current output, Application, HART, Ser- vice, DTM settings) 7 Project Project Project Project window 8 Data for device identification 10/2016 - 4003537403 - MA OPTIWAVE 1010 R03 en www.krohne.com... -
Page 34: Software Installation
1 Install Microsoft® .NET Framework 2.0. 2 Install PACTware™ 4.1 or later version. 3 Install the OPTIWAVE 1010 DTM on your workstation or your portable computer. Follow the instructions in the Installation wizard. 4 Plug the HART modem into your computer (Serial or USB HART® modem). If you are using a USB®... -
Page 35: Measurements Window
Device > Measured value > Measurements • Open the window from the Project Project Project Project window. Right click on the device (OPTIWAVE 1010 OPTIWAVE 1010 OPTIWAVE 1010) in the OPTIWAVE 1010 project list, then click on Measured value > Measurements Measured value >... -
Page 36: Analysis Window
Device > Measured value > Analysis. • Open the window from the Project Project Project Project window. Right click on the device (OPTIWAVE 1010 OPTIWAVE 1010 OPTIWAVE 1010) in the OPTIWAVE 1010 project list, then click on Measured value > Analysis Measured value >... - Page 37 • Make a selection from the available positions on the screen. • Release the mouse button. End of the procedure. The graph will appear in its new position. 10/2016 - 4003537403 - MA OPTIWAVE 1010 R03 en www.krohne.com...
-
Page 38: Diagnosis Window
• Open the window from the main toolbar. Click on Device > Diagnosis Device > Diagnosis Device > Diagnosis Device > Diagnosis. • Open the window from the Project Project window. Right click on the device (OPTIWAVE 1010 OPTIWAVE 1010) in the Project Project OPTIWAVE 1010... - Page 39 1 Summary: status of the device since the last check. Click on the list for more data about an applicable error 2 Data about the applicable error and the recommended solution 3 Number of errors found by the device since the last check 4 Button to update the device status 10/2016 - 4003537403 - MA OPTIWAVE 1010 R03 en www.krohne.com...
-
Page 40: Simulation Window
Device > Simulation. Device > Simulation Device > Simulation • Open the window from the Project Project Project Project window. Right click on the device (OPTIWAVE 1010 OPTIWAVE 1010 OPTIWAVE 1010) in the OPTIWAVE 1010 project list, then click on Simulation Simulation Simulation Simulation. -
Page 41: Operation
• Click on "OK" to save changes or "Cancel" to cancel the new configuration. • Double click on the "OPTIWAVE 1010" item in the Device Catalog window. This step will add the device DTM to the project structure in the Project pane. -
Page 42: How To Load Settings From The Device To Pactware
Figure 6-2: Click on the "Load from Device" icon in the main toolbar • Click on this icon (you can find this icon below the main toolbar). End of the procedure. www.krohne.com 10/2016 - 4003537403 - MA OPTIWAVE 1010 R03 en... - Page 43 OPERATION OPTIWAVE 1010 Procedure 3: Right click on the "OPTIWAVE 1010" element in the Project window Figure 6-3: Right click on the "OPTIWAVE 1010" element in the Project window • Right click on the "OPTIWAVE 1010" element in the Project window.
-
Page 44: How To Store Settings To The Device From Pactware
Figure 6-5: Click on the "Store to device" icon in the main toolbar • Click on this icon (you can find this icon below the main toolbar). End of the procedure. www.krohne.com 10/2016 - 4003537403 - MA OPTIWAVE 1010 R03 en... - Page 45 OPERATION OPTIWAVE 1010 Procedure 3: Right click on the "OPTIWAVE 1010" element in the Project window Figure 6-6: Right click on the "OPTIWAVE 1010" element in the Project window • Right click on the "OPTIWAVE 1010" element in the Project window.
-
Page 46: Menu Overview
DTM settings DTM settings Use this menu to change how the status display shows data at the top of the DTM DTM settings DTM settings window. www.krohne.com 10/2016 - 4003537403 - MA OPTIWAVE 1010 R03 en... -
Page 47: How To Change Device Settings
If the value is too large or too small, a red exclamation mark is shown adjacent to the incorrect value: Figure 6-9: Exclamation mark (!): the value is too large or too small 10/2016 - 4003537403 - MA OPTIWAVE 1010 R03 en www.krohne.com... -
Page 48: Data About Parameters (Online Help)
Right click on the text for data about parameters. A tooltip shows the default value, data set value (new value), minimum value and maximum value of the menu item. Figure 6-10: Data about parameters – values www.krohne.com 10/2016 - 4003537403 - MA OPTIWAVE 1010 R03 en... -
Page 49: Device Settings
Figure 6-11: Login/Logout menu Procedure: How to log in as a supervisor • (a) Double click on the "OPTIWAVE 1010" element in the project structure (Project pane) or (b) Right click on "OPTIWAVE 1010" element in the project structure (Project pane) and select "Parameter"... -
Page 50: Import / Export
OPERATION OPTIWAVE 1010 • (a) Double click on the "OPTIWAVE 1010" element in the project structure (Project pane) or (b) Right click on "OPTIWAVE 1010" element in the project structure (Project pane) and select "Parameter" in the drop-down list box. - Page 51 • Click on the "tick" button at the bottom of the window to complete the procedure. INFORMATION! Only approved personnel can use the service password. For more data, please speak to your supplier. 10/2016 - 4003537403 - MA OPTIWAVE 1010 R03 en www.krohne.com...
-
Page 52: Information
• Firmware version • Configuration changed counter • Software revision • Hardware revision • Complete device serial number • Electronic serial number • Electronics and housing serial number • Sales order number www.krohne.com 10/2016 - 4003537403 - MA OPTIWAVE 1010 R03 en... -
Page 53: Basic Parameters
(4) Tube internal diameter (4) Tube internal diameter This value is set at the factory and must not be changed. (4) Tube internal diameter (4) Tube internal diameter Figure 6-15: Basic parameters menu 10/2016 - 4003537403 - MA OPTIWAVE 1010 R03 en www.krohne.com... -
Page 54: Current Output
0 s, 10 s, 20 s, 30 s, delay error value. The error value shows that there is a 1 min, 2 min, 5 min, measurement error. min= minutes and s= seconds. 10 min, 15 min www.krohne.com 10/2016 - 4003537403 - MA OPTIWAVE 1010 R03 en... - Page 55 "distance". The electrical current value (20 mA) of the end point is set in Output range Output range Output range Output range in the Current output Current output Current output Current output menu. 10/2016 - 4003537403 - MA OPTIWAVE 1010 R03 en www.krohne.com...
-
Page 56: Application
If this function is not in operation, the device looks for the largest signal at a distance larger than the minimum distance. www.krohne.com 10/2016 - 4003537403 - MA OPTIWAVE 1010 R03 en... -
Page 57: Application: Float Offset Calculation
Ti L=292 (length is 292 mm / 11.50¨) MZ 4003777805 0.81...0.98 50.57...61.18 316L L=297 (length is 297 mm / 11.69¨) MZ 4003777804 0.98...1.20 61.18...74.91 INFORMATION! Enter the density value in kg/L only. 10/2016 - 4003537403 - MA OPTIWAVE 1010 R03 en www.krohne.com... -
Page 58: Hart
"Parameters" window and change the length unit to ft (feet) ft (feet) ft (feet) ft (feet) or in (inches) in (inches) in (inches). in (inches) Figure 6-19: HART menu 1 Tag name 2 Length unit www.krohne.com 10/2016 - 4003537403 - MA OPTIWAVE 1010 R03 en... -
Page 59: Dtm Settings
"disabled", the status display will show a gray screen. Update interval This menu item changes the interval between device min-max: 30 s status checks. 15…3600 s s = seconds 10/2016 - 4003537403 - MA OPTIWAVE 1010 R03 en www.krohne.com... -
Page 60: Status And Error Messages
Peak lost in tank bottom the same time as the error "no Information Peak lost in blocking distance measuring value". Error handling For data on errors, refer to on page 61. www.krohne.com 10/2016 - 4003537403 - MA OPTIWAVE 1010 R03 en... -
Page 61: Error Handling
If necessary, install the device signals received by the antenna. The correctly or speak to the supplier. measurement is not correct. The device will automatically increase this window to find the correct signal. 10/2016 - 4003537403 - MA OPTIWAVE 1010 R03 en www.krohne.com... - Page 62 There is a risk that the product will blocking distance. overflow and/or cover the device. 1 This error message does not have an effect on the current output signal www.krohne.com 10/2016 - 4003537403 - MA OPTIWAVE 1010 R03 en...
-
Page 63: Service
64. For more data on how to prepare the device before you send it back to the supplier, refer to Returning the device to the manufacturer on page 66. 10/2016 - 4003537403 - MA OPTIWAVE 1010 R03 en www.krohne.com... -
Page 64: How To Replace The Signal Converter
7.2.2 How to replace the signal converter Equipment needed: • 5 mm Allen wrench (not supplied) • OPTIWAVE 1010 level transmitter attached to a BM 26 Advanced bypass level indicator Spare parts • New housing and electronics block. For more data, refer to on page 86. -
Page 65: Spare Parts Availability
3 years after delivery of the last production run for the device. This regulation only applies to spare parts which are subject to wear and tear under normal operating conditions. 10/2016 - 4003537403 - MA OPTIWAVE 1010 R03 en www.krohne.com... -
Page 66: Availability Of Services
• such dangerous substances, • to enclose a certificate with the device confirming that is safe to handle and stating the product used. www.krohne.com 10/2016 - 4003537403 - MA OPTIWAVE 1010 R03 en... -
Page 67: Form (For Copying) To Accompany A Returned Device
The user must dispose of the WEEE to a designated collection point for the recycling of WEEE or send them back to our local organisation or authorised representative. 10/2016 - 4003537403 - MA OPTIWAVE 1010 R03 en www.krohne.com... -
Page 68: Technical Data
4 Distance to product surface, where change in frequency is proportional to distance 5 Differential time delay, Δt 6 Differential frequency, Δf 7 Frequency transmitted 8 Frequency received 9 Frequency 10 Time www.krohne.com 10/2016 - 4003537403 - MA OPTIWAVE 1010 R03 en... -
Page 69: Technical Data
A special float with a target is installed in the bypass chamber and used to calibrate the device Operating conditions Temperature Temperature Temperature Temperature Ambient temperature -40…+85°C / -40…+185°F Ex: see supplementary operating instructions or approval certificates Storage temperature -40…+85°C / -40…+185°F 10/2016 - 4003537403 - MA OPTIWAVE 1010 R03 en www.krohne.com... - Page 70 Stainless steel version: Metaglas® process seal with O-ring Cable gland Standard: none Options: Plastic (Non-Ex: black, Ex ia-approved: blue); nickel-plated brass; stainless steel Weather protection (option) Stainless steel (1.4404 / 316L) www.krohne.com 10/2016 - 4003537403 - MA OPTIWAVE 1010 R03 en...
- Page 71 IECEx KIW 15.0012 X Ex ia IIIC T120°C Db (stainless steel housing only); Ex db IIC T6...T4 Ga/Gb (stainless steel housing only); Ex tb IIIC T120°C Db (stainless steel housing only) 10/2016 - 4003537403 - MA OPTIWAVE 1010 R03 en www.krohne.com...
- Page 72 4 HART® is a registered trademark of the HART Communication Foundation 5 Tx = T6...T4 (without a distance piece) or T6...T3 (with a distance piece) www.krohne.com 10/2016 - 4003537403 - MA OPTIWAVE 1010 R03 en...
-
Page 73: Measuring Accuracy
X: Distance from the top process connection [inches] Y: Accuracy [+yy¨ / -yy¨] 1: 7.9¨ 2: Float offset. Refer to the "Basic parameters" menu in the DTM for the float offset value. 10/2016 - 4003537403 - MA OPTIWAVE 1010 R03 en www.krohne.com... -
Page 74: Minimum Power Supply Voltage
2: Float offset. Refer to the "Basic parameters" menu in the DTM for the float offset value. 3: 7.9¨ 8.4 Minimum power supply voltage Use these graphs to find the minimum power supply voltage for a given current output load. www.krohne.com 10/2016 - 4003537403 - MA OPTIWAVE 1010 R03 en... - Page 75 Figure 8-7: Minimum power supply voltage for an output of 22 mA at the terminal (devices with a Hazardous Location approval (Ex ia)) X: Power supply U [VDC] Y: Current output load R [Ω] 10/2016 - 4003537403 - MA OPTIWAVE 1010 R03 en www.krohne.com...
-
Page 76: Dimensions And Weights
0.55 0.55 0.55 f f f f 42.4 1.67 42.4 1.67 42.4 1.67 g g g g 3.54 3.54 3.54 h h h h 64.5 2.54 6.47 2.36 www.krohne.com 10/2016 - 4003537403 - MA OPTIWAVE 1010 R03 en... - Page 77 Non-Ex / intrinsically-safe (Ex ia) / Explosion proof (Ex db) / Protected by enclosure (Ex tb) Non-Ex / intrinsically-safe (Ex ia) / Explosion proof (Ex db) / Protected by enclosure (Ex tb) Standard 3.85 8.49 5.18 11.42 — — — — 10/2016 - 4003537403 - MA OPTIWAVE 1010 R03 en www.krohne.com...
-
Page 78: Description Of Hart Interface
Manufacturer ID: 0x45 Device: 0xBF Device Revision: DD Revision ® HART Universal Revision: ≥ 3.8 FC 475 system SW.Rev.: ≥ 12.0 AMS version: ≥ 8.1 PDM version: FDT version: www.krohne.com 10/2016 - 4003537403 - MA OPTIWAVE 1010 R03 en... -
Page 79: Connection Variants
QV (Fourth Variable) can be assigned to any of the device variables. The HART® dynamic variable PV is always connected to the HART® current output which is, for example, assigned to level measurement. 10/2016 - 4003537403 - MA OPTIWAVE 1010 R03 en www.krohne.com... -
Page 80: Field Communicator 475 (Fc 475)
9.6.2 Operation The DTM and the device's local display use almost the same procedures to operate the signal Operation converter. For more data, refer to on page 41. www.krohne.com 10/2016 - 4003537403 - MA OPTIWAVE 1010 R03 en... -
Page 81: Hart ® Menu Tree For Basic-Dd
/ Level Data Quality / Level Limit Status Overview Distance Distance Value / Distance Data Quality / Distance Limit Status Elec temp Temperature Value / Temperature Data Quality Temperature Limit Status 10/2016 - 4003537403 - MA OPTIWAVE 1010 R03 en www.krohne.com... - Page 82 1 This menu is only available if the menu item "Set Access Level" is set to "Service". Go to Detailed Setup > Device Information > Param- eter Protection to find the menu item "Set Access Level". www.krohne.com 10/2016 - 4003537403 - MA OPTIWAVE 1010 R03 en...
-
Page 83: Appendix
10.1 Order code The measuring system has 2 parts: • The OPTIWAVE 1010 radar (FMCW) level transmitter. Give the order code – refer to the table that follows. • The BM26 Advanced (magnetic level indicator (MLI) or bypass chamber). Give the order code –... - Page 84 Order code (complete this code on the VF01 VF01 Order code (complete this code on the Order code (complete this code on the pages that follow) pages that follow) pages that follow) pages that follow) www.krohne.com 10/2016 - 4003537403 - MA OPTIWAVE 1010 R03 en...
- Page 85 3 For the stainless steel housing only. The bypass chamber or BM 26 Advanced must be approved for ATEX applications. 4 The dust approval is only applicable to the stainless steel housing. 5 For the stainless steel housing only 6 Pending 10/2016 - 4003537403 - MA OPTIWAVE 1010 R03 en www.krohne.com...
-
Page 86: Spare Parts
4 screws) Metapeek seal PN16 (this includes 4 screws) 1 seal + 4 screws XF01040100 Metaglas® seal PN40 (this includes4 screws) 1 seal + 4 screws XF01040200 www.krohne.com 10/2016 - 4003537403 - MA OPTIWAVE 1010 R03 en... -
Page 87: Accessories
2 Viator USB / HART converter 3 316L stainless steel weather protection Item Description Quantity Part reference Viator RS232 / HART converter XF50020600 Viator USB / HART converter XF50020700 316L stainless steel weather protection XF50050800 10/2016 - 4003537403 - MA OPTIWAVE 1010 R03 en www.krohne.com... -
Page 88: Glossary
It is used for the controlled emission and collection of radar signals. Operators Operators Users who can choose how to display measurements. They cannot Operators Operators configure the device in supervisor mode. www.krohne.com 10/2016 - 4003537403 - MA OPTIWAVE 1010 R03 en... - Page 89 They identify and measure the level of the tank contents. Supervisor Supervisor Supervisor Supervisor Users who can configure the device in supervisor mode. They cannot configure the device in service mode. 10/2016 - 4003537403 - MA OPTIWAVE 1010 R03 en www.krohne.com...
-
Page 90: Notes
NOTES OPTIWAVE 1010 www.krohne.com 10/2016 - 4003537403 - MA OPTIWAVE 1010 R03 en... -
Page 91: Ma Optiwave 1010 R03 En Www.krohne.com
NOTES OPTIWAVE 1010 10/2016 - 4003537403 - MA OPTIWAVE 1010 R03 en www.krohne.com... - Page 92 • Process Analysis • Services Head Office KROHNE Messtechnik GmbH Ludwig-Krohne-Str. 5 47058 Duisburg (Germany) Tel.: +49 203 301 0 Fax: +49 203 301 10389 info@krohne.com The current list of all KROHNE contacts and addresses can be found at: www.krohne.com...
Need help?
Do you have a question about the OPTIWAVE 1010 and is the answer not in the manual?
Questions and answers