Advertisement
Available languages
Available languages
Quick Links
Beistellbett - Bedienungsanleitung
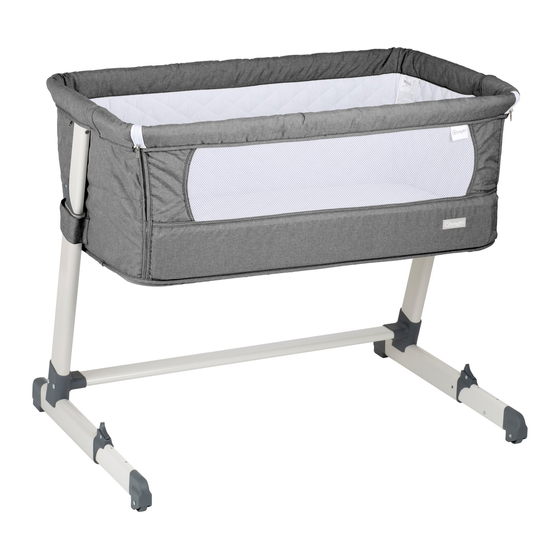
Bedside Crib - Assembly Instructions
Lit d'appoint - Instructions de Montage
WICHTIG:
FÜR SPÄTEREN GEBRAUCH
AUFBEWAHREN.
SORGFÄLTIG LESEN.
IMPORTANT:
RETAIN FOR FUTURE REFERENCE.
READ CAREFULLY.
IMPORTANT:
GARDER POUR UTILISATION
ULTÉRIEURE.
LIRE ATTENTIVEMENT.
BabyGO Baby Products GmbH
Am Bahndamm 1-3
33378 Rheda-Wiedenbrück
Germany
Bedside Crib
1
Advertisement

Related Manuals for BabyGo TOGETHER


Summary of Contents for BabyGo TOGETHER
- Page 1 Bedside Crib - Assembly Instructions Lit d‘appoint - Instructions de Montage WICHTIG: FÜR SPÄTEREN GEBRAUCH AUFBEWAHREN. SORGFÄLTIG LESEN. IMPORTANT: RETAIN FOR FUTURE REFERENCE. READ CAREFULLY. IMPORTANT: GARDER POUR UTILISATION ULTÉRIEURE. LIRE ATTENTIVEMENT. BabyGO Baby Products GmbH Am Bahndamm 1-3 33378 Rheda-Wiedenbrück Germany...
- Page 2 Bedside Crib Baby-Beistellbett Bedienungsanleitung Bedside Crib Instruction manual Lit d‘appoint Manuel d‘utilisation...
- Page 3 Bedside Crib Baby-Beistellbett Bedienungsanleitung Baby-Beistellbett Bedienungsanleitung...
- Page 4 Bedside Crib BEDIENUNGSANLEITUNG Liebe Eltern: Wir bedanken uns für den Kauf dieses Beistellbetts. Lesen Sie diese Anleitung bitte aufmerksam, bevor Sie das Beistellbett verwenden. WARNUNG! Die Anleitungen vor dem Gebrauch gut durchlesen und für ein späteres Nachschlagen gut aufbewahren. BEDIENUNGSANLEITUNG FÜR KINDERBETT WICHTIG: SORGFÄLTIG DURCHLESEN UND FÜR EIN ZUKÜNFTIGES NACHSCHLAGEN AUFLADEN Dieses Gerät entspricht den Anforderungen der Norm EN 1130-1:1996.
- Page 5 Bedside Crib WARNUNGEN: 1. ENTFERNEN UND ENTSORGEN SIE VOR DEM GEBRAUCH ALLE PLASTIKTÜTEN UND VERPACKUNGSMATERIALIEN UND BEWAHREN SIE DIESE FÜR KINDER UNZUGÄNLICH AUF. 2. Das Produkt ist erst betriebsbereit, wenn alle Verriegelungsmechanismen eingerastet sind. Überprüfen Sie dies vor der Inbetriebnahme des Produkts. 3.
- Page 6 Bedside Crib Teileübersicht Bettaufsatz Matratze Seitengestell Stützleiste Riemen Innensechs- 4x Schraube kantschlüssel Installationsanleitungen 1. Stecken Sie die Stützleiste „C“ in das linke Seitengestell „A“ (Abb. 1), mit 2 Schrauben sichern (Abb. 2). Verwenden Sie den Innensechskantschlüssel und ziehen Sie die Schrauben im Uhrzeigersinn fest (Abb.
- Page 7 Bedside Crib 2. Befestigen Sie das Verbindungsteil des Geländers an der Oberseite des Gestells (Abb. 5). Die Taste des Verbindungsteils rastet bei erfolgreicher Verbindung ein. Bettaufsatz Verbindungsstück des Geländers Abb. 5 Seitengestell 3. Um das aufklappbare Seitenteil des Betts zu schließen, heben Sie die Verrohrung des Seitenteils an (Abb.
- Page 8 Bedside Crib 4. Befestigen Sie die Seite des Kinderbetts unter Verwendung des seitlichen Reißverschlusses mit dem Fensterteil aus Netzgewebe; schließen Sie die Reißverschlüsse vollständig (Abb. 8). Das Kinderbett kann nun als freistehendes Bett verwendet werden. Abb. 8 Anleitungen für die Einstellung der Räder, Beine und Höhe 1.
- Page 9 Bedside Crib 2. Drücken Sie die Taste wie dargestellt nach unten und ziehen Sie das Bein heraus, um die Länge entsprechend einzustellen (Abb. 10). Die Einstellung ist in 2 Positionen möglich. Abb. 10 3. Das Kinderbett unterstützt 6 Höheneinstellungen. Stellen Sie die Höhe ein, indem Sie den Einstellungshebel nach unten drücken und dann das Kinderbett auf die gewünschte Höhe verstellen (Abb.
- Page 10 Bedside Crib Anleitungen für die Befestigung am Elternbett 1. Öffnen Sie den Klettverschluss an der Gelenkverbindung der Verrohrung. Lösen Sie das Kunststoffgelenk von der Verrohrung (Abb. 14) Entfernen Sie die Verrohrung teilweise. Nachdem Sie diesen Vorgang auf beiden Seiten durchgeführt haben, senken Sie das seitliche Panel des Kinderbetts ab und befestigen Sie es an der Unterseite des Bettaufsatzes unter Verwendung des Druckknopfes (Abb.
- Page 11 Bedside Crib CLICK! CLICK! Abb. 17 Abb. 18 4. Um das Kinderbett am Elternbett zu sichern, ziehen Sie erneut an den Riemen, um sich zu vergewissern, dass das Kinderbett sicher am Elternbett befestigt ist (Abb. 19). WARNUNG! Der Abstand zwischen dem Kinderbett und dem Elternbett darf maximal 2 cm betragen.
- Page 12 Bedside Crib...
- Page 13 Bedside Crib Bedside Crib Instruction manual Bedside Crib Instruction manual...
- Page 14 Bedside Crib Instruction manual Dear Parents: Thank you for purchasing the Bedside Crib. Please read and follow all instructions before using the Bedside Crib. WARNING! Read the Instruction carefully before use and keep them for future reference. INSTRUCTIONS FOR BED SIDE CRIB IMPORTANT: READ CAREFULLY AND RETAIN FOR FUTURE REFERENCE This product complies with EN 1130-1:1996.
- Page 15 Bedside Crib WARNINGS: 1. BEFORE USE, REMOVE AND DISPOSE OF ALL PLASTIC BAGS AND PACKAGING MATERIALS AND KEEP THEM OUT OF REACH OF CHILDREN. 2. The product is ready for use only when all locking mechanisms are engaged. Check carefully that these are engaged before use. 3.
- Page 16 Bedside Crib Components crib body matress side frame stand support bar a pair of strap allen wrench 4x screw Instruction for Assembly 1. Insert support bar “C” to left side frame stand “A”(fig 1) and secure with 2 screws (fig 2). Use the allen wrench to tighten screws in clockwise direction (fig 3).
- Page 17 Bedside Crib 2. Attach the handrail joint to the top of the frame stand tubing as illustrated, the plastic joint button will click into place once secure. crib body Handrail joint fig. 5 frame stand 3. To close the drop side of crib, lift up the drop side tubing (fig 6) To access the tubing joint, open the velcro panel located both sides of the padded crib rail.
- Page 18 Bedside Crib 4. Fasten the side of the crib with the mesh window using the side zips and close them completely (fig 8). Your crib is now ready to be used as a stand alone crib. fig. 8 Instruction for Wheels, Leg & Height adjustment 1.
- Page 19 Bedside Crib 2. Press button down as illustrated and pull leg out to adjust the length (fig 10). It can be adjusted in 2 positions. fig. 10 3. The crib can be adjusted to 6 different height positions. In order to adjust the height, press the adjustment lever down and adjust the crib to the desired position (fig 11).
- Page 20 Bedside Crib Instruction for fixing to parents‘ bed 1. Open the velcro panel covering the tubing joint. Release the plastic joints from the tubing (fig 14) and partially remove the tubes. Once this operation has been performed on both sides, lower the crib side panel and fit it to the base of the crib main body using snap button (fig 15).
- Page 21 Bedside Crib CLICK! CLICK! fig. 17 fig. 18 4. To secure the crib to the parents’ bed, pull the straps once again to make sure the crib is properly and firmly secured to the parents’ bed (fig 19). WARNING! The maximum distance between the crib and the parent’s bed should be 2cm.
- Page 22 Bedside Crib...
- Page 23 Bedside Crib Lit bébé d‘appoint Manuel d‘utilisation Lit bébé d‘appoint Manuel d‘utilisation...
- Page 24 Bedside Crib Installation et mode d‘emploi Chers parents: Nous vous remercions d‘avoir acheté la Lit bébé d‘appoint. S‘il vous plaît lire et suivre toutes les instructions avant d‘utiliser le lit bébé d‘appoint. Avertissement! Lisez les instructions attentivement avant toute utilisation et conserver-les pour toute référence ultérieure.
- Page 25 Bedside Crib AVERTISSEMENTS: 1. AVANT DE L’UTILISER, RETIREZ ET JETEZ TOUS LES SACS EN PLASTIQUE ET LES MATÉRIAUX D‘EMBALLAGE ET GARDEZ-LES HORS DE LA PORTÉE DES ENFANTS. 2. Le produit est prêt à l‘emploi uniquement lorsque tous les mécanismes de verrouillage sont enclenchés.
- Page 26 Bedside Crib Composants corps du lit de bébé matelas Support de Barre de Une paire de Clé hexagonale 4x Vis cadre latéral support sangle Instruction d’assemblage 1. Insérez la barre de support „C“ sur le support de cadre gauche „A“ (fig. 1) et fixez avec 2 vis (fig.
- Page 27 Bedside Crib 2. Fixez les jointures de la rampe à la partie supérieure du tube du support de cadre comme illustré, le bouton de la jointure en plastique se mettra en place une fois sécurisé. corps du lit de bébé Jointure de main courante fig.
- Page 28 Bedside Crib 4. Fixez le côté du lit de bébé avec la fenêtre en filet à l‘aide des fermetures éclaires latérales et fermez-les complètement (fig. 8). Votre lit de bébé est maintenant prêt à être utilisé comme un lit de bébé indépendant. fig.
- Page 29 Bedside Crib 2. Appuyez sur le bouton comme illustré et tirez le pied pour régler la longueur (fig. 10). Il peut être réglé en 2 positions. fig. 10 3. Le lit de bébé peut être ajusté en 6 positions de hauteur différentes. Pour régler la hauteur, appuyez sur le levier de réglage vers le bas et réglez le lit de bébé...
- Page 30 Bedside Crib Instruction pour la fixation au lit des parents 1. Ouvrez le panneau de velcro qui recouvre l‘ensemble de la tubulure. Libérez les jointures en plastique du tube (fig. 14) et enlevez partiellement les tubes. Une fois cette opération effectuée sur les deux côtés, abaissez le panneau latéral du lit de bébé...
- Page 31 Bedside Crib CLICK! CLICK! fig. 17 fig. 18 4. Pour sécuriser le lit de bébé au lit des parents, tirez de nouveau les sangles pour vous assurer que le lit de bébé est correctement et fermement fixé au lit des parents (fig. 19). ATTENTION! La distance maximale entre le lit de bébé...
- Page 32 Impressum: BabyGO Baby Products GmbH Tel.: 0049 5242 418 86 81 Am Bahndamm 1-3 Fax: 0049 5242 418 86 80 D-33378 Rheda-Wiedenbrück e-mail: info@babygo.eu Germany web: www.babygo.eu...
Need help?
Do you have a question about the TOGETHER and is the answer not in the manual?
Questions and answers