Table of Contents
Advertisement
Quick Links
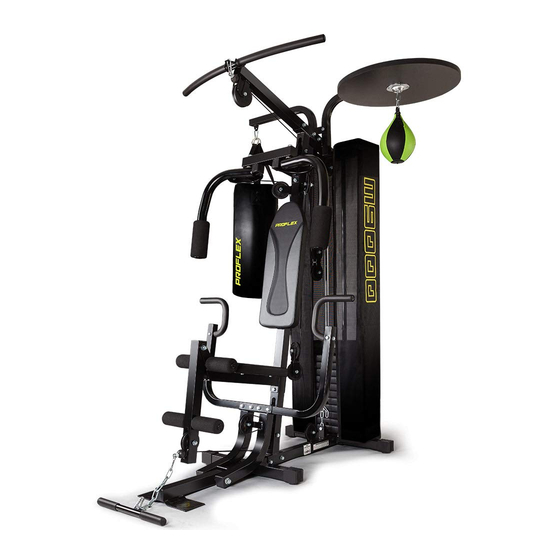
M9000 Multi-Function Home Gym
User Manual
[Revision 1.0 May 2017]
READ THIS MANUAL CAREFULLY BEFORE USE – FAILURE TO DO SO MAY RESULT IN INJURY, PROPERTY
DAMAGE AND MAY VOID WARRANTY. • KEEP THIS MANUAL FOR FUTURE REFERENCE. • Products covered by
this manual may vary in appearance, assembly, inclusions, specifications, description and packaging.
E&OE
©2017 Proflex
Advertisement
Chapters
Table of Contents

Subscribe to Our Youtube Channel
Related Manuals for Proflex M9000


Summary of Contents for Proflex M9000
- Page 1 M9000 Multi-Function Home Gym User Manual [Revision 1.0 May 2017] READ THIS MANUAL CAREFULLY BEFORE USE – FAILURE TO DO SO MAY RESULT IN INJURY, PROPERTY DAMAGE AND MAY VOID WARRANTY. • KEEP THIS MANUAL FOR FUTURE REFERENCE. • Products covered by this manual may vary in appearance, assembly, inclusions, specifications, description and packaging.
-
Page 2: Safety
M9000 Multi-Function Home Gym Safety Basic precautions, including the following important safety instructions, should always be followed when using this equipment. Read all instructions before use. If the user experiences dizziness, nausea, chest pain, or any abnormal symptoms, STOP the workout at once. - Page 3 M9000 Multi-Function Home Gym Table of Contents Safety ..............................2 Included Items ............................ 4 Assembly ............................8 Exercises............................19 E&OE ©2017 Proflex...
-
Page 4: Included Items
M9000 Multi-Function Home Gym Included Items Note: The list of included items and parts diagram are for reference. Some parts come pre-assembled. Description Qty. Description Qty. Base Frame Hand Grip Straight Main Support Tube Rubber Stop Rear Stabiliser Butterfly Arm Pad... -
Page 5: Proflex
M9000 Multi-Function Home Gym E&OE ©2017 Proflex... - Page 6 M9000 Multi-Function Home Gym E&OE ©2017 Proflex...
- Page 7 M9000 Multi-Function Home Gym E&OE ©2017 Proflex...
-
Page 8: Assembly
M9000 Multi-Function Home Gym Assembly The instructions may include fasteners that are pre-assembled to some parts – it may be necessary to remove the fasteners to perform the assembly – always use the original fasteners. • Suitable tools (not supplied) are required for assembly. • Check that all parts have been included before starting assembly. - Page 9 M9000 Multi-Function Home Gym Step 2 1. Slide the 2 guide tubes (05) through the rubber rings (47) and through the two holes in the rear stabiliser (03). Attach the tubes using 2 bolts (22) and 2 washers (33). 2. Attach the left cover bracket (73L) to the rear stabiliser (03) and secure using 2 bolts (77) and 2 washers (78).
- Page 10 M9000 Multi-Function Home Gym Step 3 1. Lower the bridge tube (08) so the guide tubes (05) are in the holes at the rear of the tube and the mid- section is in the bracket at the top of the main support tube (02).
-
Page 11: Leg Curl Tube (
M9000 Multi-Function Home Gym Step 4 1. Attach the bracket (57) to the main support tube (02) and secure using 2 bolts (25) and 2 washers (34). 2. Attach the seat support tube (06) to the main support tube (02) and secure using 2 bolts (30), 4 washers (34) and 2 nuts (38). - Page 12 M9000 Multi-Function Home Gym Step 5 1. Attach the 2 butterfly pulley brackets (17) to the mountings on either side of the main support tube (02) and secure using 2 bolts (24), 2 washers (34) and 2 nuts (38). Ensure that the butterfly pulley brackets can pivot without binding.
-
Page 13: Pull Unit (
M9000 Multi-Function Home Gym Step 6 1. Attach 2 pull bar arms (69) to the pull unit (09) and secure using 4 bolts (81), 8 washers (34) and 4 nuts (38). 2. Attach a handlebar (11) to a pull bar arm (69) and secure using 3 bolts (21) and 3 washers (33). Perform the same to attach the handlebar (11) to the other pull bar arm (69) 3. - Page 14 M9000 Multi-Function Home Gym Step 7 Filling for the punching bag (67) is not supplied. Use suitable filling materials, such as sand, rice, cloth etc. Do not use materials that are sharp or large as the bag must conform to the shape of your hands when punched.
-
Page 15: Weight Bar (
M9000 Multi-Function Home Gym Step 8 1. Run the lat bar cable (66) over pulley with collars (49 A), then place a pulley cover (50) on each side of the pulley. Notes: The ball stopper of the cable should be at the front of the machine. • Cable (65) must exit the pulley covers (50) through the opening. - Page 16 M9000 Multi-Function Home Gym Step 9 1. Attach the butterfly arm cable (64) to the right-side butterfly arm (10R) and secure using 1 bolt (21), 1 washer (33) and 1 nut (37). 2. Pull cable (64) around pulley (48 E). Attach this pulley to the butterfly pulley bracket (17) on the right- hand side of the machine and secure using 1 bolt (26) and 1 nut (38).
-
Page 17: Lower Pull Bar (
M9000 Multi-Function Home Gym Step 10 1. Attach chain (59) to the bracket on the rear end of the base frame (01) using 1 bolt (26) and nut (38). 2. Pull cable (65) through the lower opening in the leg curl tube (07) and around the underside of pulley (48 3. -
Page 18: Weight Cover
M9000 Multi-Function Home Gym Step 11 1. Attach the left-hand cover bracket (73L) to the bridge tube (08) and secure using 2 bolts (77) and 2 washers (78). Perform the same for the right-hand cover bracket (73R). 2. Press the weight cover (76) Velcro strips at the top and bottom edges to the cover brackets. -
Page 19: Exercises
M9000 Multi-Function Home Gym Exercises E&OE ©2017 Proflex... - Page 20 ©2017 Proflex. All rights reserved. No part of this document, including descriptive content, concepts, ideas, diagrams or images may be reproduced or transmitted in any form or by any means, electronic or mechanical, including photocopying, scanning or recording, or any information storage and retrieval system, without express permission or consent from the publisher.
Need help?
Do you have a question about the M9000 and is the answer not in the manual?
Questions and answers