SolaX Power MC0500 User Manual

SolaX Power MC0500 User Manual

Triple power lithium-ion battery 45ah/63ah

Advertisement

Solax Power Network Technology(Zhe jiang) Co,. Ltd.
(Solax Power Co,. Ltd)
Copyright Declaration
The copyright of this manual belongs to Solax Power Network Technology(Zhe jiang) Co,. Ltd.
(SolaX Power Co.,Ltd.). Any corporation or individual should not plagiarize, partitially or fully copy
(including software,etc.), and no reproduction or distribution of it in any form or by any means. All
rights reserved. SolaX Power Network Technology (Zhe jiang) Co.,Ltd. (SolaX Power Co.,Ltd.).
614.00331.01
reserves the right of final interpretation.
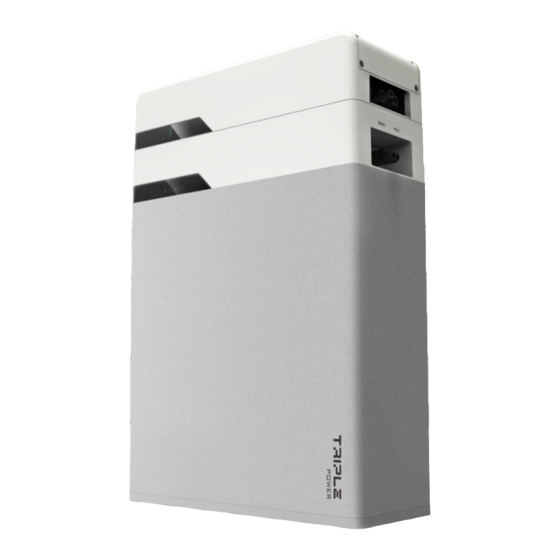
Triple Power Lithium-ion Battery
45Ah/63Ah
User Manual

Advertisement

Table of Contents
loading
Need help?

Need help?

Do you have a question about the MC0500 and is the answer not in the manual?

Questions and answers

Subscribe to Our Youtube Channel

Summary of Contents for SolaX Power MC0500

  • Page 1 (Solax Power Co,. Ltd) Copyright Declaration The copyright of this manual belongs to Solax Power Network Technology(Zhe jiang) Co,. Ltd. (SolaX Power Co.,Ltd.). Any corporation or individual should not plagiarize, partitially or fully copy (including software,etc.), and no reproduction or distribution of it in any form or by any means. All rights reserved.
  • Page 2: Table Of Contents

    Contents NOTE ON THIS MANUAL...............1 SCOPE OF VALIDITY..................1 TARGET GROUP....................1 SYMBOLS USED....................1 SAFETY....................2 SAFETY INSTRUCTIONS..................2 2.1.1 GENERAL SAFETY PRECAUTIONS...............2 2.1.2 EXPLANATION OF SYMBOLS.................3 RESPONSE TO EMERGENCY SITUATIONS..........5 2.2.1 LEAKING BAT TERIES..................5 2.2.2 FIRE...........................5 2.2.3 WET BAT TERIES AND DAMAGED BAT TERIES..........5 QUALIFIED INSTALLER..................6 PRODUCT INTRODUCTION..............7 PRODUCT OVERVIEW..................7...
  • Page 3: Note On This Manual

    Please read 4.5.3 CONNECTING CAN COMMUNICATION CABLE........24 it carefully before operating. 4.5.4 CONNECTING GROUND WIRE..............25 4.5.5 CONNECTING CHARGING CABLE...............25 T-BAT BMS OVERVIEW OF INSTALLATION...............26 MC0500 (Master Box) COMMISSIONING.................27 T-BAT Module-HV CONFIGURING BAT TERY SYSTEM...............27 HV10045 (T45) HV10063(T63) COMMISSIONING....................29 STATUS INDICATORS..................30...
  • Page 4: Safety

    – Do not dispose of the battery module in a fire. Storage Temperature: -20~+50℃ Risks of fire Ÿ SolaX Power Network Technology (Zhejiang) Co., Ltd ADD: No.288 Shizhu Road, Tonglu Economic Development Zone, Dongxing District, Tonglu City, Zhejiang Province, China. Made in China –...
  • Page 5: Response To Emergency Situations

    Response to Emergency Situations Symbol Explanation 2.2.1 Leaking Batteries If the battery leaks electrolyte which is corrosive, avoid contact with the leaking liquid or gas. Direct contact may lead to skin irritation or chemical burns. If one is exposed to the leaked substance, do these actions: TUV mark for IEC62619 Accidental inhalation of harmful substances: Evacuate people from the contaminated area , and seek medical attention immediately.
  • Page 6: Qualified Installer

    A battery system includes BMS and battery module(s). electrical devices and acceptable mitigation methods Knowledge of the installation of electrical devices Ÿ Knowledge of and adherence to this manual and all safety precautions and Ÿ MC0500 HV10045 HV10063 best practices Length 461mm...
  • Page 7: Appearance

    3. Product Introduction 3. Product Introduction Section view of HV10045/HV10063 Ÿ 3.1.2 Appearance Section view of MC0500 Ÿ Ⅰ’ Ⅱ’ Ⅵ’ Ⅲ’ Ⅳ’Ⅴ’ Ⅵ’ Ⅰ Ⅱ Ⅲ Ⅳ Ⅴ Ⅵ 100% Status Status Capacity Ⅶ Ⅷ Object Mark Description Ⅰ...
  • Page 8: Basic Features

    MC0500x1 Ÿ T-BAT H25.2 HV10063X4 25.2 340-472 Floor or wall mounting Ÿ 3.3.2 Performance 3.2.2 Certifications MC0500 HV10045 HV10063 Nominal Voltage(Vdc) 100.8 100.8 T-BAT system safety CE, FCC, RCM, TUV (IEC 62619), UL 1973 Operating Voltage(Vdc): 85-118 85-118 70-500 Battery cell safety...
  • Page 9: Installation

    4. Installation 4. Installation Tools Installation These tools are required to install the T-BAT system. Installation Prerequisites When assembling the system, avoid touching the battery terminal with any metal objects or human body. T-BAT SYS-HV provides a safe source of electric energy when operated as designed.
  • Page 10: Packing List

    4. Installation 4. Installation 4.4.3 Packing List Battery Module (T45/T63): BMS (Master Box): Object Description Quantity Power cable between battery modules (400mm) RS485 communication cable (400mm) Wall mounting backboard Floor mounting backboard Expansion screw sleeve M6 screw Ring terminal (for grounding) The table below lists the number of each component.
  • Page 11: Install Bms To Battery Module

    4. Installation 4. Installation 4.4.4 Install BMS to Battery Module 4.4.5 Mounting Steps Assemble the BMS to the battery module, and fix it with M5 screws (G) on the point where marked as below by using L-type wrench (J). Please pay attention to Note! put the same side of BMS and battery modules, which means to put the front The space between battery modules shall be more than 250mm.
  • Page 12: Cable Connection

    4. Installation 4. Installation Wall mounting: Cable Connection Make sure the wall is strong enough to withstand the weight of battery modules. Step 1: fix the wall bracket (C1) on the wall 4.5.1 Connecting Power Cables Use the wall bracket as a template to mark the position of the 5 holes Ÿ...
  • Page 13 4. Installation 4. Installation Notes for Unplugging Power Cables For 2~4 battery modules: The power cable between battery modules (A1) is different from the one that Caution! between BMS and battery module (C). The other end of the power cable is black, Forbid to plug/unplug power cables when the T-BAT system is not turned off, and this color is connected to YPLG (Ⅴ’), which is on the right side of the battery otherwise there will be an arc discharge that hurt human body!
  • Page 14: Connecting Rs485 Communication Cable

    4. Installation 4. Installation 2. After all the battery modules were correctly connected, plug the short-circuit 4.5.2 Connecting RS485 Communication Cable plug (F) at YPLUG (Ⅴ’) of last battery module to make a complete circuit. For one battery module: 1. There's a protect cover for the RS485 connector, unscrew the cover and plug one end of the RS485 communication cable to the RS485 connector.
  • Page 15: Connecting Can Communication Cable

    4. Installation 4. Installation 4.5.3 Connecting CAN Communication Cable 4.5.4 Connecting Ground Wire It is required for the BMS to communicate with the inverter for proper operation. Unscrew the ground terminal with hexagon wrench on BMS and battery module at either side of the ground port as marked at the following figure. Connect the ground wire from BMS to battery module,.
  • Page 16: Overview Of Installation

    4. Installation 5. Commissioning Overview of Installation Commissioning The following diagram is a complete T-BAT system installation with four battery Configuring Battery System modules. The DIP switch is used to configure the number of battery modules which are communicating to Inverter. The detailed configuration information is shown as follows: Configuration activated by inverters Matching one battery module (default)
  • Page 17: Commissioning

    5. Commissioning 5. Commissioning Commissioning Verify the model number of each battery module to make sure that they are all Note! the same model. When powering on the BMS, the system will start self-testing. If the If all the battery modules are installed, follow these steps to put it in operation. buzzer bips, it means DIP configuration fault or communication failure 1.
  • Page 18: Status Indicators

    5. Commissioning 5. Commissioning 5.3.2 Battery Module (T45/T63) Status Indicators The LED indicators on the front panel of the BMS and battery modules are showing the operating status. 5.3.1 BMS (Master Box) S1 and S2 represent independent status indicators. The status of S1 and S2 have the same meaning for battery modulein the following table.
  • Page 19: Troubleshooting

    6. Troubleshooting 6. Troubleshooting Troubleshooting Warning Messages Description Troubleshooting Troubleshooting Wait till the temperature of Battery over Check the indicators on the front to determine the state of the T-BAT system. A BMS_TemHigh cells go back to the normal temperature warning state is triggered when a condition, such as with voltage or temperature, state.
  • Page 20: Decommissioning

    7. Decommissioning 7. Decommissioning Decommissioning 7.1 Dismantling the Battery Shutting down T-BAT system Disconnect the cables between BMS and Inverter Disconnect the series wiring terminal on the ended battery. Disconnect the other cables. Packing Please pack the BMS and battery modules with the original packaging. If it is no longer available, you can also use an equivalent carton that meets the following requirements.

This manual is also suitable for:

Hv10045Hv10063

Table of Contents