Advertisement
P R E M I U M I S O
W I T H C H R O M E A C C E N T R I N G S
FIT S : A LL H -D M OD EL S WITH DUAL CABLE THROT T LE CON T ROLS
PARTS INCLUDED
1
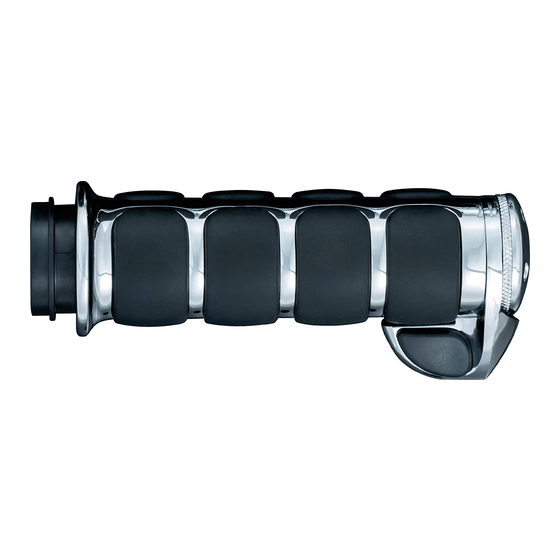
Clutch Side ISO-Grip
1
Throttle Side ISO-Grip
1
Glue Bottle
1
Installation Instructions
Please read and understand entire instructions before starting installation.
THANk YOU FOR CHOOSING küRYAkYN!
IN ORDER TO PROTECT YOU AND OTHERS FROM POSSIBLE INjURY
AND/OR PROPERTY DAMAGE OR LOSS, PLEASE PAY CLOSE ATTENTION
TO ALL INSTRUCTIONS, WARNINGS, CAUTIONS AND ATTENTION NOTES
REGARDING THE USE AND CARE OF THIS PRODUCT.
WARNING! THIS INDICATION ALERTS YOU TO THE FACT THAT IGNORING THE
CONTENTS DESCRIBED HEREIN CAN RESULT IN POTENTIAL DEATH OR
SERIOUS INJURY.
CAUTION!
This indication alerts you to the fact that ignoring the contents described herein
can result in potential injury or material damage.
ATTENTION!
This indication alerts you to the fact that ignoring the contents described herein
may negatively affect product performance and functionality.
TOOLS SUGGESTED
Set of torx drivers, set of hex drivers, combination wrenches, utility knife, 80-100 grit
sandpaper, adhesive solvent.
STRICTLY OBSERVE THE FOLLOWING GUIDELINES IN ORDER TO USE THE
PRODUCT PROPERLY AND AVOID POTENTIALLY DANGEROUS ACCIDENTS.
THROTTLE SIDE PROCEDURE
ATTENTION!
A factory service manual may be helpful in performing this installation. Do not
attempt to perform this installation if you are not confident in your ability to
complete all of the steps in the procedure; consult a trained technician.
ATTENTION!
It is the installer's responsibility to ensure that all of the fasteners (including pre-
assembled) are tightened before operation of the motorcycle. Küryakyn will not
warranty components lost due to improper installation. Periodic maintenance
may be required.
STEP 1
Park the motorcycle on a hard, level surface; turn off the ignition.
Roll or slide the rubber throttle cable adjustment covers to gain access to the
STEP 2
adjusters. See PIC. 1.
-cont.-
6212--11HD-0608
- G R I P S
®
I N S TA L L AT I O N
6 2 1 2
CUSTOMER SERVICE
877.370.3604 (toll free)
INSTALLATION QUESTIONS
techsupport@kuryakyn.com
LIMITED WARRANTY
Küryakyn warrants that any Küryakyn products sold
hereunder, shall be free of defects in materials and
workmanship for a period of one (1) year from the
date of purchase by the consumer excepting the
•
Küryakyn shall have no obligation in the event
the customer is unable to provide a receipt showing
the date the customer purchased the product(s).
•
The product must be properly installed,
maintained and operated under normal conditions.
•
Küryakyn makes no warranty, expressed or
implied, with respect to any gold plated products.
•
Küryakyn shall not be liable for any consequential
and incidental damages, including labor and
paint, resulting from failure of a Küryakyn product,
failure to deliver, delay in delivery, delivery in non-
conforming condition, or for any breech of contract
or duty between Küryakyn and a customer.
•
Küryakyn products are often intended for use
in specific applications. Küryakyn makes no
warranty if a Küryakyn product is used in
applications other than intended.
•
Küryakyn electrical products are warranted for one
(1) year from the date of purchase by the consumer.
Components of Küryakyn products containing L.E.D.s
will be warranted for defects in materials and
workmanship for 3 years from the date of purchase.
•
Küryakyn makes no warranty of any kind in
regard to other manufacturer's products distributed
by Küryakyn. Küryakyn will pass on all warranties
made by the manufacturer and where possible, will
expedite the claim on behalf of the customer,
but ultimately, responsibility for disposition of the
warranty claim lies with the manufacturer.
ABOUT OUR CATALOG
P RO O F- O F - P U RC HA SE
or call 715.247.2983
following provisions:
Advertisement
Table of Contents

Summary of Contents for Kuryakyn 6212
- Page 1 Park the motorcycle on a hard, level surface; turn off the ignition. Roll or slide the rubber throttle cable adjustment covers to gain access to the STEP 2 adjusters. See PIC. 1. P RO O F- O F - P U RC HA SE -cont.- 6212--11HD-0608...
- Page 2 Loosen the jam nuts on the adjusters on both cables; turn the jam nuts and adjusters until the STEP 3 throttle control is at its loosest point. See PIC. 1. STEP 4 Separate the switch housings by removing the two torx or hex screws (depending on the year of your motorcycle);...
- Page 3 Use 80-100 grit sandpaper or emory cloth to remove any adhesive residue, grip rubber, etc. STEP 3 The chrome surface of the handlebar must be roughed up to allow the included glue to properly adhere. STEP 4 Clean the exposed handlebar with solvent and allow the area to dry completely. PIC.


Need help?
Do you have a question about the 6212 and is the answer not in the manual?
Questions and answers