ReSound LiNX Quattro Fittings Manual
Hide thumbs
Also See for LiNX Quattro:
- User manual (60 pages) ,
- Fittings manual (16 pages) ,
- Manual (2 pages)

Subscribe to Our Youtube Channel
Related Manuals for ReSound LiNX Quattro


Summary of Contents for ReSound LiNX Quattro
- Page 1 ReSound LiNX Quattro fitting guide A guide for professionals...
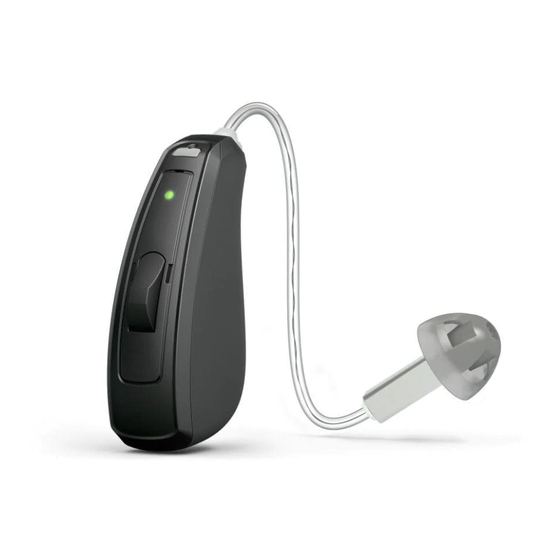
- Page 2 First fitting with ReSound Smart Fit This fitting guide gives an overview of how to fit ReSound LiNX Quattro wireless hearing instruments with ReSound Smart Fit. A ReSound LiNX Quattro 961 wireless binaural fitting is depicted. Not all features described in this fitting guide are applicable for all ReSound LiNX Quattro fittings.
- Page 3 3D hearing instruments as well as ReSound Aventa legacy instruments, and then retrieve the software appropriate for the connected device. 1. For ReSound LiNX Quattro rechargeable 961, reboot the devices by placing them in the charger and removing them. Or, reboot the hearing instruments by pressing and holding the push button for 5 seconds until the LED light flashes.
- Page 4 Select instruments The hearing instruments will appear in the ‘Select Instruments’ section. 1. When the hearing instruments to be programmed have been identified, select them by checking the left box. 2. Assign the hearing instruments to the right and left ears by choosing the correct radio button for the right and left sides.
- Page 5 Connection flow Once the hearing instruments have been selected the connection process will begin. 1. Select instrument configuration and click ‘Continue’. 2. Select physical properties of the instrument and click ‘Save’. 3. Calibration of the hearing instruments is required in order to activate DFS Ultra II.
- Page 6 Note: Access to ReSound Assist can be found in the tabs under the red navigation bar on the Patient screen. ReSound Assist is defaulted ‘on’ in Smart Fit 1.3. To be active in the hearing instruments and appear in the Smart 3D app, the patient...
-
Page 7: Advanced Features
Directionality Binaural Directionality III: Leverages ReSound’s 2.4 GHz wireless technology to allow the hearing instruments to work together, dynamically selecting the best microphone response for the listening environment. Possible configurations are bilateral omnidirectional, bilateral directional or an asymmetric omnidirectional and directional response, depending on the analysis of speech and noise detectors from both hearing instruments. - Page 8 By scrolling down or pulling up the lower part of the Advanced Features screen, all the features available for the connected hearing aid can be viewed. DFS Ultra II This is the feedback control. It is activated when the devices have been calibrated for DFS Ultra II. The default setting is Mild.
- Page 9 Impulse Noise Reduction Sudden impulse sounds can be uncomfortable for those using hearing instruments. Impulse Noise Reduction detects the loud impulse sound and attentuates it instantaneously. The feature can be set to three different degrees, with mild as the default setting. Increasing the setting will decrease the threshold to which the feature will react, or in other words, increase the aggressiveness.
- Page 10 Low Frequency Boost Should a patient fitted with an Ultra Power device feel that the sound is not full enough or loud enough, low frequency boost is a quick way to increase the low frequency gain from 250 – 1000Hz. Phone Accessories Features related to the streamed sound from a Phone Clip+, or a smart device that is capable of direct streaming, are located at the lower portion of each environmental program tab.
- Page 11 Pairing wireless accessories The Accessories screen can be accessed in the final step of the connection flow at the bottom of the fitting screen, or in the Accessories tab of the Instruments navigation item. All accessories must be charged or plugged in, and turned on during the pairing process. 1.
- Page 12 7. For LiNX Quattro Rechargeable RIE 61, the power level of the hearing instrument batteries is displayed in the collapsible sidebar. The green dots indicate the amount of charge left in the devices, as also shown on...
- Page 13 Insert Noahlink Wireless in a USB slot on the fitting PC and wait for the message that new hardware has been found. Then open ReSound Smart Fit. It is not possible for Noahlink Wireless to connect to hearing instruments that are actively connected to a smart device via Bluetooth. Ensure that the hearing instruments do not have an active Bluetooth connection to a smart device.
- Page 14 If the patient has an existing hearing instrument fit in the latest version of ReSound Aventa, then ReSound Aventa will open when you begin a new fitting. 1. Click the ‘Go to Smart Fit’ button in the left navigation panel to close ReSound Aventa and arrive at the Smart Fit Launcher.
- Page 15 Patient Profile screen or the Fitting Gain Adjustments screen. 1. For ReSound LiNX Quattro rechargeable 961, reboot the devices by placing them in the charger and removing them. Or, reboot the hearing instruments by pressing and holding the push button for 5 seconds until the LED light flashes.
-
Page 16: Getting Started
ReSound Smart Fit fitting software and the ReSound Smart 3D app. Getting Started Connect hearing instruments to the ReSound Smart Fit software. For further assistance, refer to page 3 of this guide. From the Patient Profile screen, sign in to GN Online Services. - Page 17 ReSound Assist Remote Fine-tuning 1. From the Patient screen, click ‘ReSound Assist’ from the lower navigation row. 2. Remote Fine-tuning and Remote Hearing Aid Updates are defaulted ‘On’. Patient consent must be completed before requests can be completed. Select Patient Consent from Menu To utilize ReSound Assist, the patient must complete a one-time consent form before becoming eligible to receive Remote Fine-tuning or Remote Hearing Aid updates.
- Page 18 Activate Consent 1. Click ‘Start Consent’. 2. Click ‘Agree’ on each page of the consent process. 3. Enter the patient’s name and email address. Click ‘Continue’ to send a copy of the consent agreement. Should the patient not have an email address, the hearing care professional’s email address may be used.
- Page 19 Move Cloud Icon to Taskbar The orange cloud icon should be visible in the taskbar so that the hearing care professional is notified when requests for assistance are received. If it is not already visible then: 1. Click on the upward arrow in the taskbar in order to view the hidden icons. 2.
- Page 20 Timeline within ReSound Assist for that particular patient. You will also receive email notifications for ReSound Assist requests for patients assigned to you in GN Online Services. To deactivate email notifications, go to the Patient section in GN Online Services.
- Page 21 View Patient’s Assist Questionnaire There are two ways to view the Assist Questionnaire sent by the patient via the ReSound Smart 3D app: 1. Click the ‘Assist Questionnaire’ box beneath the Data Logging box in the Sidebar. This will expand the questionnaire and enable it to be moved around the fitting screen during fine-tuning adjustments.
- Page 22 View Patient’s Preferred Settings Click the ‘On’ toggle to View Patient Settings at the bottom right of the Fitting screen. This will enable viewing of the patient’s preferred settings in the app. 1. In the Gain Adjustments screen, the patient’s preferred settings are represented as green symbols. 2.
- Page 23 Prepare to Send Package 1. After saving in the Fitting screen, a message will appear stating that the current fitting session has been saved. 2. Click ‘Send Settings’ in the lower right corner. 3. A free text screen will appear. This allows the hearing care professional to compose a message to the patient.
- Page 24 Closing the Assistance Request After sending the settings, visit the patient timeline to close the request. The patient is allowed a maximum of five open requests in the ReSound Smart 3D app. Only the hearing care professional can close them.
- Page 25 4. Save the fitting. 5. Choose ‘Send Settings’ on the Save screen as outlined in the previous section. The patient will receive the package in the ReSound Smart 3D app and the Remote Session will appear on the patient’s timeline.
- Page 28 © 2018 GN Hearing A/S. All rights reserved. ReSound is a trademark of GN Hearing A/S. Apple, the Apple logo, iPhone, iPad and iPod touch are trademarks of Apple Inc., registered in the U.S. and other countries. MK605106 Rev A 2018.06...
Need help?
Do you have a question about the LiNX Quattro and is the answer not in the manual?
Questions and answers